Roasted Butternut Squash Soup Flavorful and Simple Recipe
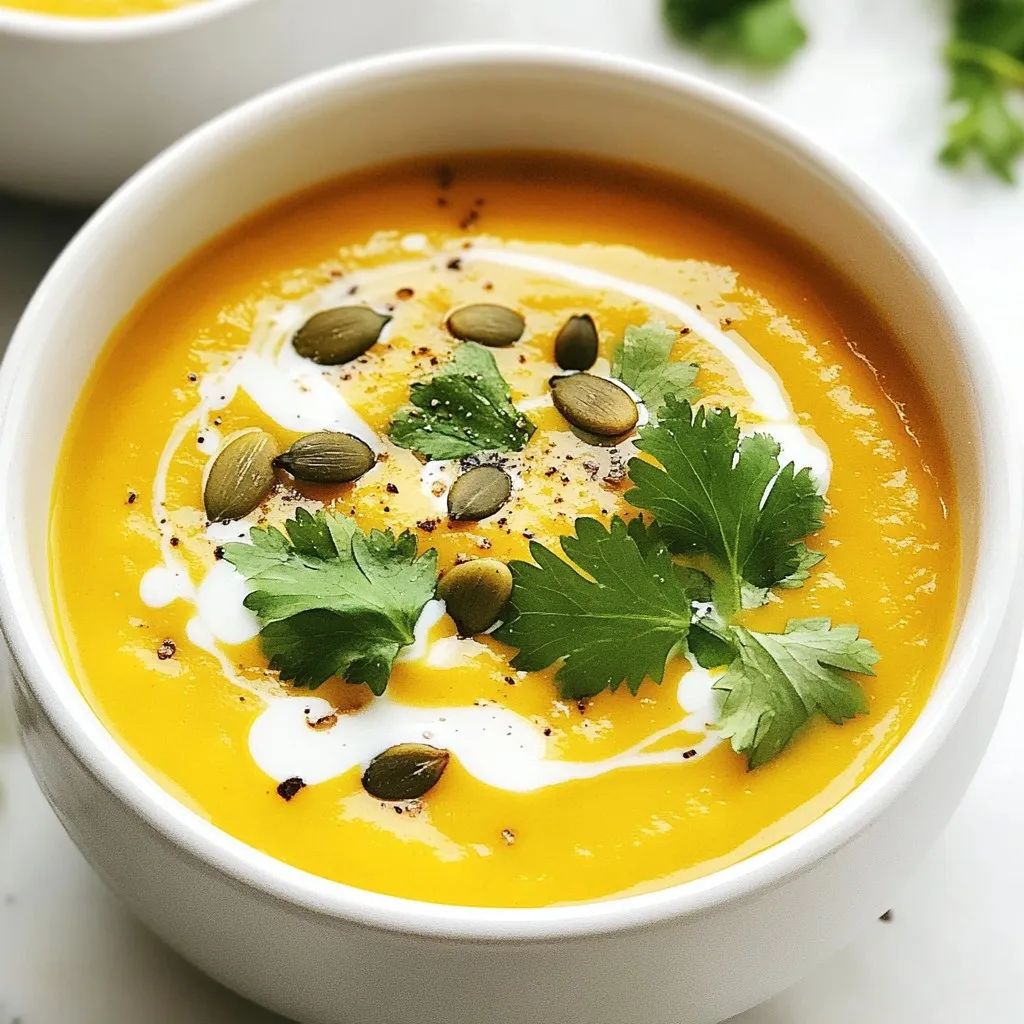

Looking for a warm, comforting recipe that’s both simple and delicious? Roasted Butternut Squash Soup is your answer! With easy ingredients like butternut squash, garlic, and coconut milk, you’ll whip up a bowl of creamy goodness in no time. This soup is perfect for cozy nights or quick meals. Dive into the full recipe and discover how to make this flavorful dish your new favorite!
Why I Love This Recipe
- Comforting Flavor: This soup has a warm and soothing flavor profile that makes it perfect for chilly days.
- Simple Ingredients: With just a few wholesome ingredients, this recipe is both easy to make and nutritious.
- Versatile Dish: This soup can be served as a starter, main dish, or even frozen for later use.
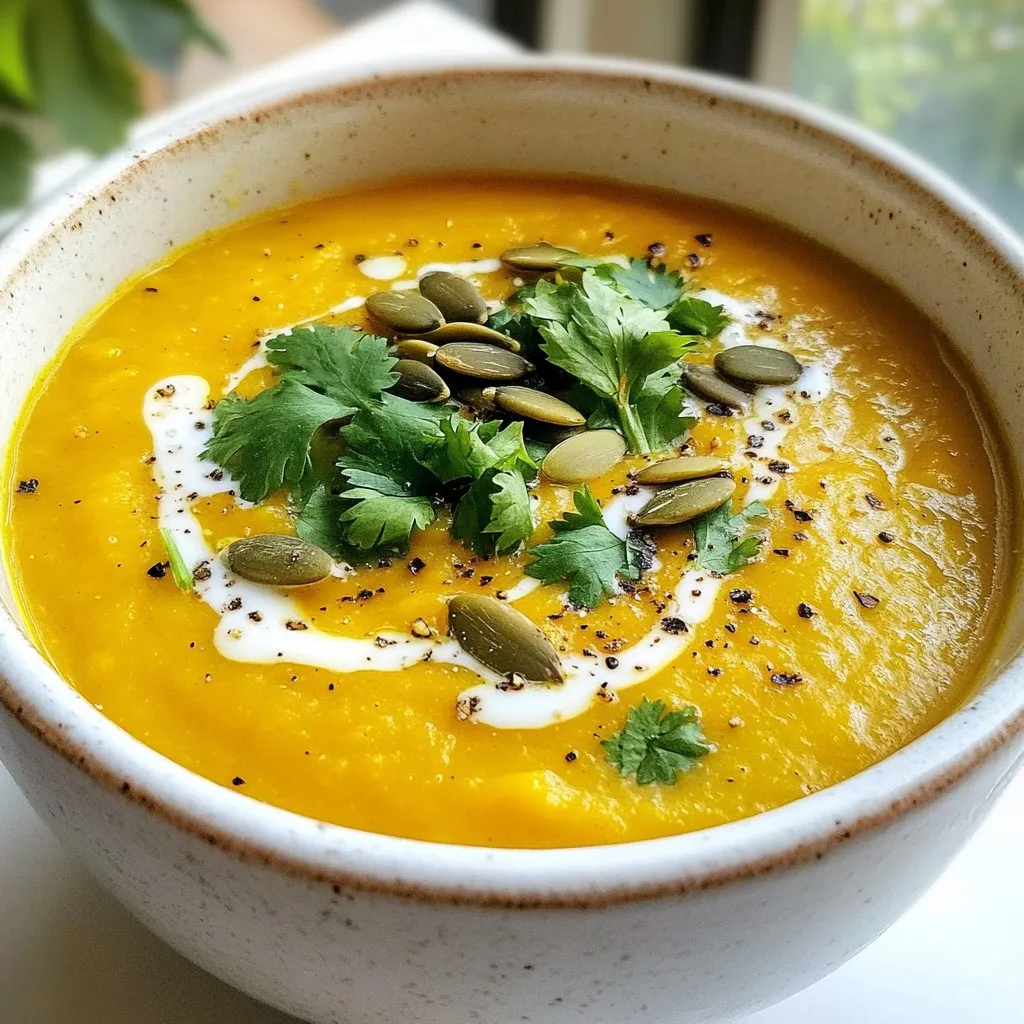
- Beautiful Presentation: Garnishing with fresh herbs and a drizzle of coconut milk adds an elegant touch to your table.
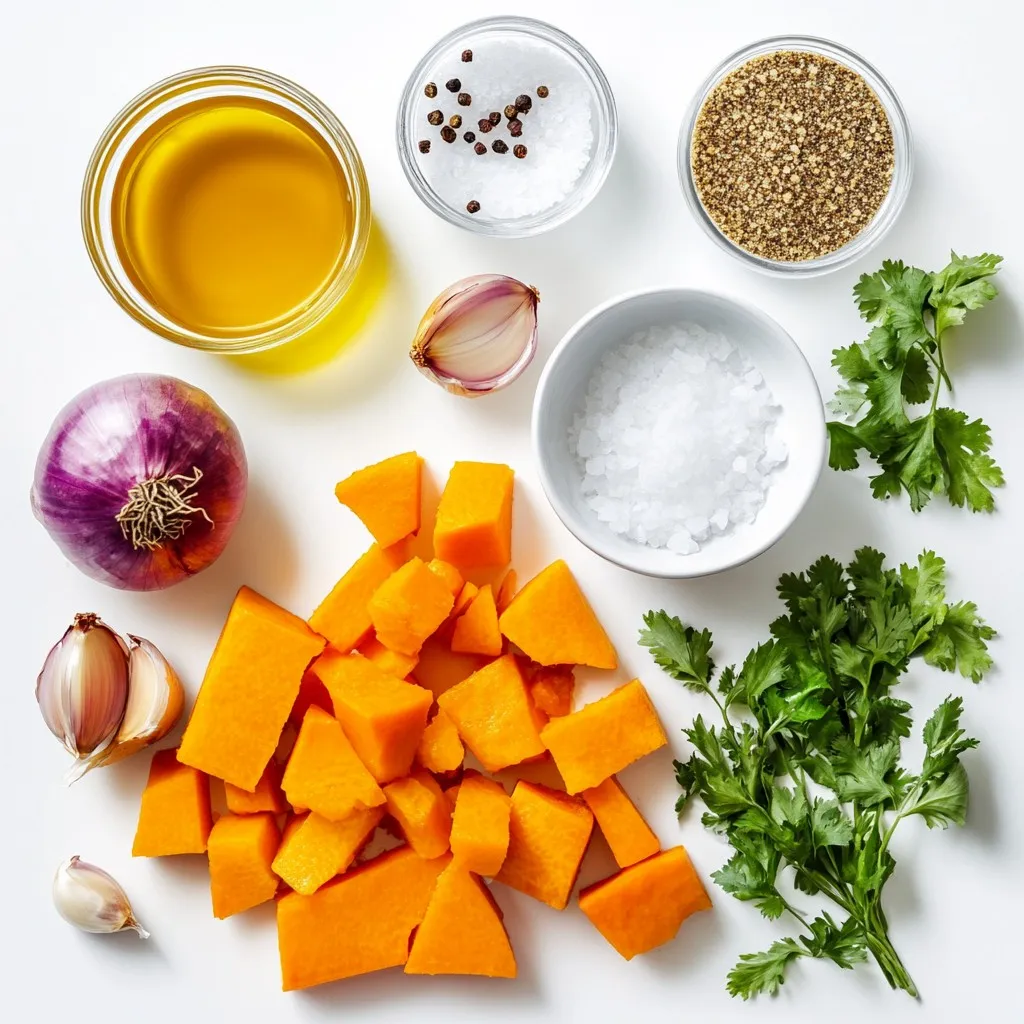
Ingredients
Main Ingredients
– 1 large butternut squash
– 2 tablespoons extra virgin olive oil
– 1 medium onion
– 2 cloves garlic
– 1 teaspoon ground ginger
– 1 teaspoon ground cumin
– 4 cups vegetable broth
– 1 cup full-fat coconut milk
– Sea salt and freshly cracked black pepper
– Fresh cilantro or parsley for garnish
The star of the show is clearly the butternut squash. Its sweet, nutty flavor shines in this soup. You want to choose a squash that feels heavy for its size and has a smooth, firm skin.
We use olive oil to help roast the squash, giving it a richer taste. The onion and garlic add depth and warmth to the flavor. Ground ginger and cumin bring a bit of spice and warmth. The vegetable broth forms the base of the soup and adds a savory note.
Finally, we finish with full-fat coconut milk. This ingredient gives the soup a creamy texture and a hint of sweetness.
Optional Garnishes
– Roasted pumpkin seeds
– Croutons
These garnishes are not just pretty; they add crunch and flavor. Roasted pumpkin seeds add a nutty taste. Croutons provide a lovely texture contrast to the smooth soup.
Nutritional Information
– Calorie count per serving: Approximately 220 calories
– Key nutrients: Vitamin A, Vitamin C, Potassium, Fiber
This soup is not only tasty but also healthy. Butternut squash is rich in vitamins and fiber. The coconut milk adds healthy fats, making this soup both nutritious and satisfying.
Step-by-Step Instructions
Preparation Steps
– Preheat oven to 400°F (200°C).
– Cube and season butternut squash.
– Prepare a baking sheet.
Start by heating your oven. This step gets the oven ready for the squash. Then, peel and cut your butternut squash into 1-inch cubes. Place the cubes in a bowl. Drizzle with olive oil. Season with sea salt and black pepper. Toss well to coat every piece evenly. Finally, arrange the squash on a baking sheet in one layer.
Roasting the Squash
– Spread squash on baking sheet.
– Roast time and stirring instructions.
Put the baking sheet in your preheated oven. Roast the squash for 25 to 30 minutes. Stir the squash halfway through. This helps it cook evenly. You want it tender and slightly caramelized. The roasting brings out a sweet flavor.
Cooking the Soup Base
– Sautéing onions and garlic.
– Adding spices.
While the squash roasts, grab a large pot. Heat the remaining olive oil over medium heat. Add chopped onions and cook for about 5 minutes. When the onions are soft and see-through, add minced garlic. Stir in ground ginger and cumin. Let these cook for 2 to 3 minutes. The spices should smell good and mix well with the onions.
Blending the Soup
– Adding roasted squash and broth.
– Pureeing the mixture.
After roasting, add the squash to the pot. Pour in the vegetable broth. Stir everything together. Bring the soup to a gentle simmer. Let it cook for 10 to 15 minutes. This time lets the flavors mix. When ready, take out your immersion blender. Blend the soup until smooth. If you don’t have an immersion blender, use a regular blender. Just cool the soup a bit before blending.
Final Adjustments
– Stirring in coconut milk.
– Adjusting seasoning and consistency.
Next, stir in the coconut milk. This makes the soup creamy. Taste it. Add more salt or pepper if needed. If the soup is too thick, mix in a bit more broth. You want a nice, smooth texture. Heat it on low for a few minutes before serving. Enjoy your warm soup!
Tips & Tricks
Perfecting the Roasting
To get that sweet caramelization on your butternut squash, follow a few key steps. First, cut the squash into 1-inch cubes for even cooking. This size allows the edges to caramelize nicely. Use a good amount of olive oil, about 2 tablespoons, to coat the squash well. Season with sea salt and freshly cracked black pepper for extra flavor.
To ensure even cooking, spread the cubes out in a single layer on your baking sheet. If they are too crowded, they will steam instead of roast. Stir the squash halfway through roasting to promote even browning.
Blending Techniques
You can use either an immersion blender or a countertop blender for this soup. An immersion blender is great because it allows you to blend right in the pot. This saves time and reduces cleanup. If you choose a countertop blender, let the soup cool a bit before blending. Hot liquids can splatter and cause burns. Always fill the blender only halfway and hold the lid down with a towel.
Enhancing Flavor
To add extra flavor, consider adding spices like nutmeg or a pinch of red pepper flakes. Fresh herbs such as thyme or rosemary can also elevate the taste.
For meal pairing, serve the soup with warm crusty bread or a fresh salad. This adds texture and balance to your meal. Enjoy experimenting with flavors and find what works best for you!
Pro Tips
- Choose the Right Squash: Look for a butternut squash that feels heavy for its size and has smooth, blemish-free skin for the best flavor and texture.
- Enhance the Flavor: Add a pinch of nutmeg or cinnamon while blending the soup for a warm, aromatic twist that complements the squash perfectly.
- Use Fresh Herbs: If available, substitute fresh ginger for ground ginger to give the soup a more vibrant and fresh flavor profile.
- Make it Creamier: For an ultra-creamy soup, blend in an additional 1/2 cup of coconut milk just before serving for a richer texture.
Variations
Ingredient Swaps
You can easily adjust this soup for dietary needs. If you’re avoiding coconut, use almond milk instead. This change still keeps the soup creamy. If you’re looking for a lower-carb option, swap butternut squash with cauliflower. It gives a similar texture without the sweetness.
Different types of squash also work well. Acorn squash adds a nutty flavor. Kabocha squash is sweet and creamy. Each type brings its own twist to the soup.
Flavor Variations
Want to spice things up? Add a pinch of chili flakes to the pot. This gives the soup a warm kick. If you prefer a tangy taste, squeeze some lime juice in before serving. It brightens the soup and adds depth.
You can also mix in fresh herbs like thyme or rosemary. These herbs bring a fragrant note that pairs well with the squash.
Presentation Variations
Serving this soup can be fun! Use warm bowls for a cozy touch. You can also create a fun swirl on top with coconut milk. This makes it look fancy.
Garnish with roasted pumpkin seeds or croutons for a crunchy bite. Fresh herbs like cilantro or parsley add color and freshness. You can even drizzle some balsamic glaze for a gourmet touch. These little details make your soup stand out.
Storage Info
Refrigeration
Store leftover soup in the fridge. Use airtight containers to keep it fresh. Glass or plastic containers work well. Let the soup cool down to room temperature before sealing. This helps avoid condensation.
Freezing Instructions
To freeze the soup, allow it to cool. Pour it into freezer-safe containers or bags. Leave some space at the top for expansion. When you’re ready to eat, thaw it in the fridge overnight. You can also use a microwave for quick thawing. Reheat the soup gently on the stove. Stir often to prevent sticking.
Shelf Life
In the fridge, the soup lasts about 3-4 days. If you freeze it, the soup can last up to 3 months. Always check for signs of spoilage before eating. If it smells off or has strange colors, toss it out. Enjoy your cozy soup whenever you want!
FAQs
What is the best way to peel a butternut squash?
To peel a butternut squash, use a sharp vegetable peeler. Start at the top and move down. Press firmly but carefully. For easier peeling, you can microwave the squash for 1-2 minutes. This softens the skin. You can also cut it in half and scoop out the seeds first. Then, peel each half.
Can I make this soup in advance?
Yes, you can make this soup ahead of time. Cook the soup as directed, then let it cool. Store it in an airtight container in the fridge. It will stay fresh for up to 5 days. To reheat, warm it on the stove over low heat. Stir it well to keep it smooth.
Is this soup gluten-free?
Yes, this soup is gluten-free. All the ingredients are safe for a gluten-free diet. You can enjoy it without worry. Just make sure to check your broth label. Some brands may add gluten.
How can I make this soup vegan?
To make this soup vegan, simply use vegetable broth. The recipe is already dairy-free because it uses coconut milk. This helps you avoid animal products. You can also add more veggies for extra flavor and nutrients.
Can I substitute the coconut milk?
Yes, you can substitute coconut milk. Use almond milk, soy milk, or cashew cream for a different flavor. For a creamier texture, try using blended silken tofu. Each option will change the taste slightly, so choose what you like best.
This soup blends simple ingredients into a comforting dish. You learned how to prepare butternut squash, cook the base, and blend the flavors. With tips for heightening taste and variations for custom tweaks, you have all you need. Store leftovers easily or freeze for later. Whether you enjoy it solo or share with friends, this soup brings warmth to any table. Now, get cooking and enjoy every bit

Cozy Roasted Butternut Squash Soup
Ingredients
- 1 large butternut squash, peeled, seeded, and cut into 1-inch cubes
- 2 tablespoons extra virgin olive oil
- 1 medium onion, finely chopped
- 2 cloves garlic, minced
- 1 teaspoon ground ginger
- 1 teaspoon ground cumin
- 4 cups vegetable broth
- 1 cup full-fat coconut milk
- to taste sea salt and freshly cracked black pepper
- for garnish fresh cilantro or parsley
Instructions
- Preheat your oven to 400°F (200°C) to ensure it's hot and ready for roasting.
- In a large mixing bowl, combine the cubed butternut squash with 1 tablespoon of olive oil. Season generously with salt and pepper, then toss to coat the squash evenly.
- Spread the seasoned squash cubes in a single layer on a baking sheet. Roast in the preheated oven for 25-30 minutes, or until the squash is tender and lightly caramelized, making sure to stir halfway through for even cooking.
- While the squash roasts, heat the remaining tablespoon of olive oil in a large pot over medium heat. Add the chopped onion and sauté for about 5 minutes, or until it becomes translucent and fragrant.
- Once the onion is ready, stir in the minced garlic, ground ginger, and cumin. Cook for an additional 2-3 minutes until the spices are aromatic and well combined with the onions.
- Carefully add the roasted butternut squash to the pot, followed by the vegetable broth. Stir to combine, then bring the mixture to a gentle simmer. Allow it to cook for 10-15 minutes, which helps the flavors meld beautifully.
- After simmering, remove the pot from heat. Using an immersion blender, carefully puree the soup until it reaches a velvety smooth consistency. If you prefer, you can blend the soup in batches with a countertop blender—just ensure it cools slightly to avoid splattering.
- Stir in the coconut milk, adjusting the seasoning with salt and pepper to taste. If the soup appears too thick for your liking, gradually mix in a little more vegetable broth until you achieve your desired consistency.
- Place the pot back on low heat for a few minutes to warm the soup through before serving.

![For a tasty BLT pasta salad, you need a few key ingredients. Here’s what you will use: - 8 oz fusilli pasta - 1 cup cherry tomatoes, halved - 1 cup fresh spinach, roughly chopped - 1 cup cooked turkey bacon, finely chopped - 1/2 cup red onion, diced These ingredients give your salad great flavor and texture. The fusilli pasta holds dressing well. Cherry tomatoes add a burst of sweetness. Fresh spinach adds color and nutrients. Turkey bacon gives a nice crunch. Now, let’s talk about the dressing. The right seasoning makes a big difference. Here’s what you need: - 1/2 cup mayonnaise - 2 tablespoons Greek yogurt - 1 tablespoon apple cider vinegar - 1 teaspoon garlic powder - Salt and black pepper to taste This creamy dressing balances the salad. Mayonnaise and yogurt add richness. Apple cider vinegar brings a tangy touch. Garlic powder enhances the flavors, while salt and pepper season everything just right. To make your salad even better, you can add some fun toppings. Consider these options: - Fresh basil leaves, for garnish Basil adds a fresh aroma and flavor. You can also use extra cherry tomatoes or some nuts for crunch. These extras can make your dish more colorful and appealing. For the full recipe, check out the details to create this delightful dish! To start, bring a large pot of salted water to a boil. The salt helps add flavor to the pasta. Add 8 oz of fusilli pasta to the pot. Cook it according to the package instructions. You want it to be al dente, which means it should be firm but not hard. This usually takes around 8 to 10 minutes. Once the pasta is done, drain it in a colander. Rinse it under cold water to stop the cooking. This step cools the pasta down and helps it not stick together. In a large mixing bowl, combine the cooled pasta with the salad ingredients. Add 1 cup of halved cherry tomatoes and 1 cup of roughly chopped fresh spinach. Then, mix in 1 cup of finely chopped cooked turkey bacon and 1/2 cup of diced red onion. Gently stir everything together until well mixed. This will create a colorful and tasty base for your salad. Now, it’s time to make the dressing. In a separate bowl, whisk together 1/2 cup of mayonnaise, 2 tablespoons of Greek yogurt, and 1 tablespoon of apple cider vinegar. Then, add 1 teaspoon of garlic powder along with salt and black pepper to taste. Mix until the dressing is smooth and creamy. This dressing adds richness and flavor to your salad. Pour it over the pasta mixture and carefully fold it in. Make sure every bite gets some dressing. Taste your salad and adjust the seasoning if needed. Cover the bowl and refrigerate for at least 30 minutes. This will help the flavors blend nicely. You can find the full recipe at [Full Recipe]. To cook pasta just right, start with a large pot. Fill it with water and add salt. The salt gives flavor to the pasta. Bring the water to a boil before adding your fusilli. Stir the pasta right away to prevent sticking. Cook it according to the package time until it's al dente, which means firm but not hard. After cooking, drain the pasta and rinse it under cold water. This stops the cooking and cools it down for the salad. To make your salad burst with flavor, use fresh herbs. Fresh basil works great, adding a sweet and peppery taste. You can also try adding a pinch of crushed red pepper for heat. Garlic powder gives a nice depth, but fresh garlic can add a sharper taste. Don’t forget to taste your salad as you season. This way, you can adjust the flavors to your liking. Making your salad ahead of time is smart. It allows the flavors to mix well. I suggest making it at least 30 minutes before serving. Just cover the bowl and chill it in the fridge. If you want to prep even earlier, you can cook the pasta and chop the veggies a day ahead. Keep the dressing separate until you’re ready to serve. This keeps everything fresh and crunchy. For the full recipe, check out the detailed instructions. {{image_4}} You can make simple swaps to boost nutrition. Use whole wheat pasta instead of regular. This adds fiber and keeps you full longer. Try Greek yogurt in place of mayonnaise for a lighter dressing. You can also add more fresh veggies, like bell peppers or cucumbers, for extra crunch and vitamins. To make this salad vegan, swap turkey bacon for tempeh or crispy chickpeas. Both options give great flavor and texture. Use vegan mayonnaise for the dressing. You can also add avocado for creaminess and healthy fats. This keeps the salad rich and satisfying without animal products. Adding ingredients can make your salad more exciting. Toss in fresh herbs like parsley or chives for brightness. You could also add nuts, like walnuts or pine nuts, for a crunchy bite. Cheese lovers can sprinkle in feta or goat cheese for a tangy twist. These additions elevate the taste and make each bite special. For the full recipe, check out the complete guide. After making your BLT pasta salad, let it cool. Transfer it to an airtight container. Cover it tightly to keep air out. This helps maintain freshness. Place it in the fridge right away. Avoid leaving it out for too long. Your pasta salad will stay fresh for about three days. After that, it may lose its flavor and texture. Check for any signs of spoilage. If it smells off or looks strange, it’s best to toss it. Freezing BLT pasta salad is not recommended. The creamy dressing can separate when thawed. The texture of pasta and veggies may change, too. If you want to save it, consider freezing the pasta and dressing separately. This way, you can enjoy fresh flavors when you reassemble it. For the full recipe, check out the details provided above. Fusilli pasta works great for this salad. Its spiral shape holds the dressing well. You can also use rotini or penne if you prefer. Both types add texture to the dish. Choose any pasta that you enjoy. Just make sure it's cooked al dente for the best bite. Yes, you can use regular bacon. It will add a rich flavor to your salad. Just cook it until crispy and chop it finely. However, turkey bacon is a lighter option. It keeps the salad healthier without losing taste. To make this salad gluten-free, use gluten-free pasta. Many brands offer great options made from rice or quinoa. Always check the label to ensure it's certified gluten-free. This way, everyone can enjoy the dish without worry. Serve this salad chilled as a side dish. It pairs well with grilled meats or sandwiches. You can also enjoy it as a light main dish. For a fun twist, serve it in lettuce cups or avocado halves for added crunch. Absolutely! This salad tastes even better after chilling. You can prepare it up to a day ahead. Just store it in the fridge until ready to serve. The flavors will blend nicely, making each bite delicious. Store any leftovers in an airtight container. Keep it in the fridge for up to three days. If it seems dry, add a bit more dressing before eating. This will help refresh the flavor and texture. For the full recipe, check out the details above! This post covers all you need for making a tasty BLT pasta salad. We explored the key ingredients, step-by-step cooking, and helpful tips. You learned about variations and storage methods to keep your salad fresh. Enjoy your own twist on this dish. Whether you want to make it healthier or add more flavor, the options are yours. Now, gather your ingredients and have fun cooking!](https://joymealplan.com/wp-content/uploads/2025/07/ece4661f-932b-46ab-84ac-afef4fdb42e9-768x768.webp)