No-Bake Peanut Butter Bars Easy and Delicious Recipe

If you love peanut butter, you’re in for a treat! These No-Bake Peanut Butter Bars are easy to make and deliciously satisfying. With just a few simple ingredients, you can whip up a sweet snack that everyone will enjoy. No need to turn on the oven—just mix, chill, and indulge! Let me guide you through this quick recipe that’s perfect for both kids and adults. Ready to get started?
Why I Love This Recipe
- Easy to Make: This recipe requires minimal ingredients and can be whipped up in just 15 minutes, making it perfect for a quick snack or dessert.
- Nutritious Ingredients: Packed with wholesome oats and natural sweeteners, these bars are a healthier alternative to traditional sweets.
- Customizable: You can easily add your favorite toppings, like nuts or sprinkles, to personalize each batch to your liking.
- Deliciously Satisfying: The combination of creamy peanut butter and rich chocolate creates a mouthwatering treat that satisfies your sweet tooth.
Ingredients
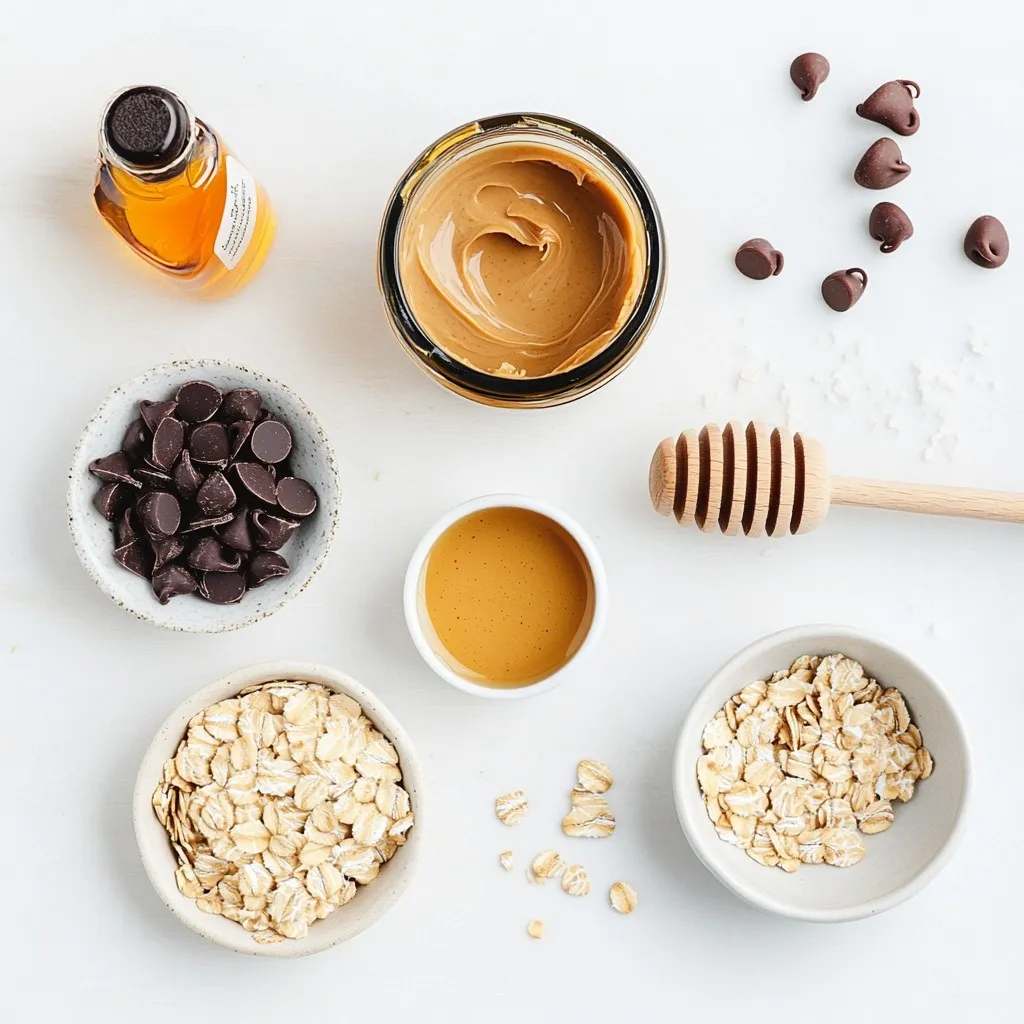
List of Required Ingredients
– 1 cup creamy peanut butter
– 1 cup rolled oats
– 1/2 cup honey or maple syrup
– 1/4 cup coconut oil, melted
– 1/2 cup dark chocolate chips
– 1/4 teaspoon sea salt
– 1 teaspoon vanilla extract
– Optional toppings like crushed nuts or colorful sprinkles
To make no-bake peanut butter bars, you need simple and tasty ingredients. Each one adds flavor and texture.
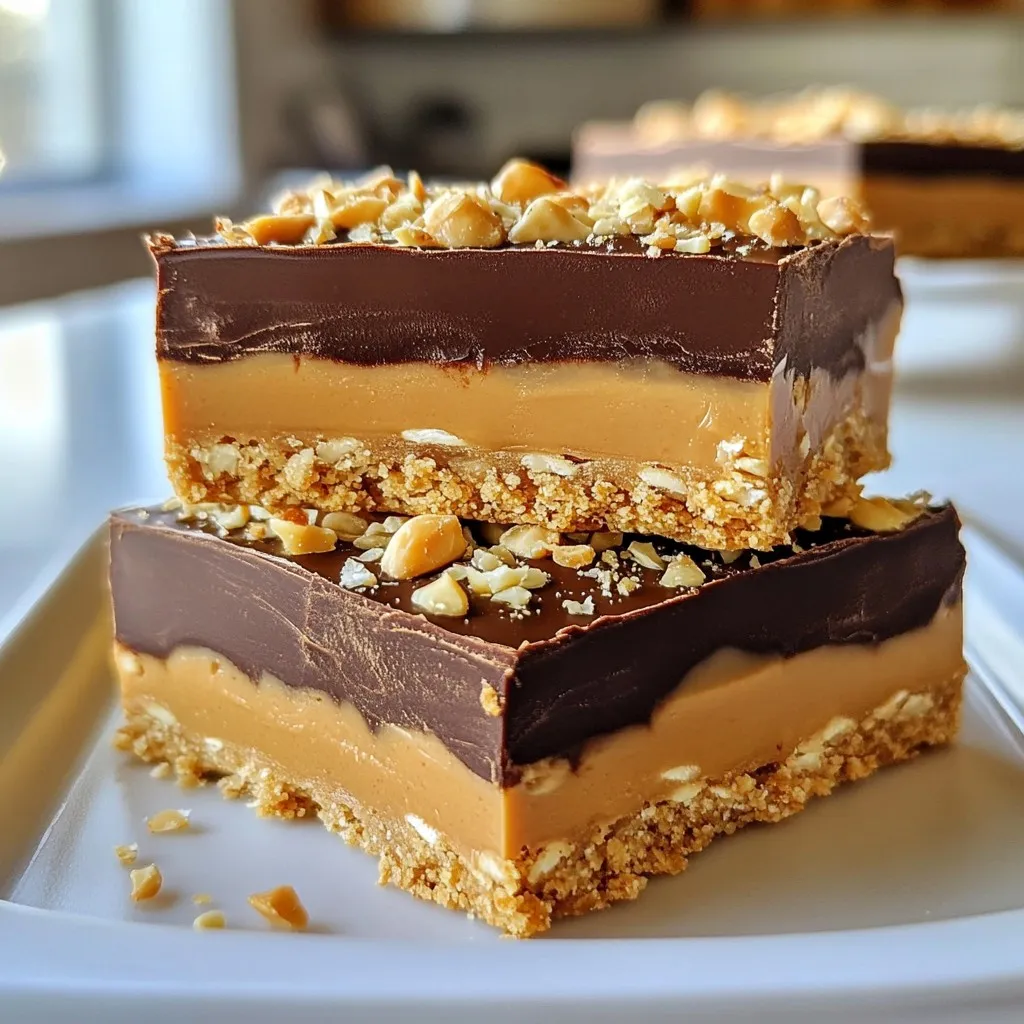
The creamy peanut butter creates a rich base. Rolled oats give the bars a chewy feel. Honey or maple syrup adds sweetness and binds everything together. The melted coconut oil helps the mixture stay moist. Dark chocolate chips on top give a sweet finish.
Sea salt balances the sweetness. Vanilla extract adds a warm flavor. You can also use crushed nuts or colorful sprinkles as fun toppings. They make the bars look great and add crunch.
Gather these ingredients, and you are ready to create a delicious treat. The recipe is easy and quick, perfect for any skill level.
Step-by-Step Instructions
Detailed Preparation Process
– Step 1: In a large bowl, combine 1 cup of creamy peanut butter, 1/2 cup of honey, 1/4 cup of melted coconut oil, and 1 teaspoon of vanilla extract. Mix until smooth. This mixture is the base for your bars.
– Step 2: Gradually mix in 1 cup of rolled oats and 1/4 teaspoon of sea salt. Stir well until the oats are fully mixed in. The mixture should feel sticky and cohesive.
– Step 3: Prepare an 8×8 inch square baking dish. Line it with parchment paper, letting some paper hang over the sides. This helps you lift the bars out later.
– Step 4: Press the peanut butter and oat mixture firmly into the bottom of the lined baking dish. Use a spatula to make sure it is even and smooth.
– Step 5: In a microwave-safe bowl, add 1/2 cup of dark chocolate chips. Melt them in the microwave in 30-second intervals. Stir well between each interval until the chocolate is smooth.
– Step 6: Carefully pour the melted chocolate over the pressed peanut butter layer. Use a spatula to spread it evenly across the surface. This will create a delicious topping.
– Step 7: If you want, sprinkle crushed nuts or colorful sprinkles over the melted chocolate. Gently press down on the toppings. This helps them stick to the chocolate layer.
– Step 8: Place the baking dish in the refrigerator for at least 2 hours. Once the bars are set, lift them out using the parchment paper. Cut into squares or rectangles.
Follow these steps, and you will have tasty no-bake peanut butter bars ready to enjoy!
Tips & Tricks
Tips for Perfect No-Bake Peanut Butter Bars
– Ensure smooth mixing of the peanut butter mixture. This keeps the bars creamy and tasty.
– Press the peanut butter oat mixture firmly for a dense bar. It helps them hold together well.
– Use high-quality chocolate for the best flavor. Good chocolate makes a big difference.
Common Mistakes to Avoid
– Overheating chocolate when melting can ruin its texture. Heat it slowly in short bursts.
– Not letting the bars set long enough in the refrigerator leads to a soft texture. Give them at least two hours to firm up.
Pro Tips
- Use Natural Peanut Butter: Opt for a natural peanut butter without added sugars or oils for a healthier option and a more authentic peanut flavor.
- Chill for Better Texture: Allow the bars to chill longer than the minimum time suggested for a firmer texture that holds together better when cut.
- Experiment with Toppings: Try using different toppings like shredded coconut, chia seeds, or various nut butters for added flavor and texture.
- Storage Tips: Store the bars in an airtight container in the refrigerator for up to two weeks to maintain freshness and prevent them from getting too soft.
Variations
Alternative Flavor Combinations
You can easily change the flavors of these bars. Here are some ideas:
– Add protein powder: Mixing in a scoop of protein powder boosts nutrition. It adds protein without changing taste much.
– Use almond or cashew butter: Swap peanut butter for almond or cashew butter. This gives a new taste and feel.
– Incorporate dried fruits or seeds: Adding dried fruits like cranberries or seeds like sunflower seeds adds great texture. It also gives a chewy bite.
Different Toppings Ideas
Toppings can make your bars more fun. Here are some options to try:
– Experiment with chocolate or nut butter: Use white chocolate, milk chocolate, or different nut butters. Each option adds its own flavor twist.
– Use shredded coconut or mini marshmallows: Sprinkling shredded coconut adds a tropical feel. Mini marshmallows give a sweet, fluffy bite.
Feel free to mix and match these suggestions. Each change brings a new twist to your no-bake peanut butter bars!
Storage Info
How to Store No-Bake Peanut Butter Bars
To keep your no-bake peanut butter bars fresh, store them in an airtight container. Place them in the refrigerator. This method helps maintain their texture and flavor. These bars last about one week in the fridge. You can serve them straight from the fridge or let them sit out for a few minutes to soften slightly.
Freezing Instructions
If you want to enjoy these bars later, freezing is a great option. Start by cutting the bars into squares. Wrap each square tightly in plastic wrap. Then, place the wrapped bars in a freezer-safe bag or container. They can stay frozen for up to three months. When you’re ready to eat, simply take out a bar. Let it thaw in the fridge for about an hour. Enjoy your tasty treat just like fresh!
FAQs
Common Questions about No-Bake Peanut Butter Bars
Can I substitute ingredients for allergies?
Yes, you can swap ingredients based on your needs. If you have a peanut allergy, use almond butter or sun butter instead. For sweeteners, maple syrup works great if honey is a problem. Just keep in mind that texture may change slightly.
How long do these bars last?
These bars stay fresh for about one week in the fridge. If you want to keep them longer, consider freezing them. They can last up to three months in the freezer. Just wrap them well in plastic wrap or foil to avoid freezer burn.
Can I make these without coconut oil?
You can replace coconut oil with another fat. Unsalted butter or even a neutral oil like canola oil works well. The bars may taste a bit different, but they will still hold together nicely.
What’s the best way to cut these bars?
To cut the bars cleanly, use a sharp knife. First, let them chill for at least two hours. Lift them out of the dish using the parchment paper. Cut them into squares or rectangles. For neat edges, wipe the knife after each cut.
These no-bake peanut butter bars are easy to make and taste great. You need simple ingredients, like peanut butter and oats, and a few steps to prepare. By following the tips provided, you can avoid common mistakes and create delicious bars. Feel free to explore different flavors and toppings to make them your own. Store them easily in the fridge or freezer for later. With this guide, making snacks is simple and fun. Enjoy your tasty treat

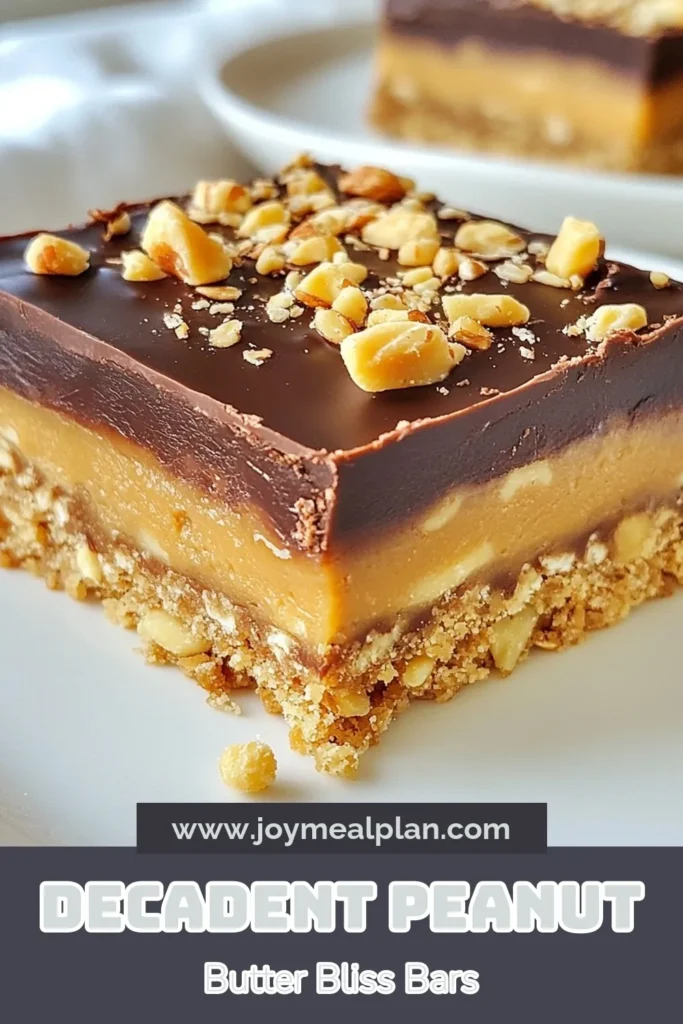
Peanut Butter Bliss Bars
Ingredients
- 1 cup creamy peanut butter
- 1 cup rolled oats
- 1/2 cup honey or maple syrup
- 1/4 cup coconut oil, melted
- 1/2 cup dark chocolate chips
- 1/4 teaspoon sea salt
- 1 teaspoon vanilla extract
- to taste crushed nuts or colorful sprinkles for topping (optional)
Instructions
- In a large mixing bowl, combine the creamy peanut butter, honey (or maple syrup), melted coconut oil, and vanilla extract. Use a whisk or spatula to stir until the mixture is completely smooth and well incorporated.
- Gradually add the rolled oats and sea salt to the peanut butter mixture. Stir until the oats are fully combined and the mixture becomes sticky and cohesive.
- Prepare an 8x8 inch square baking dish by lining it with parchment paper, letting some edges hang over the sides for easy lifting later.
- Firmly press the peanut butter and oat mixture into the bottom of the lined baking dish, using a spatula to ensure an even and smooth layer across the base.
- In a microwave-safe bowl, add the dark chocolate chips. Melt them in the microwave in 30-second intervals, stirring well between each interval until the chocolate is completely melted and velvety smooth.
- Once melted, carefully pour the chocolate over the pressed peanut butter layer. Use a spatula to spread it evenly, ensuring it coats the entire surface for a luscious topping.
- If desired, sprinkle crushed nuts or colorful sprinkles over the melted chocolate. Gently press down on the toppings to help them adhere to the chocolate layer.
- Place the baking dish in the refrigerator for at least 2 hours, or until the bars have set firmly. Once set, lift them out using the parchment overhang and cut into squares or rectangles.
![- 1 cup dark chocolate chips - 1 cup white chocolate chips - 1 cup freeze-dried strawberries, crushed - 1/2 cup roasted almonds, roughly chopped (optional) - Sea salt, for a finishing sprinkle To make chocolate covered strawberry bark, you need simple ingredients. Dark chocolate chips form the base, giving a rich taste. White chocolate chips add sweetness and a lovely contrast. Freeze-dried strawberries provide a fruity crunch. If you like, you can add roasted almonds for a nutty flavor. A sprinkle of sea salt at the end really enhances everything. - For chocolate alternatives, you can use milk chocolate or vegan chocolate. - Other nuts and toppings can include walnuts, pecans, or coconut flakes. If you want to switch things up, feel free to use different chocolates. Milk chocolate offers a sweeter note, while vegan chocolate works for plant-based diets. You can also play with toppings. Try different nuts or even dried fruits like apricots or raisins. These changes keep the bark fun and exciting. 1. Lining the baking sheet Start by lining a baking sheet with parchment paper. This paper helps the bark come off easily later. Without it, the chocolate might stick. 2. Melting the dark chocolate Next, take a microwave-safe bowl and add one cup of dark chocolate chips. Microwave the chips in 30-second bursts. Stir well after each round. Keep going until the chocolate is fully melted and smooth. Be careful; you don’t want to overheat the chocolate. 3. Spreading the dark chocolate Once your dark chocolate is melted, pour it onto the lined baking sheet. Use a spatula to spread it into an even layer. Make it as thick or thin as you like. A consistent layer looks great. 4. Melting and drizzling white chocolate In another bowl, melt one cup of white chocolate chips the same way. Use the microwave in 30-second increments until it’s silky smooth. Drizzle the melted white chocolate over the dark chocolate. To create a pretty marbled effect, take a toothpick or spatula and swirl the two chocolates together. 5. Adding toppings and sea salt Now, sprinkle the crushed freeze-dried strawberries on top. If you want, add chopped roasted almonds for crunch. Finally, lightly sprinkle sea salt over everything. This adds a nice balance to the sweetness. 6. Chilling the bark Carefully place the baking sheet in the refrigerator. Chill for about 30 minutes, or until the chocolate is firm. Once set, break the bark into pieces with your hands or a knife. This gives it a rustic look. For the [Full Recipe], check the earlier section. Enjoy your chocolate-covered strawberry bark! To melt chocolate correctly, avoid overheating it. Heat can turn chocolate into a grainy mess. Use short bursts in the microwave, about 30 seconds at a time. Stir well after each interval. If you notice the chocolate starting to seize, stop heating immediately. You can also use a double boiler as an alternative. Fill a pot with a bit of water and place a heat-safe bowl on top. This method helps keep the chocolate at a steady temperature. Stir gently as it melts for a silky smooth finish. For the best texture, aim for a thickness of about 1/4 inch when spreading the chocolate. This thickness will give your bark a nice bite. If you prefer thicker pieces, adjust accordingly. If you have leftover melted chocolate, store it in a sealed container. Keep it in the fridge for up to a week. When you want to use it again, gently reheat it in the microwave. To make your Chocolate Covered Strawberry Bark look stunning, use a decorative platter for serving. Arrange some whole strawberries next to the bark for a pop of color. You can also sprinkle some colorful garnish on top. Consider using edible flowers or nuts for added texture. These small touches make a big difference in presentation. For more creative ideas, check out the Full Recipe for inspiration. {{image_4}} You can easily change the taste of your chocolate bark. Adding flavors like peppermint or orange can make it special. Just mix in a few drops of peppermint extract or some orange zest with your melted chocolate. This twist can really freshen up the bark. You can also add dried fruits. Dried cherries, blueberries, or even mango give great flavor. These fruits add a sweet and chewy bite. Just sprinkle them on top along with the strawberries. If you need gluten-free options, worry not! Both dark and white chocolate can be gluten-free. Just check the labels to be sure. You can also skip the nuts if you have allergies. This bark stays delicious and fun to eat without them. For vegan adaptations, swap the chocolate for vegan chocolate. There are many brands that make dairy-free chocolate. This way, everyone can enjoy this treat! You can create themed bark for holidays, too. For Christmas, add crushed candy canes on top for a festive touch. For Valentine's Day, use pink or red sprinkles along with the strawberries. This can make your bark look lovely and cheerful for any celebration. Check out the Full Recipe for more details on making this delightful treat! To keep your chocolate covered strawberry bark fresh, use airtight containers. This keeps moisture out and prevents the bark from getting soft. The ideal temperature for storage is cool, around 60-70°F. Avoid placing the bark in warm areas, as heat can melt the chocolate. For best taste, enjoy your chocolate covered strawberry bark within two weeks. After that, the quality may decrease. Look for signs of spoilage like a white film or off smell. If you spot these, it’s best to throw it away. Always check for freshness before enjoying this treat. Enjoy your chocolate covered strawberry bark while it’s at its best! How do I make Chocolate Covered Strawberry Bark? Making Chocolate Covered Strawberry Bark is simple! First, gather your ingredients: - 1 cup dark chocolate chips - 1 cup white chocolate chips - 1 cup freeze-dried strawberries, crushed - 1/2 cup roasted almonds, roughly chopped (optional) - Sea salt, for a finishing sprinkle Follow the steps in the Full Recipe for smooth melting and perfect layering. This treat is fun to make and even better to eat! Can I use different types of chocolate? Yes, you can use different types of chocolate! Milk chocolate, dark chocolate, or even vegan chocolate work well. Each type brings its own flavor and sweetness. Feel free to mix and match based on your taste. Where to buy pre-made Chocolate Covered Strawberry Bark If you want to skip the prep, you can find pre-made Chocolate Covered Strawberry Bark at many specialty stores. Check local gourmet shops or online marketplaces for ready-made options. Recommended brands Some popular brands to try include: - Compartés Chocolatier - See's Candies - Godiva These brands offer quality products that can satisfy your chocolate cravings. Ideal pairings with beverages Chocolate Covered Strawberry Bark pairs well with many drinks! Consider serving it with a glass of milk, hot cocoa, or even a fruity tea. The flavors blend nicely and make for a tasty treat. Best occasions for serving this treat This bark is perfect for any occasion! Serve it at birthday parties, holiday gatherings, or as a sweet snack during movie nights. It always brings smiles and joy. In this blog post, we explored how to make Chocolate Covered Strawberry Bark. We discussed the main ingredients, including dark and white chocolate, strawberries, and optional almonds. You learned step-by-step instructions for preparation and assembly. I shared tips for melting chocolate safely and achieving the right texture. We also looked at variations and storage tips for this delightful treat. Enjoy making your own chocolate bark and get creative with flavors! It's simple, fun, and perfect for sharing.](https://joymealplan.com/wp-content/uploads/2025/07/8e3d9728-8bcd-40c4-9564-7af6a171388c-768x768.webp)