Mini Gingerbread Cheesecakes Delightful Holiday Treat
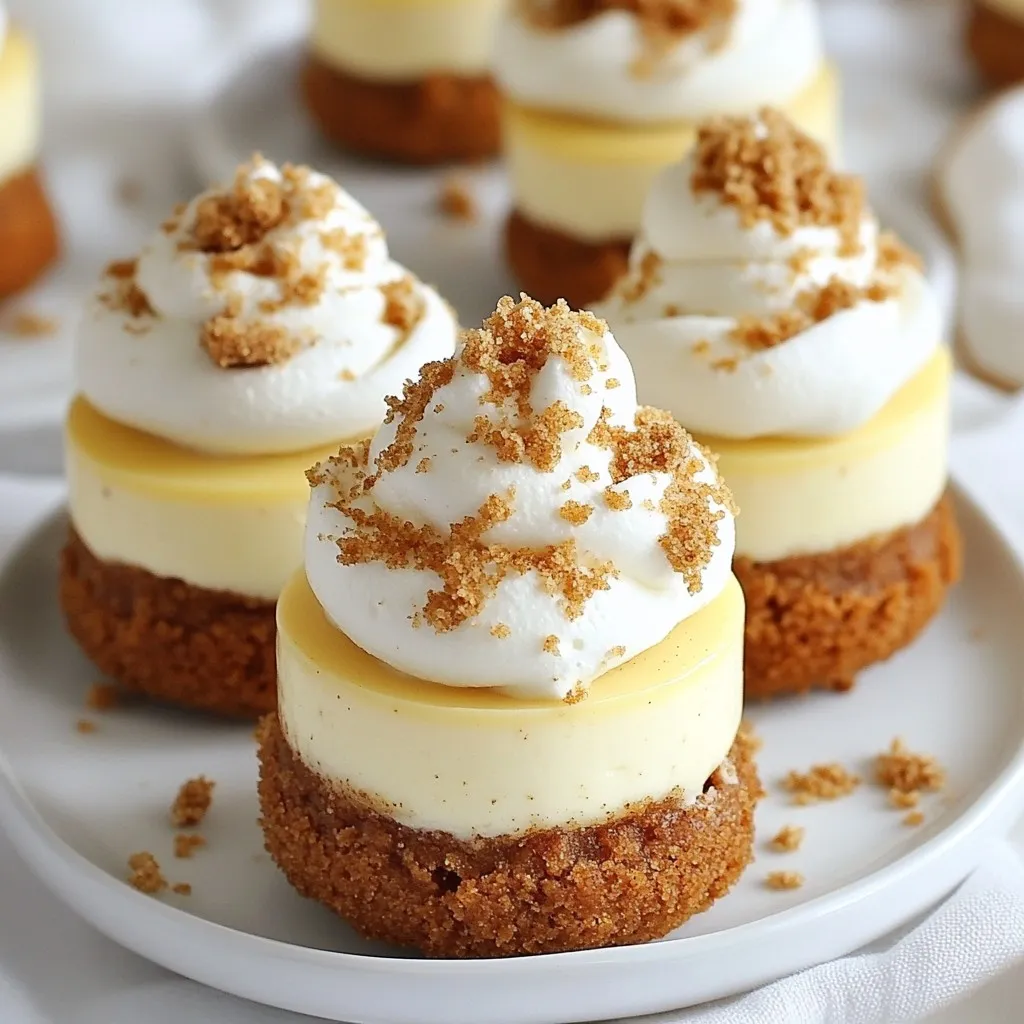
Craving a sweet holiday treat that impresses? Look no further than my Mini Gingerbread Cheesecakes! These delightful bites combine smooth cream cheese with the spicy warmth of gingerbread. Perfect for your holiday gatherings, they’re easy to make and even better to share. I’ll walk you through simple steps, clever tips, and festive variations. Ready to make your holidays sweeter? Let’s dive into this festive recipe together!
Why I Love This Recipe
- Festive Flavor: These mini cheesecakes capture the essence of the holidays with the warm spices of gingerbread, making them perfect for festive gatherings.
- Perfect Portion: Mini cheesecakes are the ideal size for dessert, allowing guests to enjoy a sweet treat without feeling overindulged.
- Easy to Make: This recipe is straightforward and doesn’t require any advanced baking skills, making it accessible for everyone.
- Impressive Presentation: With whipped cream and crushed gingerbread cookies on top, these desserts not only taste great but also look stunning on any holiday table.
Ingredients
Main Ingredients
– 1 cup gingerbread cookie crumbs
– 4 tablespoons unsalted butter, melted
– 16 oz cream cheese, softened to room temperature
– 1/2 cup granulated sugar
Flavor Enhancers
– 1 teaspoon vanilla extract
– 1 teaspoon ground ginger
– 1 teaspoon ground cinnamon
– 1/4 teaspoon ground nutmeg
Additional Components
– 2 large eggs, at room temperature
– 1 cup sour cream, at room temperature
– Whipped cream for garnishing
– Crushed gingerbread cookies for decorative topping
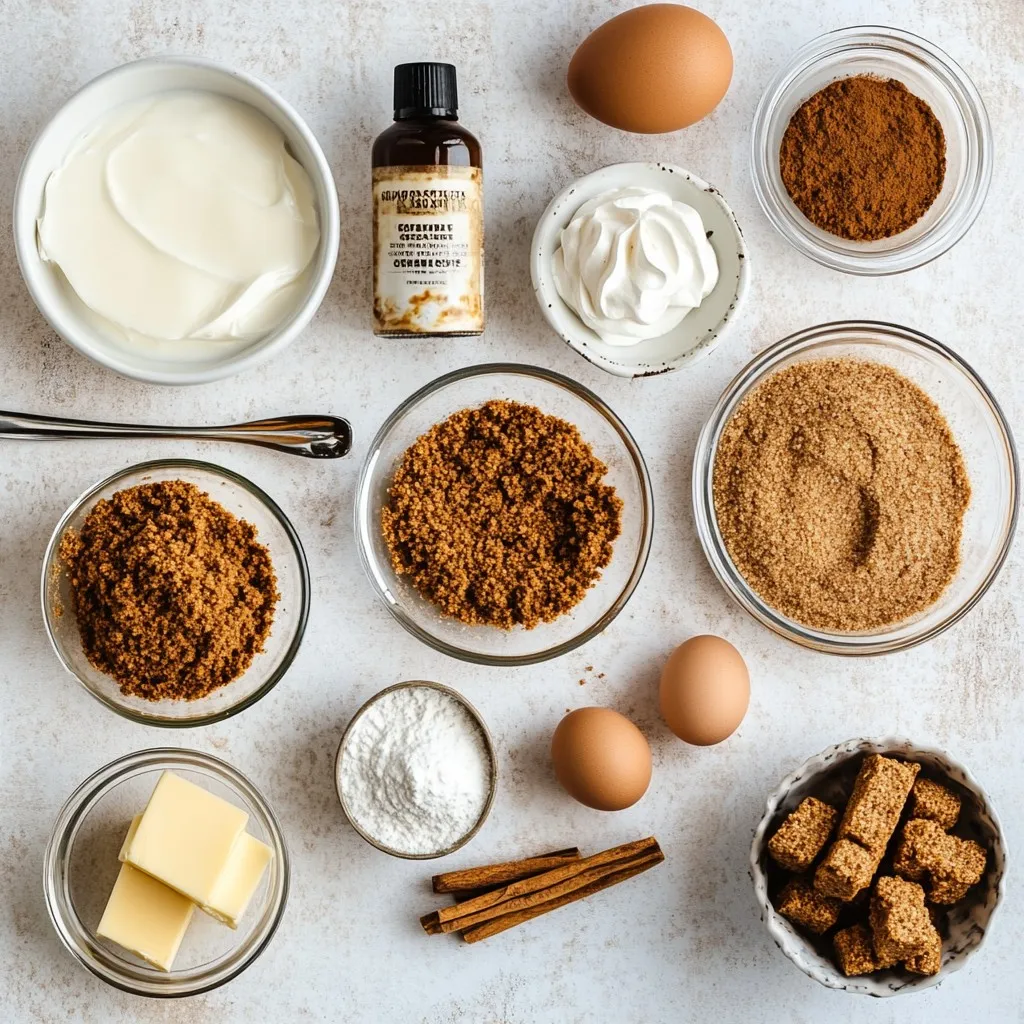
Creating these mini gingerbread cheesecakes starts with simple ingredients. You need gingerbread cookie crumbs for the crust. These crumbs give a spicy, sweet base. Melted unsalted butter helps bind the crumbs together.
Next, you’ll need cream cheese. This is the main filling. Use softened cream cheese for a smooth texture. Granulated sugar adds sweetness to balance the spices.
For flavor, vanilla extract brightens the taste. Ground ginger, ground cinnamon, and ground nutmeg bring warmth and holiday vibes.
Don’t forget the eggs! They help the cheesecake set. Sour cream adds creaminess and tang.
Finally, for serving, whipped cream provides a fluffy topping. Crushed gingerbread cookies add a fun crunch. These ingredients come together to create a delightful treat that captures the spirit of the season.
Step-by-Step Instructions
Preparing the Base
First, preheat your oven to 325°F (160°C). This will make sure your cheesecakes bake evenly. Next, line a muffin tin with paper liners. This step helps with easy removal later.
In a medium bowl, mix 1 cup of gingerbread cookie crumbs and 4 tablespoons of melted butter. Stir until the crumbs are well coated and look like wet sand. Now, distribute this crumb mixture evenly into the lined muffin tin. Press down firmly to form a solid base. Bake for 8 to 10 minutes. The crust should feel firm. Once done, carefully remove it from the oven and let it cool.
Making the Cheesecake Filling
In a large mixing bowl, beat 16 oz of softened cream cheese with an electric mixer. Mix until it is creamy and smooth. Next, gradually add in 1/2 cup of granulated sugar while mixing. Make sure it’s well blended.
Add 1 teaspoon of vanilla extract, 1 teaspoon of ground ginger, 1 teaspoon of ground cinnamon, and 1/4 teaspoon of ground nutmeg to the cream cheese mixture. Mix until everything is evenly combined. Now, introduce 2 large eggs, one at a time. Beat gently after each addition to keep the mixture airy. Finally, fold in 1 cup of sour cream and mix until the filling is smooth and creamy.
Baking and Cooling
Carefully pour the cheesecake filling over the cooled crusts. Fill each cup about three-quarters full. Return the muffin tin to the oven. Bake for 20 to 25 minutes. Watch for a slight jiggle in the center. This means they are done.
Once baked, turn off the oven but leave the door slightly open. Let the cheesecakes cool gently inside for an hour. This helps prevent cracks. After cooling, transfer them to the refrigerator. Chill for at least 4 hours or ideally overnight to set properly.
Tips & Tricks
Baking Success Tips
– Use room temperature ingredients for smooth mixing: Take your cream cheese, eggs, and sour cream out ahead of time. This helps them blend well without lumps.
– Avoid overbeating eggs for fluffy texture: Beat the eggs just until combined. Overmixing can make the cheesecake dense and heavy.
– Efficient cooling methods to prevent cracks: After baking, crack the oven door and let the cheesecakes cool slowly. This helps prevent cracks on the surface.
Decorating Ideas
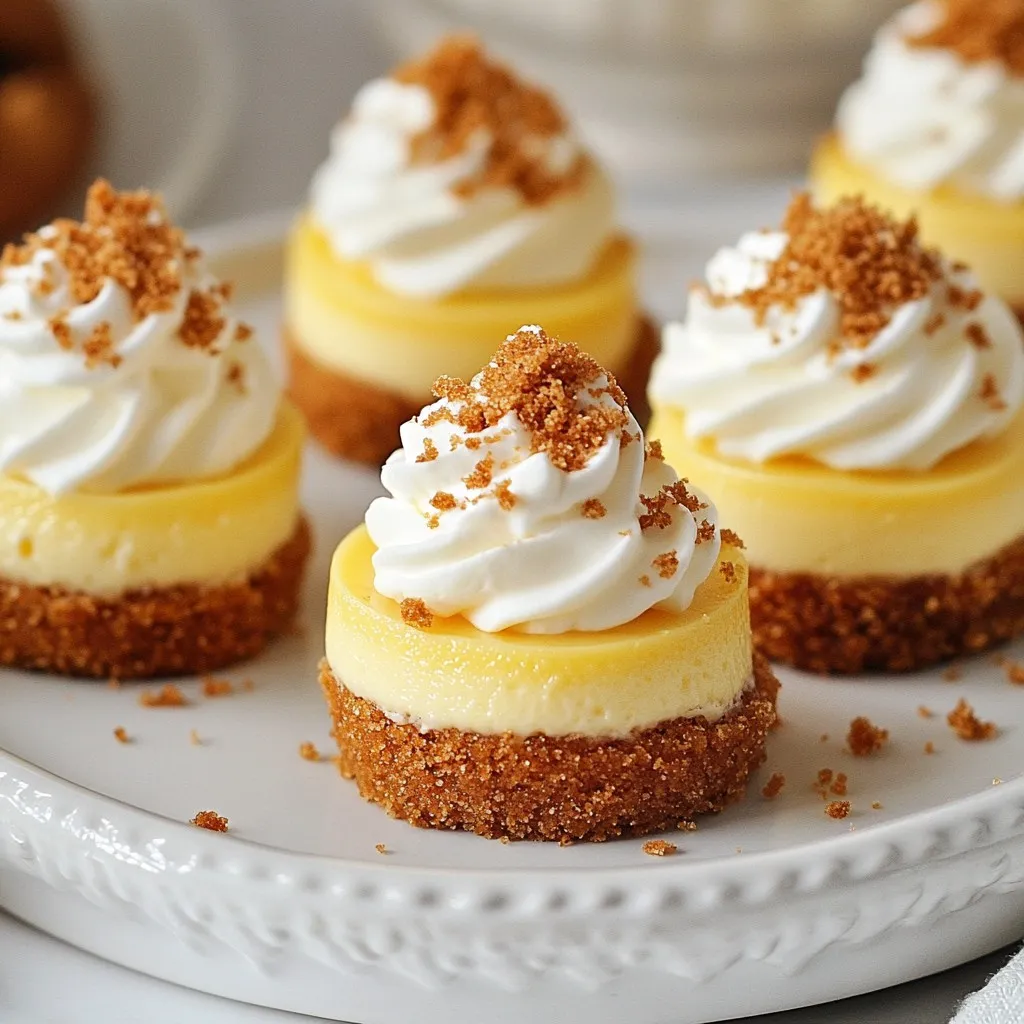
– How to garnish with whipped cream: Use a piping bag to add a swirl of whipped cream on top. This makes each cheesecake look fancy and inviting.
– Using crushed cookies for festive flair: Sprinkle crushed gingerbread cookies on top of the whipped cream. This adds a fun and crunchy touch.
– Serving suggestions and presentations: Present your mini cheesecakes on a festive platter. Add whole gingerbread cookies and a sprinkle of cinnamon for extra charm.
Common Mistakes to Avoid
– Overcooking the cheesecakes: Keep an eye on the baking time. The centers should jiggle slightly when you remove them from the oven.
– Not allowing them to cool properly: Letting them cool in the oven prevents sudden temperature changes that cause cracks.
– Skipping chilling time for best texture: Chill for at least four hours, or better yet, overnight. This ensures a creamy, smooth texture for each bite.
Pro Tips
- Use Room Temperature Ingredients: Make sure your cream cheese and eggs are at room temperature before mixing. This helps create a smoother filling without lumps.
- Prevent Cracking: Allow the cheesecakes to cool gradually in the oven with the door slightly ajar after baking. This helps prevent cracks in the surface.
- Chill Overnight: For the best flavor and texture, let the cheesecakes chill in the refrigerator overnight. This allows the flavors to meld beautifully.
- Garnish with Care: When topping with whipped cream and crushed gingerbread, use a piping bag for a professional finish and even distribution for presentation.
Variations
Flavor Variations
You can mix things up with mini gingerbread cheesecakes. Try these fun flavors:
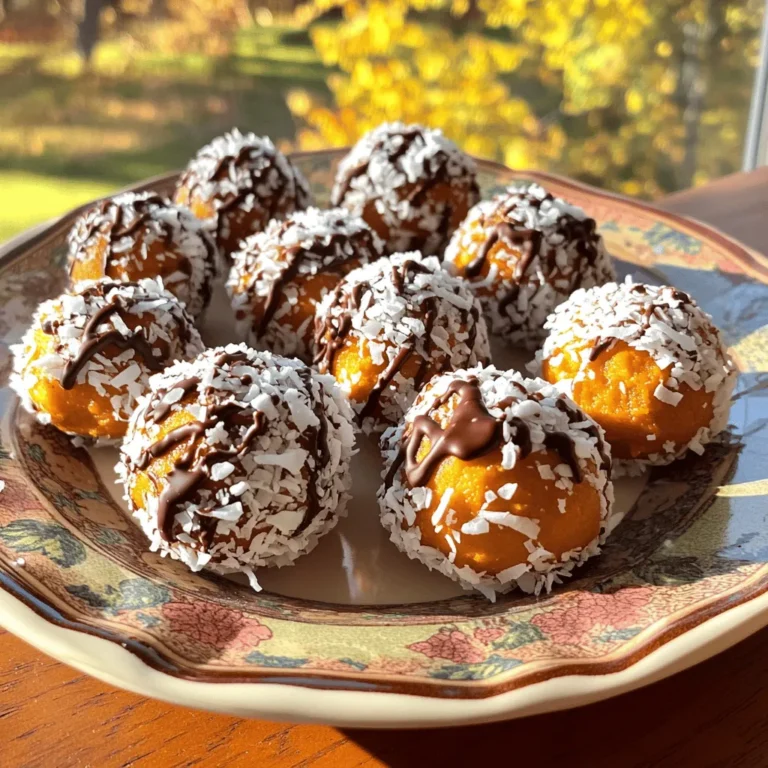
– Pumpkin spice mini cheesecakes: Add pumpkin puree and pumpkin spice for a fall twist. This brings warmth and a cozy feel to your dessert.
– Chocolate gingerbread cheesecakes: Blend cocoa powder into the cream cheese mixture. This gives a rich chocolate taste that pairs well with gingerbread.
– Nut-free options: If you want a nut-free treat, simply skip any nuts in your toppings. You can still enjoy the same great flavors.
Dietary Substitutions
Making these cheesecakes fit your diet is easy! Here are some swaps you can try:
– Gluten-free crust options: Use gluten-free gingerbread cookies for the crust. They taste great and keep the recipe simple.
– Dairy-free cream cheese alternatives: Swap traditional cream cheese with dairy-free cream cheese. This change keeps the texture smooth while being dairy-free.
– Sugar substitutes for healthier options: You can use stevia or monk fruit sweetener instead of sugar. This makes your cheesecakes lower in calories but still sweet.
Seasonal Twists
Get creative with seasonal touches! Here are some ideas to bring a festive spirit to your cheesecakes:
– Holiday-themed garnishes: Use candy canes, cinnamon sticks, or star-shaped sprinkles. These add a fun and festive look.
– Incorporating seasonal fruits or flavors: Top with cranberries or pomegranate seeds for a burst of color and flavor. These seasonal fruits add a tartness that pairs well with the sweet cheesecake.
– Unique toppings for special occasions: Try caramel sauce, chocolate drizzle, or even a dusting of powdered sugar. Toppings can change the whole vibe of your treat.
Storage Info
Storing Leftovers
After enjoying your mini gingerbread cheesecakes, store the leftovers in the fridge. Use an airtight container to keep them fresh. They will stay good for about 5 days. If you can, place a piece of wax paper between the cheesecakes to avoid sticking.
Freezing Tips
You can freeze these mini cheesecakes for up to 3 months. First, wrap each cheesecake in plastic wrap. Then, place them in a freezer-safe bag or container. This helps to prevent freezer burn. To thaw, move them to the fridge overnight. Serve them cool for the best taste.
Reheating Guidelines
Reheating is simple! Place the cheesecakes in the oven at 300°F for about 10 minutes. This warms them up nicely. Do not use the microwave. It can change the texture. Enjoy the cheesecakes warm or chilled, topped with whipped cream and crushed cookies!
FAQs
Can I use a different crust instead of gingerbread?
Yes, you can switch the crust! Here are some great options:
– Graham cracker crumbs: A classic choice that adds a sweet touch.
– Chocolate cookie crumbs: For a richer flavor.
– Oreo crumbs: Perfect for a fun twist.
– Nut-based crusts: Use ground almonds or walnuts for a gluten-free option.
Each option brings a unique taste. Try what you like best!
How do I prevent my cheesecakes from cracking?
Cracks can ruin the look of your mini cheesecakes. Here’s how to keep them smooth:
– Use room temperature ingredients: Cold cream cheese can cause lumps.
– Don’t overbeat the eggs: Mix just until combined to keep air bubbles from forming.
– Bake gently: Keep an eye on the time. When the edges set, but the center jiggles, it’s done.
– Cool slowly: After baking, crack the oven door for an hour. This helps the cheesecakes cool evenly.
Follow these tips to keep your cheesecakes looking great!
What is the best way to serve mini cheesecakes?
Serving your mini cheesecakes can be fun and festive! Here are some ideas:
– On a decorative platter: Use a holiday-themed one for extra cheer.
– Garnish with whipped cream: Add a dollop on top for creaminess.
– Sprinkle crushed gingerbread cookies: This adds texture and flavor.
– Include whole gingerbread cookies: Place them beside the mini cheesecakes for a nice touch.
These presentation ideas will impress your guests!
Can I make these ahead of time?
Absolutely! Making these mini cheesecakes ahead saves time. Here’s what to do:
– Prepare and bake: Follow the recipe and let them cool.
– Chill in the fridge: They need at least 4 hours to set. Overnight is best.
– Store properly: Keep them in an airtight container to stay fresh.
You can make these a day or two in advance. Enjoy the holiday fun!
This post covers all you need to make mini gingerbread cheesecakes. You learned about key ingredients, step-by-step baking, and tips for success. Experiment with flavors and dietary needs to delight everyone. Remember to cool your cheesecakes well for the best texture. With the right care, you’ll enjoy delicious treats, ready for any occasion. Now it’s time to bake and enjoy these festive delight

Mini Gingerbread Cheesecakes
Ingredients
- 1 cup gingerbread cookie crumbs
- 4 tablespoons unsalted butter, melted
- 16 oz cream cheese, softened to room temperature
- 1 2/3 cup granulated sugar
- 1 teaspoon vanilla extract
- 1 teaspoon ground ginger
- 1 teaspoon ground cinnamon
- 1 4 teaspoon ground nutmeg
- 2 large eggs, at room temperature
- 1 cup sour cream, at room temperature
- to taste whipped cream for garnishing
- to taste crushed gingerbread cookies for decorative topping
Instructions
- Begin by preheating your oven to 325°F (160°C). Line a muffin tin with paper liners to prepare for your cheesecakes.
- In a medium-sized bowl, mix together the gingerbread cookie crumbs and melted butter until the crumbs are thoroughly coated and have a sandy texture.
- Distribute the crumb mixture evenly into the lined muffin tin, pressing down firmly to form a solid base. Place in the oven and bake for 8-10 minutes, until the crust is firm. Once done, carefully remove from the oven and allow to cool.
- In a large mixing bowl, use an electric mixer to beat the softened cream cheese until it’s creamy and smooth, free of lumps.
- Gradually add in the granulated sugar while mixing, ensuring it's well incorporated before moving on.
- Add the vanilla extract along with the ground ginger, cinnamon, and nutmeg to the cream cheese mixture. Mix thoroughly until all spices are blended evenly.
- Introduce the eggs one at a time, beating gently just until combined with each addition to maintain airiness.
- Fold in the sour cream and mix until the filling is completely smooth and creamy, ensuring no lumps remain.
- Carefully pour the cheesecake filling over the cooled gingerbread crusts, filling each cup about three-quarters full.
- Return the muffin tin to the oven and bake for 20-25 minutes, or until the edges of the cheesecakes are set, but the centers still have a slight jiggle.
- Once baked, turn off the oven and crack the oven door open slightly. Allow the cheesecakes to cool gently inside for another hour, which helps prevent cracking.
- After cooling, transfer the cheesecakes to the refrigerator and chill for at least 4 hours (or ideally overnight) to set properly.
- When you're ready to enjoy these delicious treats, top each mini cheesecake with a generous dollop of whipped cream and a sprinkle of crushed gingerbread cookies for a festive touch.
![To make S’mores Cookie Bars, gather these key ingredients: - 1 cup unsalted butter, softened - 1 cup packed brown sugar - 1/2 cup granulated sugar - 2 large eggs - 1 teaspoon pure vanilla extract - 2 1/4 cups all-purpose flour - 1 teaspoon baking soda - 1/2 teaspoon salt - 1 cup semi-sweet or milk chocolate chips - 1 cup mini marshmallows - 3/4 cup crushed graham crackers - Additional chocolate chips and mini marshmallows for topping If you need swaps, here are a few ideas: - Use margarine instead of butter if needed. - Coconut sugar can replace brown sugar for a unique taste. - For a dairy-free option, try a plant-based butter and dairy-free chocolate chips. - You can also use large marshmallows cut into smaller pieces if mini ones are not available. When choosing your ingredients, consider these tips: - Select fresh butter for the best flavor. - Look for chocolate chips with a high cocoa content; they taste richer. - Check for freshness on your baking soda and flour. - Choose mini marshmallows that are soft and fluffy for the best texture. - For crushed graham crackers, buy a brand with simple, natural ingredients for the best taste. These ingredient insights will help you create the best S’mores Cookie Bars. Happy baking! 1. Preheat your oven to 350°F (175°C). 2. Prepare a 9x13 inch baking pan. You can grease it or line it with parchment paper for easy removal. 3. In a large bowl, cream 1 cup of softened butter, 1 cup of packed brown sugar, and 1/2 cup of granulated sugar. Beat until light and fluffy. 4. Add 2 large eggs, one at a time, and mix well after each addition. Stir in 1 teaspoon of pure vanilla extract. 5. In another bowl, mix together 2 1/4 cups of all-purpose flour, 1 teaspoon of baking soda, and 1/2 teaspoon of salt. 6. Gradually add the dry mix to the wet mix, stirring gently. Be careful not to overmix. 7. Fold in 1 cup of chocolate chips, 1 cup of mini marshmallows, and 3/4 cup of crushed graham crackers. Make sure they are evenly spread in the dough. 8. Take half of the cookie dough and spread it in the bottom of the pan. Press it down firmly. 9. Add a layer of chocolate chips and mini marshmallows over the dough. This will be your tasty filling. 10. With the remaining dough, dollop it over the filling. Gently spread it out, leaving some gaps for the marshmallows to peek through. 11. Top with extra chocolate chips and mini marshmallows. 12. Bake in the preheated oven for 25-30 minutes. Look for golden edges and a set center. 13. Once baked, let the bars cool in the pan for about 10 minutes. 14. Transfer the bars to a cutting board. Slice them into squares. 15. For the best experience, serve warm for a gooey bite or let them cool for firmer bars. You can even dust them with crushed graham crackers or serve with ice cream. This is a fun and easy way to enjoy S’mores in a cookie bar form. For the full recipe, check out the details above! To get the best texture for your S’mores cookie bars, focus on creaming the butter and sugars well. This step adds air to the dough, making it light. Don't overmix when adding the flour; this keeps the bars soft. Also, make sure to let your bars cool in the pan for a bit. This helps them set perfectly. One common mistake is overbaking. Keep an eye on the timer. The edges should look golden, but the center can be soft. Another mistake is not measuring the ingredients correctly. Use a kitchen scale when you can. Lastly, avoid pressing the dough too hard into the pan. You want a light touch for a better rise. To boost the flavor in your S’mores cookie bars, consider using dark chocolate instead of semi-sweet. It adds a richer taste. You can also mix in some toasted nuts for crunch. If you love a bit of spice, a pinch of cinnamon works wonders. Lastly, consider adding a dash of sea salt on top before baking. It enhances the sweetness and richness beautifully. For the full recipe, click here: [Full Recipe]. {{image_4}} You can elevate your S’mores cookie bars with gourmet ingredients. Try using high-quality chocolate, like dark chocolate or sea salt caramel chocolate. This gives a rich flavor that takes these bars to a new level. You can also add toasted coconut for a tropical twist. Another great idea is to sprinkle flaky sea salt on top right before serving. This adds a nice contrast to the sweetness. If you need a gluten-free option, you can easily adapt this recipe. Use gluten-free flour blends that measure cup-for-cup like regular flour. Make sure to check that your chocolate chips and graham crackers are also gluten-free. This way, everyone can enjoy these tasty bars without worry. For a fun twist, add unique flavors to your S’mores cookie bars. Swirl in Nutella or peanut butter into the dough before baking. You can also mix in chopped nuts for extra crunch. Try adding crushed peppermint candies for a festive touch during the holidays. The possibilities are endless, and you can customize these bars to fit any taste! For the complete recipe, check out [Full Recipe]. To keep your S’mores Cookie Bars fresh, store them in an airtight container. This helps avoid drying out. Place parchment paper between layers to prevent sticking. They will stay good at room temperature for about four days. If you want to keep them longer, refrigeration is a great option. Just remember to bring them to room temperature before serving for the best flavor. You can freeze S’mores Cookie Bars for up to three months. First, let them cool completely. Then, cut them into squares. Wrap each square in plastic wrap tightly. Place the wrapped bars in a freezer bag or container. Label it with the date. When you’re ready to enjoy, thaw them overnight in the fridge or for a few hours at room temperature. To reheat S’mores Cookie Bars, preheat your oven to 350°F (175°C). Place the bars on a baking sheet. Cover them loosely with foil to prevent burning. Heat for about 10 minutes or until warm. This will help restore their gooey texture and melt the chocolate again. Enjoy them warm for the best experience! For the full recipe, check out the recipe section above. S’mores cookie bars last about five days at room temperature. Store them in an airtight container. This keeps them fresh and soft. You can also refrigerate them for up to a week. Just remember to bring them to room temperature for the best taste. Yes, you can make these bars ahead of time. They are great for meal prep or parties. Bake and cool them completely. Then, cut them into squares and store them in an airtight container. You can also freeze them for up to three months. Just thaw them before serving. If you don't have mini marshmallows, you can use large marshmallows. Cut them into smaller pieces to fit. Alternatively, try using marshmallow fluff for a gooey texture. You can also skip marshmallows altogether and use caramel instead. This adds a different kind of sweetness. For the full recipe, visit the recipe section above. In this post, we covered how to make delicious s’mores cookie bars. We looked at the key ingredients and their best substitutes. You learned step-by-step how to prepare, bake, and serve these treats. We shared tips for perfect texture and flavor. You can also explore fun variations for added taste. Remember to store them well for freshness. With these tips, you're ready to create a tasty batch. Enjoy making and sharing your s’mores cookie bars!](https://joymealplan.com/wp-content/uploads/2025/07/947e80de-fe9c-4bdc-b9c7-cc0f2244d142-768x768.webp)