Buffalo Cauliflower Bites Crispy and Flavorful Snack

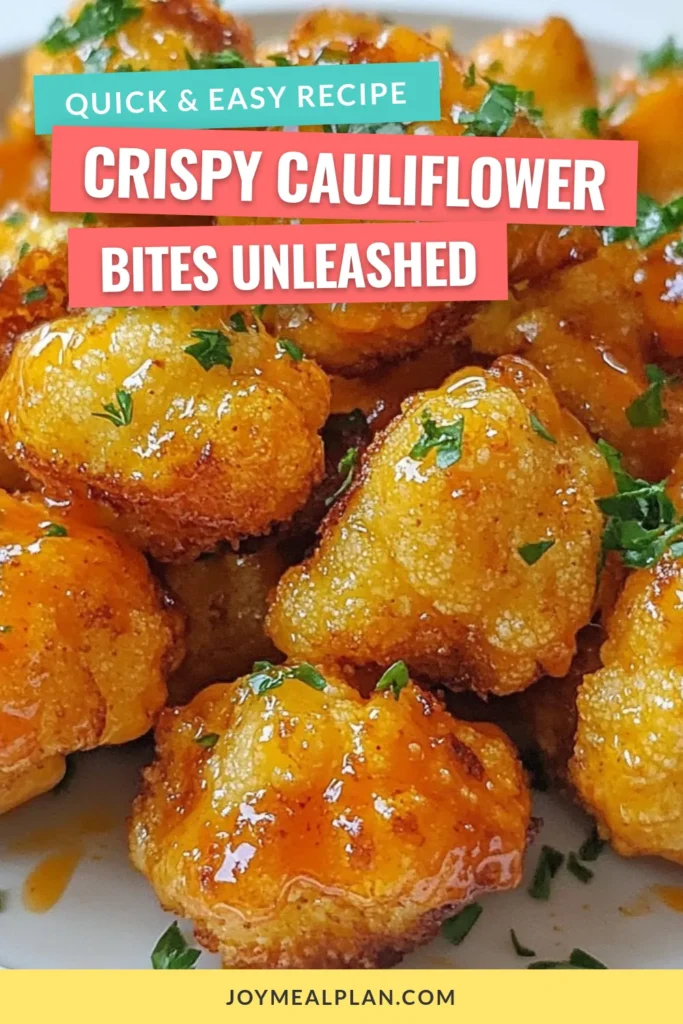
Are you ready to spice up your snack game? These Buffalo Cauliflower Bites are a crispy, flavorful treat that will leave you craving more. With just a few simple ingredients and easy steps, you can create a delicious, plant-based version of buffalo wings that everyone will love. Whether it’s for game day or a cozy night in, this recipe is sure to impress. Let’s dive into how to make these tasty bites!
Why I Love This Recipe
- Healthier Alternative: These crispy buffalo cauliflower bites offer a deliciously healthier twist on traditional buffalo wings, making them perfect for guilt-free snacking.
- Easy to Make: The simple ingredient list and straightforward steps make this recipe accessible for cooks of all skill levels, ensuring a fun cooking experience.
- Flavor Explosion: The combination of buffalo sauce and spices creates a bold flavor profile that satisfies spicy food lovers while remaining plant-based.
- Versatile Serving Options: These bites can be served as an appetizer, a party snack, or a side dish, making them a versatile addition to any meal.
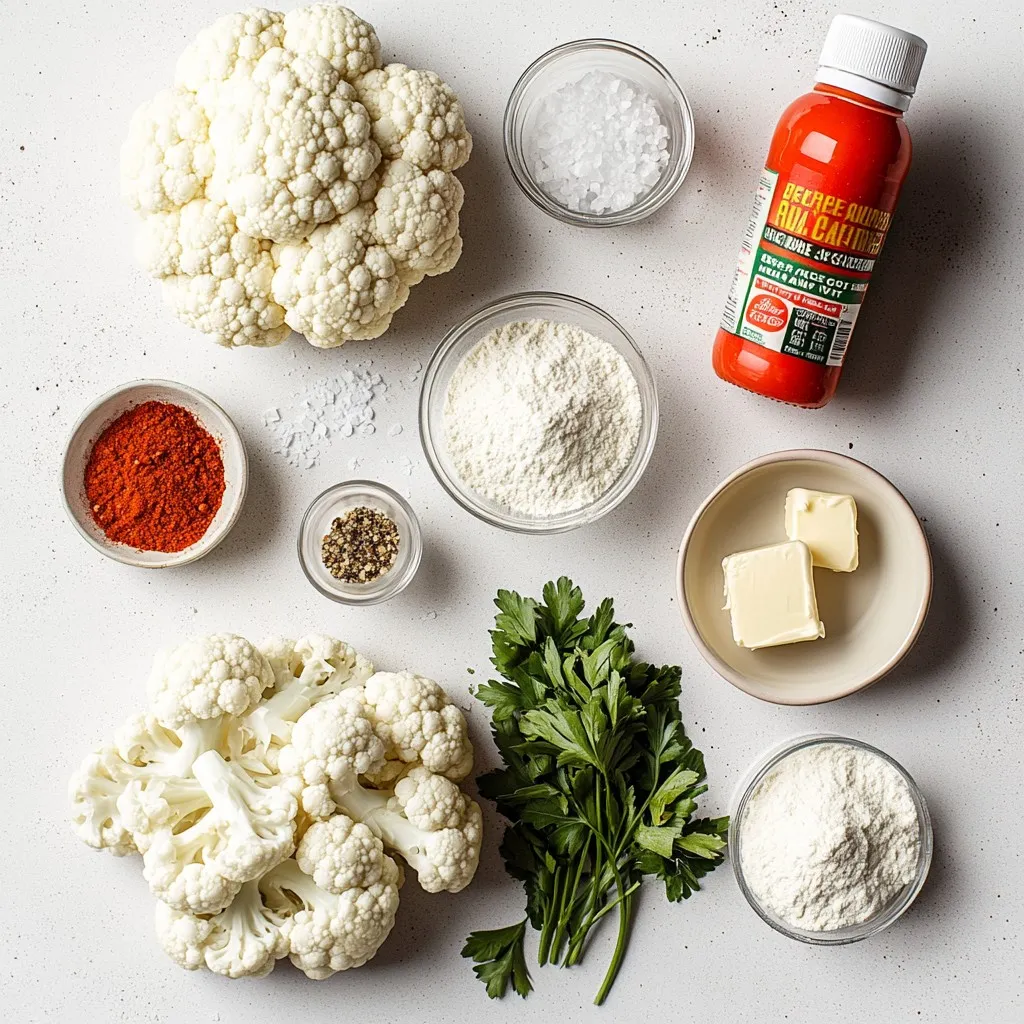
Ingredients
List of Ingredients
– 1 head of cauliflower, cut into bite-sized florets
– 3/4 cup all-purpose flour (substitute with gluten-free flour if needed)
– 1 teaspoon garlic powder
– 1 teaspoon smoked paprika
– 1/2 teaspoon salt
– 1/2 teaspoon freshly ground black pepper
– 1 cup cold water (adjust as needed for batter consistency)
– 1 cup buffalo hot sauce (recommendation: Frank’s RedHot)
– 2 tablespoons unsalted butter, melted (or use vegan butter for a plant-based option)
– Fresh parsley, finely chopped (for garnish)
I love using fresh cauliflower for this recipe. It gives each bite a nice crunch. You can use gluten-free flour if you need a gluten-free option. For added flavor, I recommend garlic powder and smoked paprika. These spices boost the taste.
The batter is simple. You mix the flour with spices and cold water. Adjust the water to get a thick yet pourable batter. This will coat the cauliflower well. The buffalo sauce is key. I prefer Frank’s RedHot for its perfect heat. The melted butter adds richness and balances the sauce.
Finally, I love garnishing with fresh parsley. It adds a pop of color and freshness. These ingredients work together to create a crispy and flavorful snack that everyone enjoys.
Step-by-Step Instructions
Preparing the Oven and Baking Sheet
– Preheat the oven to 450°F (232°C).
– Line a baking sheet with parchment paper. This helps keep the bites from sticking.
Making the Batter
– In a large bowl, whisk together the flour, garlic powder, smoked paprika, salt, and black pepper.
– Gradually add the cold water. Keep stirring until you get a smooth, thick batter. It should feel like pancake mix.
Coating the Cauliflower
– Take each cauliflower floret and dip it into the batter. Make sure each piece is well coated.
– Place the coated florets on the baking sheet. Spread them out so they cook evenly.
Baking the Cauliflower
– Put the baking sheet in the oven. Bake for 20-25 minutes.
– Look for a nice golden brown color and crisp edges. This means your bites are ready!
Preparing Buffalo Sauce
– In a bowl, mix the buffalo hot sauce with melted butter. Stir well until smooth.
– The butter adds a nice richness to the spicy sauce.
Final Toss and Bake
– After baking, take the cauliflower out of the oven. Carefully toss the hot florets in the buffalo sauce.
– Put them back on the baking sheet and return to the oven. Bake for an extra 10-15 minutes. This makes them even crispier.
Serving Suggestions
– Let the bites cool for a few minutes. This helps them set.
– Garnish with chopped parsley. Serve with your favorite dipping sauces, like ranch or blue cheese. Enjoy!
Tips & Tricks
Achieving Optimal Crispiness
To get the best crunch on your buffalo cauliflower bites, focus on the batter. You want it thick but still pourable. This ensures an even coating. When you place the cauliflower on the baking sheet, make sure they are in a single layer. This step is key for even cooking and crispiness.
Flavor Enhancements
Want to kick up the flavor? Adding spices or herbs can make a big difference. Try mixing in some onion powder or dried oregano for a twist. If you like heat, a dash of cayenne pepper can give your bites a nice kick.
Making Ahead
You can prepare your buffalo cauliflower bites in advance. Coat the florets and keep them ready in the fridge. When it’s time to serve, just pop them in the oven. This makes it easy for parties or game day snacks.
Pro Tips
- Use Cold Water: Keeping the water cold helps create a thicker batter which clings better to the cauliflower, resulting in a crispier texture.
- Don’t Overcrowd the Pan: Ensure the cauliflower florets are spaced out on the baking sheet to allow for even cooking and maximum crispiness.
- Experiment with Spices: Feel free to customize the batter by adding your favorite spices, like cayenne pepper or onion powder, to enhance the flavor profile.
- Rest Before Serving: Let the cauliflower bites sit for a few minutes after baking to allow the coating to set, which can improve the crispiness.

Variations
Vegan Version
To make these bites vegan, you can easily swap the butter. Use plant-based butter instead of unsalted butter. This change keeps the rich taste while making it suitable for everyone. For a different flavor base, try almond or coconut milk in your batter. These options add a nice twist to the flavor.
Spicy Alternatives
If you like heat, there are many ways to spice things up. Experiment with various hot sauces or spice blends. Each sauce brings its own unique kick. You can also add chili powder or sriracha to the batter. This will give your bites a different flavor profile that is sure to excite your taste buds.
Additional Coatings
For extra crunch, consider using panko breadcrumbs. They will make your bites even crispier. Another great idea is to add nutritional yeast to the batter. This gives a cheesy flavor without any dairy. Both methods will enhance your Buffalo cauliflower bites and make them even more delicious.
Storage Info
Storing Leftover Bites
After enjoying your buffalo cauliflower bites, store any leftovers in an airtight container. Place them in the refrigerator. This keeps them fresh and tasty for up to three days. Make sure they cool down before sealing them up to prevent moisture buildup.
Reheating Tips
To bring back their crispy texture, reheat the bites in the oven. Preheat your oven to 350°F (175°C) and bake for about 10 minutes. This method keeps them crunchy and delicious. If you need a quick option, you can use the microwave. However, this will make them softer and less crispy.
Freezing Instructions
You can freeze the unbaked coated cauliflower bites for later use. Arrange them on a baking sheet and freeze them until solid. Once frozen, transfer them to a freezer bag. Thaw the bites in the fridge overnight before baking. This will give you the best results when you’re ready to enjoy them.
FAQs
How do I know when the Buffalo Cauliflower Bites are done?
Look for a golden brown color and a crisp texture. This means they are ready to eat. When they reach this state, they will have a nice crunch, making them super tasty.
Can I use frozen cauliflower?
Yes, you can use frozen cauliflower. Just remember to adjust the cooking time. Frozen florets may need a bit longer to bake. Ensure they are fully thawed for the best results.
What can I serve with Buffalo Cauliflower Bites?
Great options include ranch or blue cheese dressing and crunchy celery sticks. These dips add a cool contrast to the spicy bites. They make your snack more fun and tasty.
Is this recipe gluten-free?
Yes, this recipe is gluten-free. Just substitute all-purpose flour with gluten-free flour. This way, everyone can enjoy these delicious bites without worry.
How spicy are these Buffalo Cauliflower Bites?
You can adjust the amount of buffalo sauce to control the heat level. More sauce means more spice, while less sauce makes it milder. Feel free to taste as you go to find your perfect balance.
This blog post shared the simple path to making Buffalo Cauliflower Bites. You learned about the ingredients, step-by-step instructions, and tips for crispiness. We also explored fun variations, storage tips, and answered common questions.
These bites are tasty and easy to make for any occasion. Enjoy experimenting with flavors and serving them to friends and family. You’ll find them a hit every tim

Crispy Buffalo Cauliflower Bites
Ingredients
- 1 head cauliflower, cut into bite-sized florets
- 3/4 cup all-purpose flour (substitute with gluten-free flour if needed)
- 1 teaspoon garlic powder
- 1 teaspoon smoked paprika
- 1/2 teaspoon salt
- 1/2 teaspoon freshly ground black pepper
- 1 cup cold water (adjust as needed for batter consistency)
- 1 cup buffalo hot sauce (recommendation: Frank's RedHot)
- 2 tablespoons unsalted butter, melted (or use vegan butter for a plant-based option)
- to taste fresh parsley, finely chopped (for garnish)
Instructions
- Preheat the oven to 450°F (232°C) and line a baking sheet with parchment paper.
- In a mixing bowl, whisk together the flour, garlic powder, smoked paprika, salt, and black pepper. Gradually add cold water until the mixture is smooth and thick yet pourable.
- Dip each cauliflower floret into the batter, allowing excess to drip off, and arrange them on the lined baking sheet.
- Bake for 20-25 minutes until the coating is golden brown and crispy.
- In a medium bowl, combine buffalo hot sauce with melted butter and stir until smooth.
- Once baked, transfer the cauliflower to the bowl with buffalo sauce and toss until coated.
- Return the sauced cauliflower to the baking sheet and bake for an additional 10-15 minutes for extra crispiness.
- Remove from the oven, let cool for a few minutes, and serve warm garnished with chopped parsley.
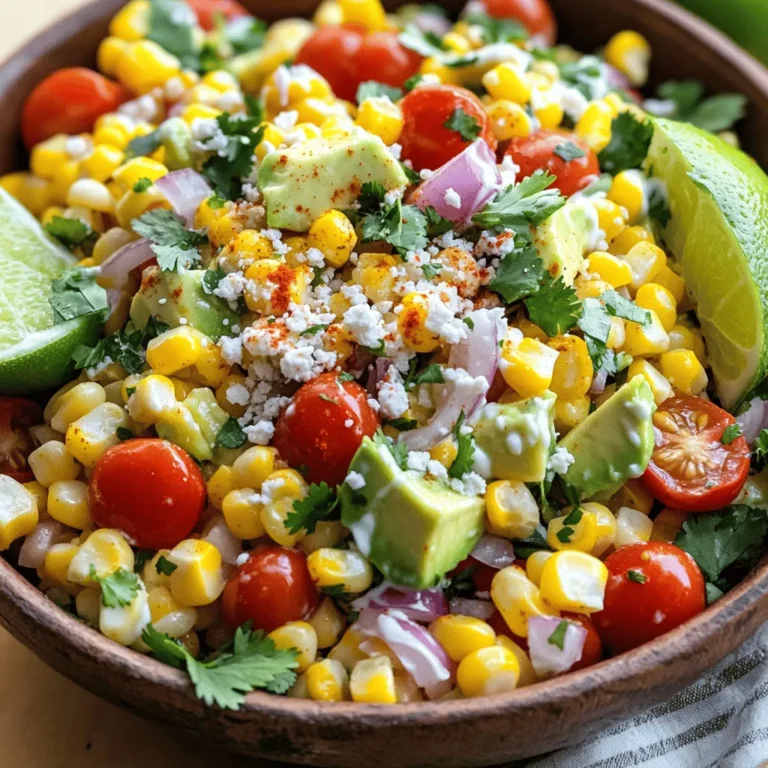
![- Tortilla chips - Black beans - Corn kernels - Cherry tomatoes - Avocado - Cheddar cheese (or dairy-free alternative) - Pickled jalapeños - Red onion - Fresh cilantro - Olive oil - Ground cumin - Smoked paprika - Salt and pepper - Optional toppings: Sour cream or Greek yogurt, lime wedges To make loaded veggie nachos, gather fresh and flavorful ingredients. I love using crispy tortilla chips as the base. They hold all the toppings without getting soggy. Black beans add protein and texture. Rinsing and draining them keeps the flavors bright. Corn kernels bring sweetness and crunch. I often use fresh corn when it’s in season, but canned works well too. Next, halved cherry tomatoes burst with flavor. Diced avocado brings creaminess. I prefer ripe avocados for the best taste. Cheddar cheese is a must for gooey goodness. You can use a dairy-free version if needed. Pickled jalapeños give a nice kick, so add as many as you like. Red onion adds a sharp taste and crunch. Fresh cilantro brings brightness. I love the fresh herb flavor it adds. For the dressing, use olive oil, ground cumin, and smoked paprika. They bring warmth and depth. Lastly, don’t forget salt and pepper to enhance all the flavors. You can serve these nachos with optional toppings like sour cream or Greek yogurt. Lime wedges add a zesty finish. For the full recipe, check out the Ultimate Loaded Veggie Nachos. Start by preheating your oven to 350°F (175°C). This temperature helps the cheese melt just right. While the oven warms up, grab a mixing bowl for the veggies. Combine 1 cup of black beans, 1 cup of corn, 1 cup of halved cherry tomatoes, 1 ripe diced avocado, and 1/4 cup of chopped red onion. Drizzle 1 tablespoon of olive oil over this mix. Sprinkle in 1 teaspoon of ground cumin, 1 teaspoon of smoked paprika, and add salt and pepper to taste. Gently toss to blend the flavors. Now take a large baking sheet. Spread an even layer of tortilla chips across it. Make sure they are not crowded. This helps the chips stay crisp. Next, generously spoon the veggie mixture over the chips. Try to cover as many chips as you can. This way, each bite is packed with flavor. Sprinkle 1 cup of shredded cheddar cheese evenly over the veggie-covered chips. If you like spice, add pickled jalapeños on top. Place the baking sheet in your preheated oven. Bake for about 10 to 15 minutes. Watch closely until the cheese is melted and bubbly, but not burnt. Once baked, carefully take the nachos out of the oven. Garnish with 1/4 cup of freshly chopped cilantro. Serve them with lime wedges on the side. For a creamy touch, add sour cream or Greek yogurt. These extra touches make every bite a treat. Serve them on a large platter or in bowls. Enjoy this savory delight with friends or family! For the full recipe, check the detailed instructions above. Choose the right cheese for your nachos. I love using cheddar, but you can try Monterey Jack or a dairy-free alternative. These cheeses melt well and add rich flavor. For the best texture, shred your cheese fresh from the block. Pre-shredded cheese often has anti-clumping agents that can affect melting. When baking, keep an eye on the nachos. You want the cheese to bubble and slightly brown, which usually takes 10 to 15 minutes at 350°F. To kick up the flavor, think about adding spices. A pinch of chili powder or a dash of hot sauce can do wonders. If you enjoy tang, drizzle some lime juice over the nachos before serving. Fresh herbs like cilantro or green onions can also brighten the dish. Chopped jalapeños, fresh or pickled, add heat and flavor. Experiment with different combinations to find your favorite mix. I often serve nachos on a large platter, letting everyone dig in. For individual servings, use small bowls. This makes for a fun, personal touch. Pair your nachos with drinks like soda, beer, or a margarita for a complete experience. Dips like guacamole or salsa work great on the side too. They add extra flavor and keep the meal exciting. Remember to keep lime wedges handy for a fresh burst of flavor. For the complete recipe, check out the [Full Recipe]. {{image_4}} You can easily make loaded veggie nachos vegan. First, swap the cheddar cheese for a dairy-free cheese. Look for brands made from nuts or soy. These options melt well and taste great. For extra vegan toppings, try using cashew cream instead of sour cream. You can also add sliced black olives, diced bell peppers, or fresh spinach. These ingredients boost flavor and nutrients. To make gluten-free nachos, choose tortilla chips marked gluten-free. Many brands offer this option. Always check the label to ensure safety. You can also use other bases like baked sweet potatoes or zucchini slices. These alternatives add a unique twist and keep things healthy. Get creative with your toppings! You can add other veggies like mushrooms, bell peppers, or even roasted zucchini. For proteins, consider topping with lentils, chickpeas, or tofu. Specialty toppings can add unique flavors. Try fresh herbs like basil or mint, or drizzle with hot sauce for a kick. You can also scatter some pomegranate seeds for a sweet touch. After enjoying your loaded veggie nachos, store any leftovers properly. This helps maintain their taste and texture. Start by letting the nachos cool down. Place them in an airtight container. If you have extra toppings, like sour cream or avocado, store those separately. Use a small bowl or a bag to keep them fresh. Refrigerate the container within two hours. The nachos will stay good for about three days. To reheat your nachos, use the oven for best results. Preheat it to 350°F (175°C). Spread the nachos on a baking sheet in a single layer. Heat them for about 10 minutes. This helps revive their crunch. If you’re in a hurry, the microwave works too. Use a microwave-safe plate and heat for 30 seconds at a time. Keep an eye on them to avoid sogginess. Enjoy your nachos as if they were just made! Making homemade tortilla chips is easy and fun! Start with corn tortillas. Cut each tortilla into six triangles. Heat oil in a pan over medium heat. When the oil is hot, add a few triangles. Fry them until they turn golden brown. Remove them and place them on paper towels to drain excess oil. Sprinkle with salt while they are hot. Enjoy your fresh chips with loaded veggie nachos! Yes, you can prepare some parts in advance. You can chop the veggies and mix them a few hours before cooking. Store the veggie mixture in the fridge. However, I recommend adding the chips and cheese just before baking. This keeps the chips crispy and delicious! You can get creative with toppings! Try adding: - Sliced black olives - Diced bell peppers - Sliced radishes - Fresh spinach - Grilled chicken or beef - Different types of cheese like pepper jack or feta These options add fun flavors and textures to your nachos. Freezing nachos is tricky. I do not recommend freezing fully assembled nachos. The chips become soggy when thawed. However, you can freeze the veggie mixture and cheese separately. When you’re ready to eat, simply bake fresh chips and top them with the thawed mixture. It’s a great way to enjoy nachos anytime! For the full recipe, check out the Ultimate Loaded Veggie Nachos. In this blog post, I covered how to make delicious nachos, highlighting key ingredients and simple steps. You learned about assembling layers and baking for the best results. I shared tips for perfect cheese melting, flavor boosts, and customizable options to fit your needs. Don't forget storage advice and reheating methods to enjoy leftovers. Nachos are easy to make and adapt, so get creative and enjoy! Your nacho journey starts here, and I hope you relish every bite.](https://joymealplan.com/wp-content/uploads/2025/06/0185d0b5-b46a-4930-af15-477191a5be30-768x768.webp)