
Salted Caramel Apple Cheesecake Delightful Treat

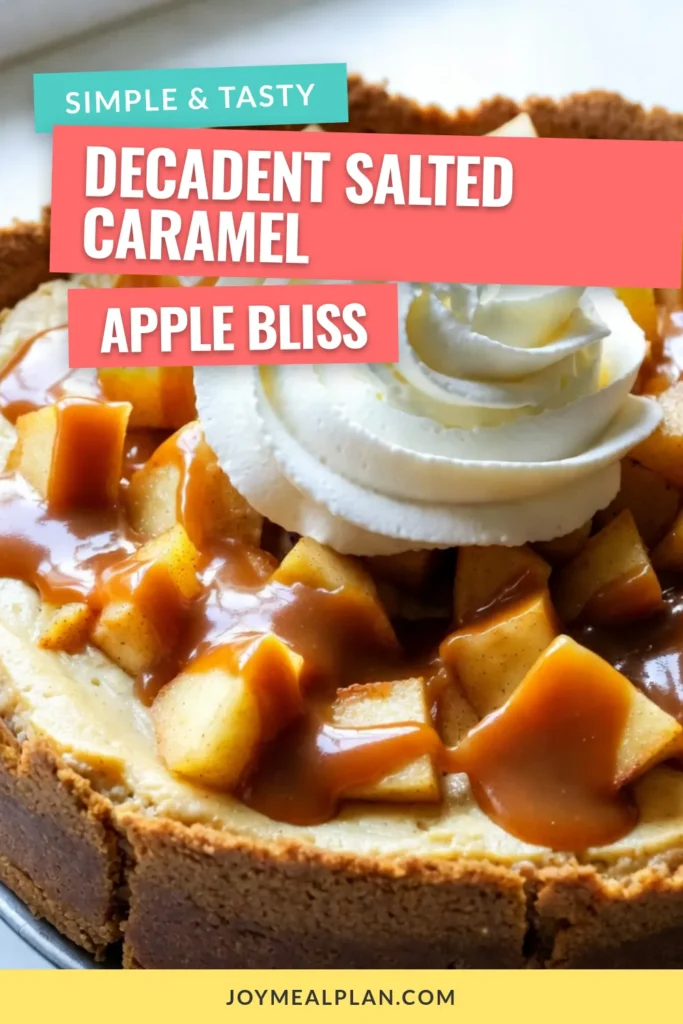
Are you ready to treat yourself? This Salted Caramel Apple Cheesecake combines creamy cheesecake with sweet, tart apples and rich caramel. In this post, I’ll guide you through each step to create this delicious dessert. From picking the best apples to perfecting the crust, you’ll find everything you need to impress your family and friends. Let’s dive into this heavenly delight!
Why I Love This Recipe
- Rich and Creamy Texture: This cheesecake boasts a smooth and luscious texture, perfectly melding the richness of cream cheese with the tartness of apples.
- Perfect Balance of Flavors: The combination of sweet salted caramel and tart Granny Smith apples creates a delightful contrast that keeps you coming back for more.
- Impressive Presentation: This dessert is not only delicious but also visually stunning, making it a showstopper at any gathering.
- Easy to Make: With simple ingredients and straightforward steps, this cheesecake is accessible for bakers of all skill levels.
Ingredients
List of Ingredients
– 1 ½ cups graham cracker crumbs
– ½ cup unsalted butter, melted
– 2 tablespoons light brown sugar
– 16 oz cream cheese, softened
– ¾ cup granulated sugar
– 3 large eggs
– 1 teaspoon pure vanilla extract
– 2 cups diced apples (Granny Smith recommended)
– ½ teaspoon ground cinnamon
– 1 cup salted caramel sauce
– Whipped cream for topping
– Additional salted caramel for drizzling
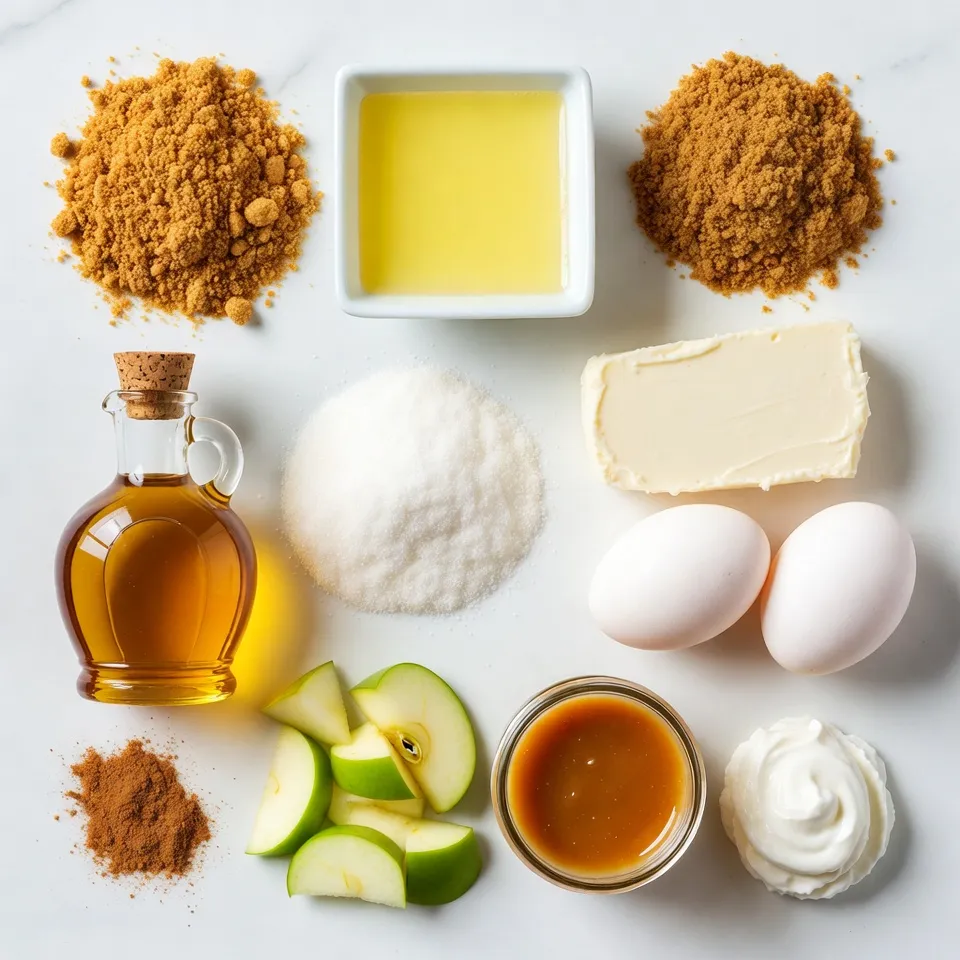
To make a great salted caramel apple cheesecake, you need simple and fresh ingredients. First, the graham cracker crumbs create a tasty crust. I mix these with melted butter and light brown sugar for a rich flavor. The cream cheese is the star of the filling. It gives the cheesecake its smooth texture.
I use three large eggs to help it set well. The pure vanilla extract adds a lovely warmth. For apples, I highly suggest Granny Smith. Their tartness balances the sweet caramel. A hint of ground cinnamon enhances the flavor, making it cozy and inviting.
The salted caramel sauce is crucial. You can buy it or make your own. I love drizzling more caramel on top before serving. Whipped cream is optional, but it looks great and tastes amazing.
Now that you know the ingredients, you can gather them and get ready to bake!
Step-by-Step Instructions
Preheating and Preparing the Springform Pan
Start by preheating your oven to 325°F (160°C). This step is key for even baking. Next, grab a 9-inch springform pan. Lightly grease the sides with cooking spray or butter. This will help the cheesecake come out easily later.
Creating the Crust
In a medium bowl, mix 1 ½ cups of graham cracker crumbs, ½ cup of melted unsalted butter, and 2 tablespoons of light brown sugar. Combine until it looks like wet sand. Press this mixture firmly into the bottom of the springform pan. Make sure it’s even and packed tight. This crust will hold your cheesecake together.
Making the Cheesecake Filling
In a large bowl, beat 16 oz of softened cream cheese. Use an electric mixer on medium speed for about 2-3 minutes. It should be smooth and creamy. Gradually add ¾ cup of granulated sugar and mix until fluffy. Then, add 3 large eggs, one at a time. Mix on low speed after each one, just until blended. Finally, stir in 1 teaspoon of pure vanilla extract. Be careful not to overmix! Fold in 2 cups of peeled and diced apples and ½ teaspoon of ground cinnamon. Use a spatula to mix gently.
Baking the Cheesecake
Pour the cheesecake batter over the crust in the springform pan. Smooth the top with a spatula. Bake in the oven for about 55-60 minutes. The center should be set, but still slightly jiggly when you shake it gently.
Cooling and Chilling Instructions
Once it’s done baking, turn off the oven. Prop the door open slightly. Let the cheesecake cool in the oven for about 1 hour. This helps prevent cracks. After that, take it out and let it cool to room temperature on a wire rack. Once cooled, cover and refrigerate it for at least 4 hours or overnight. This chilling time is crucial for the best taste and texture. When you’re ready to serve, drizzle with salted caramel sauce and add whipped cream if you like!
Tips & Tricks
Choosing the Best Apples
For this cheesecake, I suggest using Granny Smith apples. They are tart and pair well with sweet flavors. Their firm texture holds up nicely during baking, too. You can also try Honeycrisp or Fuji apples for a sweeter taste. Remember, the right apples make a big difference in flavor.
Preventing Cracks in Cheesecake
To avoid cracks, follow these steps:
– Bake at a low temperature of 325°F (160°C).
– Cool the cheesecake slowly in the oven after baking. This helps it set without sudden changes in temperature.
– Use room temperature ingredients. Cold cream cheese and eggs can cause lumps and cracks.
– Don’t overmix the batter. Mix just until smooth and combined.
These tips help create a creamy, smooth cheesecake without cracks.
Tips for Perfect Serving and Presentation
When serving, let the cheesecake sit at room temperature for 15 minutes. This makes it easier to slice. Use a warm knife for clean cuts. Dip the knife in hot water, then wipe it dry before slicing.
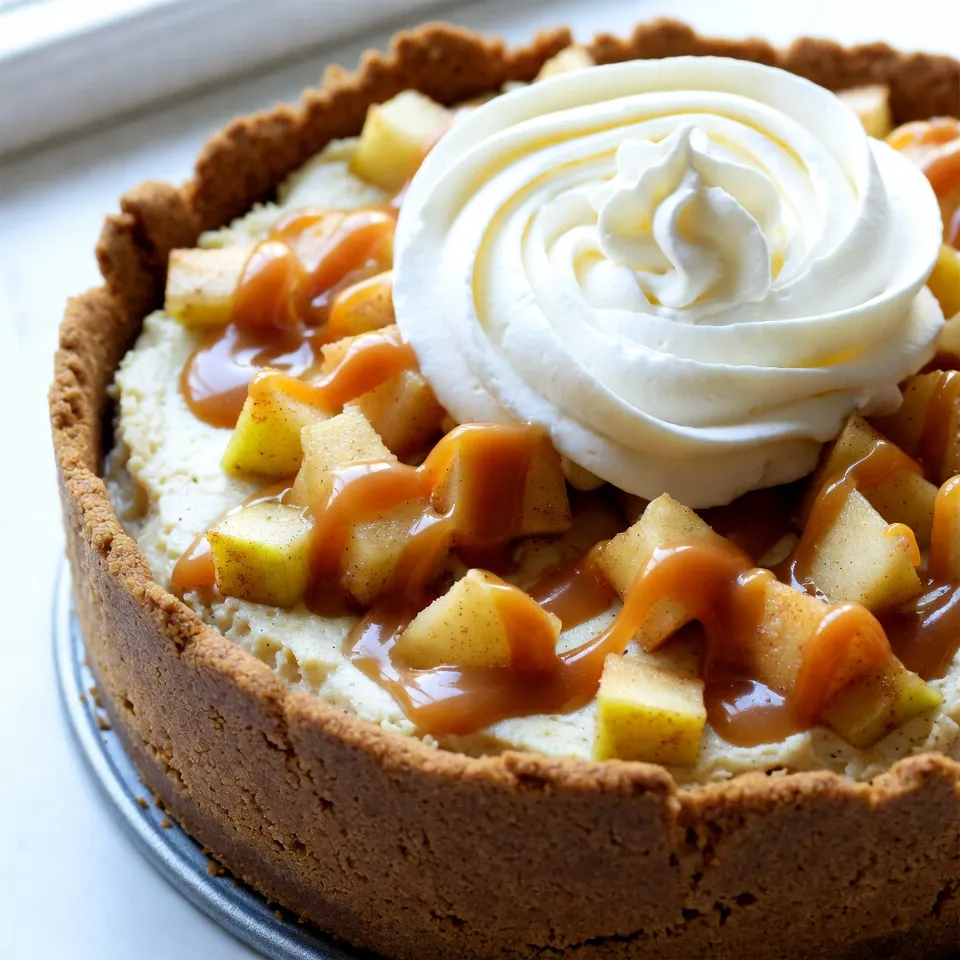
For presentation, drizzle extra salted caramel sauce over each slice. Top with whipped cream for a lovely look. You can also add a sprinkle of cinnamon or some diced apple for color and texture. This makes your cheesecake a true delight on any table!
Pro Tips
- Use Room Temperature Ingredients: Make sure your cream cheese and eggs are at room temperature before mixing. This helps create a smooth and creamy cheesecake without lumps.
- Choose the Right Apples: Granny Smith apples are recommended for their tartness which balances the sweetness of the caramel and cheesecake. Feel free to mix in other apple varieties for added flavor.
- Prevent Cracking: Gradually cooling the cheesecake in the oven helps prevent cracks. After baking, turn off the oven and leave the door ajar for an hour before transferring it to a wire rack.
- Chill Overnight: For the best texture and flavor, allow your cheesecake to chill in the refrigerator for at least 4 hours, but overnight is ideal for a perfect set.
Variations
Different Apple Options
You can use many types of apples in this cheesecake. Granny Smith apples add a tart bite. Honeycrisp apples give a sweet and crisp taste. Fuji apples are sweet and juicy, perfect for dessert. If you want a mix, try combining different apples. The blend of flavors will make your cheesecake even better.
Alternative Crust Options
While graham cracker crust is classic, you can switch it up. Use crushed Oreos for a chocolatey twist. Almond flour mixed with butter creates a gluten-free option. A shortbread crust adds a rich flavor. Each crust brings its own style, so choose one that excites you.
Flavor Enhancements (spices, toppings)
Adding spices can elevate your cheesecake. Consider nutmeg or ginger for extra warmth. You might add a pinch of cloves for a cozy touch. For toppings, try crushed nuts or chocolate shavings. Drizzling chocolate sauce can make it even more decadent. Experiment with flavors and toppings that fit your taste!
Storage Info
Storing the Cheesecake
You should store your cheesecake in the fridge. Always keep it in an airtight container. This keeps it fresh and tasty. The cheesecake lasts for about five days. If you plan to keep it longer, consider freezing it.
Freezing Tips
To freeze the cheesecake, let it cool first. Wrap it well in plastic wrap and then in foil. This method prevents freezer burn. You can freeze it for up to three months. When ready to eat, thaw it in the fridge overnight.
Reheating and Serving Suggestions
You don’t need to reheat cheesecake. It tastes best chilled. When serving, drizzle more salted caramel on top. Add a dollop of whipped cream for extra flavor. You can also sprinkle some cinnamon for a nice touch. Enjoy each bite of this delightful treat!
FAQs
Can I use different types of caramel sauce?
Yes, you can use any caramel sauce you like. Store-bought options work well. Homemade caramel adds a personal touch. For a twist, try butterscotch sauce. Just remember to keep it salted for that perfect balance. Each sauce will change the flavor slightly. Experiment to find your favorite!
How long can I store the cheesecake in the fridge?
You can store the cheesecake in the fridge for about five days. Keep it covered to prevent drying out. Place it in an airtight container or cover with plastic wrap. If you want it to last longer, consider freezing it. Just remember to thaw it in the fridge overnight before serving.
What can I substitute for cream cheese?
If you need a cream cheese substitute, use Greek yogurt or mascarpone. These options keep the texture creamy. You can also use ricotta cheese, but blend it well for smoothness. Each substitute will slightly change the flavor, so choose what you like best.
Can I make this cheesecake in advance?
Absolutely! Making the cheesecake a day or two ahead is a great idea. It allows the flavors to meld and improves the texture. Just remember to chill it properly. This makes serving easier and lets you enjoy your time with guests.
You now know how to make a delicious apple cheesecake from scratch. We covered the ingredients, step-by-step instructions, and useful tips. Remember to choose fresh apples and avoid cracks for the best results. Feel free to try different crusts or toppings that make it your own. Store leftovers in the fridge or freeze them for later. This cheesecake is a crowd-pleaser, perfect for any occasion. Enjoy your baking and impress your family or friends with this tasty treat. You have the skills to make something specia
Salted Caramel Apple Cheesecake
Ingredients
- 1.5 cups graham cracker crumbs
- 0.5 cup unsalted butter, melted
- 2 tablespoons light brown sugar
- 16 oz cream cheese, softened at room temperature
- 0.75 cup granulated sugar
- 3 large eggs, at room temperature
- 1 teaspoon pure vanilla extract
- 2 cups apples, peeled and diced
- 0.5 teaspoon ground cinnamon
- 1 cup salted caramel sauce
- 1 serving whipped cream, for optional topping
- 1 serving additional salted caramel sauce, for drizzling
Instructions
- Preheat your oven to 325°F (160°C). Prepare a 9-inch springform pan by lightly greasing the sides with cooking spray or butter.
- In a medium mixing bowl, combine the graham cracker crumbs, melted butter, and brown sugar. Mix well until the mixture resembles wet sand with clumps holding together.
- Press the crumb mixture firmly and evenly into the bottom of the prepared springform pan to create a sturdy crust. Set aside to firm up while you prepare the filling.
- In a large mixing bowl, beat the softened cream cheese using an electric mixer on medium speed until it is completely smooth and creamy, about 2-3 minutes. Gradually add the granulated sugar, continuing to beat until fully combined and fluffy.
- Add the eggs to the cream cheese mixture one at a time, beating on low speed after each addition until just incorporated. Then, add the vanilla extract and mix until combined. Be careful not to overmix.
- Gently fold in the diced apples and cinnamon into the cheesecake mixture using a spatula, ensuring they are evenly distributed without overworking the batter.
- Pour the cheesecake batter over the prepared crust in the springform pan, using a spatula to smooth the top evenly.
- Bake in the preheated oven for approximately 55-60 minutes, or until the center of the cheesecake is set but still slightly jiggly when shaken gently.
- Once baked, turn off the oven and prop the door open slightly. Allow the cheesecake to cool in the oven for about 1 hour. This gradual cooling helps prevent the cheesecake from cracking.
- After cooling, remove the cheesecake from the oven and allow it to cool to room temperature on a wire rack. Once cooled, cover and refrigerate for at least 4 hours—or overnight is best—for it to set properly.
- When ready to serve, drizzle the cheesecake generously with salted caramel sauce and add a dollop of whipped cream on top if desired. For an extra touch, drizzle more caramel over the whipped cream before serving.
![To make this tasty casserole, you need some key items: - 1 loaf of brioche or challah bread, cut into 1-inch cubes - 6 large eggs - 2 cups whole milk - 1 cup heavy cream - 1/2 cup pure maple syrup - 1 teaspoon vanilla extract - 1 teaspoon ground cinnamon - 1/4 teaspoon salt - 1 cup fresh strawberries, sliced (or any berries of your choice) - Butter, for greasing the baking dish - Powdered sugar, for dusting (optional) These ingredients create a rich and creamy base that fills each bite with flavor. The bread soaks in the egg mixture, adding softness and taste. You can tweak the recipe to fit your taste. Here are some ideas: - Other fruits like blueberries, raspberries, or bananas - Nuts for added crunch, like walnuts or pecans - Chocolate chips for a sweet twist - Different spices like nutmeg or ginger - Yogurt or sour cream for tanginess Feel free to mix and match! Customizing makes this dish even more fun and tasty. If you lack some ingredients, here are easy swaps: - Use almond milk or oat milk instead of whole milk for a dairy-free option. - Swap heavy cream with half-and-half if you want a lighter touch. - Try agave syrup instead of maple syrup for a different sweet flavor. - For gluten-free, use gluten-free bread, ensuring it’s sturdy enough to hold up. These substitutions keep the dish good while catering to your needs. Don't hesitate to experiment! For the full recipe, check out the detailed instructions. First, set your oven to 350°F (175°C). Grab a 9x13-inch baking dish. Grease it well with butter. This step helps prevent the casserole from sticking. Make sure every corner gets some butter. In a large bowl, crack six eggs. Add two cups of whole milk and one cup of heavy cream. Pour in half a cup of pure maple syrup. Next, add one teaspoon of vanilla extract and one teaspoon of ground cinnamon. Sprinkle in a bit of salt, about one-fourth teaspoon. Whisk all these ingredients together until smooth. It should look creamy and well-mixed. Now, take your loaf of brioche or challah bread. Cut it into one-inch cubes. Gently fold these cubes into your egg mixture. Use a spatula to coat each piece. Let this sit for about ten minutes so the bread can soak it up well. After ten minutes, fold in one cup of sliced strawberries. Make sure they spread evenly in the mix. Pour everything into your greased baking dish. Spread it out evenly with a spatula. Now, place it in the oven. Bake for 45 to 50 minutes. The top should turn golden brown. Finally, let it cool for five to ten minutes. Dust with powdered sugar if you'd like. Enjoy your lovely Easy Baked French Toast Casserole! For the full recipe, check [Full Recipe]. To get a creamy custard, mix eggs and milk well. Use whole milk for richness. Heavy cream adds more creaminess. Whisk until the mixture is smooth. Let the bread soak for at least 10 minutes. This helps it absorb the custard. The bread should feel soft but not mushy. You can prepare this dish a day before. Just mix the custard and soak the bread. Cover it and store in the fridge overnight. This lets the bread soak up all the flavors. In the morning, just pop it in the oven. It saves you time and effort! Serve your casserole warm for the best taste. Cut it into squares for easy serving. Top with fresh berries or a drizzle of maple syrup. A dusting of powdered sugar adds a nice touch. You could also add a dollop of whipped cream. This makes it look fancy and inviting! For the full recipe, check out the details above. {{image_4}} You can change the fruit in your casserole. I love using fresh strawberries. They add sweetness and color. You can also use blueberries, raspberries, or blackberries. Apples work well too. Cut them into small pieces and mix them in. For a tasty twist, add bananas. They become soft and sweet after baking. Want to amp up the flavor? Try adding spices like nutmeg or ginger. A pinch of each can give your casserole a warm taste. You can also use different extracts. Almond extract adds a nice touch, while orange zest can brighten the dish. Just remember, a little goes a long way! If you're looking for healthier choices, you can make your casserole low-fat. Use low-fat milk and cream. You can also swap the brioche for whole grain bread. For a gluten-free version, use gluten-free bread. It tastes great and keeps the dish light. Don't worry; it will still be delicious! For the full recipe, check out the delightful baked French toast casserole. Enjoy trying out these variations! To store leftovers, let the casserole cool completely. Then, cover it tightly with plastic wrap or foil. You can also place it in an airtight container. This keeps it fresh for up to three days in the fridge. If you have leftover slices, it’s best to separate them with parchment paper to avoid sticking. When you are ready to eat, preheat your oven to 350°F (175°C). Place the casserole in an oven-safe dish. Cover it with foil to prevent it from drying out. Heat it for about 20 to 25 minutes, or until it is warm all the way through. You can also microwave individual pieces for quick reheating. Just be sure to cover them to keep moisture in. If you want to keep the casserole longer, freezing is a great option. First, cool it completely. Then, cut it into portions and wrap each one in plastic wrap. Place the wrapped pieces in a freezer-safe bag or container. This keeps them fresh for up to three months. When you are ready to eat, thaw in the fridge overnight. Then, reheat as mentioned above. Enjoy a tasty meal even after some time! Yes, you can make this dish ahead of time! You can prepare it the night before. Just mix the egg base and soak the bread. Cover it and place it in the fridge. In the morning, bake it fresh. This helps the flavors blend well. For the best taste, use brioche or challah bread. These breads soak up the egg mixture well. They also give a soft texture and rich flavor. You can also try French bread or even sourdough. You’ll know it’s done when the top is golden brown. The center should feel firm, not jiggly. You can use a toothpick to check. If it comes out clean, it’s ready to serve! Yes, you can make this casserole dairy-free! Use almond milk or oat milk instead of regular milk. Replace heavy cream with coconut cream or a dairy-free alternative. This keeps the dish tasty and creamy. Serve it warm for the best experience. You can top it with fresh berries or a drizzle of maple syrup. Dusting powdered sugar on top adds a nice touch. This dish is perfect for breakfast or brunch! For the full recipe, check the section above. This baked French toast casserole is easy and customizable. You learned about essential ingredients, how to prepare the dish, and great tips for success. Remember, you can add fruits or spices for flavor. Storage and reheating options make leftovers simple, too. Whether you serve it for breakfast or brunch, this dish shines. Enjoy making it your own and sharing it with others!](https://joymealplan.com/wp-content/uploads/2025/06/5fa2b09d-6300-4549-87d2-c50cfd6f4f67-768x768.webp)
![To make these no-bake lemon cheesecake bites, gather the following ingredients: - 1 cup graham cracker crumbs - 1/4 cup unsalted butter, melted - 2 tablespoons granulated sugar - 8 oz cream cheese, softened to room temperature - 1/2 cup powdered sugar - 1/4 cup plain Greek yogurt - 2 tablespoons freshly squeezed lemon juice - Zest from 1 lemon - 1/2 teaspoon pure vanilla extract - Fresh berries (such as strawberries, blueberries, or raspberries) for garnish (optional) These ingredients create a creamy and zesty treat. The graham cracker crumbs form a delightful crust, while cream cheese adds richness. Greek yogurt gives a light tang, balancing the sweetness. Fresh lemon juice and zest provide a bright flavor that makes these bites so refreshing. The optional berries add color and a burst of fruitiness, making each bite even more tempting. For the complete recipe, check out the [Full Recipe]. - Start by combining the graham cracker crumbs, melted butter, and granulated sugar in a bowl. - Mix until it feels like damp sand and holds together. - Press this mixture firmly into the bottom of mini muffin tins or silicone molds. - Chill the crust in the fridge for about 10 minutes to set. - In a clean bowl, beat the softened cream cheese with powdered sugar until smooth. - Add in plain Greek yogurt, freshly squeezed lemon juice, lemon zest, and vanilla extract. - Mix these ingredients until you have a creamy and fluffy filling. - Spoon the lemon cheesecake filling into each crust. - Use a spatula to smooth the tops for an even look. - Return the molds to the fridge and chill for at least 2 hours, or until firm. You can find the Full Recipe for precise measurements and tips! Softened cream cheese is key for smooth cheesecake bites. If it’s too cold, it will clump. Let your cream cheese sit out for 30 minutes before mixing. Chilling helps the bites set and firm up. I recommend at least 2 hours in the fridge. This makes them easy to pop out and enjoy. Want a bolder lemon taste? Add extra lemon zest to the filling. This little trick brightens the flavor. You can also swap plain Greek yogurt for flavored yogurt. Lemon or vanilla yogurt adds a fun twist, making these bites even more delicious. Garnishing makes your cheesecake bites stand out. Fresh berries on top add color and taste. Drizzling honey brings out sweetness and shine. You can sprinkle extra lemon zest for a pop of brightness. Use a decorative platter to showcase your treats for friends and family. {{image_4}} You can easily change the flavor of your no-bake lemon cheesecake bites. Here are two fun ideas: - Berry cheesecake bites: Swap the lemon juice for mixed berry puree. Use strawberries, blueberries, or raspberries. This adds a sweet and fruity twist. The berry flavor pairs well with the creamy filling. - Chocolate lemon cheesecake bites: Mix in cocoa powder with the cream cheese. This gives a rich chocolate flavor. You still get the bright lemon taste, but with a chocolatey touch. Making these bites fit different diets is simple. Here’s how: - Gluten-free alternatives for crust: Use gluten-free graham cracker crumbs. You can also blend nuts or oats to make a crust. Just mix them with melted butter and sugar. - Substituting dairy for vegan options: Use vegan cream cheese instead of regular cream cheese. You can also replace yogurt with coconut yogurt. These swaps keep the bites creamy and delicious. Feel free to experiment with these variations. You can create a cheesecake treat that fits your taste and dietary needs. Enjoy! To keep your No-Bake Lemon Cheesecake Bites fresh, refrigeration is key. Store them in an airtight container. This helps to lock in moisture and keeps them from drying out. If you want to freeze them, place the bites in a single layer on a baking sheet. Once frozen, transfer them to a freezer-safe container or bag. Make sure to label it with the date. They are easy to grab for a quick treat later! How long do they last in the fridge? These cheesecake bites can last up to 5 days when stored properly in the refrigerator. After that, they may lose their taste and texture. Always check for freshness. Signs of spoilage to watch for include an off smell, discoloration, or an unusual texture. If you notice any of these signs, it’s best to toss them out. For the full recipe, check out the recipe section. No-Bake Lemon Cheesecake Bites need at least 2 hours to chill. This time lets them firm up. If you want them extra cold, you can chill them longer. Just ensure they are firm to the touch before serving. This helps create that perfect bite! Yes, you can use different cheeses! Cream cheese gives the best flavor and texture. However, you might try mascarpone for a richer taste. Cottage cheese can work too, but blend it well to avoid lumps. Each cheese adds a unique twist to these bites. If you don't have graham crackers, try crushed cookies or oat flour. Digestive biscuits work great too! For a gluten-free option, use gluten-free cookies or almond flour. These swaps can change the flavor, but they still make a good crust. Absolutely! These cheesecake bites are great to make a day ahead. Just chill them overnight. This allows the flavors to meld nicely. Be sure to cover them well to keep them fresh. They will taste even better the next day! To make these bites vegan, substitute cream cheese with a vegan cream cheese. For the crust, use coconut oil instead of butter. Replace Greek yogurt with a plant-based yogurt. You can also use maple syrup instead of powdered sugar. These changes keep the flavor while making it vegan-friendly. For the full recipe, check out the [Full Recipe]. You now have the steps to make delicious No-Bake Lemon Cheesecake Bites. We covered all ingredients, from graham cracker crumbs to fresh berries. I shared helpful tips for perfect texture and exciting flavor ideas. Variations let you adapt these bites for any taste or diet. Remember to store them properly for the best quality. Enjoy creating these treats, and don't hesitate to get creative!](https://joymealplan.com/wp-content/uploads/2025/07/839985c9-ca67-4b01-8b72-ff6921bf99fe-768x768.webp)