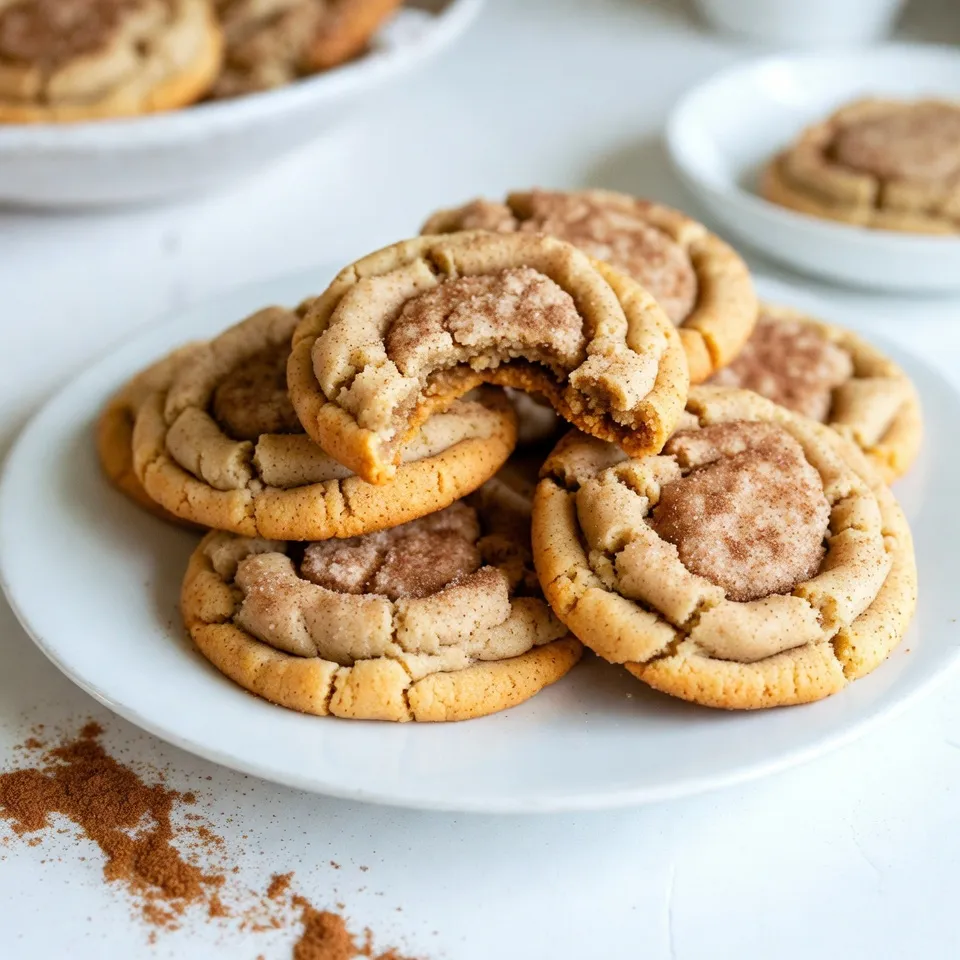
Pumpkin Spice Snickerdoodles Irresistible Fall Treat

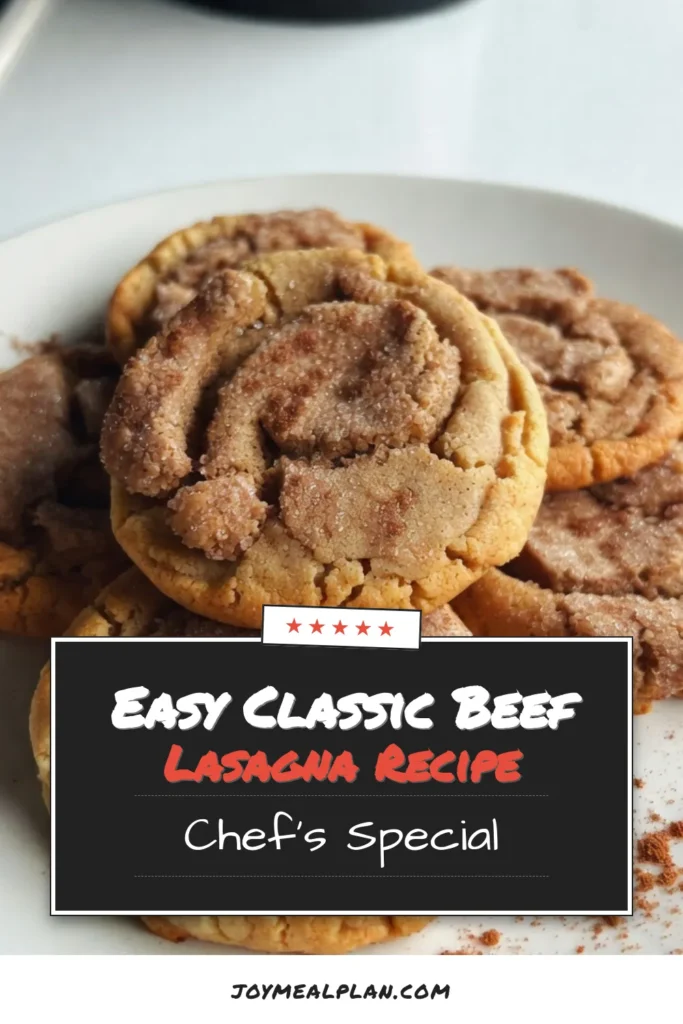
Get ready to embrace fall with a treat you won’t be able to resist: Pumpkin Spice Snickerdoodles! These cookies blend warm spices and creamy pumpkin for a flavor that screams autumn. Whether you’re a seasoned baker or a novice, I’ll guide you step-by-step to create these delicious cookies. Grab your ingredients and prepare for a delightful baking adventure! Let’s dive in and make this cozy treat a reality.
Why I Love This Recipe
- Comforting Flavors: The warm spices combined with pumpkin create a cozy, comforting taste that’s perfect for fall.
- Easy to Make: This recipe is simple and quick, making it accessible for bakers of all skill levels.
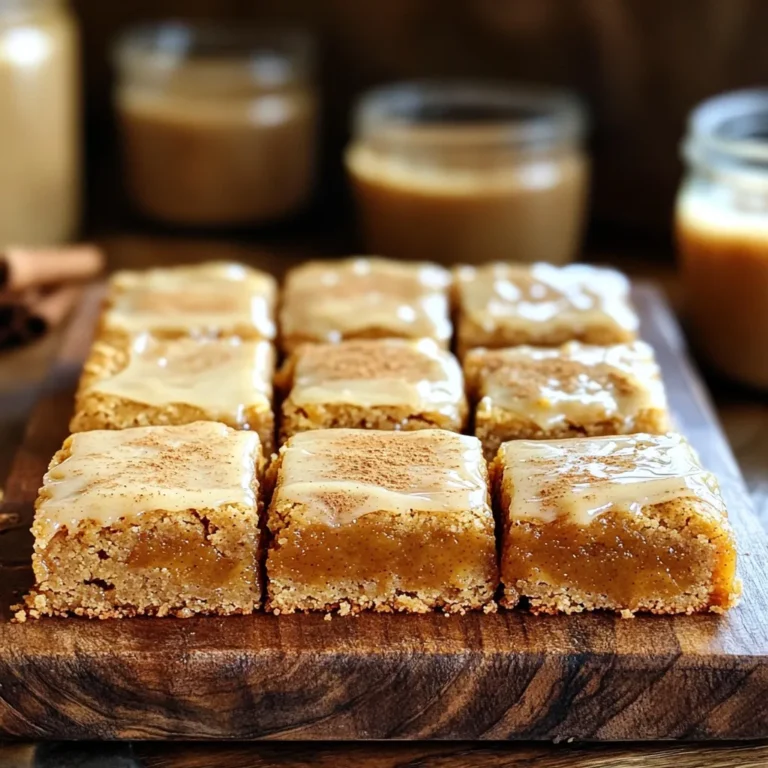
- Perfect Texture: The cookies are soft and chewy with a delightful cinnamon sugar coating that adds a sweet crunch.
- Great for Sharing: These snickerdoodles are perfect for gatherings, holidays, or just a cozy night in, making them a treat everyone will love.
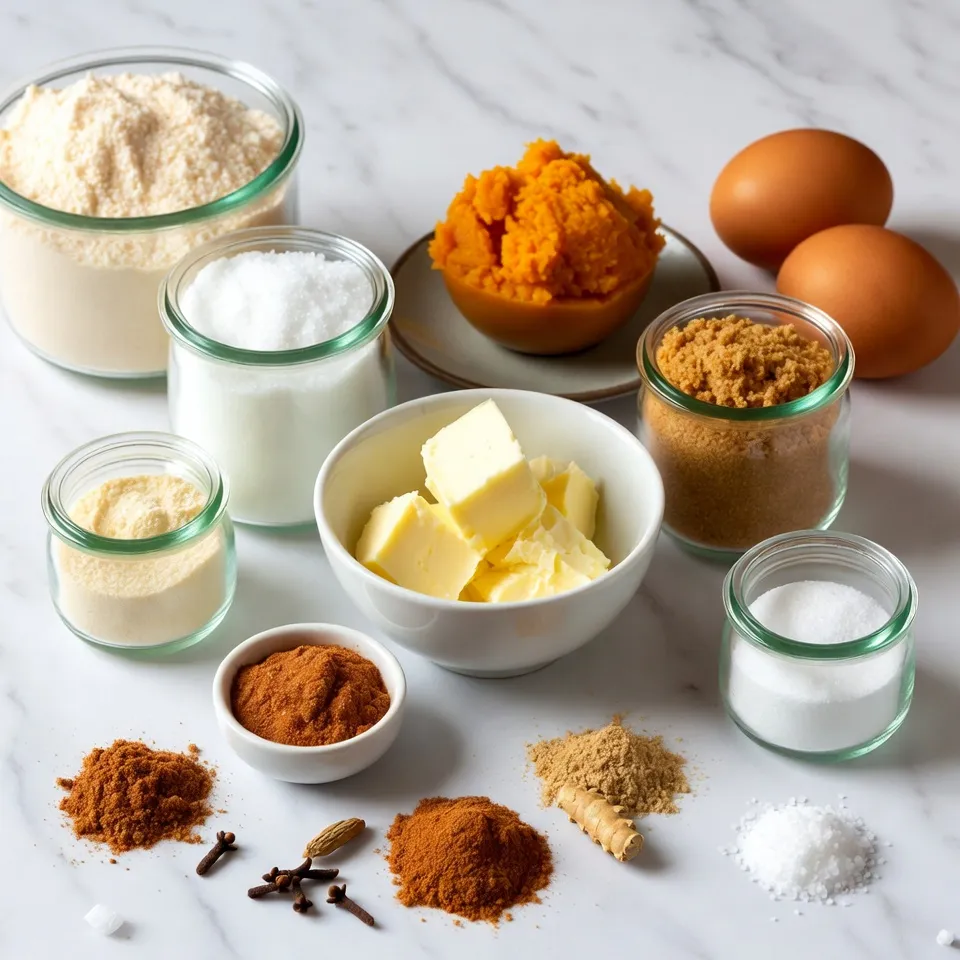
Ingredients
To make Pumpkin Spice Snickerdoodles, gather these simple ingredients:
– 1 cup unsalted butter, softened to room temperature
– 1 cup granulated sugar
– 1/2 cup packed brown sugar
– 1/2 cup canned or homemade pumpkin puree
– 2 large eggs
– 3 1/2 cups all-purpose flour
– 2 teaspoons cream of tartar
– 1 teaspoon baking soda
– 1/2 teaspoon fine salt
– 1 teaspoon ground cinnamon
– 1/2 teaspoon ground nutmeg
– 1/2 teaspoon ground ginger
– 1/4 teaspoon ground cloves
– 1 tablespoon cinnamon sugar (mix 1 tablespoon granulated sugar with 1 teaspoon ground cinnamon for rolling)
Each ingredient plays a key role. The butter adds richness and softness. The sugars give sweetness and help create that crisp edge. Pumpkin adds moisture and flavor, making the cookies extra special. Eggs bind the dough and help the cookies rise. Flour gives structure, while cream of tartar and baking soda help create a nice texture. The spices give that warm, cozy fall taste. Lastly, the cinnamon sugar coating adds sweetness and crunch. Collect these, and you’re ready to bake!
Step-by-Step Instructions
Prepping Your Ingredients
– Preheat the oven: Set your oven to 350°F (175°C). This ensures even baking.
– Prepare the baking sheet: Line it with parchment paper. This will stop the cookies from sticking.
Mixing the Dough
– Creaming butters and sugars: In a bowl, mix 1 cup of softened butter with 1 cup of granulated sugar and 1/2 cup of brown sugar. Use a mixer for about 3-5 minutes. The mixture should be light and fluffy.
– Incorporating pumpkin and eggs: Add 1/2 cup of pumpkin puree to the bowl. Mix until smooth. Then, add 2 large eggs one at a time. Beat well after each egg.
Combining Dry Ingredients
– Whisking dry components: In another bowl, combine 3 1/2 cups of flour, 2 teaspoons of cream of tartar, 1 teaspoon of baking soda, and 1/2 teaspoon of fine salt. Add 1 teaspoon of ground cinnamon, 1/2 teaspoon of nutmeg, 1/2 teaspoon of ginger, and 1/4 teaspoon of cloves. Whisk until all the dry ingredients are mixed well.
– Gradually mixing dry with wet ingredients: Slowly add the dry ingredients to the pumpkin mixture. Stir gently until just combined. Avoid overmixing; this keeps the cookies soft.
Shaping the Cookies
– Scooping and rolling dough: Use a tablespoon to scoop some dough. Roll it into a ball with your hands.
– Coating with cinnamon sugar: Mix 1 tablespoon of granulated sugar with 1 teaspoon of ground cinnamon. Roll each dough ball in this mixture until they are coated.
Baking the Cookies
– Placing on baking sheet: Put the sugar-coated dough balls on the lined baking sheet. Leave about 2 inches of space between each ball.
– Baking time and checking for doneness: Bake for 10-12 minutes. The edges should be light golden, and the centers will look soft. They will firm up as they cool.
Cooling the Cookies
– Resting on the baking sheet: Let the cookies sit on the baking sheet for about 5 minutes. This helps them set.
– Transferring to a wire rack: Move the cookies to a wire rack. Let them cool completely before serving.
Tips & Tricks
Achieving Perfect Texture
– Avoiding overmixing: Mix the dough until just combined. Overmixing makes cookies tough.
– Ensuring proper dough consistency: The dough should be soft but not sticky. If too sticky, add a little flour.
Enhancing Flavor
– Suggestions for spice adjustments: Feel free to tweak the spices. Add more cinnamon for warmth or more ginger for a kick.
– Tips for using homemade pumpkin puree: If you use homemade puree, ensure it is thick. This keeps your cookies from becoming too wet.
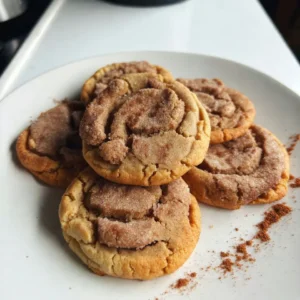
Presentation Tips
– Serving suggestions: Serve the cookies on a colorful platter. Pair them with hot cider or coffee for a cozy vibe.
– Decorative ideas for serving: Sprinkle a little extra cinnamon sugar on top. You can also add a small bowl of pumpkin spice dip for an extra treat.
Pro Tips
- Chill the Dough: For even better texture, chill the dough in the refrigerator for 30 minutes before rolling into balls. This helps the cookies maintain their shape while baking.
- Perfectly Spiced: Adjust the spices to your taste! Feel free to increase the cinnamon or add a pinch of allspice for an extra warm flavor.
- Store Smart: Keep leftover cookies in an airtight container at room temperature for up to one week to maintain their soft texture.
- Test for Doneness: If you’re unsure when the cookies are done, gently press the center with your finger. If it springs back, they are ready to come out!
Variations
Adapting Recipe for Different Diets
You can easily adapt this recipe for special diets. For a gluten-free version, swap all-purpose flour with a gluten-free blend. Make sure the blend has a good binding agent, like xanthan gum. This keeps the cookies soft and chewy.
For a vegan option, replace the butter with coconut oil or vegan butter. Substitute the eggs with flaxseed meal. Mix one tablespoon of flaxseed meal with three tablespoons of water. Let it sit for a few minutes until it thickens. This will help bind the cookies without using eggs.
Flavor Alterations
To add more flavor, experiment with spices. Try adding a pinch of cardamom for a warm twist. You could also mix in some allspice for depth. If you want a sweeter treat, fold in chocolate chips or nuts. Walnuts or pecans give a nice crunch and pair well with pumpkin.
Seasonal Twists
Incorporate other fall flavors to keep things exciting. You can add a splash of maple syrup for a rich sweetness. Another idea is to mix in dried cranberries for a fruity kick.
For holiday celebrations, dip half of the cookies in white chocolate. This adds a festive touch and a new flavor layer. You could also sprinkle crushed peppermint on top for a wintery vibe.
Storage Info
Proper Storage Techniques
To keep your Pumpkin Spice Snickerdoodles fresh, use airtight containers. Glass or plastic containers work well. Avoid using paper bags, as they let air in. Store the cookies at room temperature for easy access. For longer shelf life, you can freeze them. Wrap each cookie in plastic wrap, then place them in a freezer-safe bag. This method keeps them safe from freezer burn.
Shelf Life
When stored properly at room temperature, these cookies last about one week. If frozen, they can last up to three months. Keep an eye out for signs of spoilage. If the cookies become hard, stale, or develop an off smell, it’s best to throw them away.
Reheating Tips
To warm up your cookies, use the oven for best results. Preheat it to 350°F (175°C). Place the cookies on a baking sheet and heat for 5-7 minutes. This restores the soft texture and flavor. You can also use the microwave, but do so with care. Heat them in 10-second bursts to avoid making them tough. Enjoy your cookies warm for a cozy treat!
FAQs
Can I use fresh pumpkin instead of canned?
Yes, you can use fresh pumpkin. First, choose a sugar pumpkin or pie pumpkin. Cut it in half and remove the seeds. Roast the halves in the oven until soft, about 45 minutes at 350°F. Then, scoop out the flesh and blend it until smooth. You will need about 1/2 cup for the snickerdoodles. Fresh pumpkin gives a nice flavor and texture.
How do I know when the cookies are done baking?
Look for golden edges. The centers should look soft and slightly puffy. They will firm up as they cool. If you press gently in the middle, it should bounce back. If it leaves an imprint, bake for a minute more.
Can I make the dough in advance?
Yes, you can make the dough ahead. If you want to refrigerate it, wrap it tightly in plastic wrap. It can stay in the fridge for up to 3 days. For longer storage, freeze the dough. Shape it into balls, freeze them on a tray, then transfer to a bag. Use within 3 months. Just bake them straight from the freezer.
What’s the best way to serve Pumpkin Spice Snickerdoodles?
These cookies pair well with warm drinks. Try serving with apple cider or hot chocolate. You can also add a creamy pumpkin spice dip. This dip enhances the cookies’ flavor and adds a fun twist.
How can I reduce the sweetness?
To lower the sweetness, cut back on sugar. Use 3/4 cup granulated sugar and skip the brown sugar. You can also add a pinch of salt to balance the flavor and keep the cookies tasty.
This blog post covered how to make Pumpkin Spice Snickerdoodles. We discussed ingredients, steps for mixing and baking, and ways to enhance flavor. You learned tips for texture, variations for diets, and how to store your cookies. These snickerdoodles will wow your friends and family. Try different spices or toppings to make them your own. With these steps, you can create a delicious treat that everyone will love! Enjoy baking and sharing these delightful cookie
Pumpkin Spice Snickerdoodles Delight
Ingredients
- 1 cup unsalted butter, softened to room temperature
- 1 cup granulated sugar
- 0.5 cup packed brown sugar
- 0.5 cup canned or homemade pumpkin puree
- 2 large eggs
- 3.5 cups all-purpose flour
- 2 teaspoons cream of tartar
- 1 teaspoon baking soda
- 0.5 teaspoon fine salt
- 1 teaspoon ground cinnamon
- 0.5 teaspoon ground nutmeg
- 0.5 teaspoon ground ginger
- 0.25 teaspoon ground cloves
- 1 tablespoon cinnamon sugar (mix 1 tablespoon granulated sugar with 1 teaspoon ground cinnamon for rolling)
Instructions
- Preheat your oven to 350°F (175°C). Prepare a baking sheet by lining it with parchment paper to prevent sticking.
- In a large mixing bowl, use a hand mixer or stand mixer to cream together the softened butter, granulated sugar, and brown sugar. Mix until the mixture is light, fluffy, and well blended, typically around 3-5 minutes.
- Next, fold in the pumpkin puree until fully incorporated. Then, add the eggs one at a time, ensuring to beat well after each addition until the mixture is smooth and homogenous.
- In a separate bowl, whisk together the all-purpose flour, cream of tartar, baking soda, salt, cinnamon, nutmeg, ginger, and cloves until evenly combined.
- Gradually incorporate the dry mixture into the pumpkin mixture. Stir gently until just combined; be cautious not to overmix, as this could make the cookies tough.
- Using a tablespoon, scoop out portions of dough and roll them into balls using your palms.
- Roll each dough ball in the prepared cinnamon sugar mixture until they are completely coated.
- Place the sugar-coated dough balls onto the lined baking sheet, ensuring you leave about 2 inches of space between each cookie to allow for spreading.
- Bake in the preheated oven for 10-12 minutes. The edges should appear lightly golden while the centers will be soft; don't worry, they will firm up as they cool.
- Let the cookies rest on the baking sheet for about 5 minutes to set before transferring them to a wire rack to cool completely.

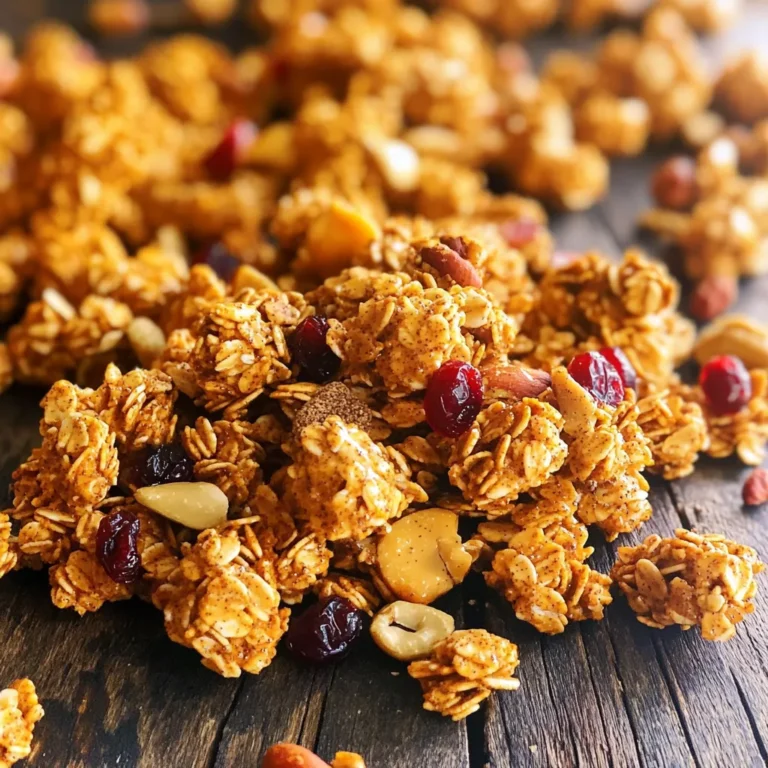
![To make these tasty chocolate chip banana bread muffins, gather these simple ingredients: - 3 ripe bananas, thoroughly mashed - 1/2 cup granulated sugar - 1/4 cup brown sugar, firmly packed - 1/3 cup unsalted butter, melted and slightly cooled - 1 large egg, at room temperature - 1 teaspoon vanilla extract - 1 teaspoon baking soda - 1/4 teaspoon salt - 1 teaspoon ground cinnamon - 1 1/2 cups all-purpose flour - 1 cup semi-sweet chocolate chips - 1/2 cup chopped walnuts (optional, for added crunch) Using the right amounts matters! Here’s a quick guide for measuring: - Bananas: Use ripe ones for natural sweetness. - Sugars: Granulated sugar is your base, while brown sugar adds moisture. - Butter: Melt it but let it cool a bit so it won’t cook the egg. - Flour: Spoon it into your cup and level it off for accuracy. You can swap some ingredients for different flavors or dietary needs: - Butter: Use coconut oil for a dairy-free option. - Sugar: Try honey or maple syrup for a natural sweetener. - Flour: Use whole wheat flour for more fiber. - Nuts: Feel free to skip walnuts or use pecans instead. For the full recipe, check the [Full Recipe]. First, gather your ingredients. You will need: - 3 ripe bananas, thoroughly mashed - 1/2 cup granulated sugar - 1/4 cup brown sugar, firmly packed - 1/3 cup unsalted butter, melted and slightly cooled - 1 large egg, at room temperature - 1 teaspoon vanilla extract - 1 teaspoon baking soda - 1/4 teaspoon salt - 1 teaspoon ground cinnamon - 1 1/2 cups all-purpose flour - 1 cup semi-sweet chocolate chips - 1/2 cup chopped walnuts (optional, for added crunch) Next, preheat your oven to 350°F (175°C). Prepare a muffin tin by lining it with paper liners or greasing it with cooking spray. This keeps the muffins from sticking. In a large bowl, mash the bananas well. Then, add the granulated sugar, brown sugar, and melted butter. Mix until smooth and creamy. Now, crack the egg into the bowl. Add the vanilla extract, and whisk until everything is mixed well. Sprinkle the baking soda, salt, and ground cinnamon over the banana mix. Stir gently to combine. Gradually sift in the all-purpose flour. Mix lightly with a spatula until just combined. Be careful not to over-mix, or your muffins may turn out dense. Finally, fold in the chocolate chips and walnuts, if using. This adds great texture and flavor to the muffins. Now, divide your batter evenly among the muffin tin cups. Fill each cup about two-thirds full. This allows the muffins to rise nicely. Place the muffin tin in the oven. Bake for 18-20 minutes. You will know they are done when a toothpick inserted into the center comes out clean or with a few moist crumbs. Once baked, take the muffins out of the oven. Let them cool in the tin for about 5 minutes. After that, carefully transfer them to a wire rack to cool completely. For an extra touch, serve the muffins warm. Lightly dust them with powdered sugar. You can also add a few extra chocolate chips on top. Pair them with coffee or tea for a delightful treat. For the full recipe, check out the Choco-Banana Bliss Muffins! To get soft and fluffy muffins, follow a few key steps. Use ripe bananas; they add natural sweetness and moisture. Mash them well, leaving no lumps. This helps blend the flavors. Don't over-mix the batter. Stir just until the flour disappears. Over-mixing can lead to tough muffins. When adding chocolate chips, fold them in gently. This keeps them evenly spread without breaking apart. A few common mistakes can ruin your muffins. First, check your oven temperature. An oven that is too hot can burn the muffins. Use an oven thermometer if needed. Avoid using cold ingredients. Always let your egg and butter come to room temperature. This helps your muffins rise better. Also, remember to fill your muffin cups only 2/3 full. This allows room for rising. These muffins are great on their own. For a special touch, serve them warm. Dust them with powdered sugar, and add extra chocolate chips on top. Pair them with coffee or tea for a cozy treat. You can also enjoy them with a dollop of yogurt or a scoop of ice cream. These options add a fun twist to your muffin experience. For the full recipe, check out the [Full Recipe]. {{image_4}} You can make these muffins gluten-free. Use a gluten-free flour blend instead of all-purpose flour. Many blends work well, like almond or coconut flour. Always check the package to ensure it is gluten-free. This option keeps the muffins soft and tasty while being safe for those with gluten issues. For a vegan version, swap the egg with a flax egg. To make a flax egg, mix 1 tablespoon of ground flaxseed with 2.5 tablespoons of water. Let it sit for 5 minutes until it thickens. Use coconut oil or vegan butter in place of regular butter. Also, choose dairy-free chocolate chips to keep it all plant-based. Want to boost nutrition? Add nuts like walnuts or pecans for crunch and healthy fats. You can also mix in ground flaxseed for extra fiber. This addition makes the muffins heartier and adds a nutty flavor. Just fold these ingredients into the batter before baking. For the full recipe, check out the Choco-Banana Bliss Muffins section above. You can store your chocolate chip banana bread muffins at room temperature. Place them in an airtight container. They stay fresh for about 2 to 3 days. If your kitchen is warm, refrigerate them to keep them from spoiling. Just remember, the fridge may dry them out a bit. To keep muffins longer, freeze them. First, let them cool completely. Wrap each muffin in plastic wrap. Then, place them in a freezer bag. Label the bag with the date. These muffins can last up to 3 months in the freezer. When ready to eat, just thaw them at room temperature or microwave for a quick treat. Reheat muffins for the best taste. You can use a microwave for about 15-20 seconds. This warms them up and melts the chocolate chips. If you want a crispy top, use an oven. Preheat to 350°F (175°C) and bake for about 5-10 minutes. Enjoy them warm for a delightful treat! For the full recipe, check out the Choco-Banana Bliss Muffins. You can check if your muffins are done by using a toothpick. Insert it into the center of one muffin. If it comes out clean or with a few moist crumbs, they are ready. The muffins should also look golden brown on top. If they are still wet, bake them for a few more minutes. Always keep an eye on them as oven times can vary. Yes, you can use frozen bananas! Just make sure to thaw them first. Once thawed, mash them well. Frozen bananas can actually make your muffins even sweeter. They also add moisture, making your muffins soft and delicious. They’re a great way to avoid waste if you have ripe bananas at home. You can add a few things to boost the flavor. Here are some options: - Nuts: Add chopped walnuts or pecans for a nice crunch. - Spices: Try adding nutmeg or extra cinnamon for warmth. - Extracts: A splash of almond extract can add a nice twist. - Fruits: Diced apples or berries can enhance the taste. - Zest: A bit of lemon or orange zest can brighten the flavors. Explore your own ideas, too! Cooking is all about creativity. Check the Full Recipe for more details on how to make these muffins. You learned about making delicious muffins from start to finish. We covered ingredients, measurements, and tasty alternatives. The step-by-step guide helps you bake easily. Tips and tricks will help you dodge common mistakes and perfect muffin texture. You also discovered fun variations, like gluten-free options and healthy extras. Lastly, we discussed storage tips to keep muffins fresh. I hope you feel ready to bake and enjoy these muffins with creative twists.](https://joymealplan.com/wp-content/uploads/2025/07/4f3c9815-0868-484a-ae71-7a97e3378a4a-768x768.webp)