Chocolate Peanut Butter Christmas Trees Delightful Treats
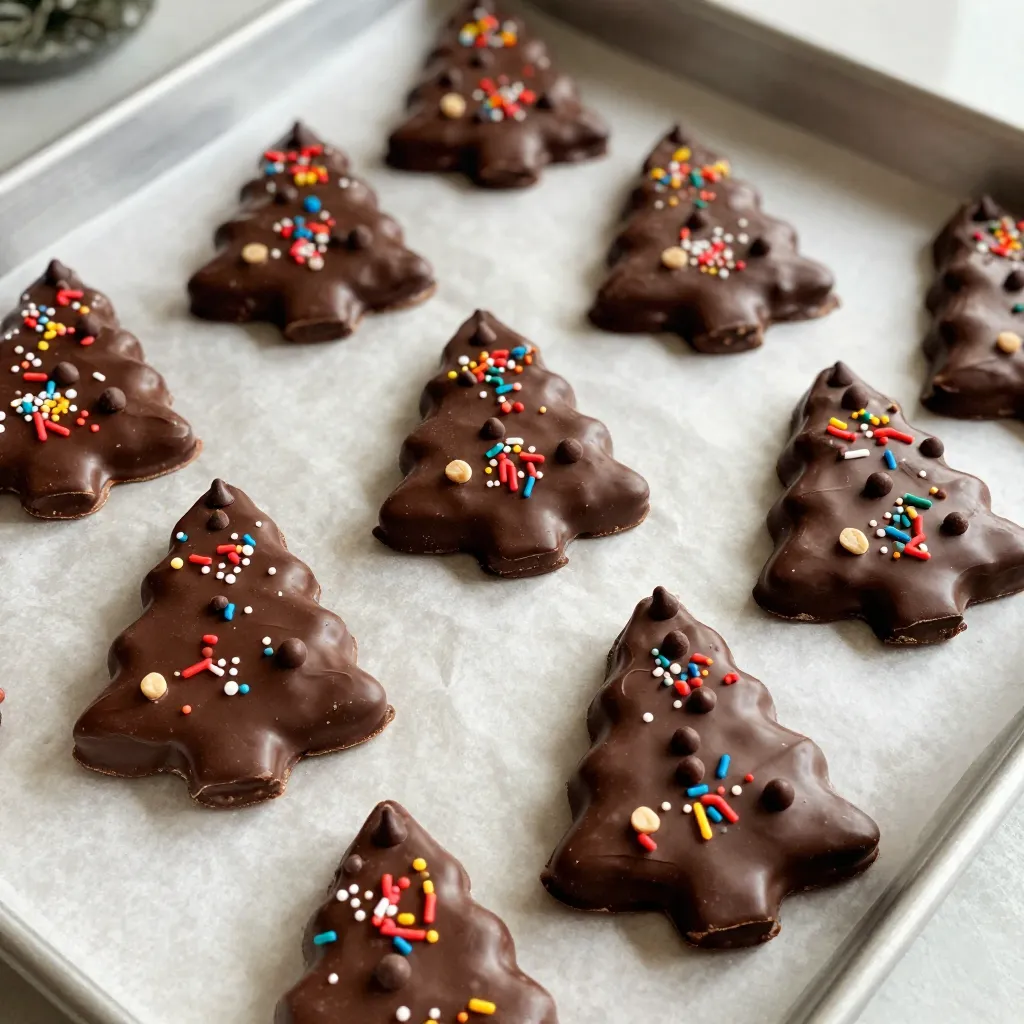
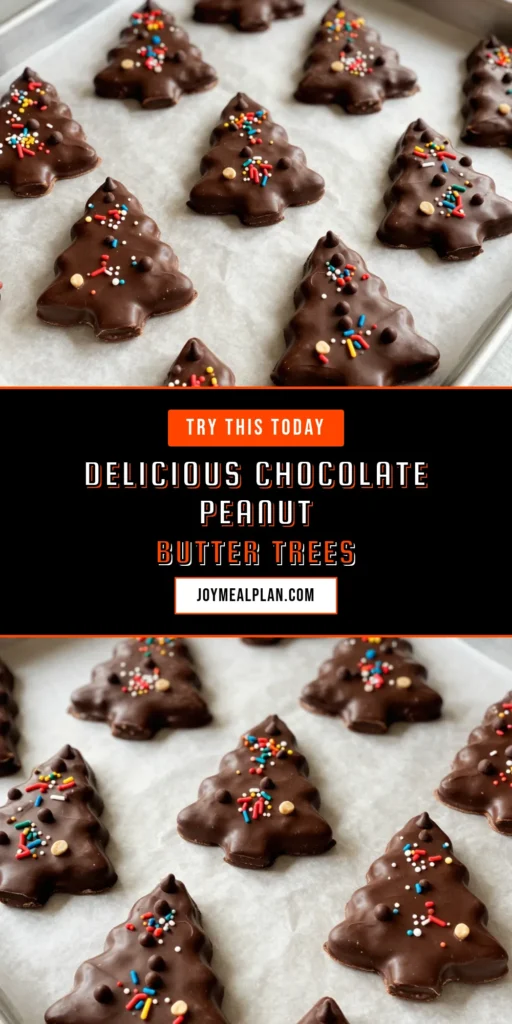
Get ready to indulge in the perfect holiday treat! These Chocolate Peanut Butter Christmas Trees are not just delicious; they’re fun to make too. With creamy peanut butter and rich chocolate, you’ll love how easy it is to shape and decorate these festive delights. In this post, I’ll guide you through each step, share tips, and suggest fun variations to create your own sweet masterpieces this Christmas. Let’s get started!
Why I Love This Recipe
- Deliciously Festive: These Chocolate Peanut Butter Christmas Trees are not only a treat for the taste buds but also a delightful addition to any holiday celebration.
- Easy to Make: With simple ingredients and straightforward steps, even novice bakers can create these charming treats without any fuss.
- Customizable Decorations: You can let your creativity shine by decorating the trees with various toppings, making each one unique and special.
- Perfect for Gifting: These adorable trees make wonderful gifts for friends and family, spreading holiday cheer and deliciousness.
Ingredients
Main Ingredients
– 1 cup creamy peanut butter
– 1/2 cup powdered sugar
– 1 1/2 cups semi-sweet chocolate chips
Optional Ingredients
– Green food coloring
– Mini chocolate chips (for ornaments)
– Sprinkles (for decoration)
Kitchen Tools Needed
– Mixing bowl
– Spatula or electric mixer
– Parchment paper
– Microwave-safe bowl
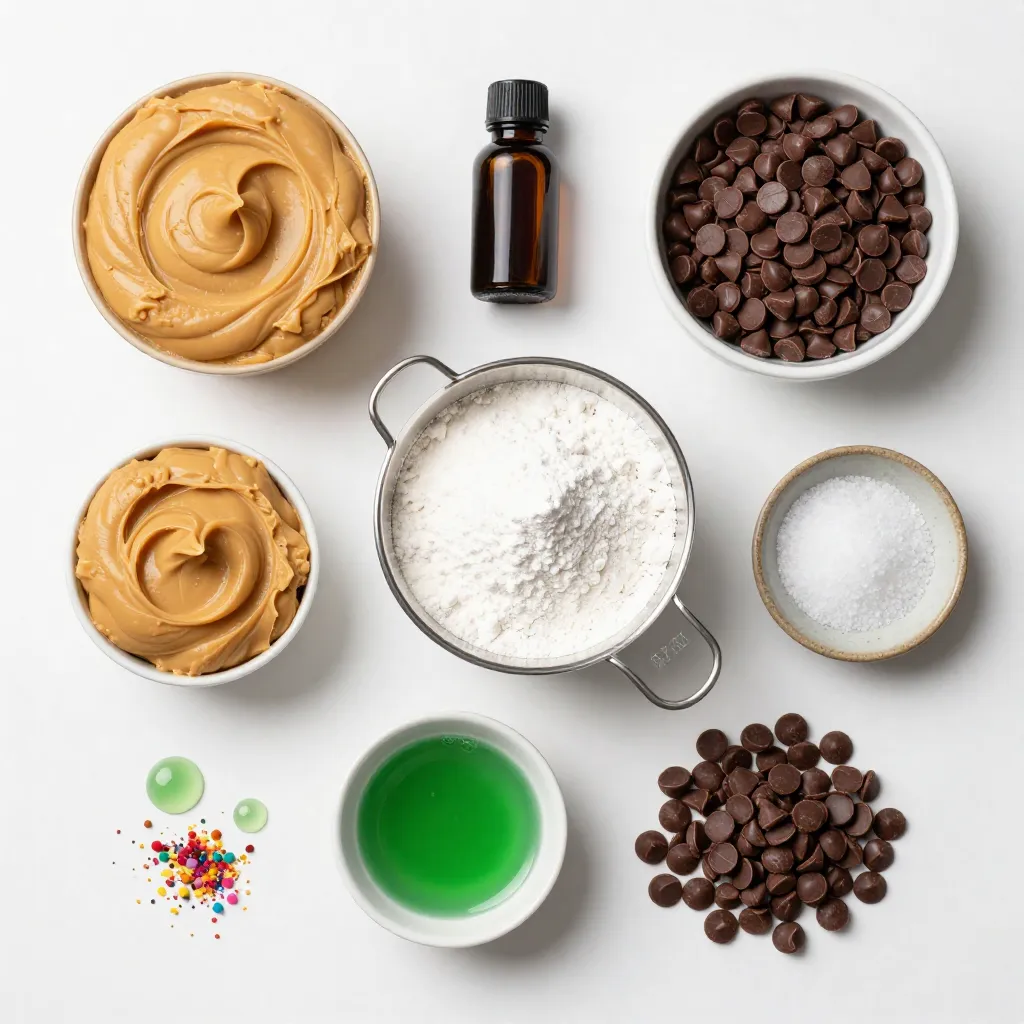
The main ingredients for these delightful treats can create a special flavor. Creamy peanut butter gives the trees a rich base. The powdered sugar adds sweetness and helps bind everything. Semi-sweet chocolate chips melt into a smooth coating that makes these trees irresistible.
You can add optional ingredients to make your trees even more festive. Green food coloring helps create a vibrant look. Mini chocolate chips work great as ornaments. Sprinkles add a fun touch to your trees’ decorations.
For tools, you’ll need a mixing bowl to blend the peanut butter mixture. A spatula or electric mixer will help you blend well. Parchment paper is key for easy cleanup and to keep trees from sticking. Finally, a microwave-safe bowl makes melting the chocolate simple.
Gather these ingredients and tools, and you’re ready to make your Christmas treats!
Step-by-Step Instructions
Preparing the Peanut Butter Mixture
To start, grab a mixing bowl. Add 1 cup of creamy peanut butter, 1/2 cup of powdered sugar, 1 teaspoon of vanilla extract, and 1/4 teaspoon of salt. Use a spatula or an electric mixer to blend these ingredients together. Mix until the mixture is smooth and well-combined. This is the base for your tasty trees.
Shaping the Christmas Trees
Next, divide the peanut butter mixture into four equal parts. With clean hands, mold each part into a tree shape. Aim for triangular peaks to mimic real Christmas trees. This makes them fun and festive!
Chilling the Trees
Now, place your shaped trees on a baking sheet lined with parchment paper. Refrigerate these for about 30 minutes. Chilling helps the shapes firm up, making them easier to coat in chocolate.
Melting the Chocolate
While the trees chill, let’s melt the chocolate. Take 1 1/2 cups of semi-sweet chocolate chips and put them in a microwave-safe bowl. Heat the chips in the microwave in 20-second intervals. Stir after each interval until the chocolate is completely melted and smooth. Avoid lumps for a nice coating!
Coating the Trees with Chocolate
Once your chocolate is ready, take the chilled peanut butter trees out. Dip each tree into the melted chocolate, ensuring every surface is coated. Allow any excess chocolate to drip back into the bowl. This step makes your trees look delicious!
Decorating the Trees
Before the chocolate sets, get creative with decorations! Add mini chocolate chips and colorful sprinkles to each tree. This makes them look like they are dressed for the holiday. Let your imagination run wild!
Setting the Chocolate
Finally, return the decorated trees to the refrigerator. Let them chill for an additional 15-20 minutes. This will help the chocolate coating harden perfectly. Soon, you’ll have beautiful, tasty treats ready to share!
Tips & Tricks
Perfecting the Peanut Butter Mixture
To create a smooth peanut butter mixture, use creamy peanut butter. This helps ensure a nice texture. Mix in powdered sugar, vanilla extract, and a pinch of salt. Blend until the mixture is free of lumps. If it feels too sticky, add a bit more powdered sugar.
When shaping the trees, divide the mixture into equal parts. Wet your hands slightly. This will help prevent sticking and make it easier to mold. Aim for triangle shapes, like Christmas trees. Aim for consistency in size to make them look great on your platter.
Chocolate Melting Techniques
Melting chocolate can be tricky. To avoid clumps or burning, use a microwave-safe bowl. Place semi-sweet chocolate chips in the bowl. Heat them in 20-second intervals. Stir well between heating times. This keeps the chocolate from getting too hot. You want it smooth and silky, not clumpy.
If you want to add color, mix in a few drops of green food coloring after melting. Stir until the color is even. This will give your trees a festive look!
Creative Decoration Ideas
Decorating your trees is where the fun begins! Use mini chocolate chips as ornaments. They add a sweet touch and look great. You can also sprinkle colorful sugar or festive sprinkles on top.
For a glittery effect, try edible glitter. It makes your trees shine bright! Get creative and mix different toppings for variety. Each tree can be a unique masterpiece.
Pro Tips
- Use a Cookie Cutter: For perfectly shaped trees, consider using a cookie cutter to shape the peanut butter mixture instead of molding by hand.
- Chill the Chocolate: If your chocolate is too thick for dipping, chill it slightly after melting. This will help achieve a smoother finish on your trees.
- Experiment with Flavors: Try adding a dash of cinnamon or nutmeg to the peanut butter mixture for a festive twist!
- Storage Tips: Store your chocolate peanut butter trees in an airtight container in the refrigerator to keep them fresh and delicious for up to a week!
Variations
Dietary Adaptations
You can make these trees fit different diets. For a vegan option, use plant-based chocolate instead of regular chocolate. This swap keeps the treat tasty and friendly for everyone. If you need a nut-free version, simply use sunflower seed butter. This keeps the joy of chocolate peanut butter trees without the nuts.
Flavor Variations
Want to change up the flavor? You can add extracts like almond or mint. These flavors mix well with chocolate and peanut butter. You can also try spices like cinnamon or nutmeg. These spices add warmth and depth to the taste, making it special for the holidays.
Decorative Themes
Get creative with decorations! You can use different colors to match holiday themes. For example, pink for Valentine’s Day or orange for Halloween. You can also create themed trees for other holidays. Think about using colors that fit birthdays or other celebrations. This makes your chocolate peanut butter trees fun all year round!
Storage Info
Best Storage Practices
Store your chocolate peanut butter trees in the fridge. This keeps them fresh and tasty. Room temperature may cause them to melt or get too soft. Always use airtight containers. This way, they stay moist and do not pick up odors from the fridge.
Shelf Life
These chocolate peanut butter trees last about one week in the fridge. Look for signs of spoilage, like a change in color or a strange smell. If the trees start to look dry or crumbly, it’s time to toss them. Fresh is best for flavor and texture.
Freezing Instructions
You can freeze these treats for longer storage. First, place each tree on a baking sheet and freeze for about an hour. Once frozen, transfer them to a freezer-safe bag. This keeps them from sticking together. To thaw, simply take them out and let them sit in the fridge overnight. This method helps maintain their flavor and texture.
FAQs
How do I make chocolate peanut butter Christmas trees without powdered sugar?
You can use honey or maple syrup instead of powdered sugar. These options add sweetness and a smooth texture. If you choose honey, reduce the peanut butter slightly. This helps keep the mixture thick enough for shaping. You might also want to add a bit of crushed nuts or oats. They give a nice crunch and enhance the taste.
Can I use milk chocolate instead of semi-sweet chocolate?
Yes, you can use milk chocolate. It will make the trees sweeter and creamier. However, semi-sweet chocolate offers a richer flavor. If you prefer a mix, combine both chocolates for a balanced taste. This way, you can enjoy the best of both flavors.
How do I make the peanut butter trees firmer?
To firm up the peanut butter trees, add more powdered sugar or reduce the peanut butter. You can also chill the mixture longer before shaping. This helps the trees hold their form better. If you find them too soft, refrigerate them for another 10-15 minutes before dipping in chocolate.
What are some fun ways to decorate the trees?
You can use mini chocolate chips as ornaments. Sprinkles add color and fun. Try using edible glitter for a magical touch. Consider drizzling melted white chocolate over the trees for a snowy effect. Each tree can tell a different story with its unique decorations!
Can children help with this recipe?
Absolutely! Kids can help mix the peanut butter and shape the trees. Keep an eye on them when melting chocolate. Use a microwave with adult supervision. This keeps everyone safe while having fun. Let them decorate with sprinkles and mini chocolate chips. It makes for a great family activity!
This blog post guides you through creating tasty chocolate peanut butter Christmas trees. We covered key ingredients like creamy peanut butter and chocolate chips. You learned how to prepare, shape, chill, and decorate these festive treats. I shared tips for melting chocolate and creative ideas to make your trees unique.
Remember, enjoy the process, and let your creativity shine. You can adapt recipes for various diets or favorite flavors. With practice, you’ll perfect this fun treat, bringing joy to your celebrations. Happy bakin

Chocolate Peanut Butter Christmas Trees
Ingredients
- 1 cup creamy peanut butter
- 0.5 cup powdered sugar
- 1.5 cups semi-sweet chocolate chips
- 1 teaspoon vanilla extract
- 0.25 teaspoon salt
- to taste green food coloring (optional)
- to taste mini chocolate chips (for ornaments)
- to taste sprinkles (for decoration)
- 1 parchment paper (for lining baking sheet)
Instructions
- In a mixing bowl, add the creamy peanut butter, powdered sugar, vanilla extract, and salt. Use a spatula or electric mixer to blend these ingredients together until smooth and thoroughly combined.
- Portion the peanut butter mixture into four equal parts. With clean hands, mold each portion into a tree shape.
- Place the shaped peanut butter trees on a baking sheet lined with parchment paper. Refrigerate them for about 30 minutes.
- Place the semi-sweet chocolate chips in a microwave-safe bowl. Heat them in the microwave in 20-second intervals, stirring between each heating, until the chocolate is completely melted and smooth.
- If you wish to make your trees a festive green, add a few drops of green food coloring to the melted chocolate and stir well.
- Take the chilled peanut butter trees out of the refrigerator. Dip each one entirely into the melted chocolate, ensuring every surface is coated.
- Before the chocolate sets, sprinkle each tree with mini chocolate chips and colorful sprinkles.
- After all the trees are dipped and adorned, return them to the refrigerator for an additional 15-20 minutes.
![To make these tasty cookies, you need simple ingredients that work well together. Here is what you will need: - 1 cup unsalted butter, softened to room temperature - 1 cup powdered sugar, plus extra for dusting - 1 teaspoon pure vanilla extract - 2 cups all-purpose flour, sifted - 1/2 teaspoon pure almond extract - 1/4 teaspoon sea salt - 1 cup raspberry jam (store-bought or homemade) - 1/2 cup sliced almonds (for topping) These key ingredients create a rich and buttery base for the cookies. The powdered sugar adds sweetness, while the extracts bring depth of flavor. The raspberry jam provides a fruity burst in every bite. You can customize these cookies to suit your taste. Here are some optional ingredients to consider: - Different jams: Swap raspberry jam for strawberry, apricot, or blueberry for new flavors. - Citrus zest: Add a teaspoon of lemon or orange zest for a bright twist. - Chopped nuts: Use pecans or walnuts instead of almonds for a different crunch. These optional ingredients let you make the cookies your own. Feel free to mix and match to create your perfect treat. For the complete details on how to put these ingredients together, check out the Full Recipe. To start, gather your ingredients. You will need butter, powdered sugar, vanilla extract, almond extract, flour, sea salt, raspberry jam, and sliced almonds. First, preheat your oven to 350°F (175°C). Line a baking sheet with parchment paper to avoid sticking. In a large bowl, cream the softened butter and powdered sugar. Use an electric mixer on medium speed for about 3-4 minutes. You want the mixture to be light and fluffy. Next, add in the vanilla and almond extracts. Beat until smooth. In another bowl, mix the sifted flour and sea salt. Gradually add this to the butter mix. Stir gently, just until it forms a dough. Avoid overmixing. With a tablespoon, scoop the dough and roll it into balls. Place them on the baking sheet about 2 inches apart. Now, make a small indentation in each dough ball using your thumb or a spoon. This will hold the jam. Spoon 1/2 teaspoon of raspberry jam into each well. Be careful not to overflow. Next, sprinkle sliced almonds around the jam. Press them lightly into the dough for a nice crunch. Bake in the preheated oven for 15-18 minutes. Look for a light golden brown on the edges. Once baked, let the cookies rest for 5 minutes on the sheet. Then, transfer them to a wire rack to cool completely. When cool, dust them with extra powdered sugar for a nice touch. For a beautiful presentation, arrange the cookies on a decorative plate. Scatter fresh raspberries around them for color. Enjoy your delicious Raspberry Almond Thumbprint Cookies! For the full recipe, refer to the earlier section. To bake the best raspberry almond thumbprint cookies, follow these tips: - Use softened butter: This helps create a creamy texture. - Sift your flour: Sifting aerates the flour, leading to lighter cookies. - Space them out: Place cookies 2 inches apart on the baking sheet. This prevents them from sticking together. - Check the time: Bake until the edges are light golden brown, about 15-18 minutes. Many home bakers face pitfalls while baking. Avoid these common mistakes: - Overmixing the dough: This makes cookies tough. Mix just until combined. - Not measuring flour correctly: Use a spoon to fill the measuring cup, then level it off. - Skipping the cooling time: Let the cookies rest before moving them. This helps them set. You can add extra flavors to your cookies for a twist. Consider these options: - Zest of lemon or orange: A little zest brightens the cookie's taste. - Chopped dark chocolate: Mix in for a rich contrast to the raspberry jam. - Coconut flakes: Add for a tropical touch and added texture. These tips will help you create the perfect batch of raspberry almond thumbprint cookies. For the complete recipe, check the Full Recipe section. {{image_4}} You can use different jam flavors in these cookies. Try strawberry or apricot for a fresh twist. Blueberry jam also works well and adds a nice color. Each jam gives the cookies its own unique taste. Experimenting with flavors keeps things exciting. If you want to change the nuts, you have many choices. Pecans or walnuts add a rich flavor. You can even skip the nuts if you prefer a nut-free cookie. Just remember, the crunch will be lost, but the jam will still shine. To make gluten-free thumbprint cookies, use a gluten-free flour blend. Brands like Bob’s Red Mill or King Arthur Flour work well. Just check that the blend has xanthan gum to bind everything together. This way, everyone can enjoy these tasty treats! Follow the [Full Recipe] for the main steps and enjoy your baking journey! To keep your Raspberry Almond Thumbprint Cookies fresh, store them in an airtight container. This will help keep them soft and tasty. If you stack them, place wax paper between layers. This helps prevent sticking. You can also use a cookie tin for a charming touch. When stored properly, these cookies will last about one week at room temperature. If you place them in the fridge, they may last up to two weeks. However, cold air can dry them out. So, if you want the best taste, enjoy them fresh! Freezing cookies is a great idea for later cravings. Allow the cookies to cool completely first. Then, place them in a single layer on a baking sheet. Freeze them for about an hour. After that, transfer them to a freezer-safe bag. They can last up to three months in the freezer. When ready to eat, thaw them in the fridge overnight or let them sit at room temperature for a few hours. For the full recipe, check out the details above! If you don’t have almond extract, you can use vanilla extract instead. This will still give your cookies great flavor. You can also try hazelnut extract for a unique twist. The cookies will still taste delicious! Yes, you can use other nuts! If you prefer, try pecans, walnuts, or even pistachios. Just chop them finely and use them in place of sliced almonds. Each nut adds a different flavor and texture. To make cookies softer, add an extra tablespoon of butter. This will give them a chewier texture. For firmer cookies, bake them a minute longer. Keep an eye on them to avoid overbaking. Adjusting these small details can really change your cookie experience. Raspberry almond thumbprint cookies are easy and fun to make. You learned about key ingredients, simple steps, and helpful tips to bake them perfectly. We also explored tasty variations and storage methods. If you follow these instructions and suggestions, your cookies will impress. Enjoy sharing this sweet treat with others. Baking can be simple and rewarding. So, gather your ingredients and start creating!](https://joymealplan.com/wp-content/uploads/2025/07/b4014d7b-fb87-49bc-9ed6-2b0ba339c469-768x768.webp)