Greek Yogurt Banana Bread Comforting and Fluffy Treat
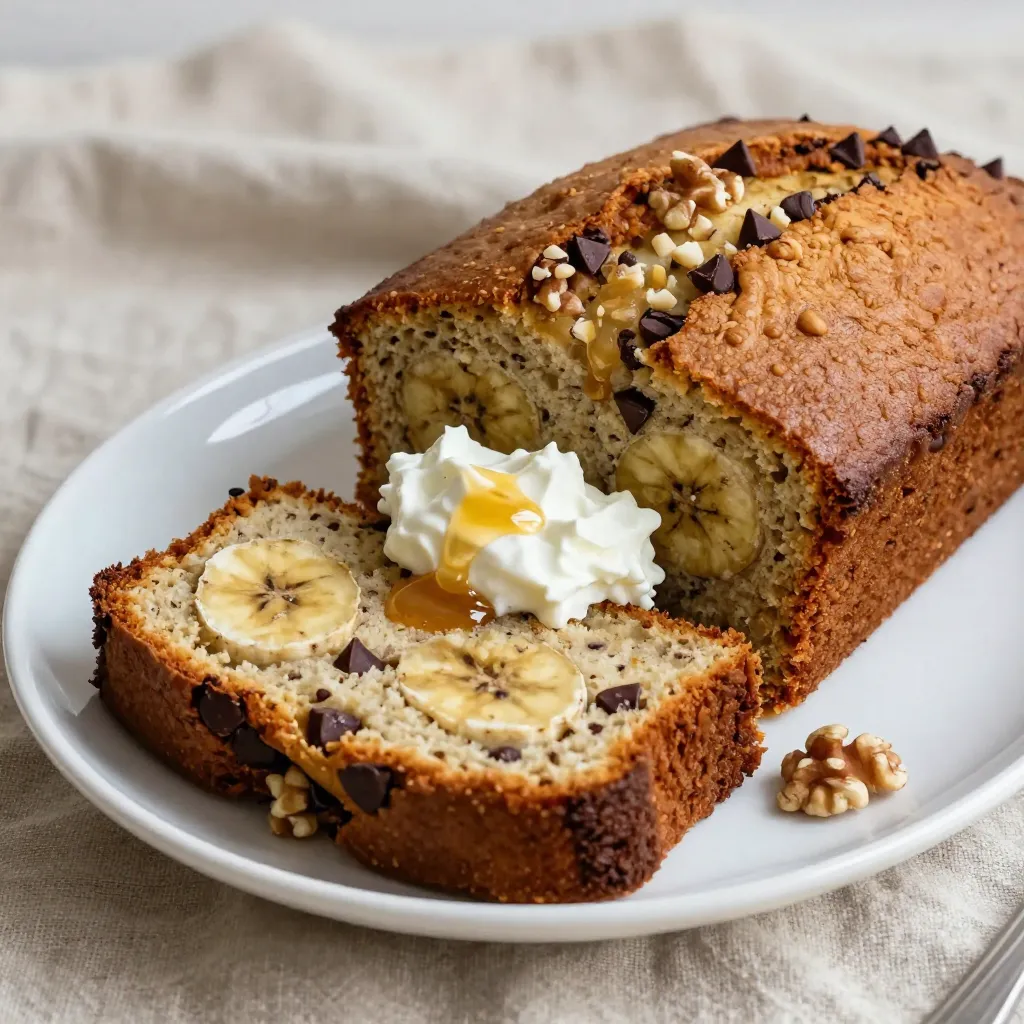
Are you ready to bake a delicious treat that brings comfort to your kitchen? This Greek Yogurt Banana Bread is not only fluffy and moist but also packed with flavor. With just a few simple ingredients, you can create a delightful loaf that your whole family will love. Join me as we explore the steps, tips, and variations to make the perfect banana bread that keeps you coming back for seconds!
Why I Love This Recipe
- Moist and Flavorful: The combination of Greek yogurt and ripe bananas ensures a moist texture that’s bursting with flavor.
- Natural Sweetness: Using honey along with brown sugar provides a delightful natural sweetness, reducing the need for refined sugars.
- Easy to Make: This recipe comes together quickly, making it perfect for a last-minute breakfast or snack option.
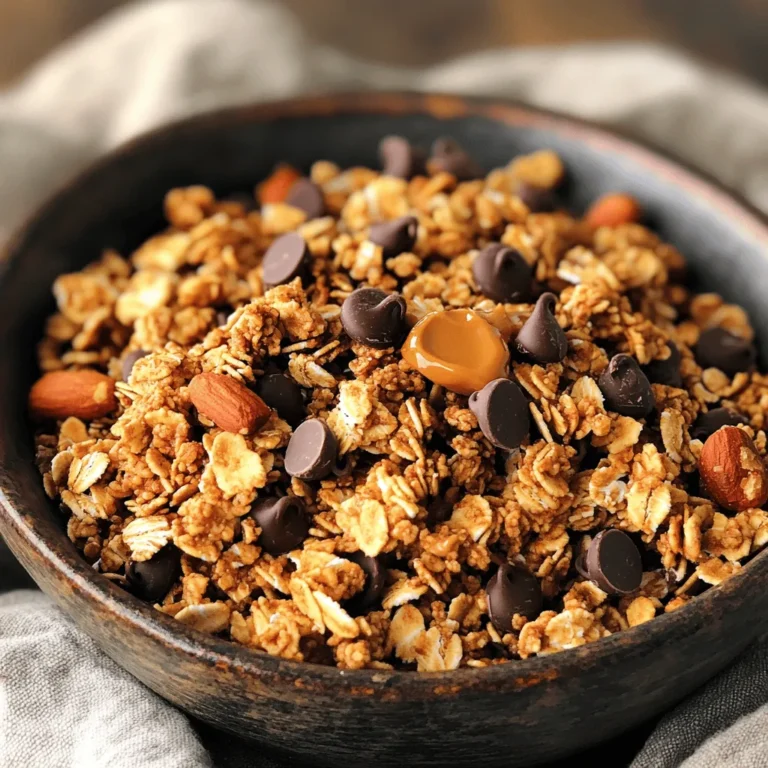
- Customizable: Add your favorite nuts or chocolate chips to make this banana bread uniquely yours!
Ingredients
When making Greek yogurt banana bread, each ingredient plays a key role in the taste and texture. Here’s what you’ll need:
– 3 ripe bananas: These should be very soft. They add natural sweetness and moisture.
– 1 cup plain Greek yogurt: This gives the bread a nice tang and keeps it moist.
– 1/2 cup packed brown sugar: This adds rich flavor and a hint of caramel.
– 1/4 cup honey: This is a natural sweetener that enhances the bread’s taste.
– 2 large eggs: Bring them to room temperature. They help bind the bread together.
– 1 teaspoon vanilla extract: This adds a warm aroma and deepens the flavor.
– 1 teaspoon baking soda: This is the main leavening agent that helps the bread rise.
– 1/2 teaspoon baking powder: This gives extra lift, making the bread fluffier.
– 1/2 teaspoon salt: This balances the sweetness and enhances all flavors.
– 1 and 1/2 cups all-purpose flour: This provides structure to the bread.
– 1 teaspoon ground cinnamon: This adds a warm spice that complements bananas well.
– 1/2 cup chopped walnuts or pecans (optional): These add a nice crunch to the bread.
– 1/4 cup chocolate chips (optional): These make the bread more indulgent and fun.
Feel free to get creative! You can mix in nuts for crunch or chocolate chips for sweetness. This recipe is flexible, so let your taste guide you!

Step-by-Step Instructions
Preheat and Prepare
First, preheat your oven to 350°F (175°C). This step is key for even baking. Next, grab a 9×5 inch loaf pan. You can grease it with butter or oil. Alternatively, line it with parchment paper. This makes the bread easy to remove later.
Mixing Wet Ingredients
In a large bowl, mash the three ripe bananas until smooth. Add 1 cup of plain Greek yogurt to the bananas. This gives moisture and a nice tang. Next, mix in 1/2 cup of packed brown sugar and 1/4 cup of honey. The brown sugar adds depth, while honey brings natural sweetness. Then, crack in 2 large eggs and pour in 1 teaspoon of vanilla extract. Whisk everything together until it is smooth and well combined.
Mixing Dry Ingredients
In another bowl, whisk together 1 teaspoon of baking soda, 1/2 teaspoon of baking powder, and 1/2 teaspoon of salt. Next, add 1 and 1/2 cups of all-purpose flour and 1 teaspoon of ground cinnamon. Make sure to break any lumps. Mixing these dry ingredients well helps the bread rise and adds flavor.
Combining Mixtures
Now, it’s time to combine the mixtures. Gradually add the dry mixture to the wet mixture. Use a spatula to fold them together gently. Be careful not to over-mix; a few lumps are okay. This will keep your banana bread fluffy and light.
Pouring and Baking
Carefully pour the batter into your prepared loaf pan. Smooth out the top with a spatula. Then, place the loaf pan in the oven. Bake for 55-65 minutes. To check if it’s done, insert a toothpick into the center. If it comes out clean, your bread is ready. Once baked, let the loaf cool in the pan for about 10 minutes. After that, transfer it to a wire rack to cool completely. Enjoy your delicious Greek yogurt banana bread!
Tips & Tricks
Achieving the Perfect Texture
To make your Greek yogurt banana bread just right, don’t over-mix the batter. Over-mixing can lead to a dense loaf. When you mix, aim for a few lumps. This keeps the bread light and fluffy. I like to fold the dry ingredients into the wet mixture gently. This helps trap air and gives your bread a nice rise.
Baking Tips
How do you know when your banana bread is done? Look for a few signs. First, the top should be golden brown. The edges may pull away slightly from the pan. A toothpick inserted into the center should come out clean. If it has wet batter, give it a few more minutes. Trust these signs to ensure your bread is baked perfectly.
Serving Suggestions
You can serve your banana bread in fun ways. Try slicing it warm and topping it with Greek yogurt. This adds creaminess and a nice tang. You might also drizzle honey on top for sweetness. Sprinkle some chopped nuts for a crunchy finish. Each bite will be a delightful mix of flavors and textures!
Pro Tips
- Use Overripe Bananas: The riper the bananas, the sweeter and more flavorful your banana bread will be. Look for bananas with plenty of brown spots for the best results.
- Room Temperature Ingredients: Ensure your eggs and Greek yogurt are at room temperature before mixing. This helps create a more homogenous batter and results in a better rise.
- Cool Before Slicing: Let the banana bread cool completely on a wire rack before slicing. This allows the flavors to set and prevents it from becoming gummy.
- Experiment with Add-ins: Feel free to add in dried fruits, seeds, or different nuts to customize your banana bread. Each addition can bring a new flavor profile and texture.
Variations
Flavor Variations
You can make this banana bread your own with some fun flavors. Try adding spices like nutmeg or ginger for a warm twist. You can also use different extracts, like almond or coconut, instead of vanilla. Each option brings a new taste to your loaf.
Healthier Substitutions
Want a lighter version of this banana bread? You can cut the brown sugar down to 1/4 cup. You can also use maple syrup instead of honey for a unique flavor. If you’re gluten-free, swap all-purpose flour for almond or coconut flour. These changes can help you enjoy your treat while staying on track.
Add-ins
Adding extras can take your banana bread to the next level. Consider folding in 1/2 cup of dried fruits like cranberries or apricots. You can also add seeds like chia or sunflower for extra crunch. Chocolate chips are a fun option too! They melt into the batter and create sweet pockets of joy.
Storage Info
How to Store
To keep your Greek yogurt banana bread fresh, store it at room temperature. Wrap the bread in plastic wrap or foil. This helps keep moisture in. Place it in an airtight container for extra protection. It can last for up to three days this way. If you want it to last longer, consider freezing it.
Freezing Instructions
Freezing banana bread is easy and great for later use. First, let the bread cool completely. Then, slice it into individual pieces. Wrap each slice tightly in plastic wrap. Place the wrapped slices in a freezer bag. Squeeze out as much air as you can before sealing. Label the bag with the date. The bread can stay frozen for up to three months.
Reheating Tips
When you’re ready to enjoy your banana bread, reheating it is simple. You can use the oven for best results. Preheat the oven to 350°F (175°C). Place the bread or slices on a baking sheet. Heat for about 10-15 minutes until warm. This helps keep the bread moist. You can also use a microwave. Heat a slice for about 15-20 seconds. Add a little butter or yogurt on top for extra flavor.
FAQs
Can I use other types of yogurt?
Yes, you can use different types of yogurt in this recipe. Non-dairy yogurts made from almond, coconut, or soy work well. They keep the bread moist and tasty. If you want a sweeter flavor, try using flavored yogurts like vanilla or honey. These will add a nice twist to the taste without changing the recipe too much.
What can I substitute for eggs?
If you want to make your banana bread vegan, there are great options to replace eggs. You can use 1/4 cup of applesauce for each egg. This will keep the bread moist. Another option is to use flaxseed meal. Mix 1 tablespoon of flaxseed meal with 2.5 tablespoons of water for each egg. Let it sit for a few minutes to thicken before adding it to the mix. Both choices work well and keep the bread fluffy.
How do I know when it’s fully baked?
To check if your banana bread is done, use the toothpick method. Insert a toothpick into the center of the loaf. If it comes out clean or with a few crumbs, the bread is ready. If it comes out wet, let it bake for a little longer. Keep an eye on it, especially after 55 minutes. This simple test helps ensure your banana bread is perfectly baked every time.
This post covered everything you need to bake delicious banana bread. We explored the key ingredients and their roles. I shared step-by-step instructions to guide you through the process. You now know tips for perfect texture and baking, along with serving ideas.
Don’t forget to try different flavors and healthy swaps. Store and freeze it to enjoy later. You have all the tools to make banana bread your way! Baking is fun, so enjoy every bit

Greek Yogurt Banana Bread
Ingredients
- 3 none ripe bananas, thoroughly mashed
- 1 cup plain Greek yogurt
- 1 2 packed brown sugar
- 1 4 cup honey
- 2 large eggs, room temperature
- 1 teaspoon vanilla extract
- 1 teaspoon baking soda
- 1 2 teaspoon baking powder
- 1 2 teaspoon salt
- 1 2 cups all-purpose flour
- 1 teaspoon ground cinnamon
- 1 2 cup chopped walnuts or pecans
- 1 4 cup chocolate chips
Instructions
- Begin by preheating your oven to 350°F (175°C). Prepare a 9x5 inch loaf pan by greasing it or lining it with parchment paper to ensure easy removal.
- In a large mixing bowl, combine the thoroughly mashed bananas, Greek yogurt, brown sugar, honey, eggs, and vanilla extract. Using a whisk or fork, mix the ingredients until completely smooth and well blended.
- In a separate mixing bowl, whisk together the baking soda, baking powder, salt, all-purpose flour, and ground cinnamon. Make sure there are no lumps and everything is evenly mixed.
- Gradually add the dry mixture to the wet mixture, folding gently with a spatula until just combined. It’s important not to over-mix; a few lumps are perfectly fine to maintain a light and fluffy texture.
- If desired, fold in the chopped walnuts or pecans and chocolate chips, enhancing the bread with added flavor and delightful texture.
- Carefully pour the batter into the prepared loaf pan, smoothing out the top with a spatula to create an even surface.
- Place the loaf pan in the preheated oven and bake for 55-65 minutes, keeping an eye out for a toothpick inserted into the center to come out clean.
- Once baked, remove the loaf from the oven and let it cool in the pan for about 10 minutes. Then, transfer it to a wire rack to cool completely.
![- 1 cup glutinous (sticky) rice - 1 ½ cups coconut milk - 1 ripe mango, peeled and thinly sliced - ¼ cup granulated sugar - ¼ teaspoon salt Glutinous rice gives Mango Sticky Rice its unique texture. It sticks together and becomes chewy when cooked. The coconut milk adds a rich and creamy flavor to the dish. Using ripe mango is key; its sweetness and juiciness balance the rice. - 1 tablespoon sesame seeds (toasted, optional) - Fresh mint leaves for garnish (optional) Toasted sesame seeds provide a nice crunch. Fresh mint leaves add a pop of color and a refreshing taste. Both are great if you want to elevate your dish. - Calories per Serving: Approximately 300 calories - Key Nutrients: Carbohydrates, fats, fiber, vitamin C, and iron Mango Sticky Rice is a delightful dessert. While it is not low-calorie, it offers some nutrients. The rice provides energy, and mango adds vitamins. Enjoy it as an occasional treat! For the complete recipe, check out the Full Recipe. Rinsing and Soaking the Rice Start by rinsing the sticky rice under cold water. Keep rinsing until the water runs clear. This step removes excess starch. It's key for the right texture. After rinsing, soak the rice in water for 4 hours. If you can, soak it overnight. This helps the rice absorb water and cook better. Steaming Process After soaking, drain the rice. Place it in a steamer lined with cheesecloth or a steaming basket. Steam the rice over simmering water for 25 to 30 minutes. You want it to become translucent and tender. This process makes the rice fluffy and sticky, perfect for the dish. Combining Ingredients While the rice steams, prepare the coconut milk mixture. In a medium saucepan, mix coconut milk, sugar, and salt. Stir the mixture over low to medium heat. Keep stirring until the sugar dissolves. Be careful not to boil it; you want a smooth texture. Cooking Technique Once the sugar is dissolved, take the saucepan off the heat. This step ensures the coconut milk stays creamy. Set it aside until the rice is ready. This coconut milk will add a rich flavor to the sticky rice. Mixing Rice and Coconut Milk When the sticky rice is cooked, transfer it to a large bowl. Gradually pour in about 1 cup of the warm coconut milk mixture. Use a gentle folding motion to mix it in. Make sure every grain of rice is coated. Let it sit for 15 to 20 minutes. This allows the rice to absorb the coconut flavor. Plating Suggestions To serve, scoop a generous amount of sticky rice onto a plate. Arrange thin slices of ripe mango on top. Drizzle some extra coconut milk over it. For added crunch, sprinkle toasted sesame seeds on top. You can also garnish with fresh mint leaves for a pop of color. This makes the dish look as good as it tastes! For the complete method, check the Full Recipe. Appearance and Aroma Indicators When choosing mangoes, look for smooth skin. The color should be bright and rich. A ripe mango feels slightly soft when gently squeezed. It should also have a sweet aroma near the stem. This smell tells you it's ready to eat. Ideal Varieties for the Dish For this dessert, I recommend using the Ataulfo or Haden mango. Ataulfo mangoes have a creamy texture and sweet taste. Haden mangoes are juicy and fragrant, adding great flavor to your dish. Both work well with the sticky rice. Toasting Sticky Rice Option Toasting the sticky rice can bring out a nutty taste. Before soaking, heat it in a pan over low heat. Stir it for a few minutes until it turns golden. This step adds depth to the flavor of your dessert. Alternative Sweeteners While granulated sugar is common, you can try other sweeteners. Honey or agave syrup can add unique flavors. Coconut sugar offers a caramel-like taste. Each option can change the dish’s final taste, so feel free to experiment. Serving Style Variations For a fun twist, try serving the sticky rice in small bowls. You can layer the mango slices on top. This makes each serving look special. You can also use a ring mold to shape the rice for a more elegant look. Creative Garnishing Tips Garnishing can elevate your dessert. Sprinkle toasted sesame seeds for crunch. Add fresh mint leaves for color and flavor. You can also drizzle a bit of coconut milk on top for a beautiful finish. These small touches make your dish more appealing. For the complete recipe, check out the [Full Recipe]. {{image_4}} Mango sticky rice shines in Thai cuisine. Each region has its own twist. In northern Thailand, you might find a version with black sticky rice. This adds a nutty flavor and a stunning dark color. Southern styles often emphasize sweetness with extra coconut milk. Other cuisines influence this dish too. In Vietnam, they serve a similar treat called "xôi xoài." It features a sweeter coconut sauce and often includes mung beans. Exploring these variations lets you enjoy mango sticky rice in new ways. If you want vegan options, just use coconut milk. This recipe is already dairy-free. You can also make it gluten-free, since glutinous rice has no gluten. For low-sugar options, try using a sugar substitute. Many people enjoy using stevia or monk fruit. These keep the sweetness without the added calories. Want to make your mango sticky rice unique? You can add food coloring to the rice. This gives it a fun pop of color. Just a few drops will do! Incorporating fruits and nuts is another way to change up the flavor. Add some chopped mango or berries for extra fruitiness. You could also sprinkle in some toasted coconut or nuts for crunch. This adds texture and makes your dish even more delightful. For the full recipe, check out the Mango Paradise Sticky Rice section. When you have leftover mango sticky rice, you want to keep it fresh. Here are some tips: - Refrigeration Tips: Store the sticky rice in an airtight container. It will stay good in the fridge for about 3 to 4 days. Always let the rice cool to room temperature before sealing it to avoid condensation. - Freezing Sticky Rice: If you want to keep it longer, consider freezing. Wrap the sticky rice tightly in plastic wrap. Then place it in a freezer bag. This way, it can last up to 3 months. You can enjoy your mango sticky rice again with these methods: - Microwave vs. Stovetop: The microwave is quick and easy. Place the rice in a bowl, add a splash of water, and cover it. Heat in short bursts until warm. The stovetop can be better for texture. Add a little coconut milk to a pot, then heat the rice gently over low heat. - Maintaining Texture and Flavor: When reheating, stir the rice often. This helps it warm evenly. Adding coconut milk will also keep it creamy and flavorful. You should know how long your mango sticky rice lasts: - How Long Can You Store It? In the fridge, it lasts 3 to 4 days. In the freezer, it can be good for up to 3 months. - Signs of Spoilage: Check for off smells or a change in color. If you see mold or a strange texture, it’s best to throw it away. Always trust your senses! Mango sticky rice is a sweet dessert from Thailand. It features glutinous rice cooked in creamy coconut milk. This dish is very popular in Thai cuisine, often enjoyed as a treat during festivals or special occasions. The soft, sweet rice pairs perfectly with ripe mango slices. The dish represents a delightful mix of flavors and textures. You should not use regular rice. Regular rice will not give the same sticky texture. Glutinous rice is key to achieving that chewy bite. If you cannot find glutinous rice, look for sushi rice as an alternative. It has a similar texture but may not be as sticky. You can easily change the sweetness of your mango sticky rice. To do this, modify the amount of sugar you use. Start with less sugar and add more to taste. If you want alternatives to granulated sugar, try using honey or maple syrup. These can add unique flavors while still sweetening your dish. Mango sticky rice is a simple, yet delicious dessert. It requires just three main ingredients: sticky rice, coconut milk, and fresh mango. You can add garnishes like sesame seeds or mint for that extra touch. Follow the easy steps for preparation and assembly to create this flavorful dish. Remember to choose ripe mangoes for the best taste. With tips on storage and variations, you can enjoy this treat anytime. Experiment with flavors and enjoy the process. Your mango sticky rice will shine with every bite!](https://joymealplan.com/wp-content/uploads/2025/06/5d335504-2931-49f8-8062-6f7285d5d66d-768x768.webp)