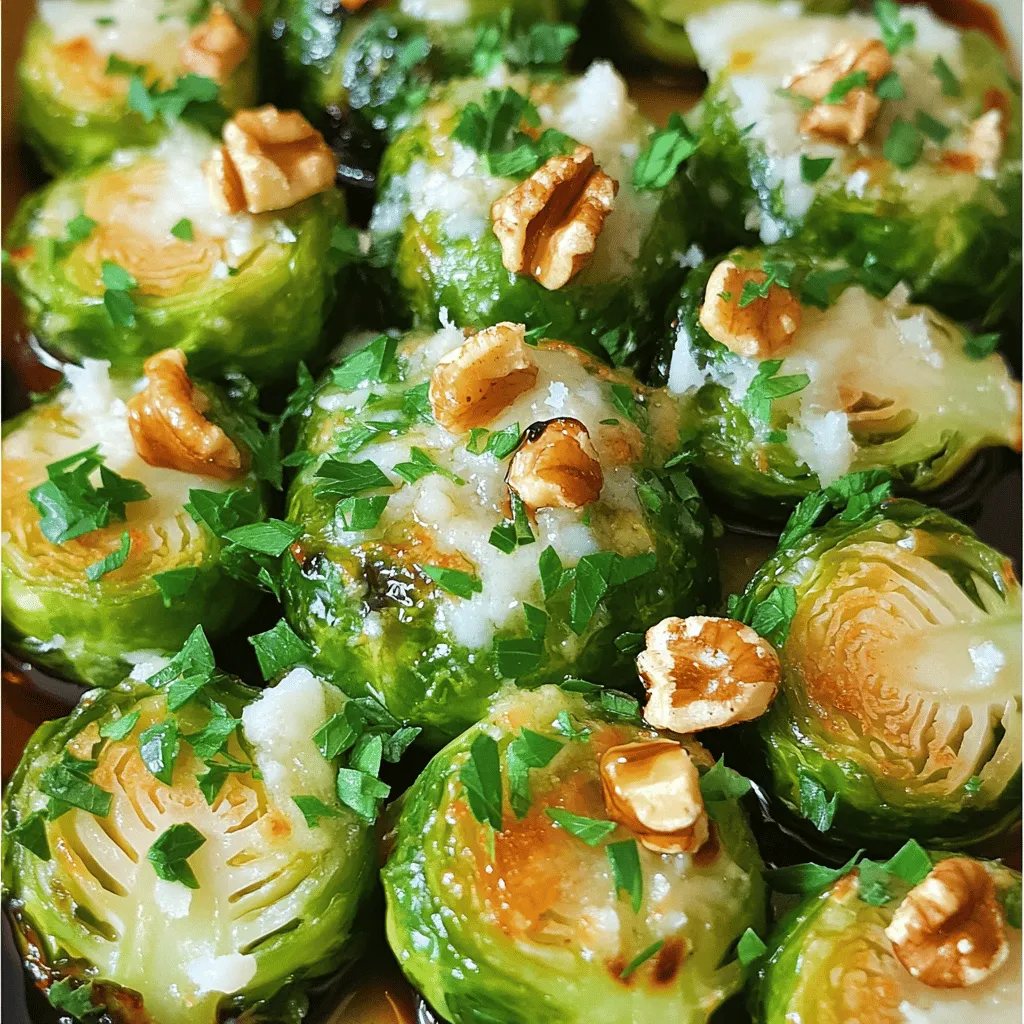
Balsamic Glazed Brussels Sprouts Quick and Easy Recipe

Love Brussels sprouts but find them boring? Let’s change that! In this quick and easy recipe, I’ll show you how to make Balsamic Glazed Brussels Sprouts that are packed with flavor. With just a few simple ingredients like balsamic vinegar and honey, you can transform these nutritious veggies into a dish everyone will crave. Ready to wow your taste buds? Let’s dive in!
Ingredients
Main Ingredients
– 1 lb Brussels sprouts
– 3 tablespoons balsamic vinegar
– 2 tablespoons honey or maple syrup
Additional Ingredients
– 3 tablespoons extra virgin olive oil
– 4 cloves garlic, minced
– Salt and pepper to taste
Optional Ingredients
– 1/4 cup grated Parmesan cheese
– 1/4 cup walnuts, toasted and chopped
– Fresh parsley, finely chopped
To make Balsamic Glazed Brussels Sprouts, you need simple, fresh ingredients. First, get Brussels sprouts. They should be trimmed and halved for even cooking. Then, grab balsamic vinegar, which adds a sweet and tangy flavor. Honey or maple syrup brings extra sweetness.
Next, use extra virgin olive oil. It helps the sprouts roast nicely. Minced garlic adds a rich flavor that enhances the dish. Season with salt and pepper to taste.
For a tasty twist, consider adding optional ingredients. Grated Parmesan cheese melts into the warm sprouts, adding creaminess. Chopped walnuts provide a nice crunch. Fresh parsley adds a pop of color and freshness.
Together, these ingredients create a delicious side dish that everyone will love.
Step-by-Step Instructions
Preparation
1. Preheat your oven to 400°F (200°C). This step is key for roasting the Brussels sprouts perfectly.
2. Trim the ends of the Brussels sprouts and slice each one in half. This helps them cook evenly.
Mixing the Ingredients
1. In a large mixing bowl, add the halved Brussels sprouts, minced garlic, balsamic vinegar, honey or maple syrup, and extra virgin olive oil.
2. Season the mixture with salt and freshly ground black pepper. Toss everything well to coat the sprouts nicely.
Roasting Process
1. Spread the Brussels sprouts in a single layer on a parchment-lined baking sheet. This allows them to roast rather than steam.
2. Place the baking sheet into the preheated oven and roast for 20-25 minutes. Shake the pan gently halfway through to help them brown evenly.
3. Check for doneness by piercing a sprout with a fork. It should be tender and slightly crispy on the edges.
This step-by-step guide will help you create a delicious dish of balsamic glazed Brussels sprouts.Enjoy cooking!
Tips & Tricks
Ensuring Perfect Roasting
To get that great, even browning, space the Brussels sprouts well on the pan. Each sprout should have room around it. If they touch, they will steam instead of roast. Make sure to shake the pan halfway through cooking. This helps them brown evenly.
The cooking time is key. Roast at 400°F (200°C) for 20 to 25 minutes. Check them at the 20-minute mark. They should be tender and slightly crispy. If they are not done, give them a few more minutes.
Garnishing Ideas
Adding cheese can boost flavor. A sprinkle of grated Parmesan adds creaminess. It melts slightly on warm sprouts, making each bite rich.
Fresh herbs like parsley bring brightness. A sprinkle of chopped parsley on top adds a nice color. It also gives a fresh taste that balances the rich glaze.
Common Mistakes to Avoid
One big mistake is overcrowding the pan. This can lead to soggy sprouts. Always use a large enough baking sheet.
Another mistake is skipping seasoning. The salt and pepper elevate the taste. Don’t forget to season well before roasting. This step enhances the dish’s flavor.
Variations
Flavor Enhancements
You can easily boost the taste of your balsamic glazed Brussels sprouts. Start by adding spices or herbs. Try red pepper flakes for heat or thyme for a fresh touch. You can also add alternative sweeteners. If you prefer, use agave syrup instead of honey or maple syrup. Each sweetener brings a unique flavor, so experiment to find your favorite.
Dietary Modifications
If you want a vegan or dairy-free option, simply skip the Parmesan cheese. You can also try nutritional yeast for a cheesy flavor without dairy. For low-carb adaptations, reduce the honey or maple syrup. This keeps the dish flavorful while lowering the carbs.
Serving Suggestions
These Brussels sprouts pair well with many main dishes. Serve them alongside roasted chicken or grilled salmon for a balanced meal. You can also get creative with serving ideas. Try topping them on a salad or mixing them into a grain bowl. Their rich flavor adds depth to any dish!
Storage Info
Short-term Storage
To keep your Balsamic Glazed Brussels Sprouts fresh, store leftovers in the refrigerator. Place them in an airtight container. They will stay good for up to 3 days. When you want to enjoy them again, just take them out and check for any changes in texture or smell before reheating.
Long-term Storage
If you want to save Brussels sprouts for later, you can freeze them. First, let them cool completely after cooking. Then, spread them on a baking sheet in a single layer. Freeze for a few hours until they are solid. Once frozen, transfer them to a freezer bag. They will last for about 3 months. Make sure to label the bag with the date.
Reheating Instructions
When it’s time to eat your Brussels sprouts again, reheating is simple. The best way is to use an oven. Preheat it to 350°F (175°C). Spread the sprouts on a baking sheet and heat for about 10-15 minutes. This helps keep them crispy. You can also microwave them, but they may become soft. If you use the microwave, heat in short bursts to avoid overcooking. Enjoy your leftover sprouts just as much as the first time!
FAQs
Can I use frozen Brussels sprouts?
Yes, you can use frozen Brussels sprouts. However, they may lose some flavor and texture. Frozen sprouts often become mushy when cooked. For best results, I recommend using fresh Brussels sprouts. Fresh ones will give you a crisp bite and better flavor.
How to cut Brussels sprouts properly?
Cutting Brussels sprouts is simple. Start by trimming the stem end. Then, slice them in half from the top to the bottom. If they are large, you can quarter them. This helps them cook evenly. Always make sure to wash them well before cutting.
Can I make this recipe ahead of time?
You can prepare this dish ahead of time. You can wash, trim, and cut the Brussels sprouts earlier in the day. Just store them in the fridge. When you are ready to cook, mix the ingredients and roast them. This keeps things quick and easy.
This article covered how to make tasty roasted Brussels sprouts. We started with key ingredients like balsamic vinegar and honey. Then, I shared step-by-step instructions for preparation and roasting. Tips for perfect texture came next, followed by different ways to enjoy this dish. Finally, I provided storage advice and answers to common questions.
Now you’re ready to create your own delicious roasted Brussels sprouts. Enjoy the rich flavors and share them with others!
. Yes, you can prepare Classic Caprese Skewers in advance. Assemble the skewers up to a few hours ahead of time. Just keep them in the fridge. To keep them fresh, cover them with plastic wrap. Avoid adding olive oil or balsamic glaze until you are ready to serve. This keeps the skewers from getting soggy. Right before serving, drizzle the oils and season with salt and pepper. To serve Caprese Skewers, presentation matters. Arrange them upright in a jar or glass. This creates a lovely display. You can add extra basil leaves around them for color. A small bowl of balsamic glaze on the side is a great touch. It invites guests to dip the skewers. Make sure each skewer is easy to grab. This helps keep the party fun and relaxed. You now have all the steps to create delicious Caprese skewers. From gathering fresh ingredients to assembling and serving them, it’s simple and fun. Remember to choose quality produce and experiment with variations to keep things exciting. These skewers not only look great but taste amazing too. Serve them at your next gathering, and watch your guests enjoy every bite. Enjoy your kitchen adventure, and savor the delicious results!](https://joymealplan.com/wp-content/uploads/2025/06/97cab98c-e756-45a3-bf7b-ace4126d32cb-768x768.webp)
![- 2 pounds baby potatoes, halved - 4 tablespoons high-quality olive oil - 4 cloves garlic, finely minced - 1 teaspoon dried thyme - 1 teaspoon dried rosemary - ½ cup freshly grated Parmesan cheese - Salt and freshly ground black pepper to taste - Fresh parsley, finely chopped (for garnish) - Baking sheet - Parchment paper - Mixing bowl - Spatula or hands for tossing Gathering the right ingredients is key to making Garlic Parmesan Roasted Potatoes. I always choose small, fresh baby potatoes. Their size ensures they cook evenly and stay tender inside. You’ll need high-quality olive oil to help the potatoes crisp up nicely. Fresh garlic gives a strong flavor, while dried thyme and rosemary add warmth and depth. You can use pre-grated Parmesan, but fresh is best! It melts beautifully and enhances the taste. Don't forget salt and pepper; they really make the flavors pop. Finally, chop some fresh parsley. This adds a bright touch right before serving. As for equipment, a baking sheet lined with parchment paper makes cleanup easy and helps the potatoes roast evenly. A mixing bowl is essential for tossing the potatoes with oil and spices. You can use a spatula or your hands for this task. It’s important to coat each potato well for the best flavor. For more details and step-by-step guidance, check out the Full Recipe. Set your oven to 425°F (220°C). This high heat helps the potatoes become crispy. Preheating is key for even cooking. In a large mixing bowl, add 2 pounds of halved baby potatoes. Next, pour in 4 tablespoons of olive oil. Add 4 cloves of finely minced garlic, 1 teaspoon of dried thyme, and 1 teaspoon of dried rosemary. Sprinkle salt and pepper to taste. Toss everything well. Make sure each potato piece is coated in the tasty mix. This step makes all the flavors stick. Spread the seasoned potatoes on a lined baking sheet. Make sure they are in a single layer. If they are crowded, they won’t get crispy. Roast them for 25 minutes. They should start to soften and brown. After 25 minutes, carefully take the baking sheet out. Sprinkle ½ cup of grated Parmesan cheese over the potatoes. Gently toss to coat the potatoes with cheese. Return them to the oven for another 10-15 minutes. Watch for a golden brown color and crisp texture. Once done, let the potatoes cool for a few minutes. Sprinkle fresh parsley on top for a bright finish. For the complete guide, check the Full Recipe. To get your potatoes nice and crispy, keep them spread out on the baking sheet. If they are too close together, they will steam rather than roast. This can lead to soggy potatoes, which is not what you want. Check for doneness by piercing a potato with a fork. It should slide in easily when they are ready. You can make these potatoes even better by adding some herbs. Try fresh basil or oregano for a twist. If you love garlic, feel free to add more minced cloves. Just remember, balance is key. Too much garlic can overpower the dish. Garlic Parmesan Roasted Potatoes pair well with many dishes. They go great with grilled chicken or fish. You can also serve them alongside a fresh salad for a light meal. For a special touch, garnish with chopped parsley or a sprinkle of extra Parmesan. This adds color and makes the dish look fancy. Check out the full recipe for more tips on presentation! {{image_4}} Using fresh herbs can add more flavor than dried ones. Fresh herbs have a bright taste that brings life to your dish. If you use dried herbs, remember that they are stronger. Use about one-third the amount of dried herbs as fresh. Other herbs that pair well with garlic and Parmesan include: - Oregano - Basil - Chives - Dill These herbs can change the taste and make it your own. If you're looking for vegan options, try using vegan cheese. Many brands offer cheese that melts well and tastes great. For gluten-free needs, ensure your cheese is certified gluten-free. Potatoes are naturally gluten-free, making them a safe choice. For a quicker option, you can use an air fryer. The air fryer cooks potatoes fast and makes them super crispy. Cook them at 400°F for about 20 minutes, shaking the basket halfway through. Grilling the potatoes adds a smoky flavor. Toss halved potatoes with oil and seasonings, then wrap them in foil. Grill them over medium heat for 25-30 minutes. This method gives a delicious char and keeps the potatoes soft. Try these variations to make your Garlic Parmesan Roasted Potatoes even better! For the complete recipe, check out the [Full Recipe]. After enjoying your Garlic Parmesan Roasted Potatoes, store any leftovers in a safe way. Let the potatoes cool down before putting them in the fridge. This helps keep their taste and texture. Use an airtight container to keep them fresh. You can also use a zip-top bag, but make sure to remove as much air as possible. This keeps them from getting soggy. When it's time to eat leftovers, you have two good options: the oven or the microwave. The oven is best for keeping the crispiness. Preheat your oven to 375°F (190°C). Place the potatoes on a baking sheet and heat for about 10-15 minutes. Flip them halfway for even heating. If you're short on time, the microwave works, but it may make them soft. Heat in 30-second intervals until warm. To restore some crispiness in the microwave, use a plate lined with paper towels. This absorbs extra moisture. Enjoy your tasty dish again! For the full recipe, check out the details in the previous sections. To make Garlic Parmesan Roasted Potatoes crispy, follow these tips: - Use high heat: Preheat your oven to 425°F (220°C). High heat helps the potatoes crisp up. - Cut potatoes evenly: Halve the baby potatoes into similar sizes. This ensures they cook evenly. - Don’t overcrowd: Spread the potatoes in a single layer on the baking sheet. This allows air to circulate and helps them brown nicely. - Flip halfway: Toss the potatoes halfway through roasting. This promotes even browning and crispiness. - Add cheese at the right time: Sprinkle the Parmesan halfway through roasting. This helps it melt and form a crispy crust. Yes, you can use different types of potatoes. Here are some good options: - Yukon Gold: These are creamy and buttery. They roast well and have great flavor. - Red Potatoes: Their skin is thin and they hold their shape well when cooked. - Russet Potatoes: These are starchy and create a fluffy inside. They can also get nice and crispy. If you need a cheese alternative, consider these options: - Pecorino Romano: This cheese has a similar flavor and works well in this dish. - Nutritional Yeast: For a vegan option, sprinkle nutritional yeast for a cheesy flavor. - Grated Mozzarella: This cheese melts well, though it won't have the same sharpness. For the full recipe, check the Garlic Parmesan Roasted Potatoes section above. Garlic Parmesan Roasted Potatoes are easy and delicious. We covered the key ingredients, tools, and steps to roast your potatoes perfectly. You learned how to ensure crispiness and enhance flavor with herbs. I shared different variations to suit diets and cooking methods. Storing and reheating tips help keep leftovers tasty. With simple adjustments, you can enjoy this dish your way. Try making it for your next meal; it’s sure to impress. Enjoy the tasty results and happy cooking!](https://joymealplan.com/wp-content/uploads/2025/06/60840b92-dc9c-41ba-bef9-b9347b379e7b-768x768.webp)