Carrot Cake Pancakes Irresistible Breakfast Delight
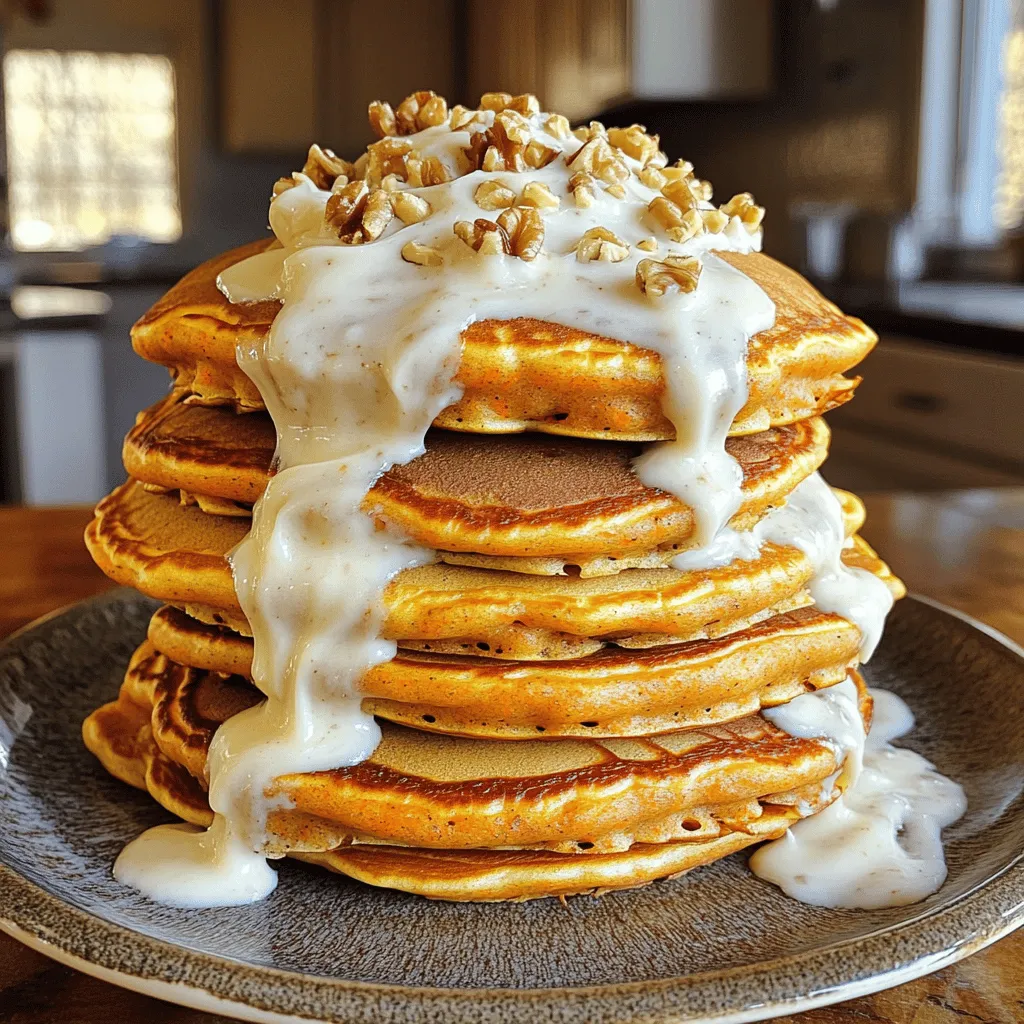
Carrot Cake Pancakes are the ultimate morning treat! Imagine fluffy pancakes packed with the warm spices and sweet flavor of carrot cake. They’re easy to make and perfect for brunch or a cozy breakfast. In this post, I’ll share the ingredients, step-by-step instructions, and tips to make them amazing. You can even find fun variations to suit your taste. Let’s dive into this delicious breakfast delight together!
Ingredients
List of Ingredients
To make carrot cake pancakes, you need:
– 1 cup all-purpose flour
– 1 teaspoon baking powder
– 1/2 teaspoon baking soda
– 1/2 teaspoon ground cinnamon
– 1/4 teaspoon ground nutmeg
– 1/4 teaspoon salt
– 1 cup finely grated carrots (about 2 medium carrots)
– 1/4 cup packed brown sugar
– 1/4 cup granulated sugar
– 1 large egg, lightly beaten
– 1 cup buttermilk, at room temperature
– 1/4 cup unsweetened applesauce
– 2 tablespoons unsalted butter, melted (plus extra for cooking)
– 1/2 cup chopped walnuts or pecans (optional)
– Cream cheese frosting for topping (optional)
Ingredient Substitutions
If you need to swap some ingredients, here are helpful options:
– Flour: Use whole wheat flour for a healthier twist.
– Buttermilk: Make a quick substitute by mixing milk with vinegar or lemon juice.
– Egg: Replace with a flaxseed meal for a vegan option.
– Brown Sugar: Coconut sugar works well if you want a lower glycemic index.
– Nuts: You can skip the nuts or use sunflower seeds for crunch.
Nutritional Information
Carrot cake pancakes can be a nutritious breakfast. Here’s a quick look at what’s inside:
– Calories: About 200 per pancake (without frosting)
– Protein: 6 grams
– Carbohydrates: 30 grams
– Fat: 7 grams
– Fiber: 2 grams
– Sugars: 8 grams
This dish is a great way to start your day with some veggies and whole grains.
Step-by-Step Instructions
Preparation of Dry Mixture
Start by gathering your dry ingredients. In a large mixing bowl, add 1 cup of all-purpose flour, 1 teaspoon of baking powder, and 1/2 teaspoon of baking soda. Next, sprinkle in 1/2 teaspoon of ground cinnamon, 1/4 teaspoon of ground nutmeg, and 1/4 teaspoon of salt.
Whisk all these ingredients together until they are well mixed. This step helps to ensure that your pancakes rise properly. Set this bowl aside while you work on the wet mixture.
Incorporating Wet Ingredients
Now, move on to your wet ingredients. In another bowl, combine 1 cup of finely grated carrots, which is about 2 medium carrots. Add 1/4 cup of packed brown sugar and 1/4 cup of granulated sugar. Crack in 1 large egg and pour in 1 cup of room temperature buttermilk. Add 1/4 cup of unsweetened applesauce and 2 tablespoons of melted unsalted butter.
Stir this mixture until it is smooth and well combined. The carrots will add moisture and sweetness to your pancakes.
Cooking Procedure
It’s time to cook! Heat a non-stick skillet or griddle over medium heat. Add a small pat of butter, allowing it to melt and coat the skillet. For each pancake, pour about 1/4 cup of batter onto the hot surface.
Cook until bubbles form on the surface, about 2-3 minutes. Carefully flip the pancake and cook for another 2-3 minutes, until both sides are golden brown. Repeat this until you cook all the batter.
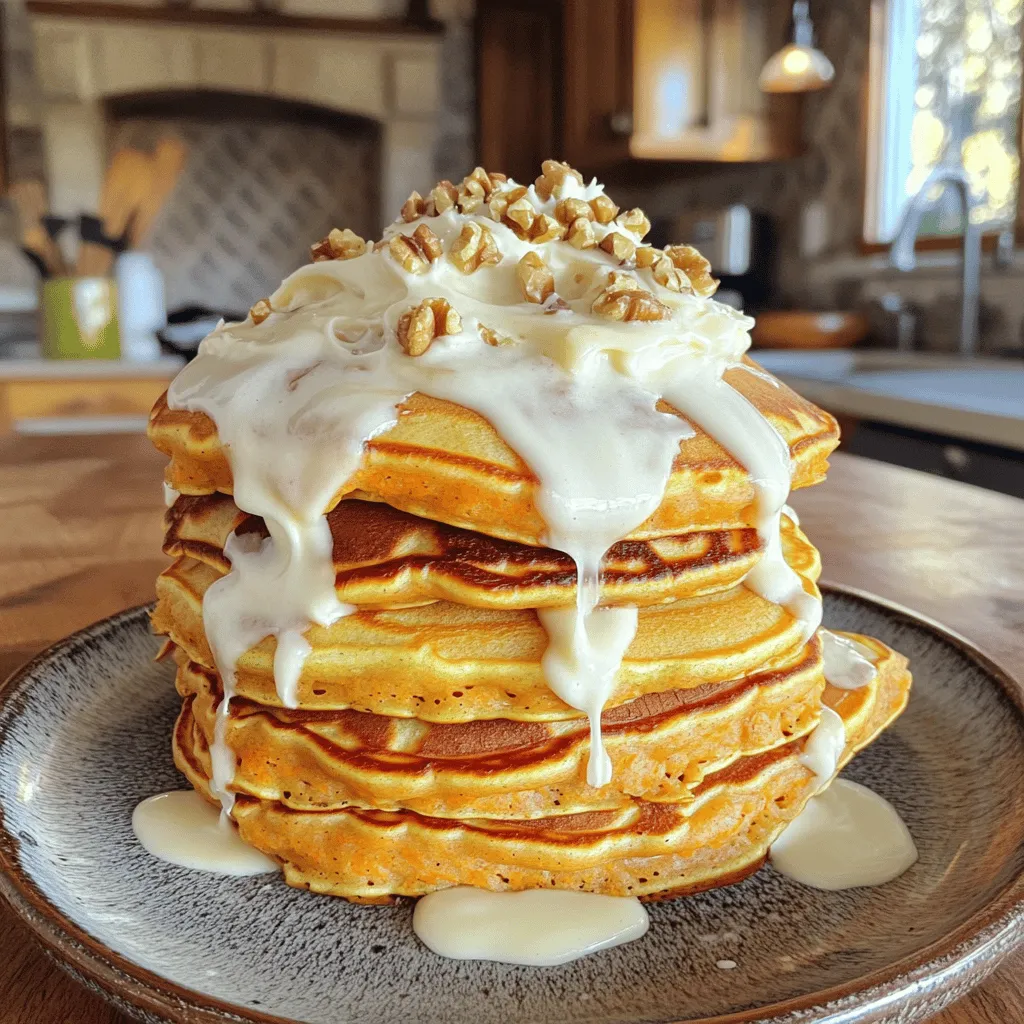
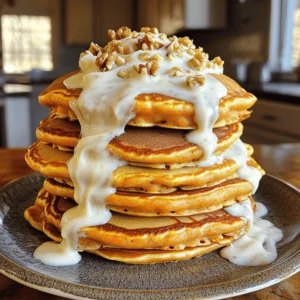
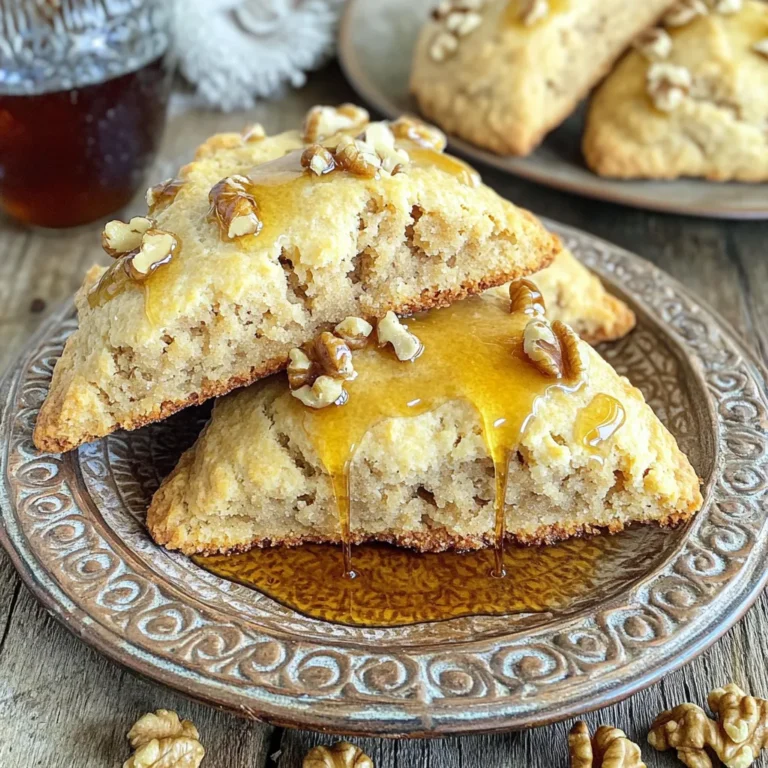
Serve your pancakes warm, topped with cream cheese frosting if you like. You can even sprinkle some extra nuts on top for a great crunch. Enjoy your delicious Carrot Cake Pancakes!
Tips & Tricks
Achieving Fluffy Pancakes
To make your carrot cake pancakes fluffy, mix gently. Overmixing can create tough pancakes. It’s okay to leave some lumps in your batter. This helps keep them light and airy. Also, make sure your baking powder and baking soda are fresh. Old leavening agents can lead to flat pancakes.
Storing Leftover Pancakes
If you have extra pancakes, let them cool first. Place them in a single layer on a plate. Use parchment paper between layers to avoid sticking. Cover with plastic wrap or foil. You can store them in the fridge for up to 3 days. For longer storage, freeze them. Wrap each pancake in plastic wrap and place them in a freezer bag. They last up to 2 months in the freezer.
Serving Suggestions
These pancakes shine with cream cheese frosting on top. You can also sprinkle chopped nuts for crunch. Try adding fresh fruit like berries or banana slices. A drizzle of maple syrup can enhance the sweetness. For a fun twist, serve with a dollop of yogurt. Enjoy exploring different toppings to find your favorite!
Variations
Gluten-Free Options
You can easily make carrot cake pancakes gluten-free. Simply swap the all-purpose flour for a gluten-free blend. Look for a blend that contains xanthan gum, which helps the pancakes rise. This will give you a fluffy texture. Many blends work well, like almond or coconut flour. Just remember, each flour absorbs different amounts of liquid. You might need to adjust the buttermilk or applesauce accordingly.
Vegan Adaptations
If you want a vegan version, replace the egg with a flaxseed meal. Mix one tablespoon of flaxseed with three tablespoons of water. Let it sit for a few minutes until it thickens. Use plant-based milk instead of buttermilk. Almond milk or oat milk works great here. Swap the melted butter with coconut oil or a vegan butter alternative. You won’t miss the dairy at all!
Flavor Enhancements
To jazz up your carrot cake pancakes, add spices or fruits. Extra cinnamon or a dash of ginger can boost flavor. You could also mix in some raisins or pineapple for added sweetness and moisture. If you love nuts, consider pecans or walnuts. They add a nice crunch. You can even top the pancakes with fresh fruit like berries or bananas for a fresh twist. Want a sweet finish? Drizzle with maple syrup or honey for extra goodness.
Storage Info
How to Store Pancakes
You can keep your carrot cake pancakes fresh in the fridge. Place them in an airtight container. They will stay good for about three days. If you want to store them longer, consider freezing.
Reheating Tips
To reheat your pancakes, use a microwave or a skillet. In the microwave, heat them for about 20-30 seconds. For the skillet, warm them over medium heat for a minute on each side. This keeps them soft and tasty.
Freezing Pancakes
Freezing pancakes is easy. First, let them cool completely. Then, stack them with parchment paper in between. Place the stack in a freezer bag or container. You can freeze them for up to three months. When you want them, just reheat as described above. Enjoy your delicious breakfast treat any time!
FAQs
Can I make Carrot Cake Pancakes ahead of time?
Yes, you can make Carrot Cake Pancakes ahead of time. Cook the pancakes and let them cool. Then, stack them with parchment paper in between. Place the stack in an airtight container. You can store them in the fridge for three days. For longer storage, freeze them for up to three months. To enjoy later, simply reheat them in the microwave or toaster.
How do I make them less sweet?
To make your Carrot Cake Pancakes less sweet, reduce the sugar. You can cut both the brown sugar and granulated sugar by half. Another option is to use unsweetened applesauce. This keeps moisture but lowers sweetness. You can also add more spices, like cinnamon and nutmeg, for flavor without sugar.
What toppings pair best with Carrot Cake Pancakes?
The best toppings for Carrot Cake Pancakes include:
– Cream cheese frosting
– Chopped walnuts or pecans
– A sprinkle of cinnamon
– Fresh fruit, like banana or pineapple
– Maple syrup for added sweetness
Feel free to mix and match these toppings. They add texture and flavor, making your breakfast even more delightful.
We explored how to make tasty carrot cake pancakes. You learned about ingredients, substitutions, and nutrition. I shared step-by-step instructions for perfect pancakes. We went over tips for fluffiness and how to store leftovers. I also suggested gluten-free and vegan options. Finally, I answered common questions about meal prep and toppings.
Try these pancakes for breakfast. You won’t be disappointed! Enjoy the flavors and fun!
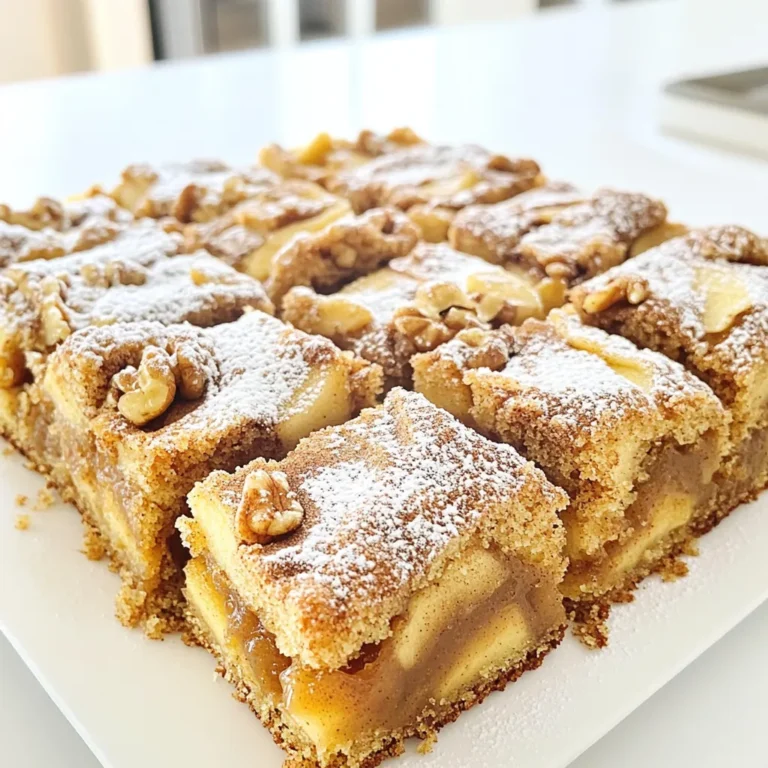


![- 1 ½ cups all-purpose flour - 1 teaspoon baking powder - ½ teaspoon baking soda - ¼ teaspoon salt - ½ cup unsalted butter, softened - 1 cup granulated sugar - 2 large eggs, room temperature - Zest of 1 lemon - 2 tablespoons lemon juice - ½ teaspoon vanilla extract - ½ cup Greek yogurt - 1 cup fresh blueberries - 1 tablespoon flour (for coating blueberries) Gather these ingredients before you start baking. They are the stars of this loaf. The butter gives it a rich taste while the lemon adds brightness. The blueberries bring sweetness and color. Make sure your butter is softened. It helps mix well with sugar. Room temperature eggs also blend better. The Greek yogurt adds moisture and keeps the loaf fluffy. The flour, baking powder, baking soda, and salt work together to give the loaf structure. The lemon zest and juice infuse a fresh, zesty flavor. Coating the blueberries in flour helps them stay suspended in the batter. This step is key to a beautiful loaf. You will love how all these flavors come together. For the full recipe and instructions, check out the [Full Recipe]. - Preheat your oven to 350°F (175°C). - Grease a 9x5-inch loaf pan with butter or cooking spray. - Lightly dust the pan with flour, or line it with parchment paper. - In a medium bowl, whisk together 1 ½ cups of all-purpose flour, 1 teaspoon of baking powder, ½ teaspoon of baking soda, and ¼ teaspoon of salt. - In a large bowl, cream together ½ cup of softened butter and 1 cup of granulated sugar until light and fluffy, about 2 to 3 minutes. - Add 2 large eggs, one at a time, mixing well after each. Stir in the zest of 1 lemon, 2 tablespoons of lemon juice, and ½ teaspoon of vanilla extract until well combined. - Gradually add the dry mixture to the wet ingredients, alternating with ½ cup of Greek yogurt. Start and end with the flour mixture. Mix gently to combine without overmixing. - In a small bowl, toss 1 cup of fresh blueberries with 1 tablespoon of flour to coat them. - Fold the blueberries into the batter gently, ensuring they are spread evenly throughout. - Pour the batter into your prepared loaf pan, smoothing the top if needed. Bake for 50 to 60 minutes, or until a toothpick inserted in the center comes out clean. - If the top browns too quickly, cover it with aluminum foil. Allow the loaf to cool in the pan for about 10 minutes. Then, transfer it to a wire rack to cool completely. For more details on the ingredients and instructions, check the Full Recipe. To make a great loaf, avoid overmixing the batter. This keeps your loaf light and fluffy. When you mix the wet and dry ingredients, do it gently. Also, use eggs and butter at room temperature. This helps them blend better and gives your loaf a nice rise. For a beautiful presentation, slice the loaf neatly. Dust each slice with powdered sugar. Add a few lemon slices beside the loaf. This adds color and a fresh look. Serve your loaf with tea or coffee. The flavors of lemon and blueberry pair well with these drinks. If your loaf is overcooked, it may be dry. Lower the oven temperature next time. Check it a few minutes earlier to avoid this. If it’s undercooked, bake it longer. Insert a toothpick into the center; it should come out clean. For a moist loaf, make sure to measure your ingredients correctly. Adding Greek yogurt helps keep it tender. Follow the Full Recipe for detailed steps and tips. {{image_4}} You can make this loaf even more fun! Try adding other fruits like raspberries or strawberries. These fruits will give a nice twist to the flavor. Spices like cinnamon or nutmeg can also add warmth. Just a pinch can change the whole taste. If you need a gluten-free version, use almond flour or coconut flour instead of all-purpose flour. For a dairy-free option, swap Greek yogurt with coconut yogurt. You can also use vegan butter instead of regular butter. These small changes still keep the loaf tasty. In summer, add more citrus flavors. Try using orange zest or juice for a bright note. For the holidays, consider adding cranberries or spices like ginger and cloves. These seasonal changes will make your loaf fit the time of year. Mix and match these ideas to create your perfect buttery lemon blueberry loaf. For the complete recipe, check out the Full Recipe. Enjoy baking! To keep your buttery lemon blueberry loaf fresh, store it in an airtight container. This prevents moisture loss and keeps the loaf soft. You can also wrap it in plastic wrap before placing it in the container for extra protection. If you have leftover slices, I suggest placing parchment paper between them. This helps avoid sticking. For the best storage, use a glass or plastic container with a tight seal. Avoid metal containers, as they can affect the loaf's flavor. Keep the container at room temperature, away from direct sunlight. If you want to freeze the loaf, wrap it tightly in plastic wrap. After that, place it in a freezer-safe bag. Make sure to remove as much air as possible to prevent freezer burn. You can freeze the loaf for up to three months. When you're ready to enjoy it, thaw the loaf in the fridge overnight. For the best texture, let it sit at room temperature for a few hours after thawing before slicing. This helps restore the moisture lost during freezing. At room temperature, the buttery lemon blueberry loaf stays fresh for about three days. If you store it properly, it can last up to a week in the fridge. Watch for signs of spoilage, such as an off smell or mold. If you notice any changes in texture, it’s best to discard the loaf. Enjoy every slice while it’s fresh for the best flavor! Yes, you can use frozen blueberries. They add great flavor. Just follow these tips for best results: - Do not thaw them before adding to the batter. This helps keep the color bright. - Coat them in flour before mixing in. This keeps them from sinking to the bottom. - Reduce baking time slightly. Frozen berries can add moisture, so check for doneness a few minutes early. If you don’t have Greek yogurt, here are some great options: - Sour cream works well and gives a nice tang. - Plain yogurt can be used, but choose a thicker variety if possible. - Cottage cheese blended smooth can also work as a substitute. You can check for doneness using these signs: - The top should be golden brown and spring back when touched. - A toothpick inserted in the center should come out clean or with a few moist crumbs. - The loaf should pull away from the sides of the pan slightly. Absolutely! Here’s how to adjust: - For mini loaves, divide the batter into smaller pans. Bake for about 25-30 minutes. - For muffins, fill each muffin cup about 2/3 full. Bake for 18-22 minutes. Keep an eye on them as baking times may vary. Serving this loaf can elevate your experience: - Slice it neatly and place it on a wooden board for a rustic look. - Dust with powdered sugar for a sweet touch. - Add lemon slices or fresh blueberries on the side for color. Pair it with tea or coffee for a delightful treat. Try the Full Recipe to create your own buttery lemon blueberry loaf! This blog post covered everything you need for a delicious lemon blueberry loaf. We went through the simple ingredients, step-by-step instructions, and helpful tips. You learned about variations, storage methods, and common questions. Baking this loaf is easy and fun. Enjoy the fresh taste and share it with others. Dive in and let your baking journey begin!](https://joymealplan.com/wp-content/uploads/2025/07/6f5180c5-8cb8-4276-b09e-ab74a4ecf0f2-768x768.webp)