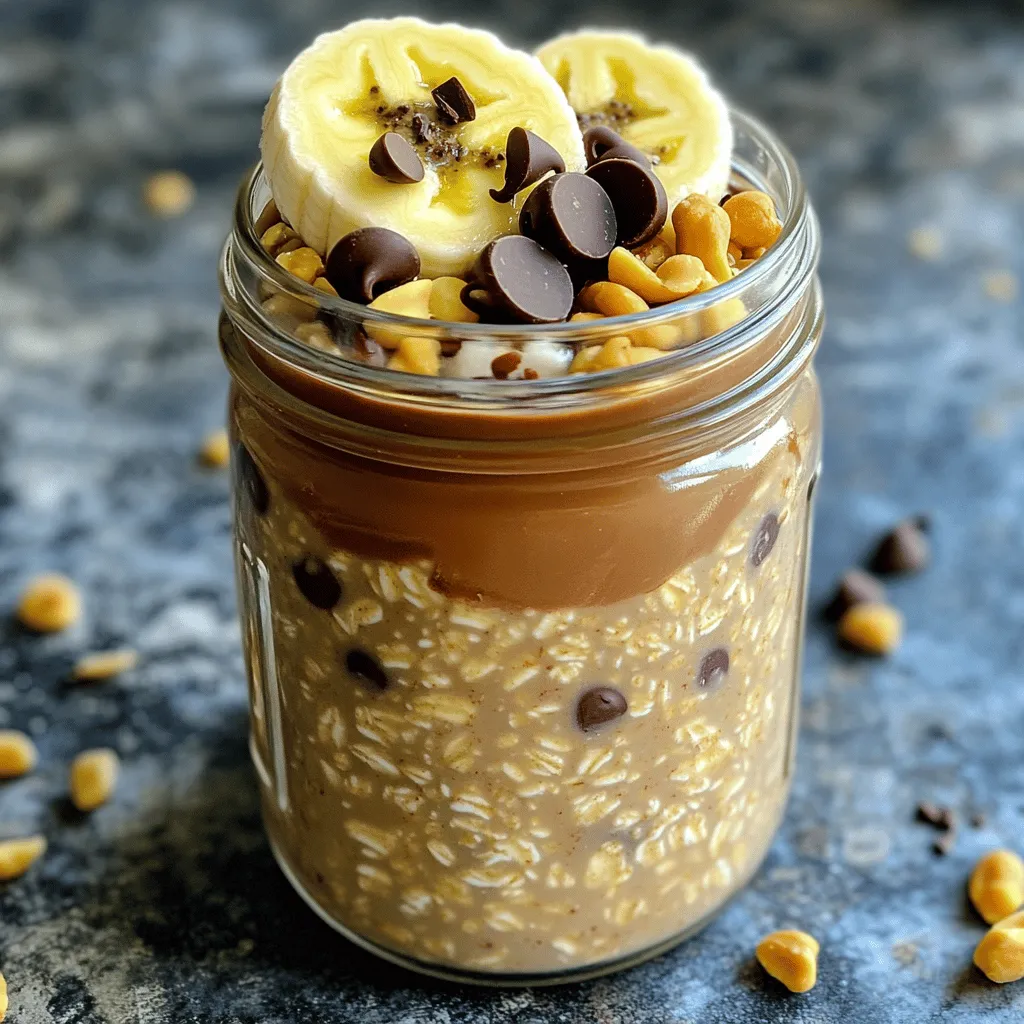
Peanut Butter Cup Overnight Oats Delicious and Easy

Looking for a quick, tasty breakfast? Try Peanut Butter Cup Overnight Oats! This sweet, creamy dish is perfect for busy mornings. Just mix oats, almond milk, and peanut butter, then let it chill overnight. You’ll wake up to a ready-to-eat delight! With rich flavors and simple steps, I’ll show you how to make this awesome meal in no time. Let’s dive into the delicious details!
Ingredients
List of Ingredients
– 1 cup rolled oats
– 2 cups almond milk (or your choice of milk)
– 1/2 cup natural peanut butter
– 1 tablespoon maple syrup (or honey)
– 1/4 teaspoon pure vanilla extract
– 2 tablespoons unsweetened cocoa powder
– 1/2 ripe banana, sliced
– 2 tablespoons chocolate chips (dark or milk chocolate)
– Chopped peanuts, for garnish
These ingredients create a tasty and healthy breakfast. Using rolled oats gives a nice texture. Almond milk adds creaminess, but you can pick any milk you like. Natural peanut butter adds protein and flavor, making this dish filling.
Maple syrup or honey gives a sweet touch without being too much. Pure vanilla extract enhances all the flavors. Cocoa powder adds a rich chocolate taste. The banana brings natural sweetness and creaminess, while chocolate chips give a fun twist. Finally, chopped peanuts add a nice crunch and look great on top.
Nutritional Information
Each serving of Peanut Butter Cup Overnight Oats has about:
– Calories: 400
– Protein: 15g
– Fat: 22g
– Carbohydrates: 45g
– Fiber: 8g
This meal is not just delicious but also offers a balanced amount of nutrition. You get good protein from the oats and peanut butter. The fiber helps you feel full, making it a great start to your day. With these ingredients, you can enjoy a sweet breakfast without guilt.
Step-by-Step Instructions
Preparation Overview
To make peanut butter cup overnight oats, you need some tools. Grab a mixing bowl and a mason jar. The mason jar is great for storage and easy to take on the go.
Mixing the Oats
Step 1: Combine 1 cup of rolled oats and 2 cups of almond milk in your mixing bowl. Stir well to make sure all the oats soak. This helps them become soft and creamy overnight.
Creating the Peanut Butter Mixture
Step 2: In a separate bowl, blend together 1/2 cup of natural peanut butter, 1 tablespoon of maple syrup (or honey), 1/4 teaspoon of pure vanilla extract, and 2 tablespoons of unsweetened cocoa powder. Mix until it’s smooth and lump-free. This mixture adds rich flavor to your oats.
Combining Ingredients
Step 3: Pour the peanut butter mixture into the bowl with the oats and almond milk. Stir until everything is mixed well. You want a nice, even blend.
Step 4: Now, gently fold in 1/2 of a ripe banana, sliced, and 2 tablespoons of chocolate chips. Be careful not to mash the banana too much. This adds sweetness and fun texture.
Step 5: Cover the bowl with a lid or seal the mason jar tightly. Place it in the fridge overnight, or for at least 4 hours. This soaking time allows the oats to absorb all the yummy flavors.
When morning comes, you’ll have tasty peanut butter cup overnight oats ready to enjoy.
Tips & Tricks
Achieving the Right Consistency
To get the best texture in your overnight oats, soak them long enough. I suggest soaking them for at least 4 hours or overnight. The longer they soak, the creamier they become. Start with a ratio of 1 cup of oats to 2 cups of milk. This mix gives you a nice, thick base. If you want it creamier, add a little more milk.
Sweetness Adjustments
You can control the sweetness in your oats. Start with 1 tablespoon of maple syrup or honey. After mixing, taste it. If you want more sweetness, add a little more maple syrup or honey. This way, you can make it just right for you.
Serving Suggestions
Toppings can make your oats even better! Try adding sliced bananas, chocolate chips, or a sprinkle of chopped peanuts. You can also drizzle some extra peanut butter on top. It adds flavor and looks great! Each serving can be a little different, so feel free to get creative with your toppings.
Variations
Different Flavor Profiles
You can switch up the taste by using different nut butters. Almond butter tastes great and adds a nutty flavor. Cashew butter gives your oats a creamy touch. Each nut butter offers a unique taste. Experiment with these options to find your favorite.
Dairy-Free & Vegan Options
If you want a dairy-free or vegan option, use plant-based milk. Almond milk, coconut milk, or oat milk works well. For a creamy texture, try full-fat coconut milk. You can also swap honey for maple syrup to keep it vegan. These changes keep your oats tasty and friendly for all diets.
Texture Variations
Add fun texture to your oats with seeds, nuts, or fruit. Chia seeds give a nice crunch and are healthy. You can add walnuts or pecans for extra flavor. Fresh berries or sliced apples bring sweetness and color. Mix and match these options to create your perfect bowl.
Storage Info
Best Practices for Refrigeration
To keep your Peanut Butter Cup Overnight Oats fresh, use airtight containers. Glass mason jars work great. They seal tightly and let you see the layers. If you use a bowl, cover it well with plastic wrap or a lid. This keeps moisture in and odors out.
Shelf Life
You can store these oats in the fridge for up to five days. This makes them perfect for meal prep. Just remember to check for any changes in smell or texture before eating. If they look or smell weird, toss them out.
Reheating Instructions
If you prefer warm oats, just scoop them into a bowl. Microwave them for 30 seconds. Stir and heat again if needed. You can also add a splash of milk to make them creamier. Enjoy your warm breakfast just like you enjoy the chilled version!
FAQs
What are overnight oats?
Overnight oats are a no-cook method for making oatmeal. You mix rolled oats with milk and let them soak overnight. This softens the oats, making them creamy. Overnight oats are easy to prepare and save time in the morning. They are also healthy and filling. You can add fruits, nuts, and seeds for extra flavor and nutrition. This makes them a great choice for busy mornings or meal prep.
Can I prepare Peanut Butter Cup Overnight Oats in advance?
Yes, you can prepare Peanut Butter Cup Overnight Oats in advance. They taste great when made the night before. Just mix all your ingredients and store them in the fridge. They can last up to 5 days. This is perfect for a quick breakfast during a busy week. To keep them fresh, use airtight containers. You can also double the recipe for more servings.
Can I use other types of milk?
Absolutely! You can use any milk you like. Some great alternatives are soy milk, oat milk, or coconut milk. Each type of milk adds its own flavor. If you’re lactose intolerant or vegan, these options work well. Just remember to choose unsweetened versions for a healthier choice. Each milk will give your oats a unique taste.
How can I customize my overnight oats?
Customizing your overnight oats is fun and easy! Here are some ideas:
– Fruits: Try berries, apples, or peaches for different flavors.
– Nuts: Add almonds, walnuts, or pecans for crunch.
– Seeds: Chia seeds or flaxseeds boost nutrition.
– Spices: Cinnamon or nutmeg can add warmth.
– Toppings: Drizzle honey or add yogurt for creaminess.
Feel free to mix and match to find your favorite combination.
Peanut Butter Cup Overnight Oats are easy to make and delicious. We gathered simple ingredients: oats, almond milk, and peanut butter. The step-by-step instructions help you mix everything well. You can tweak the sweetness and try different flavors. This meal is great for breakfast or a snack.
Remember, you can store these oats in the fridge for up to five days. Enjoy the fun of making your own version with different toppings and mix-ins. Start your day with this tasty treat!


![- Ripe avocados: Choose avocados that feel soft but not mushy. Ripe avocados add creaminess. They bring healthy fats and nutrients to the mousse. When selecting avocados, look for dark green skin. A little give when pressed is a good sign. Avoid avocados with large dark spots or cracks. - Cocoa powder: The type of cocoa powder you use matters. Choose high-quality, unsweetened cocoa for the best flavor. Dutch-processed cocoa has a smooth taste. Regular cocoa has a rich chocolate flavor. Both are great choices. - Sweeteners: Maple syrup and agave syrup are both tasty options. Maple syrup gives a unique flavor. It adds a slight caramel note. Agave syrup is milder and sweeter. It blends well without changing the taste much. You can adjust the sweetness based on your preference. - Non-dairy milk options: You can use almond, coconut, or oat milk. Almond milk is light and nutty. Coconut milk adds creaminess and a hint of tropical flavor. Oat milk is thick and wholesome. Any of these choices work well to create a smooth texture. - Flavor enhancers: Vanilla extract adds warmth and depth. A little cinnamon gives an extra layer of flavor. Both options are simple and enhance the chocolate taste. You can try adding a pinch to see what you like best. - Garnish suggestions: Dark chocolate shavings are a rich topping. They add elegance and extra chocolate flavor. Fresh berries like raspberries or strawberries bring brightness. Their color and tartness balance the rich mousse perfectly. These garnishes make the dish even more appealing. You can find the full recipe at the beginning of this article. First, you need to prepare your avocados. To peel and pit them easily, slice the avocado in half. Twist the halves apart. Use a spoon to scoop out the pit. Then, scoop the green flesh into a bowl. Next, measure your ingredients. For this mousse, you will need: - 2 ripe avocados, peeled and pitted - 1/2 cup unsweetened cocoa powder - 1/3 cup maple syrup (or agave syrup) - 1/4 cup almond milk (or any non-dairy milk of your choice) - 1 teaspoon vanilla extract - 1/4 teaspoon sea salt - A pinch of cinnamon (optional) Combine all these ingredients in a food processor. Now, let’s blend for that creamy texture. Start blending on high speed. Stop occasionally to scrape down the sides. This ensures everything mixes well. Blend until it’s smooth. Taste your mousse after blending. If you desire more sweetness, add extra maple syrup. Blend again to mix in the syrup. Adjust to your liking for the best flavor. Chilling the mousse is very important. It allows the flavors to develop and the mousse to thicken. Cover the individual dishes with plastic wrap. Chill them in the fridge for at least 30 minutes. For serving, get creative! Garnish your mousse with dark chocolate shavings or fresh berries. This adds a pop of color and texture. You can serve it in small bowls or glasses for a fun touch. Enjoy your rich and creamy vegan chocolate avocado mousse! - Over-blending the mousse: Blending too long makes it thin. Blend just until smooth. You want a creamy texture, not soup. - Using unripe avocados: Unripe avocados are hard and bitter. Always pick ripe ones. They should feel slightly soft. - Balancing sweetness: Taste your mousse before serving. If it's too bitter, add more maple syrup. Start with a little more. Keep tasting until it’s just right. - Experimenting with additional flavorings: You can try adding a pinch of espresso or a drop of peppermint extract. These flavors can make the mousse even more exciting. - Best food processors for smooth blending: Look for a powerful food processor. A 600-watt model works well. It blends the ingredients evenly and quickly. - Storage containers for chilling the mousse: Use small bowls with lids. This keeps the mousse fresh. Glass containers are a great choice. They help keep the mousse cool and tasty. For the full recipe, check out the [Full Recipe]. {{image_4}} You can make your Vegan Chocolate Avocado Mousse even more fun by adding nut butters. Try almond or peanut butter for a rich and creamy taste. These nut butters enhance the texture and add healthy fats. You can also infuse flavors like coffee or mint. A splash of coffee brings a deep, bold taste. Mint adds a refreshing twist that brightens up the dessert. Both options create a unique mousse that surprises and delights. For those with dietary needs, gluten-free variations are easy to make. All the ingredients in this mousse are naturally gluten-free. This makes it a great choice for anyone avoiding gluten. You can also opt for sugar-free alternatives. Using stevia or monk fruit keeps the mousse sweet without added sugar. These substitutes do not change the creamy texture. You can enjoy a guilt-free treat that still tastes amazing. Transform your mousse into parfaits for a stunning dessert. Layer the mousse with fresh fruits or granola in clear cups. This adds color and texture, making your dessert look beautiful. You can use the mousse as a filling for cakes or other desserts. It works well between layers of cake or as a filling for tart shells. This gives you a chance to be creative with your presentation. For the complete recipe, check out the Full Recipe section. To keep your Vegan Chocolate Avocado Mousse fresh, follow these steps: - Chill the mousse: After making it, cover your mousse with plastic wrap or a lid. This helps prevent air from getting in. - Use airtight containers: Store the mousse in airtight containers. This keeps it from absorbing other flavors in the fridge. - Refrigerate promptly: Place it in the fridge as soon as it's ready. This helps maintain its creamy texture. The mousse stays fresh for about 3 to 5 days in the fridge. Always check for any changes in smell or texture before serving. Can you freeze Vegan Chocolate Avocado Mousse? Yes, you can! Freezing is a great option if you want to store it longer. - Portion it out: Divide the mousse into small portions before freezing. This makes it easy to thaw only what you need. - Use freezer-safe containers: Make sure to use containers that are safe for freezing. This prevents freezer burn. When you're ready to enjoy it again, follow these steps to thaw: - Thaw in the fridge: Place the frozen mousse in the fridge overnight. This keeps it at a safe temperature while it thaws. - Stir before serving: After thawing, give the mousse a quick stir. This helps regain its smooth texture. By following these storage and freezing tips, you can enjoy your Vegan Chocolate Avocado Mousse at its best. For the complete recipe, check out the Full Recipe section. Yes, you can use different sweeteners. Honey or agave syrup works well too. Each sweetener changes the taste slightly. Honey adds a floral note, while agave is milder. You can experiment to find your favorite. Just keep the amount similar to maple syrup for the best results. This mousse stays fresh for about three days in the fridge. Store it in an airtight container to keep it from drying out. The mousse may thicken as it sits, so stirring it gently can help restore its creamy texture. Enjoy it within this timeframe for the best flavor and quality. Yes, this dessert is quite healthy! Avocados are full of good fats and nutrients. They can boost heart health and provide fiber. Cocoa powder is also rich in antioxidants, adding to the health benefits. This mousse is a guilt-free treat that satisfies your sweet tooth while nourishing your body. Absolutely! To make it nut-free, choose oat milk or soy milk instead of almond milk. Both options work well and keep the mousse creamy. Ensure your cocoa powder is also nut-free. With these swaps, you can enjoy this tasty dessert without any nut allergy concerns. Vegan Chocolate Avocado Mousse is simple and fun to make. You learned about key ingredients like ripe avocados, cocoa powder, and sweeteners. I shared tips on preparation, blending, and storing your mousse. Mixing in flavors or making parfaits adds creativity. Remember, use ripe avocados for the best taste. This mousse is healthy and easily customizable for different diets. Enjoy your tasty treat, and don't hesitate to share your own variations!](https://joymealplan.com/wp-content/uploads/2025/06/f08f53b2-ba89-49fb-bc73-48bd2b3a08b2-768x768.webp)