Zucchini Noodle Pad Thai Flavorful and Fresh Delight

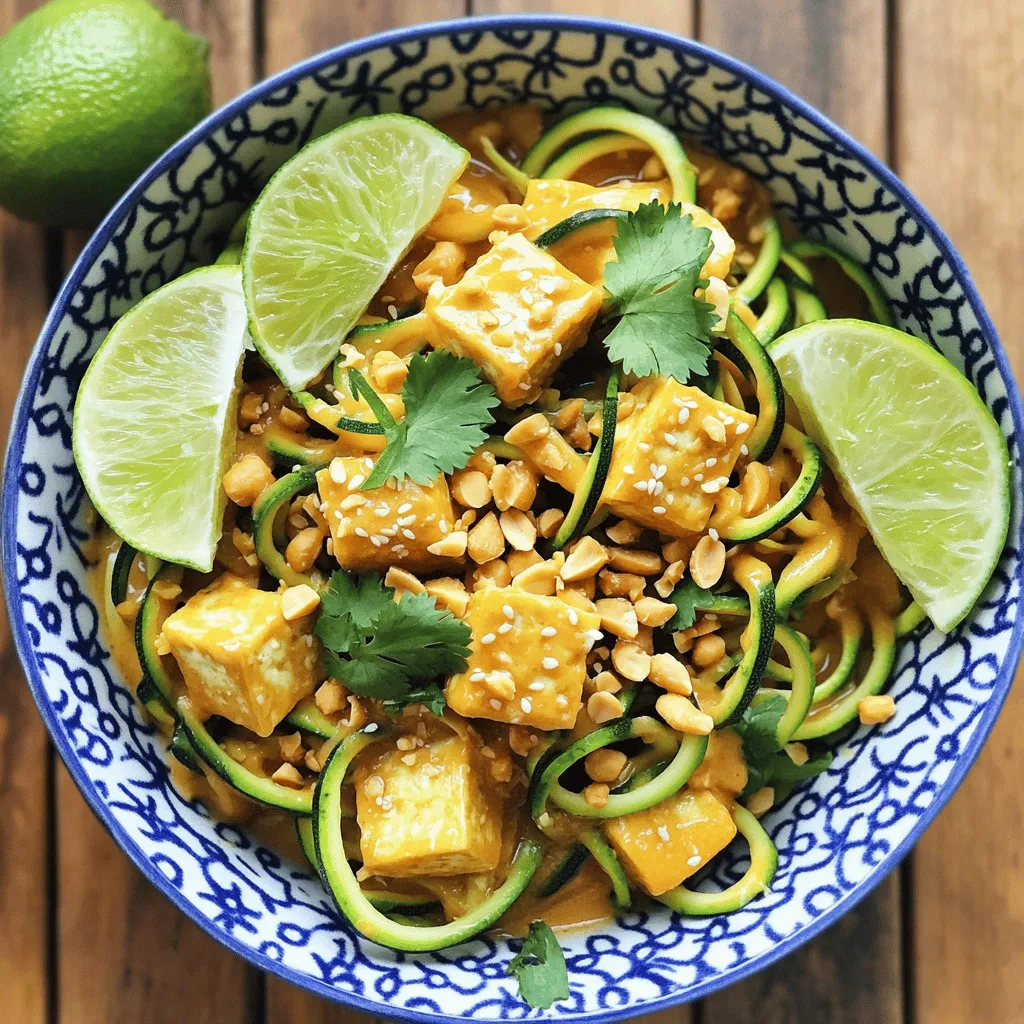
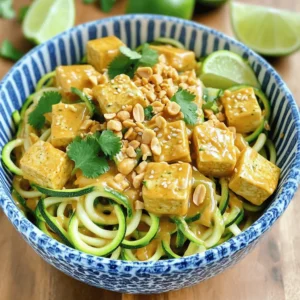
Are you looking for a fresh twist on a classic dish? My Zucchini Noodle Pad Thai is your answer! With spiralized zucchini taking the place of traditional noodles, this dish bursts with flavor while keeping it light and healthy. Plus, the creamy sauce and crunchy toppings will delight your taste buds. Get ready to impress your friends and family with this quick, easy recipe! Let’s dive in and create a flavorful masterpiece.
Ingredients
Main Ingredients
– 2 medium zucchinis, spiralized into noodles
– 1 cup firm tofu, pressed and cubed
– 2 tablespoons creamy peanut butter
– 2 tablespoons soy sauce (or tamari)
– 1 tablespoon tamarind paste
Additional Ingredients
– 1 tablespoon coconut sugar
– 2 green onions, finely sliced
– 1/4 cup fresh bean sprouts
– 2 cloves garlic, minced
– 1 tablespoon sesame oil
Garnish and Serving
– Crushed peanuts
– Lime wedges
– Fresh cilantro
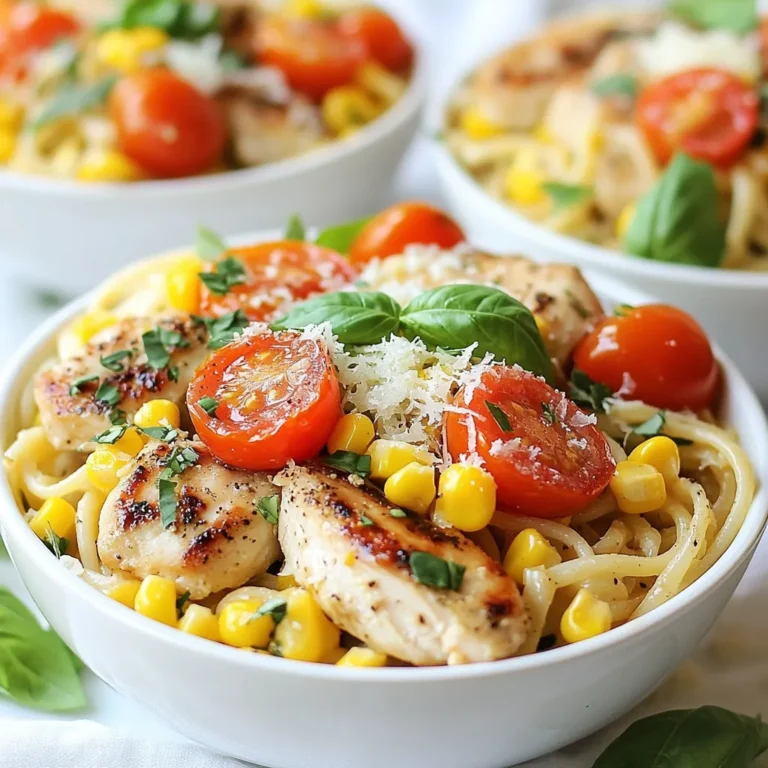
Gather these ingredients for a fresh twist on traditional Pad Thai. The zucchini noodles offer a light and crunchy base. The firm tofu adds protein and richness. Creamy peanut butter brings a nutty flavor that pairs well with the soy sauce and tamarind paste. Coconut sugar adds a hint of sweetness, balancing the dish perfectly.
The green onions and bean sprouts provide a fresh crunch. Garlic infuses the oil with a fragrant aroma. Finally, sesame oil adds depth to the flavor profile.
When you serve the dish, sprinkle crushed peanuts on top. The lime wedges add brightness, while fresh cilantro gives a burst of flavor. This combination of ingredients makes the Zucchini Noodle Pad Thai a delightful meal that feels both light and satisfying.
Step-by-Step Instructions
Preparation of Tofu
– Heat sesame oil in a skillet.
– Cook tofu until golden brown.
– Set aside the cooked tofu.
To start, I heat one tablespoon of sesame oil in a skillet over medium heat. Once the oil is hot, I add the cubed tofu. I cook the tofu until golden brown, about 5 to 7 minutes. I turn it occasionally to ensure even cooking. When it looks crispy, I take it out and set it aside on a plate. This gives the tofu a nice texture that complements the dish.
Making the Sauce
– Combine peanut butter, soy sauce, lime juice, tamarind paste, and coconut sugar.
– Whisk until smooth and creamy.
– Adjust seasoning to taste.
Next, I prepare the sauce. In a small bowl, I mix peanut butter, soy sauce, lime juice, tamarind paste, and coconut sugar. I whisk these ingredients together until I get a smooth and creamy mix. I taste the sauce and tweak it as needed. If I want more saltiness, I add soy sauce. For extra tang, I add more lime juice.
Cooking the Zucchini Noodles
– Sauté minced garlic until fragrant.
– Add zucchini noodles to skillet.
– Cook until slightly softened.
Now, I move on to the zucchini noodles. With the skillet still on medium heat, I add minced garlic to the remaining oil. I sauté the garlic for about 30 seconds, stirring so it doesn’t burn. Then, I add the spiralized zucchini noodles to the skillet. I cook them for about 2 to 3 minutes, tossing them gently. I want them to soften a bit but still keep a nice crunch.
Combining Ingredients
– Return tofu to the skillet.
– Pour sauce over the mixture.
– Toss everything to coat and heat through.
Once the zucchini noodles are ready, I return the golden tofu to the skillet. I pour the prepared sauce over everything. Next, I gently toss the mixture to coat it well. I let it cook for another minute or two. This step helps the noodles and tofu absorb all the delicious flavors.
Adding Fresh Ingredients
– Stir in green onions and bean sprouts.
– Cook for an additional minute.
After that, I mix in sliced green onions and fresh bean sprouts. I cook everything for another minute. This keeps the veggies fresh and adds a nice crunch to the dish.
Serving the Dish
– Divide the Zucchini Noodle Pad Thai among plates.
– Garnish with peanuts, cilantro, and lime wedges.
Finally, I divide the Zucchini Noodle Pad Thai among plates. I like to garnish it with crushed peanuts, fresh cilantro, and lime wedges. The lime adds a zesty kick that brightens the dish.
Tips & Tricks
Choosing Zucchini
– Select firm, fresh zucchinis.
– Look for smooth skin without blemishes.
– Plan to use them within a few days for best texture.
Tofu Preparation
– Press tofu well to remove moisture.
– Wrap tofu in a towel and place a weight on it.
– Consider marinating tofu for extra flavor.
– Use soy sauce, garlic, and ginger for a tasty marinade.
Sauce Variations
– Experiment with different nut butters.
– Almond butter or sunflower seed butter can add unique flavors.
– Adjust sweetness to personal preference.
– Add more coconut sugar for sweetness or lime juice for tang.
These tips will help you create a vibrant and tasty Zucchini Noodle Pad Thai.
Variations
Protein Alternatives
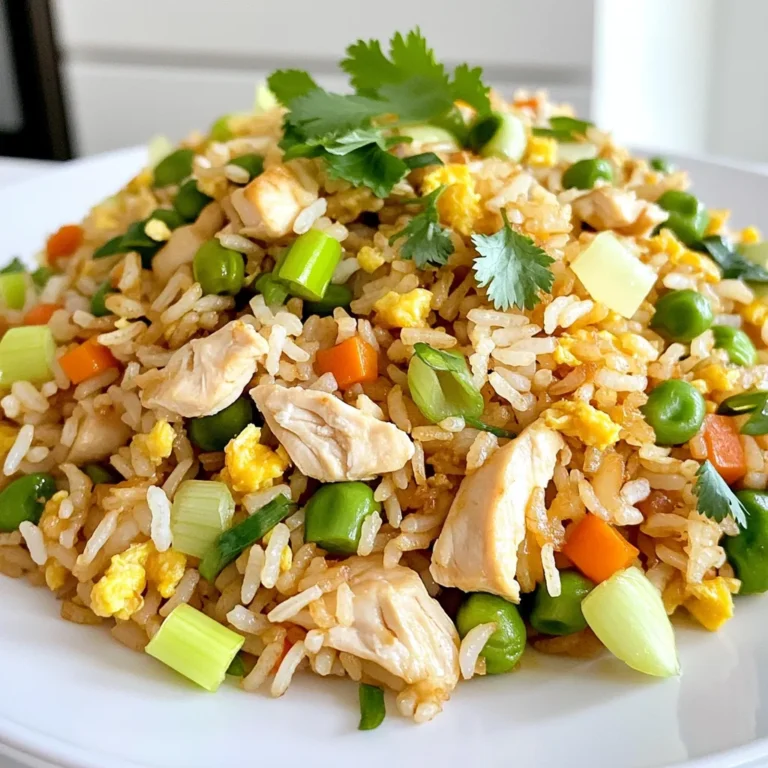
You can easily change the protein in this dish. If you don’t want tofu, try shrimp or chicken. Both add a nice flavor and texture. For a vegetarian option, chickpeas work great. They bring protein and a hearty bite to the meal.
Additions for Extra Flavor
Want more flavor? Add sliced bell peppers or carrots to the mix. They give the dish a nice crunch and bright color. You can also add fresh herbs like basil or mint. These herbs add a fresh taste that elevates the dish.
Vegan Option
If you want to make this dish vegan, check all your ingredients. Make sure they are certified vegan. If your recipe uses honey, swap it for maple syrup. This keeps it sweet but plant-based.
Storage Info
Refrigeration Guidelines
After making Zucchini Noodle Pad Thai, store any leftovers in an airtight container. This will keep them fresh and flavorful. It’s best to eat the dish within 2-3 days. After that, the zucchini may lose its crunch.
Freezing Instructions
I recommend avoiding freezing this dish. Zucchini can turn mushy when thawed. If you must freeze, keep the sauce separate. You can freeze the sauce for up to a month. Just thaw it in the fridge before using.
Reheating Tips
To reheat, use a non-stick skillet over low heat. This helps maintain the texture. Add a splash of water to restore moisture. Stir gently to combine everything well. This way, your Zucchini Noodle Pad Thai stays delicious!
FAQs
How do I spiralize zucchini?
To spiralize zucchini, use a spiralizer. You can also use a vegetable peeler. Just run the peeler along the zucchini to create thin strips. This gives you the noodle shape you need for the dish.
Can I make Zucchini Noodle Pad Thai ahead of time?
Yes, you can prepare it ahead. Store the ingredients separately to keep them fresh. This way, the noodles stay crunchy and the flavors stay bright when you are ready to serve.
Is this recipe gluten-free?
Yes, if you use tamari instead of soy sauce, it is gluten-free. Tamari has a similar flavor but does not contain gluten. This makes it a great choice for those with dietary restrictions.
How do I make this dish spicier?
To add spice, include red pepper flakes or sriracha in the sauce. You can start with a small amount and increase it to suit your taste. This lets you control the heat level.
What can I substitute for tamarind paste?
If you don’t have tamarind paste, lime juice works well. Rice vinegar is another good option. Both will give a different flavor but still add the tangy taste you want in this dish.
This article shared a simple Zucchini Noodle Pad Thai recipe. You learned about the main ingredients, like zucchini and tofu, plus how to prepare and serve the dish. I also provided tips on ingredient choices and variations to boost flavor.
Now, you can create a tasty meal that fits your choices. Whether you prefer tofu, shrimp, or chickpeas, feel free to customize it. Enjoy making this healthy dish for friends or family!
![For a tasty BLT pasta salad, you need a few key ingredients. Here’s what you will use: - 8 oz fusilli pasta - 1 cup cherry tomatoes, halved - 1 cup fresh spinach, roughly chopped - 1 cup cooked turkey bacon, finely chopped - 1/2 cup red onion, diced These ingredients give your salad great flavor and texture. The fusilli pasta holds dressing well. Cherry tomatoes add a burst of sweetness. Fresh spinach adds color and nutrients. Turkey bacon gives a nice crunch. Now, let’s talk about the dressing. The right seasoning makes a big difference. Here’s what you need: - 1/2 cup mayonnaise - 2 tablespoons Greek yogurt - 1 tablespoon apple cider vinegar - 1 teaspoon garlic powder - Salt and black pepper to taste This creamy dressing balances the salad. Mayonnaise and yogurt add richness. Apple cider vinegar brings a tangy touch. Garlic powder enhances the flavors, while salt and pepper season everything just right. To make your salad even better, you can add some fun toppings. Consider these options: - Fresh basil leaves, for garnish Basil adds a fresh aroma and flavor. You can also use extra cherry tomatoes or some nuts for crunch. These extras can make your dish more colorful and appealing. For the full recipe, check out the details to create this delightful dish! To start, bring a large pot of salted water to a boil. The salt helps add flavor to the pasta. Add 8 oz of fusilli pasta to the pot. Cook it according to the package instructions. You want it to be al dente, which means it should be firm but not hard. This usually takes around 8 to 10 minutes. Once the pasta is done, drain it in a colander. Rinse it under cold water to stop the cooking. This step cools the pasta down and helps it not stick together. In a large mixing bowl, combine the cooled pasta with the salad ingredients. Add 1 cup of halved cherry tomatoes and 1 cup of roughly chopped fresh spinach. Then, mix in 1 cup of finely chopped cooked turkey bacon and 1/2 cup of diced red onion. Gently stir everything together until well mixed. This will create a colorful and tasty base for your salad. Now, it’s time to make the dressing. In a separate bowl, whisk together 1/2 cup of mayonnaise, 2 tablespoons of Greek yogurt, and 1 tablespoon of apple cider vinegar. Then, add 1 teaspoon of garlic powder along with salt and black pepper to taste. Mix until the dressing is smooth and creamy. This dressing adds richness and flavor to your salad. Pour it over the pasta mixture and carefully fold it in. Make sure every bite gets some dressing. Taste your salad and adjust the seasoning if needed. Cover the bowl and refrigerate for at least 30 minutes. This will help the flavors blend nicely. You can find the full recipe at [Full Recipe]. To cook pasta just right, start with a large pot. Fill it with water and add salt. The salt gives flavor to the pasta. Bring the water to a boil before adding your fusilli. Stir the pasta right away to prevent sticking. Cook it according to the package time until it's al dente, which means firm but not hard. After cooking, drain the pasta and rinse it under cold water. This stops the cooking and cools it down for the salad. To make your salad burst with flavor, use fresh herbs. Fresh basil works great, adding a sweet and peppery taste. You can also try adding a pinch of crushed red pepper for heat. Garlic powder gives a nice depth, but fresh garlic can add a sharper taste. Don’t forget to taste your salad as you season. This way, you can adjust the flavors to your liking. Making your salad ahead of time is smart. It allows the flavors to mix well. I suggest making it at least 30 minutes before serving. Just cover the bowl and chill it in the fridge. If you want to prep even earlier, you can cook the pasta and chop the veggies a day ahead. Keep the dressing separate until you’re ready to serve. This keeps everything fresh and crunchy. For the full recipe, check out the detailed instructions. {{image_4}} You can make simple swaps to boost nutrition. Use whole wheat pasta instead of regular. This adds fiber and keeps you full longer. Try Greek yogurt in place of mayonnaise for a lighter dressing. You can also add more fresh veggies, like bell peppers or cucumbers, for extra crunch and vitamins. To make this salad vegan, swap turkey bacon for tempeh or crispy chickpeas. Both options give great flavor and texture. Use vegan mayonnaise for the dressing. You can also add avocado for creaminess and healthy fats. This keeps the salad rich and satisfying without animal products. Adding ingredients can make your salad more exciting. Toss in fresh herbs like parsley or chives for brightness. You could also add nuts, like walnuts or pine nuts, for a crunchy bite. Cheese lovers can sprinkle in feta or goat cheese for a tangy twist. These additions elevate the taste and make each bite special. For the full recipe, check out the complete guide. After making your BLT pasta salad, let it cool. Transfer it to an airtight container. Cover it tightly to keep air out. This helps maintain freshness. Place it in the fridge right away. Avoid leaving it out for too long. Your pasta salad will stay fresh for about three days. After that, it may lose its flavor and texture. Check for any signs of spoilage. If it smells off or looks strange, it’s best to toss it. Freezing BLT pasta salad is not recommended. The creamy dressing can separate when thawed. The texture of pasta and veggies may change, too. If you want to save it, consider freezing the pasta and dressing separately. This way, you can enjoy fresh flavors when you reassemble it. For the full recipe, check out the details provided above. Fusilli pasta works great for this salad. Its spiral shape holds the dressing well. You can also use rotini or penne if you prefer. Both types add texture to the dish. Choose any pasta that you enjoy. Just make sure it's cooked al dente for the best bite. Yes, you can use regular bacon. It will add a rich flavor to your salad. Just cook it until crispy and chop it finely. However, turkey bacon is a lighter option. It keeps the salad healthier without losing taste. To make this salad gluten-free, use gluten-free pasta. Many brands offer great options made from rice or quinoa. Always check the label to ensure it's certified gluten-free. This way, everyone can enjoy the dish without worry. Serve this salad chilled as a side dish. It pairs well with grilled meats or sandwiches. You can also enjoy it as a light main dish. For a fun twist, serve it in lettuce cups or avocado halves for added crunch. Absolutely! This salad tastes even better after chilling. You can prepare it up to a day ahead. Just store it in the fridge until ready to serve. The flavors will blend nicely, making each bite delicious. Store any leftovers in an airtight container. Keep it in the fridge for up to three days. If it seems dry, add a bit more dressing before eating. This will help refresh the flavor and texture. For the full recipe, check out the details above! This post covers all you need for making a tasty BLT pasta salad. We explored the key ingredients, step-by-step cooking, and helpful tips. You learned about variations and storage methods to keep your salad fresh. Enjoy your own twist on this dish. Whether you want to make it healthier or add more flavor, the options are yours. Now, gather your ingredients and have fun cooking!](https://joymealplan.com/wp-content/uploads/2025/07/ece4661f-932b-46ab-84ac-afef4fdb42e9-768x768.webp)