Savory Breakfast Muffins Flavorful and Easy Recipe

Do you love simple yet tasty breakfast ideas? Savory breakfast muffins are perfect for busy mornings or cozy brunches. In this easy recipe, you’ll learn how to mix fresh veggies and cheese into a fluffy muffin base. You’ll also discover fun flavor add-ins and tips to make your muffins light and delicious. Ready to impress your taste buds? Let’s get baking!
Ingredients
Essential Ingredients for Savory Breakfast Muffins
To make these savory breakfast muffins, you need some key ingredients. Here’s what you will need:
– 1 ½ cups all-purpose flour
– 1 teaspoon baking powder
– 1 teaspoon baking soda
– ½ teaspoon salt
– ½ teaspoon freshly ground black pepper
– 3 large eggs
– ¾ cup milk (dairy or non-dairy for preference)
– ¼ cup extra virgin olive oil
– 1 cup shredded cheese (cheddar or your favorite blend)
– 1 cup cooked spinach, roughly chopped
– ½ cup sun-dried tomatoes, finely chopped
– ½ cup bell pepper, diced (any color you prefer)
– ¼ cup green onions, thinly sliced
These ingredients combine to create a fluffy and flavorful muffin. Each bite bursts with taste and nutrition.
Optional Add-ins for Extra Flavor
You can customize your muffins with optional add-ins. Here are some ideas:
– Cooked bacon or sausage for a meatier option
– Feta cheese for a tangy kick
– Chopped olives for a briny touch
– Herbs like basil or parsley for freshness
Feel free to experiment. Each add-in brings its own unique flavor to the mix.
Nutritional Information Overview
These savory breakfast muffins pack a nutritious punch. Each muffin is rich in protein from eggs and cheese. The spinach adds essential vitamins and minerals. The sun-dried tomatoes contribute antioxidants and flavor. Here’s a quick look at the nutrients:
– Calories: About 150 per muffin
– Protein: 7 grams
– Carbohydrates: 15 grams
– Fiber: 2 grams
– Fat: 8 grams
This overview shows that you can enjoy these muffins without guilt. They are a tasty start to your day!
Step-by-Step Instructions
Prepping the Muffin Tin and Oven
First, set your oven to 375°F (190°C). While it heats, get your muffin tin ready. You can line it with paper liners or spray it with cooking oil. This helps the muffins not stick.
Mixing Dry Ingredients
In a big bowl, mix together the dry ingredients. Add 1 ½ cups of flour, 1 teaspoon baking powder, 1 teaspoon baking soda, ½ teaspoon salt, and ½ teaspoon black pepper. Sift these together to mix well and make them light.
Combining Wet Ingredients
In a different bowl, crack 3 large eggs. Whisk them until the yolks and whites blend together. Then, add ¾ cup milk and ¼ cup olive oil. Mix these liquids well until smooth.
Folding in Veggies and Cheese
Now, pour the wet mix into the dry ingredients. Stir gently with a spatula until just combined. Don’t overmix! Next, fold in 1 cup of shredded cheese, 1 cup of chopped spinach, ½ cup of sun-dried tomatoes, ½ cup of diced bell pepper, and ¼ cup of green onions. Make sure everything is evenly mixed.
Baking the Muffins
Use a spoon or ice cream scoop to fill each muffin cup about three-quarters full. This gives them room to rise. Bake in the hot oven for 18-20 minutes. They are done when they are golden brown and a toothpick comes out clean.
Cooling and Serving Suggestions
After baking, let the muffins cool in the pan for 5 minutes. Then, move them to a wire rack. This helps them cool evenly. Serve warm and consider adding some extra cheese on top. You can also pair them with ripe avocado or fresh fruit for a tasty breakfast.
Tips & Tricks
How to Ensure Light and Fluffy Muffins
To make light and fluffy muffins, start with room temperature ingredients. Cold eggs and milk can lead to a denser batter. Always sift the flour with baking powder and baking soda. This adds air to the mix. Be careful when mixing. Stir until just combined. Overmixing can make your muffins tough.
Perfect Baking Times and Temperature
Bake your muffins at 375°F (190°C). This temperature helps them rise evenly. Check your muffins after 18 minutes. If they are golden brown and a toothpick comes out clean, they are done. If not, give them a few more minutes. Every oven is different, so keep an eye on them.
Recommended Equipment for Easy Baking
Use a standard muffin tin for best results. I recommend using paper liners for easy cleanup. A whisk is great for mixing wet ingredients. A spatula helps fold in the veggies and cheese without overmixing. Finally, have a cooling rack ready to let the muffins cool properly. This keeps them from getting soggy.

Variations
Substitutions for Dietary Preferences
You can easily change this recipe to fit your needs. For a gluten-free option, use gluten-free flour instead of all-purpose flour. If you’re vegan, replace the eggs with flax eggs. Use almond milk or oat milk in place of dairy milk. You can also swap out cheese for a vegan cheese or nutritional yeast for a cheesy flavor without dairy.
Flavor Combinations to Try
Experiment with different flavors to keep things exciting. Add cooked bacon or sausage for a meaty kick. Try adding feta cheese and olives for a Mediterranean twist. You could also mix in some chopped herbs like basil or parsley for a fresh taste. Consider spicy jalapeños or roasted red peppers for a little heat.
Mini Muffin Version for Bite-Sized Treats
If you want smaller bites, make mini muffins! Use a mini muffin tin instead of a regular one. Fill each cup halfway and bake for 12-15 minutes. Mini muffins are great for kids or as party snacks. They are easy to grab and enjoy, and you can mix and match different flavors for fun!
Storage Info
Best Practices for Storing Muffins
To keep your savory breakfast muffins fresh, store them in an airtight container. Place parchment paper between layers to avoid sticking. They stay good at room temperature for 2-3 days. If you want them to last longer, move them to the fridge. In the fridge, they can stay fresh for about a week.
Freezing Savory Breakfast Muffins
You can freeze these muffins for later use. First, let them cool completely. Then, wrap each muffin in plastic wrap. Place the wrapped muffins in a freezer-safe bag. They can last in the freezer for up to three months. When you’re ready to eat them, just take out what you need.
Reheating Tips for Freshness
To reheat your muffins, the oven works best. Preheat your oven to 350°F (175°C). Place the muffins on a baking sheet and heat for about 10 minutes. This method keeps them warm and restores their texture. You can also use a microwave if you’re in a hurry. Heat for 20-30 seconds, but this may result in a softer muffin. Enjoy your savory breakfast muffins warm for the best taste!
FAQs
Can I use gluten-free flour for this recipe?
Yes, you can use gluten-free flour. It works well in this recipe. Just choose a blend that includes xantham gum. This helps with the texture and rise of the muffins. You may need to adjust the liquid slightly. Add a bit more milk if the batter feels too thick.
How long do these muffins last?
These muffins can last for about three days at room temperature. If you store them in an airtight container, they stay fresh longer. You can also keep them in the fridge for up to a week. Just remember to reheat them before serving for the best taste.
Can I make these muffins ahead of time?
Yes, you can make these muffins ahead of time. Bake them, let them cool, and store them. They freeze well too. Just place them in a freezer bag. When you’re ready to eat, thaw them overnight in the fridge. Then, warm them in the oven or microwave.
What type of cheese works best in savory muffins?
Cheddar cheese is a great choice for savory muffins. It melts well and adds flavor. You can also try mozzarella for a milder taste or feta for a tangy twist. Feel free to mix different cheeses for a unique flavor profile.
How to customize the ingredients based on preferences?
You can easily customize these muffins. Add your favorite veggies like zucchini or mushrooms. Swap out the sun-dried tomatoes for olives or roasted red peppers. If you prefer a spicier kick, add jalapeños. Get creative and make the recipe your own!
Savory breakfast muffins offer great taste and nutrition. We covered key ingredients, step-by-step baking, and helpful tips. You can also explore variations and storage methods to enjoy them longer. The options for customization are endless, making these muffins perfect for everyone. Try making them your own with different flavors or ingredients. Saving leftovers is easy, ensuring you savor every bite. Enjoy your delicious muffins, knowing you’ve mastered a simple yet satisfying dish!

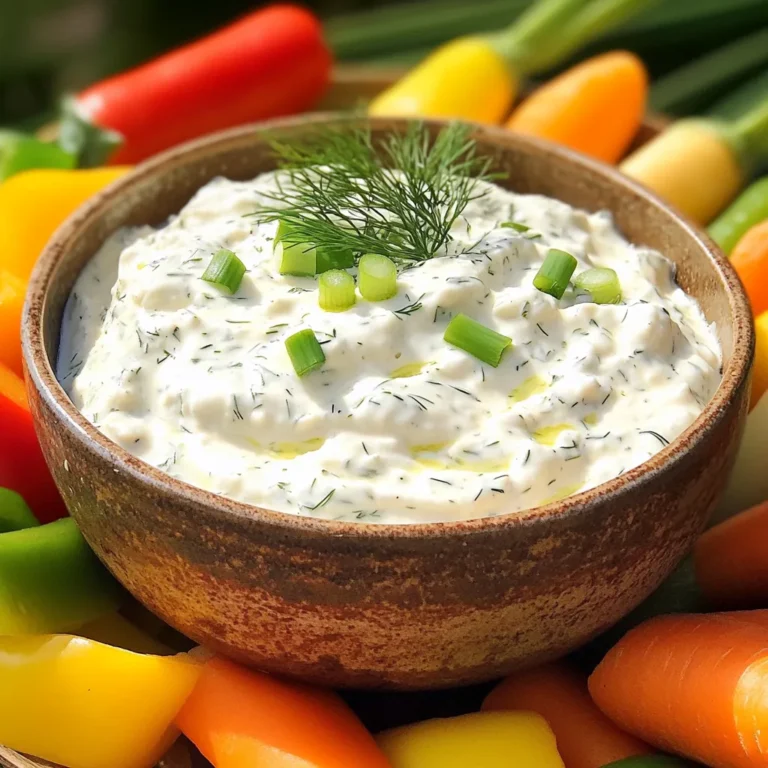
![- 1 cup fresh spinach, roughly chopped - 1 cup canned or jarred artichoke hearts, drained and diced - 1 cup cream cheese, softened - ½ cup sour cream - ½ cup mayonnaise - 1 cup shredded mozzarella cheese - ½ cup grated Parmesan cheese, divided - 2 cloves garlic, minced - ½ teaspoon onion powder - ½ teaspoon red pepper flakes (optional) - Salt and freshly cracked black pepper to taste I love gathering my ingredients before I start cooking. It makes the process smooth and fun. For this creamy spinach and artichoke dip, I use fresh spinach and canned artichokes. The fresh spinach adds a nice crunch. The artichokes bring a unique flavor that pairs perfectly with the creaminess of the cheeses. You want your cream cheese soft, so set it out ahead of time. The sour cream and mayonnaise keep the dip smooth and rich. I use mozzarella for its stretchy texture and Parmesan for a sharp bite. Don’t forget the garlic! It adds a lovely aroma and depth. The onion powder gives a subtle sweetness. If you like a little heat, add red pepper flakes. Finally, season with salt and freshly cracked black pepper to taste. These ingredients come together to create a delightful dish that everyone will love. Check out the Full Recipe for complete steps to bring this dip to life! - Preheat the oven to 350°F (175°C). This step is key for even cooking. - In a large bowl, blend cream cheese, sour cream, and mayonnaise until smooth. Use a hand mixer or spatula to get a creamy texture. - Next, fold in the chopped spinach, diced artichokes, minced garlic, and both cheeses. Use a gentle hand to keep the mix fluffy. - Transfer the mixture to a greased baking dish. Make sure it spreads evenly for nice cooking. - Sprinkle the remaining Parmesan cheese on top. This will give it a golden crust. - Bake for 25-30 minutes until it is golden and bubbly. Keep an eye on it so it doesn’t burn. Following these steps will help you create a creamy spinach and artichoke dip that is sure to impress. For the complete recipe, check out the [Full Recipe]. - Use full-fat cream cheese and sour cream. This makes the dip rich and smooth. - Add a splash of heavy cream for extra richness. This enhances the creamy texture. - Substitute Greek yogurt for sour cream and mayo. This keeps the dip creamy with less fat. - Use low-fat cheese options. This helps cut calories while still keeping flavor. These tips can help you tailor the dip to your liking. Try them out for a new twist! If you want the full recipe, check out the link. {{image_4}} You can give your dip a fun twist. First, try adding cooked bacon or sausage. This addition makes the dip heartier and adds a nice smoky flavor. Another option is to spice things up. Chopped jalapeños or a splash of hot sauce can bring some heat. This adds a kick that many guests will love. Feel free to mix up your greens. You can replace spinach with kale or Swiss chard. Both greens taste great and add a different texture. For cheese lovers, try experimenting with different types of cheese. Feta adds a tangy flavor, while cheddar gives a sharp taste. These swaps can change the dip's flavor profile entirely, making it uniquely yours. For the complete recipe, check the Full Recipe. Store any leftovers in an airtight container for up to 3 days. Make sure to let the dip cool before sealing it. This helps keep the dip fresh and tasty for your next snack. When you want to enjoy it again, simply reheat it in the oven or microwave. If you have more dip than you can eat, freeze it! Place the dip in a freezer-safe container for up to 2 months. To enjoy it later, just thaw it in the refrigerator overnight. Before baking, stir it well and add a little bit of cream if it looks dry. This way, you'll have a delicious dip ready to bake whenever you want. Check the [Full Recipe] for more details on how to prepare this tasty treat! You can prepare the dip and store it in the refrigerator before baking. This makes it easy to serve later. Just mix all the ingredients and put them in a dish. Cover the dish tightly with plastic wrap or a lid. When you are ready, bake it straight from the fridge. Yes, you can enjoy it cold as a spread too. This dip tastes great on crackers or bread. Just let it chill in the fridge until you are ready to serve. Cold or hot, it’s delicious! This dip pairs well with many snacks. It’s great with tortilla chips for a crunchy bite. You can also use sliced baguette for a softer touch. Fresh vegetable sticks add a nice crunch and color. Try carrots, celery, or bell peppers for a healthy option. This blog post explored a delicious spinach and artichoke dip. We covered all the key ingredients, simple steps, and tips for making it your own. You learned how to make it creamier and healthier, plus fun variations to try. In the end, this dip is perfect for sharing at any gathering. It’s easy, tasty, and can suit any flavor choice. Enjoy making it your way!](https://joymealplan.com/wp-content/uploads/2025/05/215b829f-066f-42c4-87e7-302b3fd8aa81-768x768.webp)

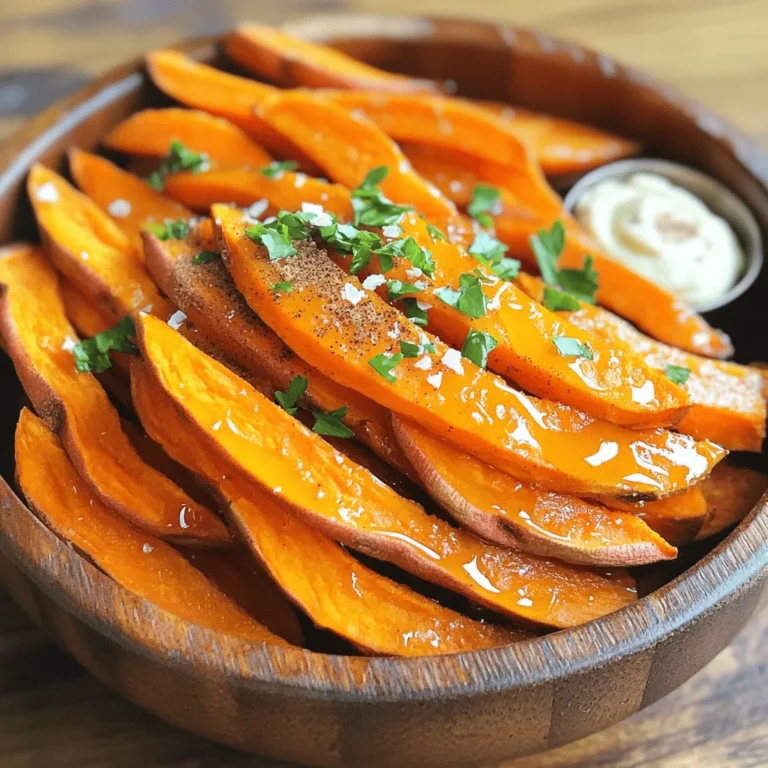
![This Mediterranean chickpea salad is fresh and easy. You can make it in just 15 minutes. It’s perfect for a quick lunch or a side dish. You can find the full recipe at the bottom. Here are the ingredients you will need: - 1 can (15 oz) chickpeas, drained and rinsed - 1 cup cherry tomatoes, halved - 1 cucumber, diced into bite-sized pieces - 1/2 red onion, finely chopped - 1/3 cup Kalamata olives, pitted and sliced - 1/4 cup feta cheese, crumbled - 2 tablespoons fresh parsley, chopped - 2 tablespoons extra virgin olive oil - 2 tablespoons fresh lemon juice - 1 teaspoon dried oregano - Salt and freshly ground black pepper to taste When you pick your ingredients, look for bright colors and firm textures. For tomatoes, choose ones that feel heavy for their size. A ripe cucumber should be smooth and firm. When selecting red onion, avoid any that have soft spots. For olives, pick a jar that looks full and well-sealed. Fresh herbs should smell fragrant and look vibrant. Always choose extra virgin olive oil for the best flavor. Finally, opt for feta that is creamy and not too dry. First, grab a large mixing bowl. Add the drained and rinsed chickpeas to the bowl. Next, toss in the halved cherry tomatoes and diced cucumber. Chop the red onion finely and add that too. Finally, include the sliced Kalamata olives. Gently mix everything to blend well. Now, it’s time for cheese and herbs. Sprinkle the crumbled feta cheese over the chickpea mix. Then, add the chopped fresh parsley. This will give the salad a nice pop of color and flavor. In a small bowl, whisk together the extra virgin olive oil and fresh lemon juice. Add the dried oregano, salt, and freshly ground black pepper. Mix until everything is well combined. This dressing will bring the salad to life. Pour the dressing over the chickpea mixture. Use a spatula or large spoon to toss gently. Make sure all the ingredients are well coated with the dressing. This step helps every bite taste amazing. Take a moment to taste your salad. If it needs more flavor, add more salt, pepper, or lemon juice. Adjust the seasoning until it suits your taste. This is your salad, so make it yours! Cover the bowl with plastic wrap or a lid. Place the salad in the fridge for at least 30 minutes. Chilling allows the flavors to meld beautifully. This step is key for a refreshing salad. Once chilled, it’s time to serve. You can serve it straight from the fridge or at room temperature. For a special touch, garnish with more crumbled feta and parsley. This adds a nice finish and makes it look inviting. For the full recipe, check out the [Full Recipe] section. When making Mediterranean Chickpea Salad, always use fresh ingredients. Fresh herbs and ripe tomatoes make a big difference. Rinse your chickpeas well to remove any canning liquid. This helps improve flavor and texture. Cut your vegetables into similar sizes for even bites. It makes the salad look nice and taste better. You can prepare this salad a day in advance. Just follow the recipe and chill it in the fridge. The flavors will blend well overnight. If you make it ahead, wait to add the feta and parsley until right before serving. This keeps them fresh and tasty. Serve this salad as a light lunch or as a side dish. It pairs nicely with grilled chicken or fish. You can also serve it with pita bread or hummus for a fun twist. For extra crunch, add some toasted nuts or seeds on top. Feel free to experiment with your favorite ingredients! Check out the Full Recipe for more ideas. {{image_4}} You can change some ingredients if you want. For example, swap feta cheese for avocado. This adds creaminess and healthy fats. If you don’t like olives, try capers instead. They bring a nice tangy flavor. You can also use any fresh herbs you like, such as mint or cilantro. This salad fits many diets. It’s already vegan if you skip the feta cheese. For low-carb eaters, reduce chickpeas and add more veggies. You can make it gluten-free by using only safe ingredients. This salad is hearty, making it perfect for those on a plant-based diet. You can change the salad with the seasons. In spring, add fresh peas or asparagus. In summer, include bell peppers or zucchini. In fall, roasted squash adds warmth. In winter, use kale for a hearty twist. You can mix and match as you like for a fresh vibe each time. Using the Full Recipe, you can create a delightful dish that fits any season or diet. Store any leftover Mediterranean Chickpea Salad in an airtight container. This keeps it fresh. Place the container in the fridge. The cold air helps maintain flavor and texture. While I don’t recommend freezing this salad, you can freeze the chickpeas. Drain and rinse them first. Place them in a freezer-safe bag. Squeeze out the air before sealing. They can last up to three months in the freezer. The salad lasts about three days in the fridge. After that, the veggies may get soggy. To keep it fresh longer, store the dressing separately. Combine it right before serving. This keeps all the flavors bright and tasty. For more details on preparing the dish, refer to the Full Recipe. Yes, you can use dried chickpeas. Just soak them overnight. Cook them until tender. This method takes longer but adds great flavor. This salad pairs well with grilled chicken or fish. You can also serve it with pita bread or quinoa. It makes a tasty side dish or a light main meal. The salad can stay fresh in the fridge for about three days. Keep it in a sealed container. The flavors will deepen as it sits. Absolutely! Just skip the feta cheese. You can replace it with vegan cheese or leave it out. The salad still tastes great without it. Yes, this Mediterranean Chickpea Salad is gluten-free. All the ingredients are safe for a gluten-free diet. Enjoy it without worry! This blog post covers how to make a delicious Mediterranean Chickpea Salad. We started with key ingredients and then went through step-by-step instructions. You learned valuable tips for prep and how to store leftovers. Variations allow for personal taste and dietary needs. In conclusion, with simple steps and fresh ingredients, you can create a tasty dish. Enjoying this salad can be fun and healthy. Experiment with it to make it your own!](https://joymealplan.com/wp-content/uploads/2025/05/7c349552-9bfa-4234-aaf2-b24410fd6834-768x768.webp)