Veggie Quesadillas Flavorful and Easy to Make Meal
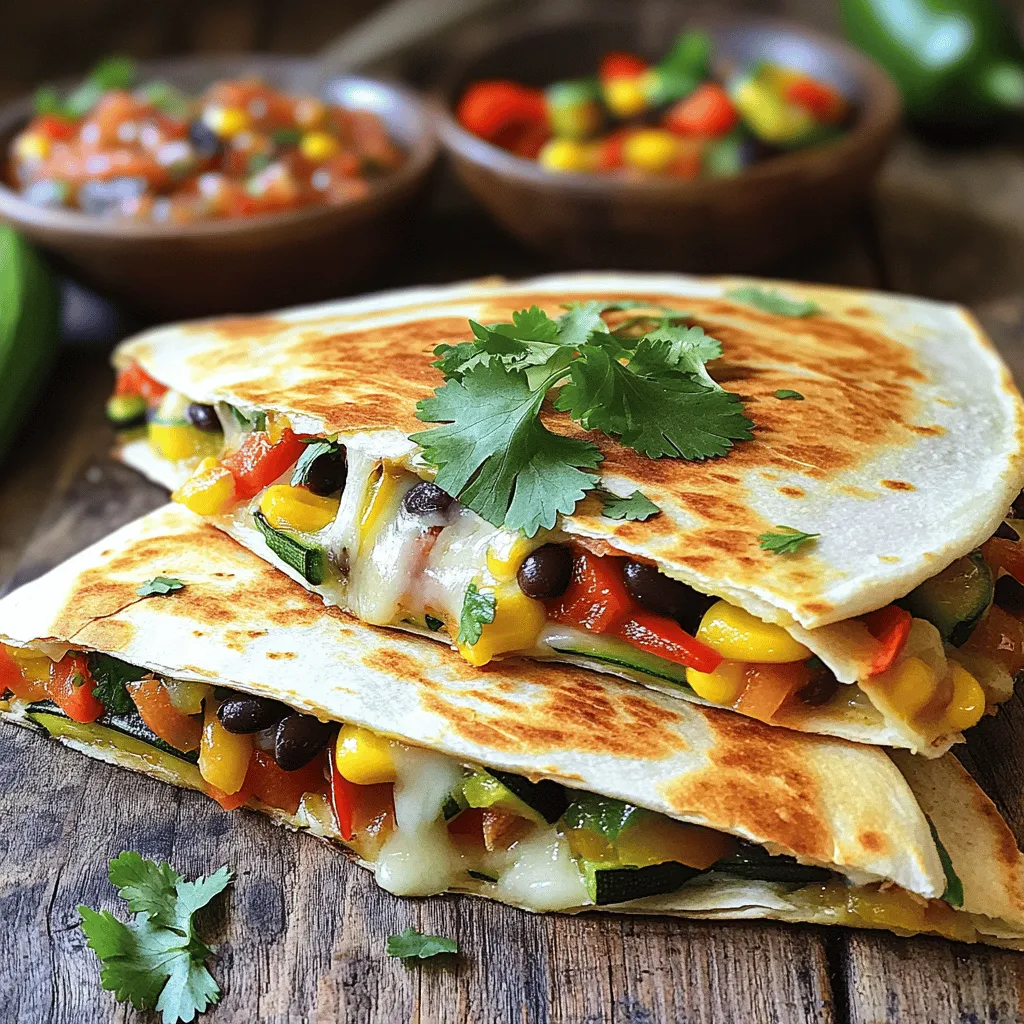
Looking for a quick, tasty meal that’s bursting with flavor? Veggie quesadillas are your answer! They’re simple to make, perfect for any meal, and packed with fresh veggies and gooey cheese. In this post, I’ll guide you through the process step by step, from choosing the best ingredients to cooking techniques that ensure a crispy finish. Get ready to enjoy your new favorite recipe!
Ingredients
Essential Ingredients for Veggie Quesadillas
– Whole wheat tortillas
– Cheese options: mozzarella and alternatives
– Vegetable selections: bell peppers, zucchini, corn, and beans
– Seasonings and oils
To make veggie quesadillas, you need a few key ingredients. First, I love using whole wheat tortillas for a healthy twist. These tortillas add fiber and a nice texture. You can also use regular tortillas if you prefer.
Next, cheese is a must. I suggest mozzarella for its great melt. You can try other cheeses too, like cheddar or pepper jack for extra flavor.
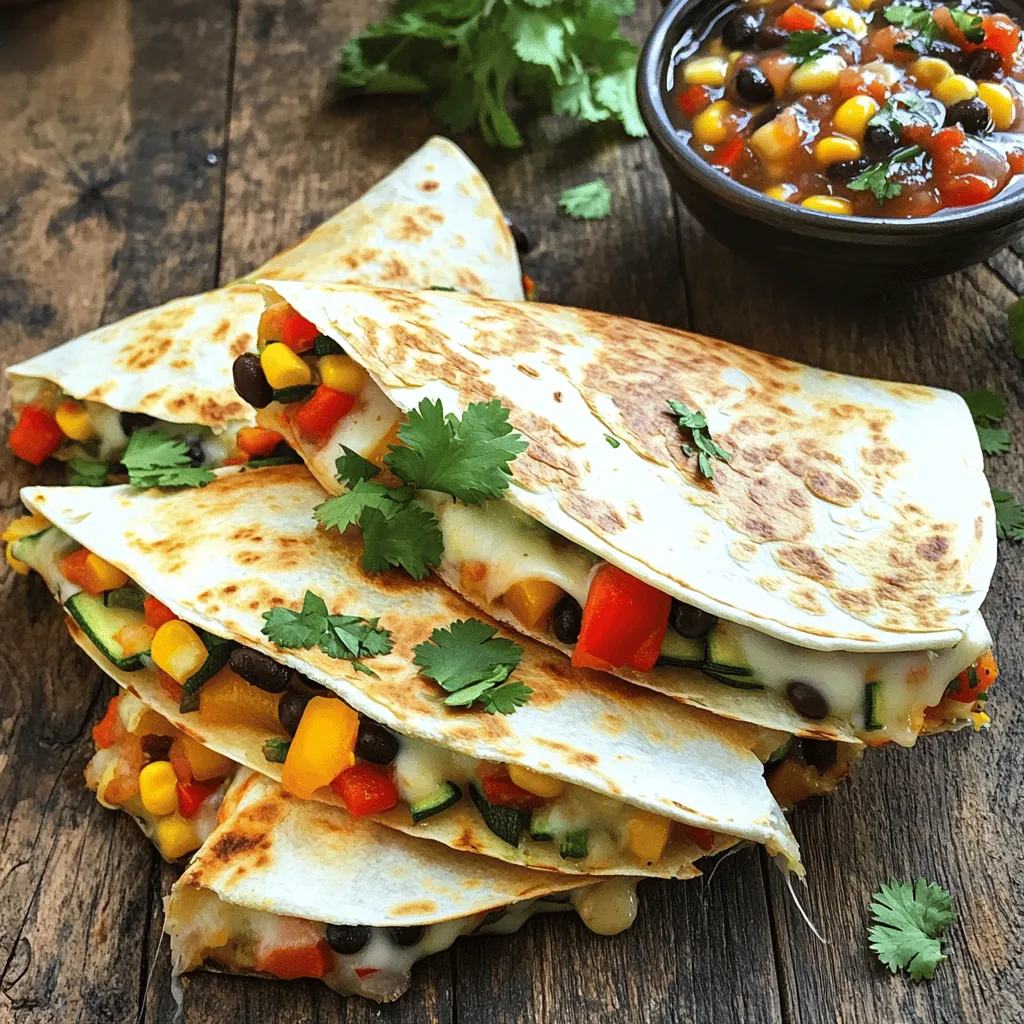
For the veggies, choose a mix that excites you. I often use bell peppers, zucchini, corn, and black beans. These veggies add color and crunch. You can even use leftover veggies from your fridge!
Lastly, seasonings make your quesadillas shine. Use ground cumin and chili powder for warmth. A drizzle of olive oil keeps everything tasty and helps the veggies cook well.
Optional Garnishes and Dipping Sauces
– Fresh cilantro
– Salsa and other salsa alternatives
Garnishes can take your quesadillas to the next level. Fresh cilantro adds a burst of flavor. If you’re not a fan, try green onions or avocado instead.
Salsa is a perfect dip for these quesadillas. You can use store-bought salsa or make your own. Other dipping sauces like guacamole or sour cream also work well.Enjoy your cooking!
Step-by-Step Instructions
Preparation Steps for Cooking
1. Heat a non-stick skillet over medium heat. Add 1 tablespoon of extra virgin olive oil. This oil adds flavor and helps cook the veggies well.
2. Once the oil is hot, add your diced red and yellow bell peppers and sliced zucchini. Sauté these for about 3-4 minutes. You want them to soften but not get mushy.
3. Next, stir in 1/4 cup of corn and 1/4 cup of rinsed black beans. Season with 1/4 teaspoon each of ground cumin and chili powder, plus salt and black pepper to taste. Cook for another 2 minutes to warm everything through. Set the veggie mix aside.
Assembling the Quesadilla
1. Wipe the skillet clean and place it back on the heat. Lay a whole wheat tortilla flat in the skillet to warm it up.
2. On one half of the tortilla, sprinkle 1/2 cup of shredded mozzarella cheese.
3. Layer your sautéed veggie mix over the cheese. Top it with more mozzarella for extra cheesiness.
4. Carefully fold the tortilla over to cover the filling. Press down gently to seal the edges.
Cooking Techniques for Perfect Quesadillas
1. Cook the folded quesadilla for about 2-3 minutes on one side. Look for a golden brown color and melted cheese.
2. To flip, use a spatula. Gently turn it over and cook for another 2-3 minutes until both sides are crispy.
3. Once cooked, remove the quesadilla from heat. Let it cool for a minute before slicing it into wedges.
4. For a fun touch, garnish with fresh cilantro and serve it with salsa for dipping.
Enjoy this simple and tasty dish!
Tips & Tricks
Perfecting Your Veggie Quesadillas
To get the perfect crispiness in your quesadillas, use medium heat. This helps the tortilla brown nicely without burning. A non-stick skillet works best for this. You want to flip the quesadilla carefully. This way, you keep all the filling inside.
For the best cheese melting techniques, use shredded cheese. Shredded cheese melts faster and spreads out evenly. Mozzarella is great, but feel free to mix in other cheeses too. Try cheddar or pepper jack for a fun twist.
Enhancing Flavor with Seasonings
To boost the flavor of your veggie quesadillas, add spices. Ground cumin and chili powder add depth. A pinch of smoked paprika can also bring a nice smoky taste. Consider fresh herbs like cilantro for an added freshness.
Customizing heat levels is easy with chili options. If you like it spicy, add diced jalapeños or red pepper flakes. For a milder taste, stick with bell peppers. It’s all about finding your perfect balance.
Cooking Methods
You can cook your quesadillas on the stovetop or bake them. Stovetop cooking gives you quick, crispy results. Baking is a great option for larger batches, but it takes longer.
If you’re making many quesadillas, use a griddle. A griddle lets you cook several at once. This saves time and ensures even cooking. Just keep an eye on the heat to avoid burning!Enjoy cooking!
Variations
Different Vegetable Combinations
You can mix and match veggies in your quesadillas. Seasonal vegetables add fun and new flavors. Try spinach, mushrooms, or even sweet potatoes. These choices keep your meals fresh and exciting. Adding protein sources like tofu or tempeh boosts nutrition. These ingredients make your quesadillas filling and satisfying. When you use different veggies, you create a colorful and vibrant dish.
Cheese Alternatives and Combinations
Cheese plays a big role in quesadillas. You can use non-dairy cheese options if you prefer. Brands now offer tasty vegan cheeses that melt well. If you want something special, try flavored cheeses. Cheddar, pepper jack, or even feta can change the whole taste. Mixing cheeses can create a unique flavor experience. Experiment until you find your favorite combo.
Gluten-Free and Low-Carb Versions
If you need gluten-free options, look for gluten-free tortillas. Many brands make tasty versions that work great. You can also try low-carb versions using cauliflower tortillas. They hold up well and taste amazing. This option is perfect for anyone watching carbs. Just make sure to adjust cooking times, as they can cook faster. Enjoy these variations for a tailored meal that suits your needs.
Storage Info
Storing Leftover Veggie Quesadillas
To keep your veggie quesadillas fresh, store them in an airtight container. This helps prevent them from drying out. You can keep them in the fridge for up to three days. When you are ready to eat, reheat them in a skillet over medium heat. This method makes them crispy again. You can also use a microwave, but they may lose some crispiness.
Freezing and Thawing Tips
If you want to save some quesadillas for later, freezing is a great option. To freeze cooked quesadillas, let them cool completely. Then, wrap each one tightly in plastic wrap or aluminum foil. Place them in a freezer-safe bag. They can last for up to three months in the freezer.
When you are ready to eat, take the quesadillas out of the freezer. Let them thaw in the fridge overnight or for a few hours at room temperature. Reheat them in a skillet or oven until they are hot and crispy again. Enjoy a quick and tasty meal anytime!
FAQs
What vegetables are best in veggie quesadillas?
You can use many tasty veggies in veggie quesadillas. Some of my favorites include:
– Bell peppers (red, yellow, or green)
– Zucchini
– Corn
– Spinach
– Mushrooms
– Onions
These vegetables mix well and add great color and flavor. You can also try seasonal veggies for a fresh twist. Combining these will give a crunch and sweetness.
Can veggie quesadillas be made ahead of time?
Yes, you can prep veggie quesadillas ahead of time. Here’s how:
– Chop your veggies and store them in an airtight container in the fridge.
– You can also cook the veggie mix and cool it before storing.
– Assemble the quesadillas and wrap them in foil for easy storage.
Make sure to eat them within a few days for the best taste.
How to make veggie quesadillas crispy?
To get that perfect crunch, follow these tips:
– Use a non-stick skillet and heat it well before adding the quesadilla.
– Brush the outside of the tortilla with a little olive oil for extra crispiness.
– Cook on medium heat to avoid burning while letting the cheese melt.
– Flip carefully to keep the filling inside.
These methods will help you achieve a golden, crispy quesadilla.
Veggie quesadillas are easy to make and very tasty. You learned about the key ingredients, like whole wheat tortillas and cheese options. I shared steps for cooking and tips for getting them crispy. You can customize with your favorite veggies and spices. Remember, leftovers can be stored or frozen. These quesadillas give you a fun way to enjoy healthy food. Try different cheeses and vegetables to find your perfect mix! Enjoy your cooking and creativity with veggie quesadillas.

. When making buffalo chicken lettuce wraps, choose your buffalo sauce wisely. Some sauces are mild, while others pack a punch. If you like heat, go for a hotter sauce. If you prefer less spice, choose a milder option. You can also add extra spices. A pinch of cayenne or red pepper flakes boosts the heat without changing the sauce. To make your wraps even better, think about toppings. Shredded carrots add crunch and color. You can also try diced celery for extra freshness. Blue cheese crumbles add a creamy touch. If you want a sauce, ranch or blue cheese dressing pairs well. They balance the heat of the buffalo sauce and add creaminess. Serve your wraps in a fun way. Use a large platter to hold the wraps. Surround them with extra lettuce leaves. This lets guests make their own wraps. Add a small bowl of dressing on the side for dipping. Use bright garnishes, like chopped green onions, to make the dish pop. These tips make your wraps look as good as they taste! {{image_4}} You can switch up the protein in these wraps. Ground chicken or turkey works well. Just cook it in the same way as the diced chicken. For a vegetarian twist, try using plant-based proteins. Crumbled tofu or tempeh can soak up the buffalo sauce nicely. These options keep the wraps healthy and flavorful. If you need gluten-free options, check your buffalo sauce. Many brands are gluten-free. For a dairy-free option, skip the blue cheese. You can use a vegan ranch dressing instead. It brings a nice creaminess without the dairy. These swaps let everyone enjoy the wraps. Pair your wraps with fresh veggies, like carrot sticks or cucumber slices. These sides add crunch and color. You might also serve chips for a fun crunch. For drinks, refreshing iced tea or lemonade works well. These options make a great meal or snack. If you want the full recipe, you can find it here: [Full Recipe] To store your buffalo chicken lettuce wraps, place them in an airtight container. This keeps them fresh and tasty. Try to refrigerate them within two hours after cooking. They will stay good for about 3 to 4 days in the fridge. When reheating, I suggest using the stovetop or microwave. For the stovetop, warm them in a skillet over low heat. This helps keep the wraps from getting soggy. If using a microwave, heat on medium power for short bursts. Do not reheat more than once, as this can affect the flavor and texture. Yes, you can freeze buffalo chicken wraps! To freeze, place the chicken filling in a freezer-safe bag or container. Remove as much air as possible. You can freeze them for up to three months. When ready to eat, thaw the filling overnight in the fridge. Reheat it and serve in fresh lettuce leaves for the best taste. The spice level depends on the buffalo sauce you choose. You can find mild, medium, or hot sauces. If you like heat, pick a hot sauce. For a mild kick, go for a mild sauce. You can also mix sauces to control the heat. If you want to tone down the spice, add extra toppings like ranch dressing or blue cheese. These cool flavors balance the heat well. Yes, you can prepare the chicken and other ingredients in advance. Cook the chicken and store it in the fridge for up to three days. You can also wash and dry the lettuce leaves ahead of time. Keep the chicken and lettuce in separate containers to maintain freshness. When you’re ready to eat, just assemble the wraps. This makes for a quick and healthy snack. If you want an alternative to lettuce, try tortillas or collard greens. Tortillas work well if you prefer a more traditional wrap. Collard greens are sturdy and add a nice flavor. You can also use rice paper for a fun twist. Each option brings its own taste and texture, so choose what you like best. For the complete recipe, check out the Buffalo Bliss Chicken Lettuce Wraps full recipe for easy access. Buffalo chicken lettuce wraps are a fun and tasty dish. We reviewed key ingredients, cooking steps, and tips for customization. You can mix flavors, adjust spice, and even swap proteins to suit your needs. These wraps are great for meals and snacks. Remember to store leftovers properly for later enjoyment. I hope this guide helps you create delicious wraps for friends or family. Enjoy experimenting with your own twists!](https://joymealplan.com/wp-content/uploads/2025/07/5600c779-5454-4d90-be3f-06d6a192c4a1-768x768.webp)