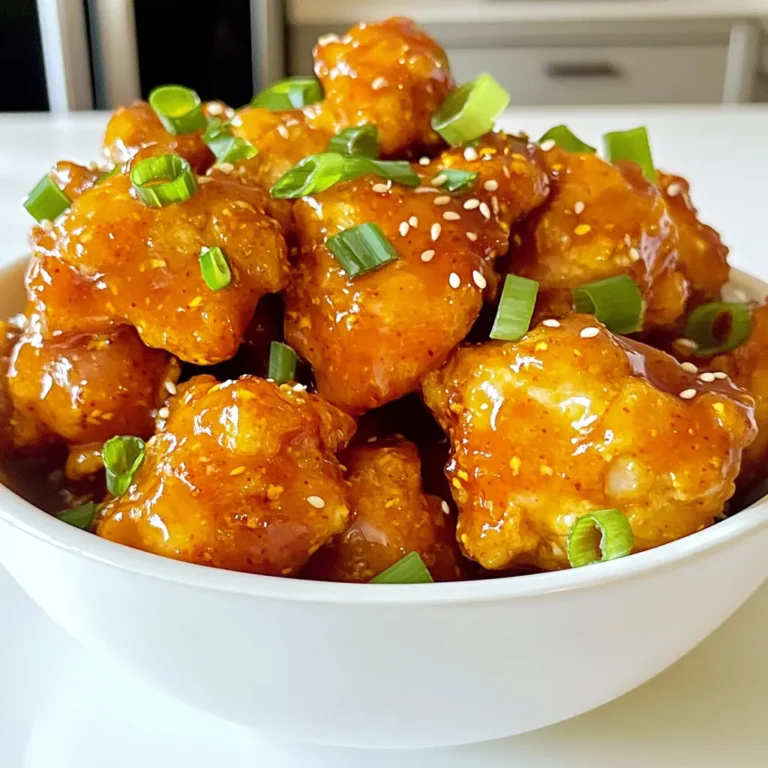
Honey Garlic Chicken Stir-Fry Simple and Tasty Meal
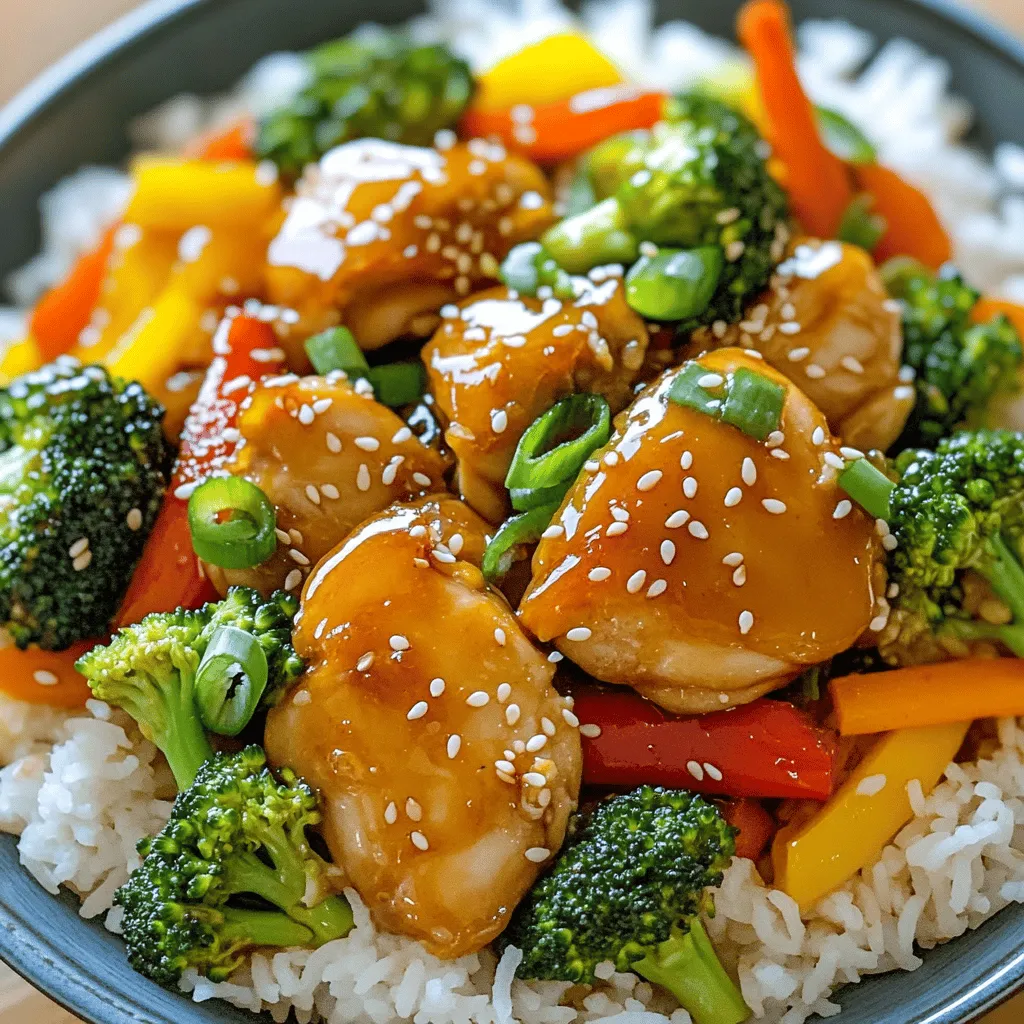
If you’re looking for a quick and tasty dish, let me show you how to whip up a Honey Garlic Chicken Stir-Fry. This meal is simple, satisfying, and packed with flavor. You can have it ready in no time, making it perfect for a busy weeknight dinner. Join me as we explore easy steps and tips to make this dish shine! You’ll impress your family or friends, and they’ll want more. Let’s get cooking!
Ingredients
Main Ingredients
– 500g boneless chicken thighs, cut into bite-sized pieces
– 2 tablespoons honey
– 3 tablespoons low-sodium soy sauce
– 2 cloves garlic, finely minced
– 1 tablespoon fresh ginger, finely minced
– 2 tablespoons cornstarch
– 1 tablespoon vegetable oil
– 1 bell pepper (choose either red or yellow), sliced into thin strips
– 1 cup fresh broccoli florets
– 1 medium carrot, julienned
– 1 small onion, sliced into half-moons
Optional Garnishes
– 2 green onions, finely chopped
– Sesame seeds
Cooking Essentials
– Large non-stick skillet or wok
– Medium-sized mixing bowl
– Whisk
– Spatula
When I prepare this honey garlic chicken stir-fry, I love using fresh, quality ingredients. The chicken thighs offer a rich flavor and stay juicy when cooked. Honey adds a sweet touch to the dish. I prefer low-sodium soy sauce to keep it balanced. Fresh garlic and ginger give a nice kick and aroma. Cornstarch is key for a crispy texture.
For veggies, I choose a bright bell pepper and fresh broccoli. These add color and crunch. Carrots and onions round out the mix. You can also add green onions and sesame seeds for a lovely finish.
Make sure to have your cooking essentials ready. A large skillet or wok works best for stir-frying. A medium bowl and whisk help mix the sauce. This setup makes the cooking process smooth and fun.
Step-by-Step Instructions
Preparation of the Sauce
To start, grab a medium bowl. In this bowl, whisk together the honey, low-sodium soy sauce, minced garlic, and minced ginger. This sauce is the star of your dish. It gives the chicken its sweet and tasty flavor. Set the sauce aside for now. Letting it sit will help the flavors mix well.
Cooking the Chicken
Next, take another bowl and place the chicken pieces in it. Sprinkle the cornstarch over the chicken. Toss the pieces gently until they are coated well. This step makes the chicken crispy when cooked. Now, heat vegetable oil in a large non-stick skillet or wok over medium-high heat. Make sure the oil is hot before adding chicken. Carefully add the chicken in a single layer. Cook it for about 5-6 minutes. Stir occasionally until the chicken turns golden brown and is fully cooked. After that, remove the chicken from the skillet and set it aside on a plate.
Stir-Frying the Vegetables
In the same skillet, add the sliced onion. Sauté it for about 2-3 minutes until it smells good and softens. Then, add the broccoli florets, sliced bell pepper, and julienned carrot. Stir-fry these veggies for about 4-5 minutes. You want them to stay bright and a bit crunchy.
Combining and Serving
Now, return the cooked chicken to the skillet. Pour the honey garlic sauce over everything. Stir well so the chicken and veggies are coated evenly. Cook this mixture for another 2-3 minutes. This step helps the sauce thicken a bit. Taste it and add salt and pepper as needed. Once ready, remove it from heat. Garnish your dish with chopped green onions and sesame seeds. Your honey garlic chicken stir-fry is now ready to enjoy!
Tips & Tricks
Achieving the Perfect Sauce Consistency
To get the sauce just right, mix the honey, soy sauce, garlic, and ginger well. The cornstarch helps thicken the sauce as it cooks. If the sauce is too thin, let it cook a bit longer. If it’s too thick, add a splash of water. Keep stirring to avoid lumps. For a shiny finish, cook it until it bubbles slightly.
Ensuring Juicy Chicken
For juicy chicken, always use thighs instead of breasts. The thighs have more fat, which keeps them moist. Toss the chicken with cornstarch to lock in moisture during cooking. Avoid overcooking, as this can dry out the meat. Cook until golden brown and check with a knife to ensure it’s no longer pink inside.
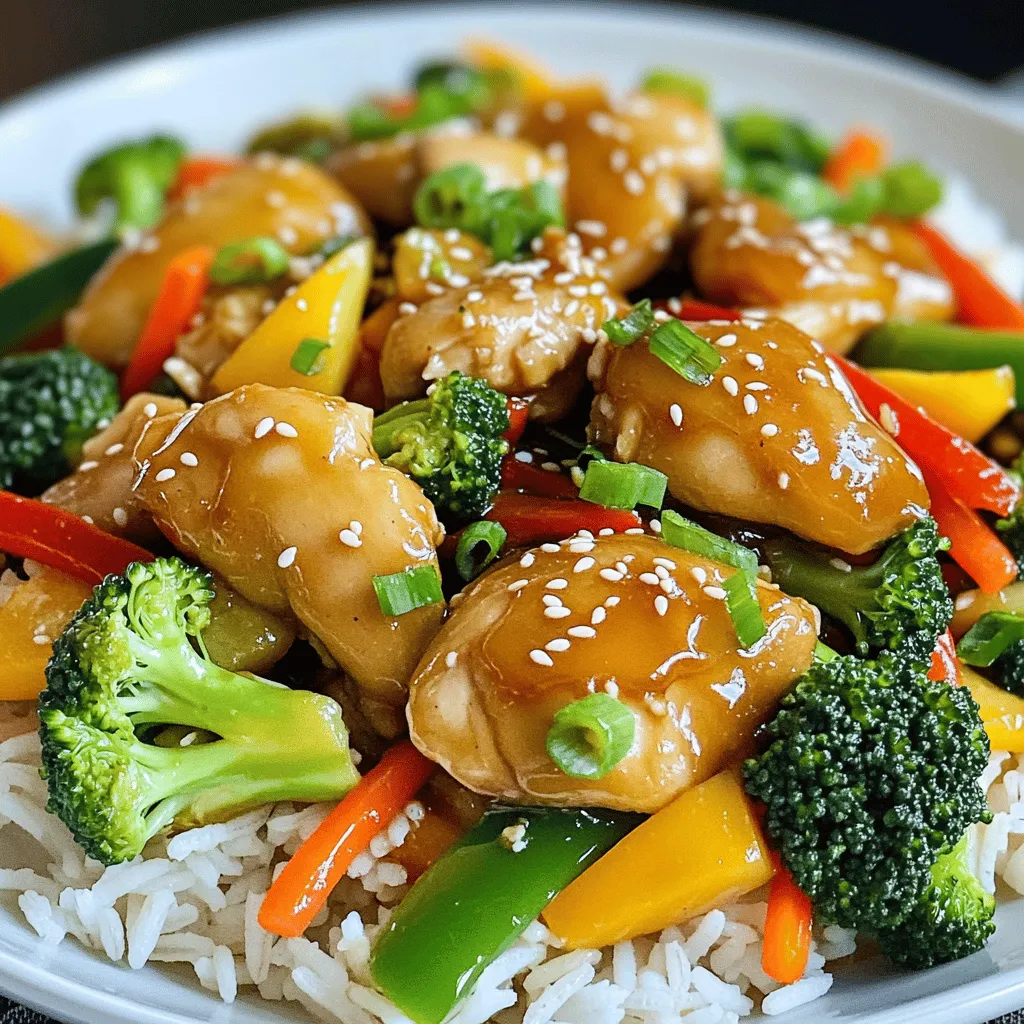
Serving Suggestions
Serve your honey garlic chicken stir-fry over fluffy jasmine rice or quinoa. The rice soaks up the sauce nicely. For extra flavor, drizzle some honey on top before serving. Garnish with green onions and sesame seeds for a pop of color. This dish pairs great with a side of steamed vegetables or a fresh salad.
Variations
Protein Alternatives
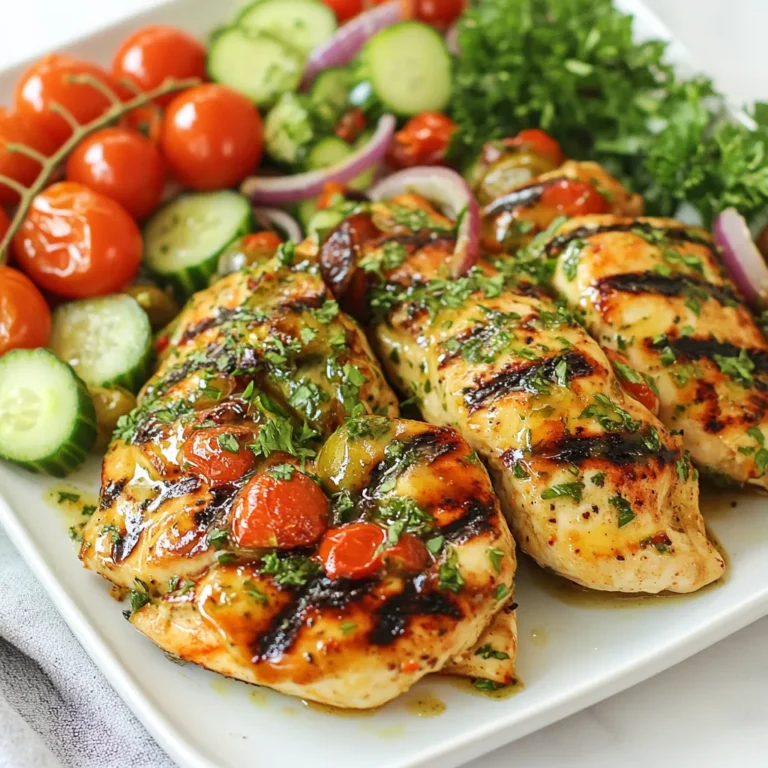
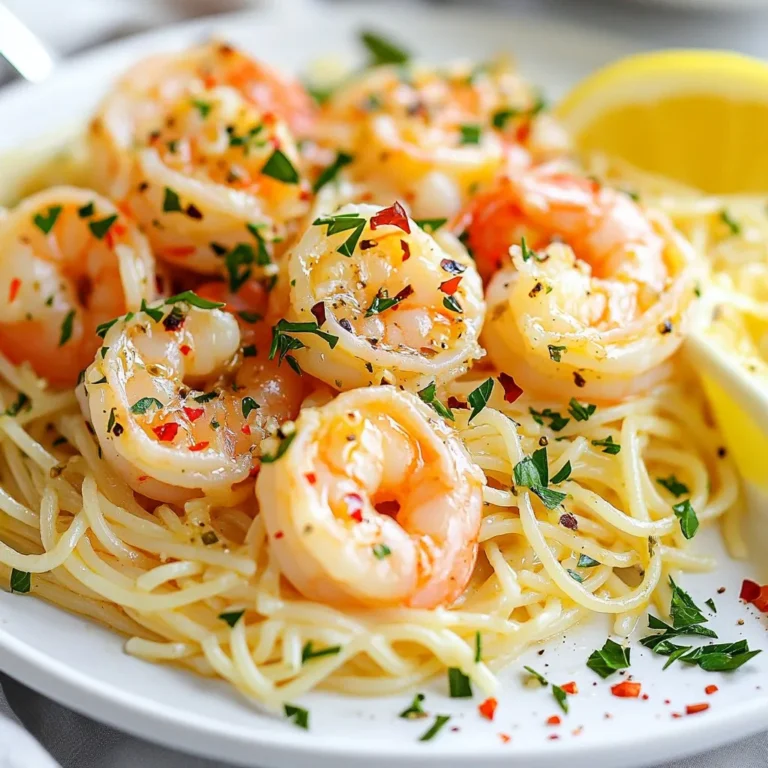
You can switch chicken for other proteins. Try shrimp or tofu for a tasty twist. Beef or pork also work well in this dish. Each choice gives a new flavor to the stir-fry. Adjust cooking times as needed. For shrimp, cook just until pink. Tofu should be golden and crispy.
Vegetable Substitutions
Feel free to mix up the veggies! Snow peas, zucchini, or snap peas add great crunch. You can use mushrooms for a savory touch. Cauliflower and asparagus also pair nicely. Keep the colors bright for a joyful plate. Aim for fresh and seasonal veggies for best taste.
Spice Level Adjustments
Love a kick? Add some red pepper flakes to the sauce. You can also use Sriracha for extra heat. Start with a small amount and taste as you go. If you want less spice, skip the hot ingredients. This dish is great for everyone, even kids!
Storage Info
How to Store Leftovers
Store any leftover honey garlic chicken stir-fry in an airtight container. Let it cool down first. This helps lock in flavors and keep the dish fresh. Place the container in the fridge. It will stay good for about three to four days. If you want to keep it longer, freezing works too.
Reheating Instructions
To reheat, use a microwave or a stovetop. If using a microwave, place the stir-fry in a bowl. Cover it with a microwave-safe lid or wrap. Heat on high for one to two minutes. Stir halfway through for even heat. On the stovetop, add a splash of water to a pan and heat on medium. Stir until warm. This keeps the chicken juicy and the veggies crisp.
Freezing Tips
To freeze, use a freezer-safe container. Make sure it’s sealed tightly to prevent freezer burn. Label the container with the date. Honey garlic chicken stir-fry can last up to three months in the freezer. When ready to eat, thaw it overnight in the fridge. Reheat it as mentioned above. Enjoy a quick, tasty meal any time!
FAQs
What can I substitute for soy sauce?
If you need a soy sauce substitute, use tamari. Tamari has a similar taste and works well in most dishes. You can also try coconut aminos. This option is sweet and has less salt.
Can I make this recipe gluten-free?
Yes, you can easily make this dish gluten-free. Use tamari instead of soy sauce. Be sure to check the labels if you use pre-made sauces.
How long does the stir-fry last in the fridge?
The stir-fry lasts about three to four days in the fridge. Store it in an airtight container to keep it fresh. Reheat it on the stove or in the microwave before enjoying again.
Can I add more vegetables to the stir-fry?
Absolutely! Feel free to add your favorite veggies. Snow peas, bok choy, or snap peas all work great. Just make sure to adjust the cooking time based on the vegetables you add.Enjoy making this tasty dish!
This blog post covered key ingredients, cooking steps, and tips for a great stir-fry. You learned about main ingredients, optional garnishes, and cooking essentials. We explored sauce preparation, cooking chicken, and stir-frying veggies. You now have tips for sauce consistency and juicy chicken. Plus, there are many variations to suit your taste.
With this knowledge, you can create a delicious stir-fry that’s easy to store. Enjoy making your dish and impressing others with your skills!

![- 1 can (15 oz) chickpeas, thoroughly drained and rinsed - 4 cups romaine lettuce, roughly chopped into bite-sized pieces - 1/2 cup cherry tomatoes, sliced in half - 1/4 cup red onion, thinly sliced for a pop of color - 1/4 cup nutritional yeast, for a cheesy essence - 1/4 cup vegan mayonnaise, creamy base of the dressing - 2 tablespoons Dijon mustard, adding a tangy kick - 1 tablespoon fresh lemon juice, for brightness - 1 tablespoon extra virgin olive oil, for richness - 1 teaspoon garlic powder, enhancing flavor - Salt and fresh ground pepper to taste - Croutons (store-bought or homemade) for the finishing crunch The chickpeas in this salad add protein and fiber. They make the dish filling and healthy. Romaine lettuce gives a nice crunch and freshness. Cherry tomatoes bring sweetness, while red onion adds a burst of flavor. For the dressing, I love using nutritional yeast. It gives a cheesy taste without dairy. Vegan mayonnaise makes it creamy, while Dijon mustard adds a nice tang. Fresh lemon juice brightens everything up. Olive oil adds richness, and garlic powder boosts flavor. You can add salt and pepper to taste. For extra crunch, top it off with croutons. This salad is not just tasty; it’s also colorful and fun to eat. If you want to make it even better, check out the [Full Recipe]. - Combine chickpeas, romaine, cherry tomatoes, and red onion in a large bowl. - Mix well to ensure an even distribution of ingredients. In this step, I love to use my hands to mix. It helps me feel the textures and see how colorful the salad becomes. The chickpeas add protein, while the romaine gives a nice crunch. Cherry tomatoes burst with flavor, and red onion adds a sweet bite. - In a separate bowl, whisk together vegan mayonnaise, Dijon mustard, lemon juice, olive oil, nutritional yeast, garlic powder, salt, and pepper until smooth. This dressing is magic! The vegan mayonnaise makes it creamy. The Dijon mustard gives it a tangy kick, while lemon juice brightens it up. Nutritional yeast brings a cheesy taste without dairy. I whisk until it’s really smooth, so every bite is delicious. - Pour dressing over the salad mixture, gently toss to coat. - Let the salad sit for 5-10 minutes to allow flavors to meld. - Top with croutons just before serving, and optionally sprinkle with additional nutritional yeast. Now, I pour the dressing over the salad and toss gently. I let it rest for a bit. This helps all the flavors mix well. Right before serving, I add the croutons for that perfect crunch. If you want more cheesy flavor, sprinkle extra nutritional yeast on top. It's so good! For the full recipe, check the earlier section. To make this salad shine, adjust the salt and pepper to fit your taste. Everyone’s palate is different, so find your perfect balance. Letting the salad sit for a bit allows the flavors to mix and deepen. I suggest giving it 5 to 10 minutes for best results. When serving, you can use a large bowl for sharing or individual plates for a personal touch. To make it look even better, add halved cherry tomatoes and a sprinkle of nutritional yeast on top. This adds color and a bit of flair to your dish. For easy meal prep, make the dressing first and keep it in the fridge. This way, you can use it later without any hassle. Assemble the salad just before serving to keep everything fresh and crisp. The crunch of the romaine is key to enjoying this salad fully. {{image_4}} You can add other beans or lentils to your salad for more protein. Chickpeas are great, but black beans or lentils work well too. They add unique flavors and textures. Avocado or tofu can also join your salad. Both add creaminess and extra protein, making your meal even more filling. To spice things up, try different vinegars in your dressing. Balsamic or apple cider vinegar can change the taste in exciting ways. You might also want to add spices like cayenne or smoked paprika. These spices bring flavor complexity and a fun kick to your dish. If you want to try something new, swap out romaine lettuce for spinach or kale. These greens change the texture and add their own taste. You can also change the dressing base. Cashew cream or tahini can replace the vegan mayonnaise if you want to try something different. This will give your salad a fresh twist. For the full recipe, check out the Chickpea Caesar Bliss Salad. - Refrigerate in an airtight container for up to 3 days. - Store dressing separately to prevent sogginess in greens. Leftovers can stay fresh, but the greens will wilt if mixed with the dressing. I recommend keeping the salad and dressing apart. This way, you can enjoy the crispness of the romaine lettuce each time you serve it. - Not recommended for freezing due to texture changes in salad components. Freezing this salad is not a good idea. The chickpeas and vegetables will lose their nice crunch. Plus, the dressing will separate and become watery. Enjoy it fresh for the best taste and texture. - Prepare ingredients in advance and assemble fresh before consuming. Meal prep can save time. Chop your veggies and drain your chickpeas ahead of time. When you are ready to eat, toss everything together. This keeps the salad fresh and tasty, making it a great option for busy days. For the full recipe, check the Chickpea Caesar Bliss Salad 🥗. Yes, prepare ingredients and dressing in advance, assembling just before serving. This way, your salad stays fresh and crunchy. You can cut the veggies and make the dressing a day ahead. Just store them separately in the fridge. When it’s time to eat, toss it all together for a quick meal. Yes, the ingredients used are naturally gluten-free; ensure croutons are gluten-free if using. If you want homemade croutons, use gluten-free bread. This makes the salad safe for those with gluten sensitivities. Adding seeds, nuts, or extra veggies can boost nutrients and flavor diversity. Try adding sunflower seeds or pumpkin seeds for crunch. You can also include sliced cucumbers or bell peppers for extra color and vitamins. Each addition makes the salad even more satisfying. Pair with vegan garlic bread, roasted vegetables, or a light soup for a complete meal. These sides complement the salad nicely and provide a variety of textures and flavors. They also make for a filling and balanced dinner. If you want to explore more, check out the Full Recipe for ideas! This salad blends fresh ingredients with a creamy dressing. You start with chickpeas, lettuce, and tomatoes, adding a vibrant kick from red onion. The dressing, made from vegan mayonnaise and nutritional yeast, brings a cheesy and tangy flavor. Adjust seasonings to suit your taste, and enjoy optional toppings like croutons. Finalize your meal prep by storing dressing separately. This keeps your salad crisp and fresh. With all these tips and variations, you can create a delicious salad that fits your flavor preferences and keeps nutrition in mind. Dive in and enjoy!](https://joymealplan.com/wp-content/uploads/2025/06/b140c7e6-ada9-439d-98fe-37f2f6e6ca2c-768x768.webp)
![To make the Homemade Crunchwrap Supreme, gather these items: - 1 lb ground turkey or beef - 1 packet of taco seasoning - 1 cup black beans, drained and rinsed - 1 cup corn kernels (fresh or frozen) - 1 cup shredded cheddar cheese - 1 cup lettuce, finely shredded - 1 large tomato, diced - ½ cup sour cream - 4 large flour tortillas - 4 small tostada shells - 1 tablespoon olive oil - Salsa for serving Each Crunchwrap has around 500 calories. It includes protein from the meat and beans. The cheese adds calcium but also fat. Fresh veggies bring fiber and vitamins. If you want to cut calories, use less cheese or sour cream. This recipe feeds four, perfect for a family meal or a fun gathering. You can swap ground turkey for chicken or even tofu for a veggie option. Use black beans or pinto beans based on your taste. For cheese, try pepper jack for some heat. If you need a gluten-free option, use corn tortillas instead of flour. You can also replace sour cream with Greek yogurt for a healthier twist. Enjoy making it your own! Making a Homemade Crunchwrap Supreme is fun and easy. You start by cooking the meat. Then, you mix it with beans, corn, and cheese. Next, you assemble the wrap with layers of toppings. Finally, you cook the wrap until it’s crispy and golden. 1. Brown the Meat: Heat 1 tablespoon of olive oil in a skillet. Add 1 lb of ground turkey or beef. Cook it for 5-7 minutes until it’s browned. 2. Season the Meat: Drain any extra grease. Add 1 packet of taco seasoning. If needed, splash in some water. Cook for another 2-3 minutes. 3. Combine Ingredients: In a bowl, mix the seasoned meat with 1 cup of black beans, 1 cup of corn, and half of 1 cup of shredded cheese. Stir well. 4. Prepare the Tortilla: Lay out 1 large flour tortilla on a flat surface. 5. Assemble the Crunchwrap: Spoon the meat and bean mix into the center. Leave about 2 inches of space from the edges. 6. Add Tostada and Toppings: Place 1 small tostada shell on top of the mixture. Spread ½ cup of sour cream over the tostada. Add 1 cup of shredded lettuce, 1 diced tomato, and the rest of the cheese. 7. Fold the Crunchwrap: Fold the edges of the tortilla over the filling. Make pleats around the edge until it’s all enclosed. 8. Cook the Crunchwrap: Heat a non-stick skillet on medium heat. Place the crunchwrap seam-side down. Cook for 2-3 minutes until golden, then flip it and cook for another 2-3 minutes. 9. Serve: Cut each crunchwrap in half. Serve warm with salsa on the side. While I can't show pictures, I recommend you take photos of each step. It can help you track your progress. You can also find great visual aids in the [Full Recipe]. They can guide you through the cooking process with ease! To get that perfect crunchwrap texture, you want a good balance. Start with a large flour tortilla. This gives you room to fold. Use a small tostada shell inside. This will add a nice crunch. When you cook it, make sure your skillet is hot. A hot skillet helps create a nice, crispy outside. Flip it gently to avoid spills. Let it brown evenly on both sides for the best result. Flavorful meat is key to a great crunchwrap. I like to use ground turkey or beef. Sauté it in olive oil until browned. After that, add taco seasoning. This is where the magic happens. Follow the packet instructions for best results. If the meat seems dry, add a splash of water. This helps the seasonings stick and blend. Mix in black beans and corn for added taste and texture. Making ahead can save you time. You can prepare the meat mixture a day before. Just store it in an airtight container. When you are ready, assemble your crunchwraps. This way, you can enjoy a fresh meal with less work. You can also freeze the assembled crunchwraps. Just make sure to wrap them well. When you are ready to eat, heat them up in the skillet. This keeps them nice and crispy. For more details, check the Full Recipe. {{image_4}} You can easily make a tasty veggie crunchwrap. Just replace the meat with veggies. Use a mix of black beans, corn, and diced peppers. You can add mushrooms for a nice texture. To keep it creamy, use extra sour cream or a plant-based option. This way, you get all the flavor without meat! Want to spice things up? Add some jalapeños to the filling. You can use fresh slices or pickled ones. If you like heat, toss in some hot sauce or pepper flakes. A dash of chipotle seasoning in the meat gives a smoky kick. This adds a new level of flavor! Don’t stick to just one topping. Try different sauces like guacamole or zesty salsa. You can also add sliced olives or diced onions for crunch. Consider using different cheeses, like pepper jack, for extra flavor. Mix and match to create your perfect crunchwrap. For the full recipe, check out the Ultimate Crunchwrap Supreme. To keep your leftover Crunchwrap Supreme fresh, wrap it tightly in plastic wrap or foil. Place it in an airtight container. This way, it stays safe from air and moisture. Store it in the fridge for up to three days. To enjoy it later, make sure you don’t leave it out too long. Reheating your Crunchwrap is easy. Start by taking it out of the fridge. Place it in a skillet over medium heat. Cover it with a lid. Heat for about 3-4 minutes on each side. This method keeps it crispy. You can also use the microwave if you're in a hurry. Just place it on a microwave-safe plate. Heat it for about 1-2 minutes until warm. If you want to save your Crunchwrap for later, freezing is a great option. Wrap each Crunchwrap in plastic wrap, then in foil. This helps protect it from freezer burn. You can freeze them for up to three months. When you’re ready to eat, let it thaw in the fridge overnight. Then, reheat it as described above. Enjoy your homemade Crunchwrap Supreme whenever you crave it! For the full recipe, check out the Ultimate Crunchwrap Supreme . To make your Crunchwrap Supreme gluten-free, use gluten-free tortillas. You can find them at most grocery stores. Make sure the taco seasoning is also gluten-free. Check the label to be sure. All other ingredients in this recipe are naturally gluten-free. The best way to reheat a crunchwrap is to use a skillet. Heat it over medium heat for about 2-3 minutes on each side. This keeps the crunchwrap crispy. You can also use an oven at 350°F. Bake it for about 10 minutes. This method warms it through without making it soggy. Yes, you can customize your crunchwrap for any diet. For a vegetarian option, skip the meat and add more beans or veggies. You can also switch the cheese for a dairy-free kind. If you like spice, add jalapeños or hot sauce. This recipe is flexible and allows for many tasty changes. Try different flavors to find what you love most. For the full recipe, refer to the Ultimate Crunchwrap Supreme. In this post, I covered how to make a Crunchwrap Supreme from start to finish. We discussed key ingredients, cooking steps, and storage tips. I shared tricks for the perfect texture and flavorful meat. You have options for vegetarian and spicy versions, plus ways to adjust for your taste. With these insights, you can now make this fun and tasty meal. Enjoy your Crunchwrap adventure!](https://joymealplan.com/wp-content/uploads/2025/06/9254d856-97cc-48f7-bdd4-96eee0233a6c-768x768.webp)