Vegan Chocolate Mousse Creamy and Simple Recipe

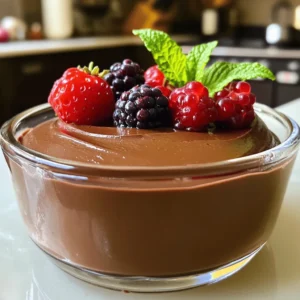
If you think vegan desserts can’t be creamy and rich, think again! This Vegan Chocolate Mousse recipe is simple and satisfying. Made with silken tofu and dairy-free chocolate, you won’t feel guilty indulging in this treat. It’s perfect for parties or a quiet night in. Ready to impress your friends and family? Let’s dive into the world of delicious plant-based desserts with this easy recipe!
Ingredients
Creating a vegan chocolate mousse is simple and fun. You only need a few key ingredients to make this creamy delight. Here’s a list of the main items you’ll want to gather:
– 1 cup silken tofu, well-drained
– 1/2 cup dairy-free dark chocolate chips
– 1/4 cup pure maple syrup
– 1 teaspoon pure vanilla extract
– A pinch of fine sea salt
– 1/4 cup coconut cream (optional, for an extra luxurious texture)
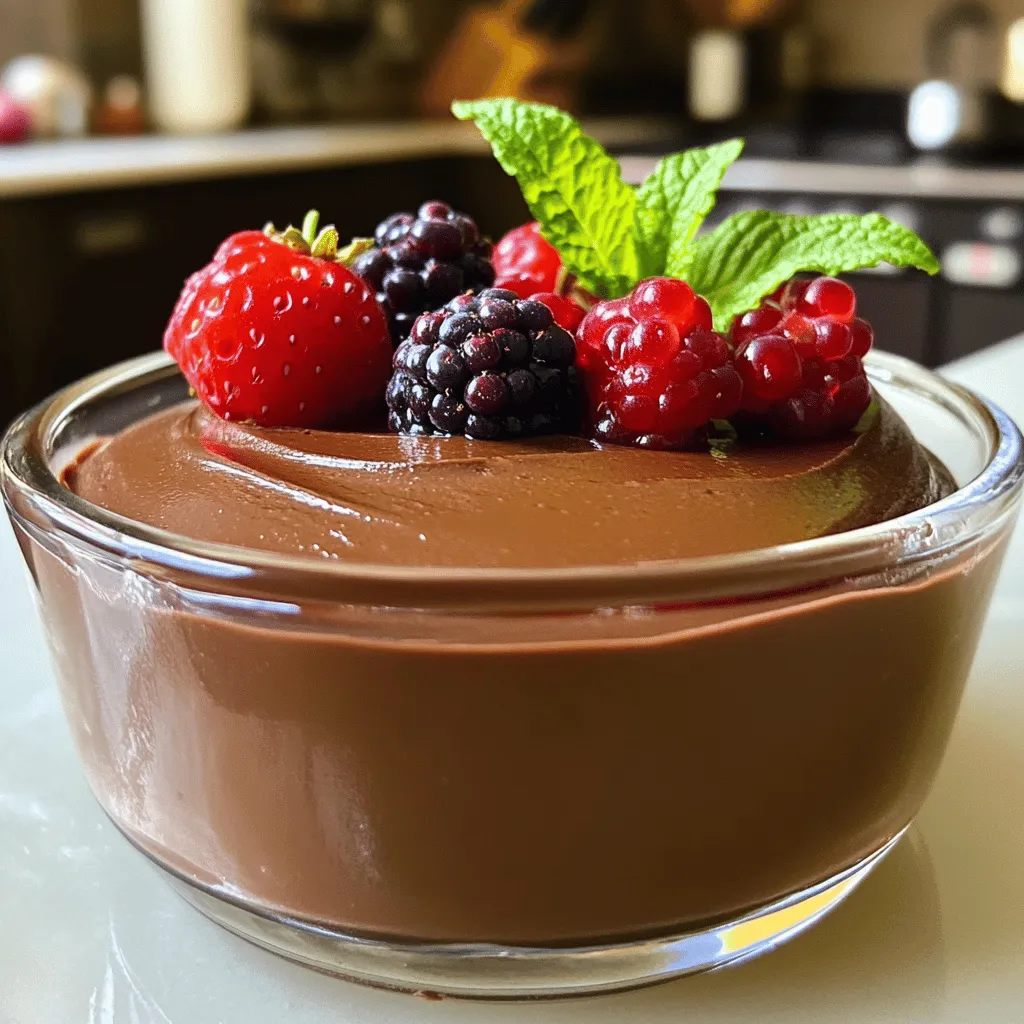
– Fresh seasonal berries (such as raspberries or strawberries) and mint leaves for garnish
Silken tofu serves as the base, giving the mousse its smooth texture. Dairy-free dark chocolate chips bring rich flavor, while maple syrup adds the right sweetness. A touch of vanilla extract enhances the taste, and fine sea salt balances the flavors beautifully.
If you want a creamier mousse, add coconut cream. It gives a lovely, rich mouthfeel. For an eye-catching finish, top your mousse with fresh berries and a mint leaf. This adds color and a fresh burst of flavor.Enjoy creating this tasty vegan chocolate mousse!
Step-by-Step Instructions
Step 1: Melt the Chocolate
Start by melting the dairy-free dark chocolate chips. You can use two methods: a double boiler or a microwave.
– Double Boiler Method: Place a heatproof bowl over a pot of simmering water. Add the chocolate chips to the bowl. Stir gently until melted.
– Microwave Method: Put the chocolate chips in a microwave-safe bowl. Heat in short bursts of 10-15 seconds. Stir in between until the chocolate is silky.
Avoid overheating the chocolate. If it gets too hot, it can seize up. If you see any signs of graininess, it’s too late!
Step 2: Blend the Ingredients
Now, it’s time to blend. Use a high-speed blender or a food processor. Both work well, but I prefer a blender for a creamier texture.
Add the drained silken tofu, melted chocolate, maple syrup, vanilla extract, and a pinch of sea salt. If you want an even richer mousse, add coconut cream now. This gives a nice, creamy touch.
Step 3: Achieve the Perfect Texture
Blend on high speed until smooth and fluffy. This step is key to getting the right texture.
– Scraping Down the Sides: Stop the blender occasionally. Use a spatula to scrape down the sides. This ensures every bit mixes well.
You want a light and airy mousse, so take your time with this step. Enjoy the process, and you’ll end up with a delicious treat!
Tips & Tricks
Adjusting Sweetness
To get your mousse just right, taste it after blending. If it feels too bitter, you can add more maple syrup. It’s all about your preference. If you want alternatives, try agave nectar or date syrup. Both give a nice sweetness without losing flavor.
Achieving the Right Consistency
Silken tofu is key to a smooth mousse. It blends easily and gives a creamy feel. Make sure to drain it well. For the best results, chill the mousse for at least two hours. This helps it set and become fluffy.
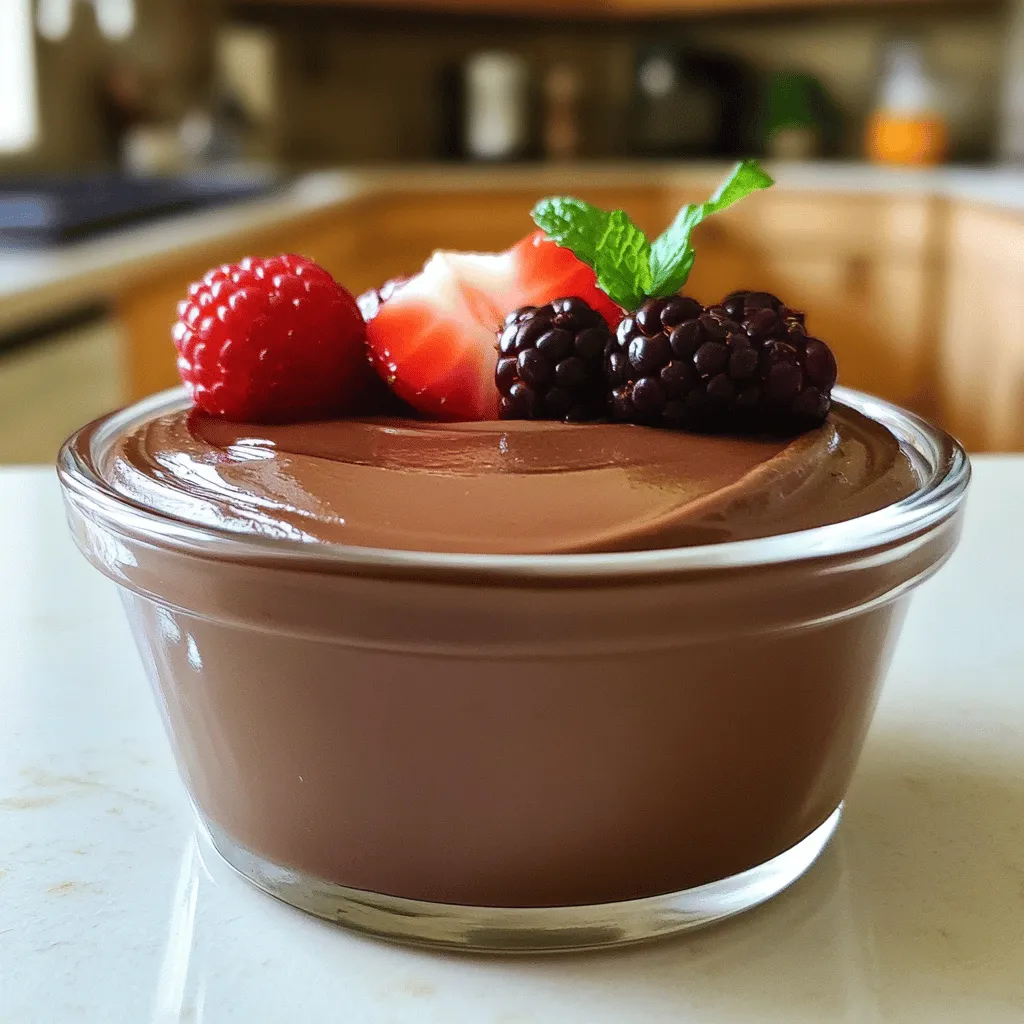
Serving Suggestions
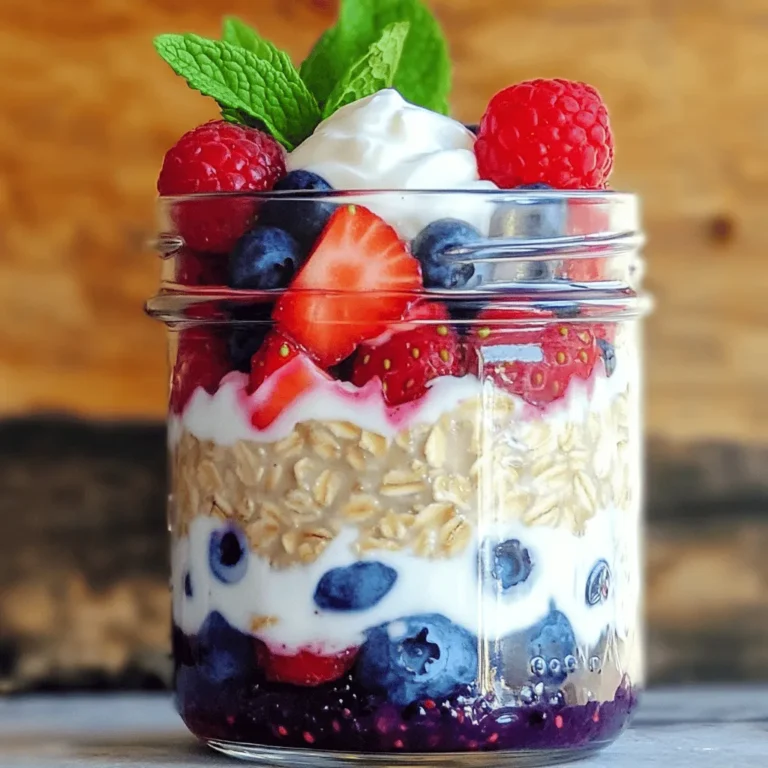
Get creative when you serve your mousse. Try layering it in clear cups with berries for a fun look. You can also use small jars for a cute touch. To enhance the flavor, pair it with fresh fruit, nuts, or a drizzle of chocolate sauce. Each bite will burst with joy!

Variations
Flavor additions
You can make your vegan chocolate mousse even more exciting. Try adding flavors like espresso or orange zest. A splash of espresso gives a rich, coffee taste. Orange zest brightens the mousse with a fresh, zesty note. You can also choose different chocolates. Dark chocolate gives a bold taste, while milk chocolate offers a creamier, sweeter bite.
Dietary Adjustments
If you need a nut-free or gluten-free option, it’s easy to adjust. Use ingredients like rice milk or oat milk for creaminess. Check labels on chocolate chips to ensure they are gluten-free. You can also substitute silken tofu with other creamy items. For example, use avocado or banana for a different twist. Always consider allergies and find safe alternatives.
Portion Control
Portion control is key for serving. You can make mini servings in small cups or jars. This way, each guest has their own treat. If you prefer a grand presentation, use large bowls. You can serve the mousse in elegant dessert glasses or even mason jars. Each dish adds its own flair to your table.
Storage Info
Refrigeration Tips
You can keep your vegan chocolate mousse in the fridge for about 3 to 5 days. To store it well, place it in an airtight container. This helps keep it fresh and prevents it from absorbing other smells. Always cover the mousse with plastic wrap or a lid. This keeps moisture in and stops it from drying out.
Freezing Guidelines
Yes, you can freeze vegan chocolate mousse! However, freezing can change its texture. If you freeze it, use a freezer-safe container. When you want to enjoy it again, thaw the mousse in the fridge overnight. This helps maintain its creamy texture. Avoid thawing it at room temperature, as this can make it too runny.
Reheating Not Applicable
You should not reheat chocolate mousse. Heating can ruin its texture and make it grainy. Mousse is best enjoyed cold, so serve it straight from the fridge or after thawing if frozen. Enjoy this rich dessert as it is, and let the flavors shine!
FAQs
What is the best type of chocolate for vegan mousse?
The best type of chocolate for vegan mousse is dairy-free dark chocolate. It gives a rich flavor and smooth texture. Look for chips with at least 70% cocoa. This chocolate melts well and blends nicely. You can also use semi-sweet chocolate for a sweeter taste. Always check the label to ensure it is vegan-friendly.
Can I use tofu alternatives?
Yes, you can use tofu alternatives like cashew cream or avocado. Cashew cream makes the mousse rich and creamy. You must soak cashews in water first. Avocado adds a nice creaminess too. However, it may change the flavor slightly. Experiment to find what you like best.
Is this recipe gluten-free?
Yes, this vegan chocolate mousse recipe is gluten-free. All the ingredients listed are safe for a gluten-free diet. Just ensure the chocolate chips are labeled gluten-free. This makes it a great dessert for everyone to enjoy.
How do I make it sweeter without adding more syrup?
To make it sweeter without more syrup, try adding ripe bananas or dates. These natural sweeteners blend well and add flavor. You can also use vanilla extract for extra sweetness. Just a tiny bit will enhance the taste without changing the texture.
In this blog post, I shared how to make vegan chocolate mousse using simple ingredients like silken tofu and dairy-free dark chocolate. You learned step-by-step methods for melting chocolate, blending ingredients, and achieving the perfect texture. I offered tips for adjusting sweetness, serving suggestions, and variations to suit different diets.
This mousse is not only easy to make but also delicious and customizable. With a little creativity, you can make this dessert your own. Enjoy experimenting with flavors and serving styles!


![For a delicious Strawberry Shortcake Trifle, you will need fresh and simple ingredients. Here’s what you need to gather: - 2 cups fresh strawberries, hulled and sliced - 1/4 cup granulated sugar (for macerating strawberries) - 1 cup heavy whipping cream - 1/4 cup powdered sugar (for the whipped cream) - 1 teaspoon pure vanilla extract - 1 package (10 oz) ladyfinger cookies or sponge cake, cut into bite-sized pieces - 1 cup vanilla pudding (store-bought or homemade) - Fresh mint leaves, for garnish (optional) Each ingredient plays a key role. The strawberries need sugar to bring out their flavor. The heavy cream and powdered sugar create a light, airy whipped cream. The ladyfingers or sponge cake form the base. Lastly, the vanilla pudding adds creaminess to the trifle. When you layer these ingredients, you create a beautiful and tasty dessert. For the full recipe, you can check [Full Recipe]. Enjoy making this sweet treat! To macerate the strawberries, start by slicing them. Place 2 cups of fresh strawberries in a bowl. Add 1/4 cup of granulated sugar on top. Gently stir the strawberries to coat them with sugar. Let them sit for 15 to 20 minutes. This helps draw out their sweet juices, creating a syrup. For optimal syrup extraction, keep an eye on the time. The longer you let them sit, the more syrup you will get. Just don’t let them sit too long, or they may become mushy. For the perfect whipped cream, you will need a large mixing bowl and a hand or stand mixer. Start by adding 1 cup of heavy whipping cream, 1/4 cup of powdered sugar, and 1 teaspoon of pure vanilla extract to the bowl. Whip the mixture on medium-high speed. Watch closely for soft peaks to form. Stop mixing as soon as you see those peaks. Overwhipping can turn your cream into butter, and we want it light and fluffy! Now comes the fun part: layering! In a large trifle bowl or individual glasses, start with ladyfinger pieces or sponge cake at the bottom. Use enough pieces to cover the base. Next, spoon a layer of vanilla pudding over the cake. Spread it evenly. Then, add a layer of your macerated strawberries, syrup included. Finish this layer with a dollop of whipped cream. Repeat these steps. Add another layer of ladyfingers, pudding, strawberries, and another dollop of cream. Keep going until you reach the top. The last layer should be whipped cream for a nice finish. Chill your trifle for at least 1 hour. Cover it with plastic wrap or a lid. If you have more time, chill it longer. The flavors blend better that way. Refrigerating helps the ladyfingers absorb moisture from the pudding and strawberries. This makes every bite taste amazing! Plus, it keeps your trifle fresh and cool, perfect for a warm summer day. For the full recipe, check out the complete instructions. To keep your trifle layers from turning soggy, use fresh, dry ladyfingers or sponge cake. Make sure to layer them quickly after preparation. You can also lightly toast the ladyfingers for added texture. This helps them hold their shape better. To whip cream correctly, start with cold equipment. Cold bowls and beaters help the cream whip faster. Whip the cream at medium speed until soft peaks form. Stop as soon as the cream holds its shape. Overwhipping makes the cream grainy and hard. Serve your trifle in a clear glass bowl to show off the layers. You can also use small jars for individual servings. This adds a fun touch for guests. For garnishes, fresh mint leaves or extra strawberry slices on top create a beautiful finish. You can also sprinkle some crushed cookies for crunch. One common mistake is not preparing ingredients well. Make sure your strawberries are hulled and sliced evenly. This ensures great flavor throughout. Layering inconsistently can lead to a messy trifle. Each layer should be even and flat. This keeps your trifle looking nice and appetizing. For the full recipe, check the Strawberry Shortcake Trifle Delight section. {{image_4}} You can change the fruit in your trifle to mix things up. Blueberries work great in place of strawberries. Peaches add a sweet twist, too. You can also try different pudding flavors. Chocolate pudding gives a rich taste, while banana adds a fun touch. Each swap gives your trifle a new vibe. If you need gluten-free options, use gluten-free ladyfingers or sponge cake. Many stores sell these now. For a dairy-free version, use coconut cream instead of heavy cream. Dairy-free pudding is also easy to find. These swaps keep the trifle tasty for all diets. You can make themed trifles for special times of the year. For example, add pumpkin spice for fall or berries for a Fourth of July treat. You can also create fun trifle recipes for parties. Layer with seasonal fruits and colorful toppings for a festive look. This way, your trifle is always a showstopper. For a full recipe, check the [Full Recipe]. To keep your trifle fresh, store it in the fridge. Use an airtight container to avoid unwanted smells. Cover the top with plastic wrap if you don't have a lid. This helps keep the layers intact. It's best to eat your trifle within three days. This way, you enjoy the best taste and texture. Avoid stacking heavy items on top of it, as this can cause squishing. Your stored trifle stays good in the fridge for up to three days. After this, the ingredients start to separate. If you see watery layers, it’s a sign that it’s no longer fresh. Trust your nose and eyes; if it smells off, it's time to toss it. Always check for any strange colors or textures before diving in. You can freeze the trifle, but it changes the texture. Freeze only the layers separately for best results. Make sure to wrap each layer tightly in plastic wrap. When you're ready to eat, thaw them in the fridge overnight. Avoid refreezing once it's thawed, as it affects quality. For the best flavor and texture, enjoy your trifle fresh, but freezing can work in a pinch. For the complete recipe, check the Full Recipe link. Making a strawberry shortcake trifle takes about 30 minutes of prep time. You will need an hour for chilling. This allows all the flavors to mix well and makes the trifle taste its best. Yes, you can make this trifle ahead of time! I suggest preparing it a few hours before serving. This gives the layers time to blend. Just keep it covered in the fridge until you are ready to serve. If you can't find ladyfingers or sponge cake, you can use pound cake or angel food cake. Both options work well. Cut them into smaller pieces, just like the ladyfingers. To avoid sogginess, use less liquid in your layers. You can also layer quickly and serve soon after making it. If you chill it too long, the cake may soak up too much liquid. Yes! You can use gluten-free ladyfingers or sponge cake. Make sure to check the labels on all ingredients. Also, consider using gluten-free pudding mix for a fully gluten-free dessert. You can use frozen strawberries! Just thaw them first and drain excess liquid. This keeps your trifle layers from becoming too wet. Frozen strawberries still give a sweet flavor, making them a great substitute. For the full recipe, check here. Now you know how to create a delicious strawberry shortcake trifle. We walked through each step, from fresh ingredients to layering tips. You learned how to prepare strawberries, whip cream, and avoid common mistakes. Remember to chill your trifle for maximum flavor. Feel free to try different fruits or flavors to make it your own. With careful preparation and creativity, your trifle will impress everyone. Enjoy serving this delightful dessert at your next gathering!](https://joymealplan.com/wp-content/uploads/2025/07/d4c251d2-a8a0-4e84-a7ee-6717c5d98257-768x768.webp)