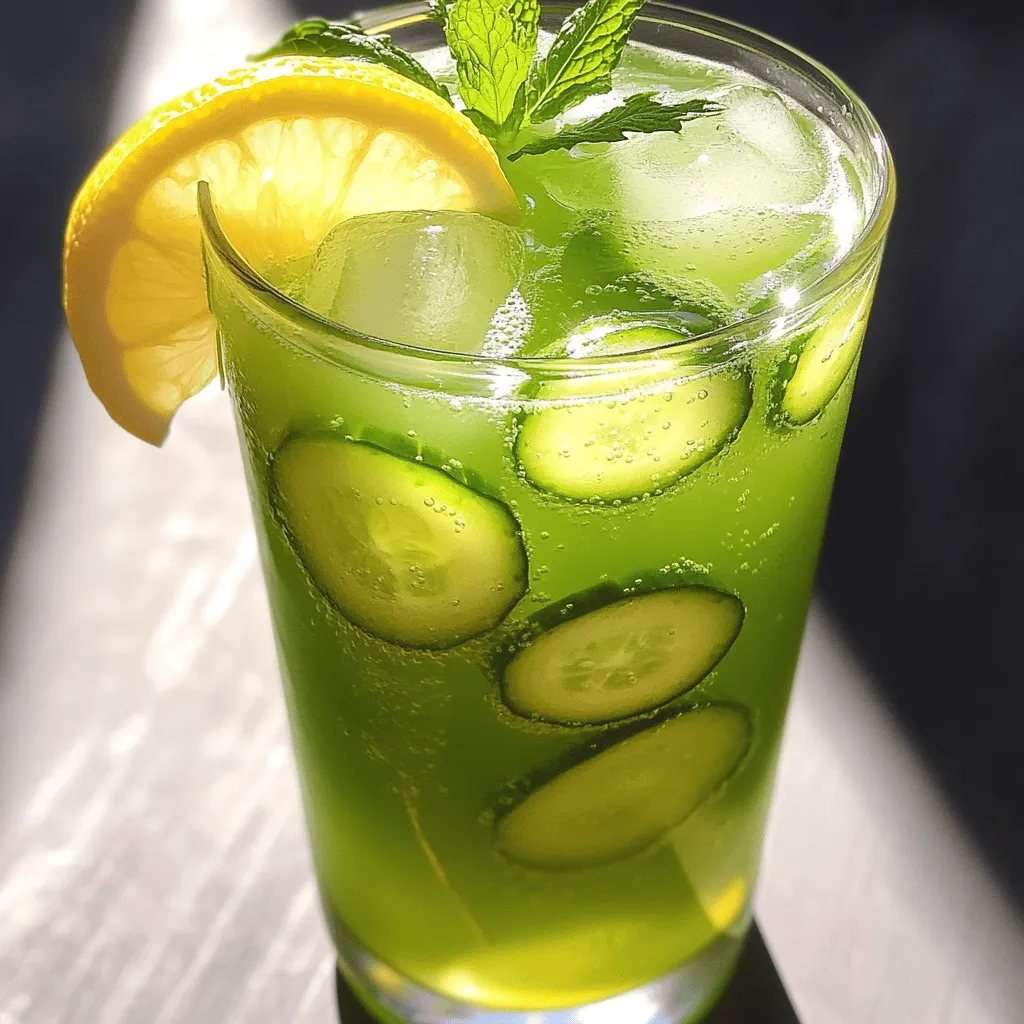
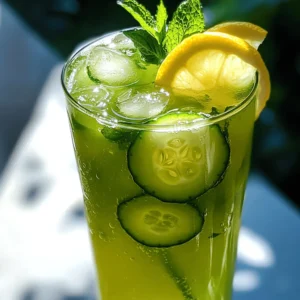
Cucumber Mint Lemonade Refreshing Summer Drink
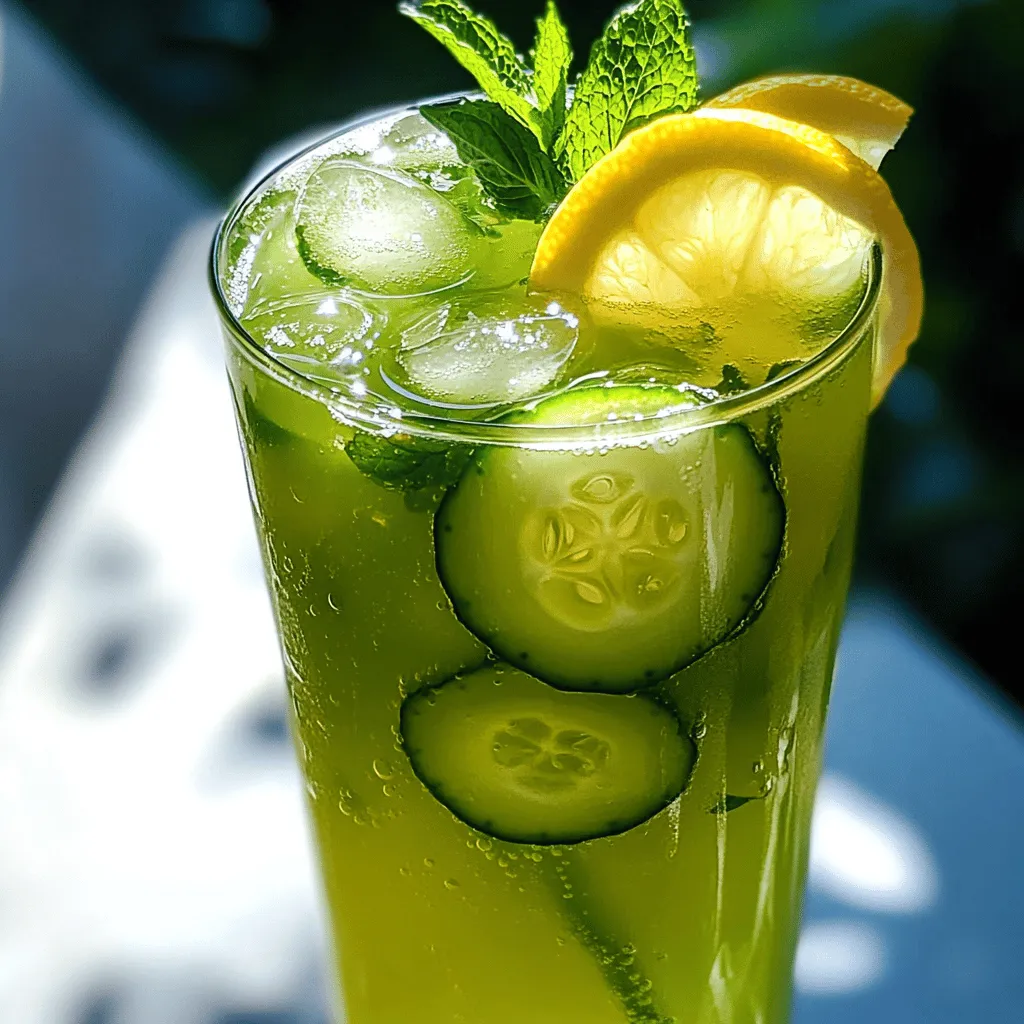
Looking for a cool and tasty drink this summer? Try my Cucumber Mint Lemonade! This drink is refreshing, packed with flavor, and easy to make. It brings together crisp cucumber, fragrant mint, and zesty lemon for the perfect sip. Whether you’re at a backyard BBQ or just relaxing on your porch, this drink will quench your thirst. Ready to dive in and learn how to make it? Let’s go!
Ingredients
Detailed List of Ingredients
To make a tasty cucumber mint lemonade, you’ll need:
– 1 large cucumber, peeled and thinly sliced
– 1 cup fresh mint leaves, packed
– Juice of 4 large lemons (about 1 cup)
– 1/2 cup agave syrup or honey (adjust for sweetness)
– 5 cups cold water
– Ice cubes for serving
– Lemon slices and fresh mint sprigs for garnish
Measurements and Substitutions
When making this drink, exact measurements help. Here are some easy swaps if you need them:
– Cucumber: You can use English cucumber for less bitterness.
– Mint: If you can’t find fresh mint, try using mint extract. Use just a few drops.
– Lemon Juice: Fresh is best, but bottled lemon juice works in a pinch.
– Sweetener: Swap agave syrup for honey or sugar, just adjust to taste.
Health Benefits of Ingredients
Cucumber, mint, and lemon pack a health punch:
– Cucumber: It has lots of water, which keeps you hydrated. It’s low in calories too.
– Mint: This herb helps with digestion and freshens your breath.
– Lemon: High in vitamin C, lemons boost your immune system and help detox your body.
These ingredients not only make your drink refreshing but also good for your health! You can enjoy this delightful beverage without any guilt.
Step-by-Step Instructions
Preparation of the Cucumber-Mint Blend
To start, gather your fresh cucumber and mint leaves. Peel and thinly slice one large cucumber. It is important to slice it thin for smooth blending. Place the cucumber slices and one cup of packed mint leaves in a blender. Next, add one cup of cold water. Blend this mix on high speed until it becomes smooth. You want to ensure the cucumber and mint combine well. This step creates a refreshing base for your lemonade.
Straining the Mixture
After blending, it’s time to strain the cucumber-mint mixture. Use a fine mesh sieve or cheesecloth for this task. Take a large pitcher and pour the blended mixture into it. With a spatula or spoon, press down gently. This helps to extract all the liquid while leaving the solids behind. What you get is a vibrant, green cucumber-mint juice that is both refreshing and fragrant.
Mixing Lemonade Base and Incorporating Water
Now that you have your cucumber-mint juice, it’s time to make the lemonade base. Squeeze the juice from four large lemons to get about one cup. Pour this juice into the pitcher with the cucumber-mint juice. Add half a cup of agave syrup or honey to the mix. Stir well to dissolve the syrup completely. Finally, add four cups of cold water to the pitcher. Mix everything until it is evenly combined. Taste your lemonade and adjust the sweetness if needed. You can add more syrup or honey based on your preference.
Tips & Tricks
Tips for Achieving the Perfect Taste
To get the best taste from your cucumber mint lemonade, you can adjust sweetness and acidity. Start with the recipe’s recommended amount of agave syrup or honey. Taste it after mixing, and if you want more sweetness, add a little more. If it’s too sweet, squeeze in more lemon juice. The balance of sweet and tart is key!
Chilling Recommendations
Chilling your lemonade is very important. For the best flavor, let it sit in the fridge for at least 30 minutes. This time allows the cucumber and mint to infuse into the lemonade. If you need it faster, try putting the pitcher in an ice bath for about 15 minutes. This will cool it down quickly without diluting the flavor.
Presentation Tips
Presentation makes your drink more inviting. Use tall glasses filled with ice cubes when serving. Garnish with a lemon slice and a fresh mint sprig. You can also add cucumber slices to the rim of the glass for a fun look. For an even better display, consider using colorful straws and a tray with extra lemon slices and mint sprigs. This makes your cucumber mint lemonade a real treat!
Variations
Flavor Variations
You can play with flavors in your cucumber mint lemonade. Try adding fresh fruit juices like watermelon, lime, or pineapple for a fruity twist. Each juice brings its own taste and sweetness. You can also mix in herbs like basil or rosemary. These herbs add a unique flavor and aroma. Experiment with different combinations to find your favorite mix.
Sweetener Alternatives
If you want to change up the sweetness, you have options. Use maple syrup or stevia instead of agave syrup. These sweeteners can reduce calories while keeping the drink tasty. You can also try coconut sugar or monk fruit sweetener. Adjust the amount based on your taste. Just remember, some sweeteners are stronger than others. So, add them gradually and taste as you go.
Alcoholic Version
Want to make a fun cocktail? You can add spirits to your cucumber mint lemonade. Vodka works well for a light and refreshing drink. Gin can add a herbal note that pairs great with cucumber and mint. Just mix in about 1-2 ounces of your chosen spirit for each glass. Garnish with extra mint and lemon slices for a lovely look. Enjoy your refreshing drink at a summer party or a cozy evening at home.
Storage Info
How to Store Leftovers
To keep your cucumber mint lemonade fresh, store it in the fridge. Use a clean, airtight pitcher or bottle. This helps keep out air and light, which can change the flavor. If you have any leftover garnishes, keep them separate. This way, your drink stays fresh and tasty.
Shelf Life
You can enjoy your cucumber mint lemonade for about 3 to 5 days when stored properly. After that, it may lose its crisp flavor. Always check for any strange smells or changes in color before drinking.
Freezing Tips
If you want to save some lemonade for later, freezing is a great option. Pour the lemonade into ice cube trays. Once frozen, transfer the cubes to a freezer bag. You can then add these cubes to your drinks later for a quick refresh. Just remember, frozen lemonade is best used within 2 to 3 months.
FAQs
What is the best way to prepare cucumber mint lemonade?
To make the best cucumber mint lemonade, start with fresh ingredients. Use a large cucumber, peeled and thinly sliced, for smooth blending. Fresh mint leaves packed tightly give the best flavor. Blend the cucumber and mint with cold water until smooth. Strain the blend to remove solids. This step ensures a refreshing drink without pulp.
For flavor, mix the cucumber-mint juice with fresh lemon juice and your choice of sweetener. I recommend agave syrup or honey. Stir well to combine all the flavors. Finally, chill the lemonade for at least 30 minutes. This allows the flavors to meld beautifully.
Can I use dried mint instead of fresh?
You can use dried mint, but the flavor will differ. Dried mint is less potent than fresh mint. If you use dried mint, you need less. About one tablespoon of dried mint equals one cup of fresh.
Add the dried mint to the cucumber and water blend. Let it steep for a few minutes before straining. This helps release the flavor. But remember, fresh mint brings a bright, lively taste that dried mint cannot match.
How to adjust the recipe for more servings?
To make more cucumber mint lemonade, simply double or triple the recipe. Keep the same ratios of cucumber, mint, lemon juice, sweetener, and water. For example, if you want to serve 12 people, use 2 large cucumbers, 2 cups of mint, and juice from 8 lemons.
Make sure to blend and strain in batches if your blender is small. After mixing, chill the lemonade in a larger pitcher. This way, you can serve a crowd while keeping everything tasty and fresh.
Cucumber-mint lemonade is a refreshing drink made with simple ingredients. We explored how to blend cucumbers, mint, and lemon for a tasty treat. Health benefits of these ingredients add to its appeal. I shared tips for flavor adjustments, chilling, and eye-catching presentation. You can even customize it with different fruits or make it a cocktail. Store your leftovers wisely for future enjoyment. Overall, this drink is a delightful way to stay cool, healthy, and satisfied. Enjoy making and sharing it with others!
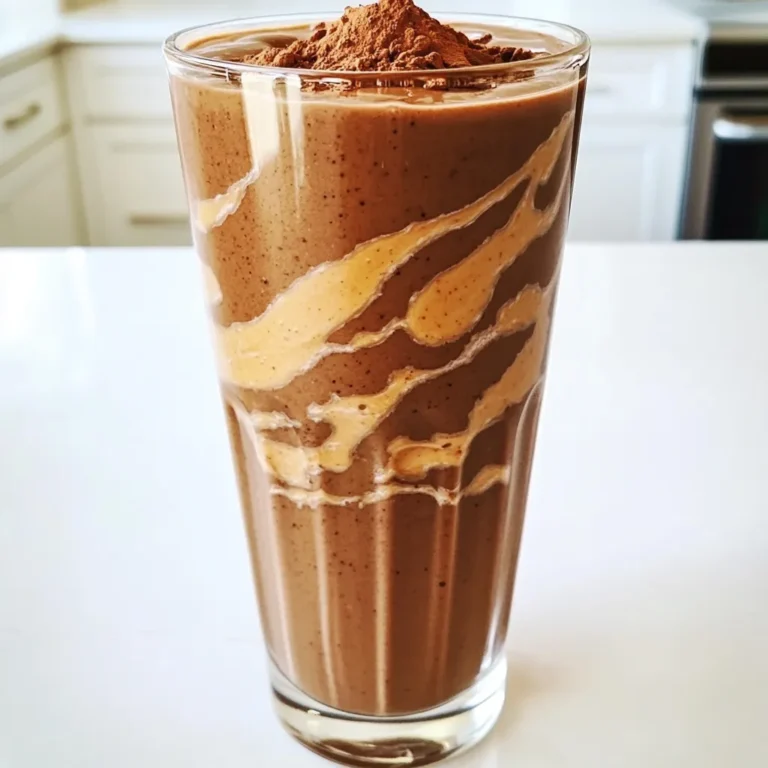
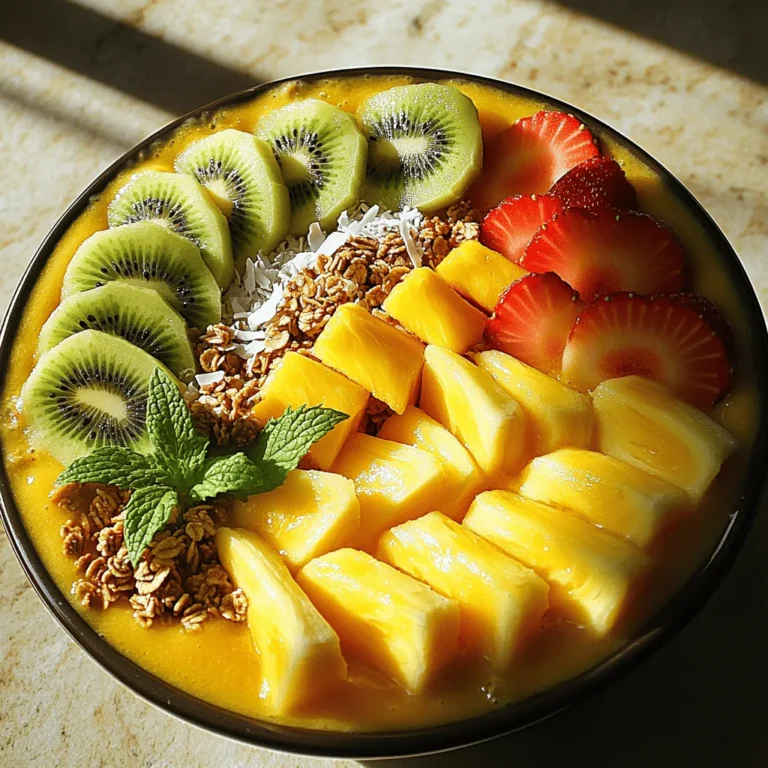
![- 2 ripe mangoes, peeled and diced into small cubes - 1 can (20 oz) lychee fruit in syrup, thoroughly drained - 1 cup refreshing coconut water - 1 tablespoon freshly squeezed lime juice - 1 tablespoon agave syrup or honey (optional, adjust for personal sweetness preference) - A handful of fresh mint leaves for an aromatic garnish - Ice cubes for serving To make the Mango Lychee Breeze, you need ripe mangoes. They should feel soft but not mushy. Their sweetness boosts our drink. Lychee fruit in syrup adds a floral taste. Be sure to drain it well. Coconut water gives a light and fresh flavor. It hydrates and makes the drink smooth. Fresh lime juice brightens everything up. You can use agave syrup or honey for sweetness. Adjust this to suit your taste. Fresh mint leaves will add a nice touch. They also smell great when you sip. Finally, ice cubes keep your drink cold and refreshing. For the full recipe, you can check the details above. To make the Mango Lychee Breeze, start with fresh, ripe mangoes. Use a sharp knife to peel and dice them into small cubes. Aim for bite-sized pieces for easy blending. Next, open the can of lychee. Carefully drain the syrup from the fruit. Rinse the lychee under cold water to remove any remaining syrup. This step helps keep the drink light and refreshing. Now it’s time to combine the ingredients in a blender. Add the diced mangoes and drained lychee to the blender. Pour in one cup of refreshing coconut water and a tablespoon of freshly squeezed lime juice. If you want a sweeter drink, add a tablespoon of agave syrup or honey. Blend everything on high speed for about 30 to 45 seconds. You want to achieve a smooth and creamy consistency. Pause the blender, and taste the mixture. If it needs more sweetness, add a little more agave syrup or honey. Blend again briefly to mix it well. Get your serving glasses ready. Fill each glass halfway with ice cubes. This keeps the drink nice and cold. Carefully pour the creamy mango and lychee mix over the ice, filling the glass nearly to the top. Give it a gentle stir to blend the drink with the ice. Finally, garnish each glass with fresh mint leaves. This adds a lovely look and a wonderful scent to your drink. Enjoy your Mango Lychee Breeze! For the complete recipe, check out the [Full Recipe]. Adjusting sweetness levels Taste is key when making the Mango Lychee Breeze. Start with the basic recipe. Blend the mangoes and lychee first. Then taste the mix. If it’s not sweet enough, add a dash of agave syrup or honey. Blend again to mix. Remember, you can always add more sweetness, but you can't take it away. Tips for blending For the best blend, cut the mangoes into small cubes. This helps them blend quickly and evenly. Always blend on high speed. This gives you a smooth drink. If you find chunks, blend for a few more seconds. If your blender struggles, add a bit more coconut water. This helps the motor work better. Pre-prepping ingredients for a quick assembly You can peel and chop the mangoes ahead of time. Store them in an airtight container in the fridge. This way, when you’re ready to make the drink, it’s quick and easy. You can also drain the lychee in advance. Just keep them in their syrup until you’re ready. Storing leftovers If you have any drink left, store it in the fridge. Use a sealed jar or bottle. It should stay fresh for about a day. Give it a good shake before serving again. The ingredients may settle, but this will bring back that creamy texture. Remember, this drink tastes best fresh! For the full recipe, check the recipe section. {{image_4}} You can switch up the fruit in this drink. Try using peaches or strawberries instead of mango. These fruits add unique flavors and fun colors. You can also experiment with flavored coconut water. Coconut water with pineapple or passion fruit can add a tasty twist. Want to make this drink for adults? Add rum or vodka to your mix. This change brings a fun kick to the refreshing flavors. The best mixers for an alcoholic twist are soda water or tonic water. These mixers help balance the sweetness of the fruit while keeping it light. For the full recipe of Mango Lychee Breeze, check the earlier section. Enjoy experimenting! Mangoes bring a wealth of health benefits. They are rich in vitamins A, C, and E. These vitamins help keep your skin healthy and your immune system strong. Mangoes also contain minerals like potassium and magnesium, which support heart health and muscle function. Mangoes are packed with antioxidants. These are compounds that fight free radicals in your body. Free radicals can cause cell damage, leading to health issues. Eating mangoes may help reduce the risk of chronic diseases. Their antioxidant properties also contribute to good digestion. Lychee fruit is hydrating and great for skin health. It is about 80% water, which helps keep you hydrated on hot days. Staying hydrated supports your skin’s glow and overall health. Lychee also contains vitamin C, which boosts your skin’s natural barrier. Lychee is low in calories, making it a smart choice for snacks. It has dietary fiber that aids digestion. This fruit may help support weight management and overall gut health. Additionally, lychee has flavonoids, which have anti-inflammatory effects. These benefits can enhance your well-being as you enjoy your Mango Lychee Breeze. For the full recipe, check out the [Full Recipe]. If you don’t have coconut water, you can use regular water or sparkling water. Both options keep the drink refreshing. You can also try almond milk for a creamy twist. If you want a different flavor, use fruit juice like pineapple or orange juice. Each choice will change the taste slightly. Keep in mind that coconut water adds a unique sweetness and flavor. Yes, you can make Mango Lychee Breeze ahead of time! Blend the ingredients together and store the drink in the fridge. Just remember to keep it in a sealed container. This way, it will stay fresh for up to 24 hours. When you’re ready to serve, give it a quick stir. You might want to add more ice to keep it cold. You can find pre-made Mango Lychee Breeze at some grocery stores. Look for it in the beverage section, often near juice drinks. Some brands may offer it in bottles or cans. If you prefer online shopping, check websites like Amazon or specialty food shops. Prices can vary, but expect to pay around $3 to $5 per bottle. Availability may depend on your location. You learned how to make a refreshing Mango Lychee Breeze. We covered the main ingredients, preparation steps, and serving tips. I shared ways to adjust flavors and make variations. Plus, we discussed the health benefits of mangoes and lychees. This drink is not just tasty; it’s also good for you. Try it at your next gathering or when you want a cooling treat. Enjoy mixing and experimenting with this fun recipe!](https://joymealplan.com/wp-content/uploads/2025/06/0bedcb2e-8f34-49c6-a17f-dd97c376b34b-768x768.webp)
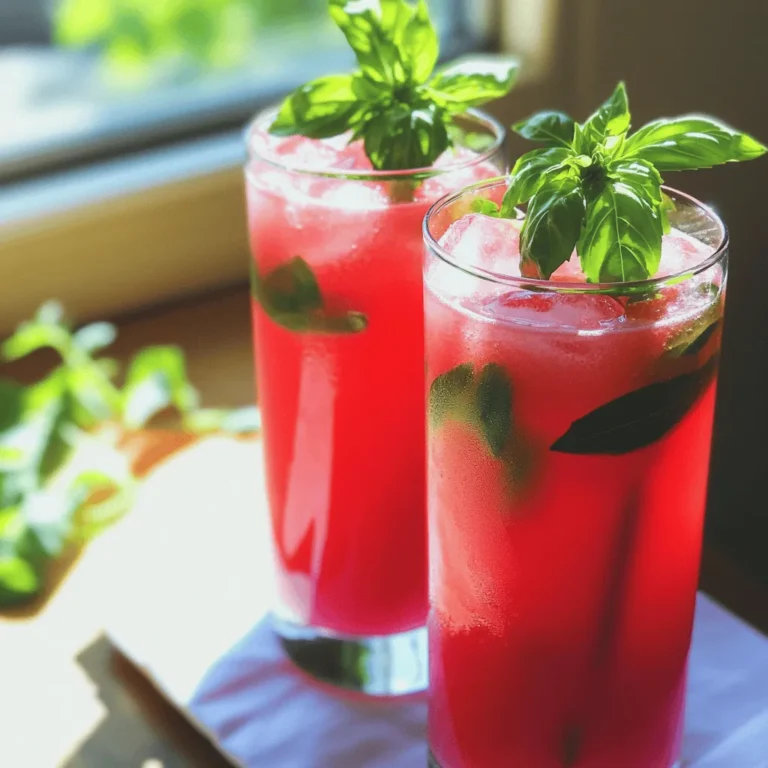
![For the Coconut Pineapple Matcha Freeze, you will need: - 1 cup full-fat coconut milk - 1 cup fresh pineapple chunks - 2 teaspoons matcha powder - 2 tablespoons honey or agave syrup - 1/2 cup crushed ice - A pinch of sea salt - Fresh pineapple slices and shredded coconut for garnish If you cannot find fresh pineapple, canned pineapple works well. Just drain it first. For a dairy-free option, stick with full-fat coconut milk. You can also swap honey for agave syrup if you prefer a vegan option. For a lighter version, use light coconut milk. If you want a sweeter drink, add more honey or agave. When picking fresh pineapple, look for a sweet smell at the base. The skin should be firm but not hard. Choose coconuts that feel heavy with water inside. Shake them to check. If you hear sloshing, it’s fresh. Always check the matcha powder color; it should be bright green. This shows it is high quality and fresh. Start by gathering all your ingredients. Use one cup of full-fat coconut milk for creaminess. Add one cup of fresh pineapple chunks for sweetness. Sprinkle in two teaspoons of matcha powder for flavor and color. I like to sweeten mine with two tablespoons of honey or agave syrup. Adjust the amount based on your taste. Don’t forget a half cup of crushed ice for that frosty texture. Lastly, a pinch of sea salt brightens all the flavors. Place everything in your blender. Blend the mixture on high speed. Watch for lumps, especially from the matcha powder. If you see any, stop the blender. Scrape down the sides to mix it well. Blend again until you have a smooth and creamy texture. This step is key for a delightful drink. Once blended, taste your Coconut Pineapple Matcha Freeze. If it needs more sweetness, add more honey or agave syrup. Blend briefly again to mix in the extra sweetener. Pour the mixture into serving glasses. Fill each glass about three-quarters full. This helps achieve the right texture and looks great. Transfer the glasses to the freezer and chill for about 30 minutes. This step makes it firm but not too hard. Finally, stir gently before serving to keep it creamy. Enjoy your refreshing summer treat! To make the best Coconut Pineapple Matcha Freeze, start by pouring your mix into serving glasses. Fill each glass about three-quarters full. This way, you have enough room for blending later. Place the filled glasses in the freezer for about 30 minutes. This helps the drink firm up just right without freezing solid. Creaminess is key for this drink. To keep it smooth, blend the mixture until it’s fully combined. If you find lumps of matcha, blend again or scrape the sides of the blender. After the chilling time, give the drink a gentle stir before serving. This keeps the texture creamy and light. Make your drink pop with fun garnishes! Add a slice of fresh pineapple on the rim of the glass. You can also sprinkle some shredded coconut on top for a tropical vibe. Use colorful straws or spoons for an extra flair. These small touches make your Coconut Pineapple Matcha Freeze feel special and inviting. For the full recipe, check out the recipe section above. {{image_4}} You can switch up the flavors in your Coconut Pineapple Matcha Freeze. Try adding mango for a tropical twist. Blend in some strawberries for a berry delight. You might also enjoy a hint of lime for a zesty finish. Each of these options adds a new layer of flavor. Feel free to mix and match to find your favorite combo. Making this treat vegan is easy! Replace honey or agave syrup with maple syrup or a sugar-free sweetener. This way, you can enjoy the same creamy texture without dairy. You can also use a low-sugar milk option, like almond or oat milk. This keeps the taste delicious while lowering the sugar content. You can experiment with different milks based on your taste. Almond milk gives a nice nutty flavor. Cashew milk adds extra creaminess. Coconut milk is still the best for that rich taste. For sweeteners, try coconut sugar or stevia. Adjust the amounts to fit your taste buds. Keep in mind that each milk and sweetener gives a unique flavor profile. This lets you customize your Coconut Pineapple Matcha Freeze just the way you like it! For the complete recipe, check out the [Full Recipe]. To store leftover Coconut Pineapple Matcha Freeze, pour it into an airtight container. Seal tightly and put it in the freezer. This drink tastes best when fresh, but it can last up to a week. Make sure to label the container with the date. If your Coconut Pineapple Matcha Freeze becomes too hard, don’t worry! Simply take it out of the freezer. Let it sit for a few minutes to soften. Then, scoop it back into your blender. Add a splash of coconut milk to help it blend smoothly. Blend until you achieve your desired texture. The best way to enjoy your Coconut Pineapple Matcha Freeze is fresh. However, if you store it properly, it can last up to one week in the freezer. For the best flavor, consume it within the first few days. Always check for any changes in smell or color before serving. Enjoy your tropical treat! Matcha is a special type of green tea made from finely ground tea leaves. Unlike regular green tea, you drink the whole leaf in matcha. This gives matcha a richer flavor and more nutrients. Regular green tea is steeped, and you discard the leaves. Matcha has a bright green color and a creamy texture. It also has a unique taste that is both sweet and grassy. This makes it perfect for drinks like Coconut Pineapple Matcha Freeze. Yes, you can make Coconut Pineapple Matcha Freeze in advance. Prepare the drink and pour it into glasses. Cover them with plastic wrap or lids. Place the glasses in the freezer for up to a few days. If you freeze them longer, the texture may change. To serve, let them sit at room temperature for a few minutes. Stir gently before enjoying. Coconut Pineapple Matcha Freeze has many health benefits. Matcha is high in antioxidants, which help fight free radicals. It can boost your energy and improve focus. Coconut milk adds healthy fats that are good for your heart. Pineapple is rich in vitamins and helps digestion. This drink is a tasty way to hydrate while getting nutrients. Enjoying it can make you feel refreshed and energized. You now know the key ingredients for a delicious Coconut Pineapple Matcha Freeze. Choose fresh items for great taste. Follow the step-by-step guide to blend for the perfect texture. Use tips to serve this drink in fun ways. Try different flavors or make it vegan. Store leftovers well for later enjoyment. This drink is a tasty way to enjoy matcha's health benefits. Enjoy making and sharing this refreshing treat!](https://joymealplan.com/wp-content/uploads/2025/06/95f0bd42-8f40-4f80-b2de-1daa2e62c0ea-768x768.webp)
![- Ripe pears - Chai tea bags or loose chai tea - Milk options (dairy or non-dairy alternatives) The main ingredients are simple yet full of flavor. Ripe pears give the latte its sweet base. Choose chai tea bags or loose tea for that warm spice mix. For milk, you can use dairy or any non-dairy milk. Almond, oat, or soy milk all work nicely. - Honey or maple syrup - Vanilla extract - Ground spices (cinnamon, cardamom, ginger, black pepper) Flavor enhancers take this drink to the next level. Honey or maple syrup adds sweetness. Vanilla extract brightens the mix with a rich aroma. Ground spices like cinnamon and cardamom add warmth. Ginger brings a bit of zing, while black pepper adds a subtle kick. - Whipped cream or whipped coconut cream - Cinnamon stick for garnish For a fun touch, consider whipped cream on top. Whipped coconut cream is a great vegan choice. A cinnamon stick as a garnish makes the drink look pretty and adds extra flavor. For the full recipe, check out the [Full Recipe]. To start, you need to cook the pears. Take 2 ripe pears, peel and dice them. In a medium pot, add the diced pears and one cup of water. Bring this to a boil over medium heat. Once boiling, lower the heat and let it simmer for about 10 minutes. The pears should soften and be easy to pierce with a fork. Next, we need to puree the pears. Remove the pot from the heat. Use an immersion blender to blend the pears until smooth. If you don’t have one, you can transfer the pears to a regular blender. Blend them until smooth, then put the pear puree back in the pot. Now it’s time to mix our ingredients. Pour 2 cups of your choice of milk into the pot with the pear puree. Place the pot back on the stove over medium heat. Add the chai tea bags or 2 tablespoons of loose chai tea to the mix. Then, add one tablespoon of honey (or maple syrup if you want it vegan). Include one teaspoon of vanilla extract, half a teaspoon of ground cinnamon, a quarter teaspoon of ground cardamom, and a quarter teaspoon of ground ginger. Don’t forget a pinch of freshly ground black pepper! Stir everything well. Now, let’s heat this mixture. Keep stirring occasionally until it gets warm. Be careful not to let it boil. This should take about 5 minutes. If you used tea bags, remove them now. Finally, pour the spiced pear chai latte into cozy mugs. You can top it with whipped cream or whipped coconut cream if you like. Dust a little cinnamon on top or add a cinnamon stick for a lovely touch. For the full recipe, check out the [Full Recipe]. To get the best flavor, start with ripe pears. Look for pears that feel slightly soft when you press them. This means they are sweet and juicy. You can also choose pears that have a nice golden color. Adjust sweetness to your taste. If you like it sweeter, add more honey or maple syrup. If you prefer less sweetness, use less. Taste as you mix! Brewing the chai tea right is key. Start by placing your tea bags in hot water. Let them steep for about 5 minutes. This helps release all the yummy flavors. Avoid boiling the mixture. Boiling can make the chai bitter and spoil the pear flavor. Keep the heat low and gentle. For serving, clear glass mugs are perfect. They show off the beautiful color of the latte. You can also use cozy ceramic mugs for warmth. Pair your latte with a small cookie or a slice of spiced cake. This makes your drink feel even more special. It’s a delightful way to enjoy a cozy moment. For the full recipe, check out the detailed steps. {{image_4}} You can change up flavors to fit the season. Try adding pumpkin spice for a warm, fall taste. The mix of spices will give your latte a cozy feel. In the summer, think about using fresh fruits. Apples or peaches can add a fun twist to the drink. Just blend them in like you do with the pears. Do you want a vegan latte? Swap dairy milk for almond or oat milk. You can also replace honey with maple syrup. This makes it sweet and vegan-friendly. If you want to try different teas, rooibos is a great option. It has a sweet, earthy taste that works well with the pears. Iced drinks are perfect for hot days. To make an iced spiced pear chai latte, cool the mixture after heating it. Blend it with ice until it’s smooth. Serve it in a tall glass for a refreshing treat. You can also add whipped cream on top for a special touch. Enjoy it chilled, and savor the sweet pear and spice flavors! For the complete recipe, check out [Full Recipe]. To keep your spiced pear chai latte fresh, store it in the fridge. Use an airtight container for best results. This method helps to prevent any off-flavors from entering your drink. You can keep it for up to three days. After that, the flavor may fade, and the texture can change. When it’s time to enjoy your latte again, reheat it gently. Use a saucepan over low heat. Stir it often to ensure an even warmth. This method helps maintain the smooth texture and rich flavor. Avoid boiling it, as this can ruin the latte's creaminess. You can freeze your spiced pear chai latte if you want to save some for later. Pour it into freezer-safe containers, leaving some space for expansion. It can last up to one month in the freezer. To enjoy it, move it to the fridge to thaw overnight. Once thawed, reheat it using the stovetop method for the best taste. A spiced pear chai latte is a warm drink that blends sweet pears with spicy chai. This latte has a rich and creamy texture with a cozy flavor. You’ll taste hints of cinnamon, cardamom, and ginger. The pear adds a unique sweetness that pairs perfectly with the spices. Ingredients include: - 2 ripe pears, peeled and diced - 2 cups milk (dairy or non-dairy) - 1 cup water - 2 chai tea bags (or loose chai tea) - 1 tablespoon honey (or maple syrup) - 1 teaspoon vanilla extract - 1/2 teaspoon ground cinnamon - 1/4 teaspoon ground cardamom - 1/4 teaspoon ground ginger - A pinch of freshly ground black pepper Yes, you can make this drink in advance. First, prepare the pear puree as directed. Once cooled, store it in a sealed container in the fridge. You can keep it fresh for up to three days. When you’re ready to enjoy, simply heat it up, add milk, and spices again. This makes it easy for busy mornings or cozy gatherings. You can find spiced pear chai lattes at local cafes, especially those that focus on unique drinks. Many coffee shops offer seasonal specials, so be on the lookout. If you prefer to make it at home, you can buy chai tea and pears at most grocery stores. Some brands may even sell ready-made versions in stores. Absolutely! You can use any milk you prefer. Almond, oat, or soy milk all work well in this recipe. Each type will add its unique flavor and creaminess. If you want a richer taste, try whole milk or even coconut milk. Just keep in mind that some non-dairy milks may be sweeter, so adjust the honey to taste. This blog post covered how to make a spiced pear chai latte. We explored key ingredients like ripe pears and chai tea, plus flavor enhancers such as honey and spices. I shared step-by-step instructions for preparing, combining, and serving the drink. You learned tips for the best flavor and presentation, as well as variations, storage info, and answered common questions. Enjoy making this latte at home. Experiment with flavors and share your creations!](https://joymealplan.com/wp-content/uploads/2025/06/300236b5-0783-47ce-bc7a-6a028b80e161-768x768.webp)