
Crispy Baked Sweet Potato Fries Easy and Flavorful Snack
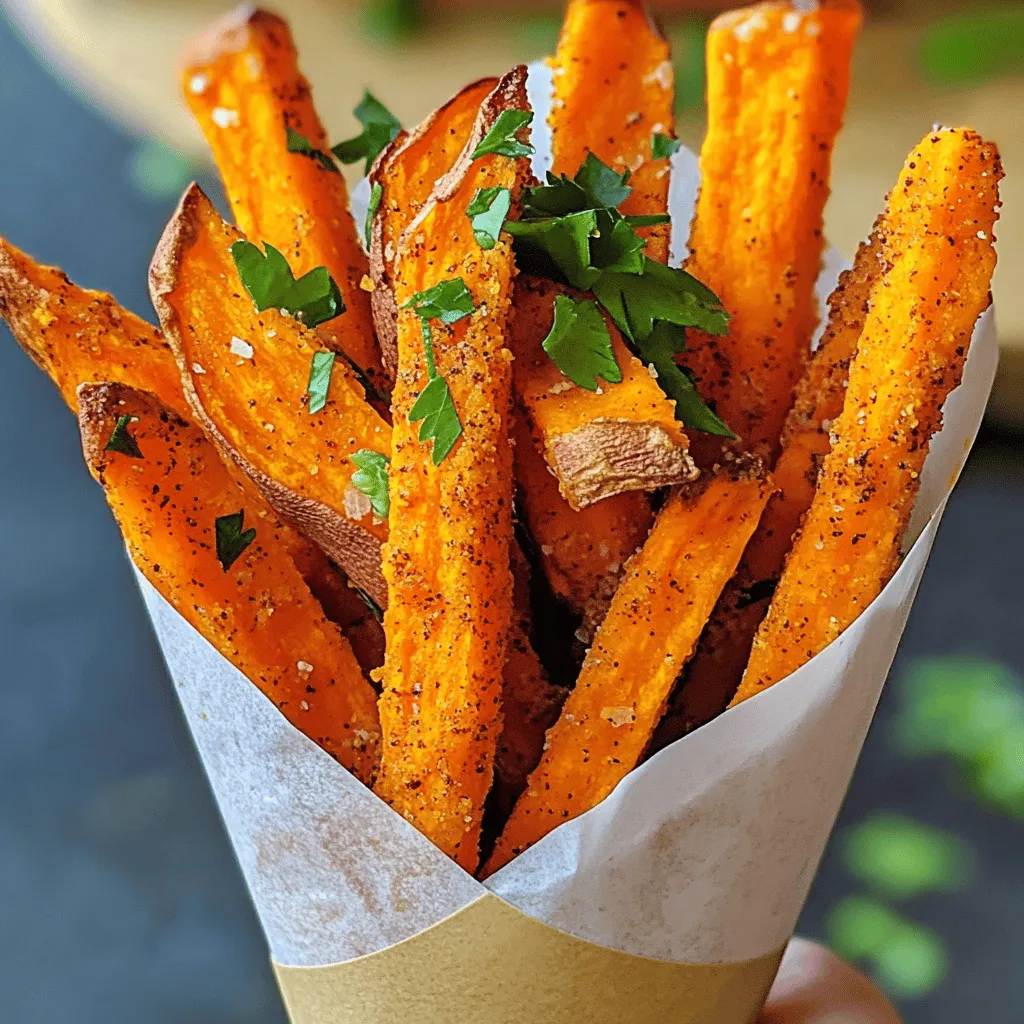
Looking for a snack that’s both easy and packed with flavor? Crispy baked sweet potato fries are your answer! In this guide, I’ll share how to make the perfect fries with simple ingredients you already have. Plus, I’ll give you tips for that crunch everyone loves. Whether you enjoy them plain or with fun toppings, these fries will soon be your go-to treat. Let’s get started on this tasty journey together!
Ingredients
Main Ingredients for Crispy Baked Sweet Potato Fries
To make crispy baked sweet potato fries, you need just a few main ingredients:
– 2 large sweet potatoes, peeled and cut into fry shapes
– 2 tablespoons olive oil
– 1 teaspoon cornstarch
These ingredients form the base of your fries. Sweet potatoes bring a natural sweetness and vibrant color. Olive oil adds healthy fat, helping the fries crisp up nicely. Cornstarch is the secret ingredient that helps achieve that perfect crunch.
Essential Seasonings
Next, let’s add flavor with some key seasonings:
– 1 teaspoon garlic powder
– 1 teaspoon smoked paprika
– ½ teaspoon cayenne pepper (adjust based on your spice level)
– Salt and freshly ground black pepper to taste
These seasonings elevate the fries. Garlic powder gives a savory kick, while smoked paprika adds a lovely depth. Cayenne pepper gives a bit of heat. Make sure to adjust the amount based on your taste.
Optional Garnishes
For a touch of freshness and color, consider these optional garnishes:
– Fresh parsley, finely chopped
Garnishing with parsley not only brightens the dish but also adds a fresh flavor. You can skip this step if you’re in a hurry, but it makes the fries look even more appealing.
Step-by-Step Instructions
Preparing the Sweet Potatoes
Start by peeling the sweet potatoes. Use a sharp peeler for easy work. Cut them into fry shapes, about a half-inch thick. This size helps them cook evenly. Once cut, place them in a bowl and set aside.
Mixing and Coating Ingredients
Take a large mixing bowl and add the sweet potato fries. Drizzle in two tablespoons of olive oil. Toss the fries well so they are fully coated. This oil gives the fries great flavor and helps them crisp up. Next, sprinkle one teaspoon of cornstarch over the fries. Toss again. This step is key for crunchiness.
Now, add the spices: one teaspoon of garlic powder, one teaspoon of smoked paprika, and half a teaspoon of cayenne pepper. Don’t forget to add salt and black pepper to taste. Mix everything together until the fries are evenly coated with the spices.
Baking the Fries to Crispy Perfection
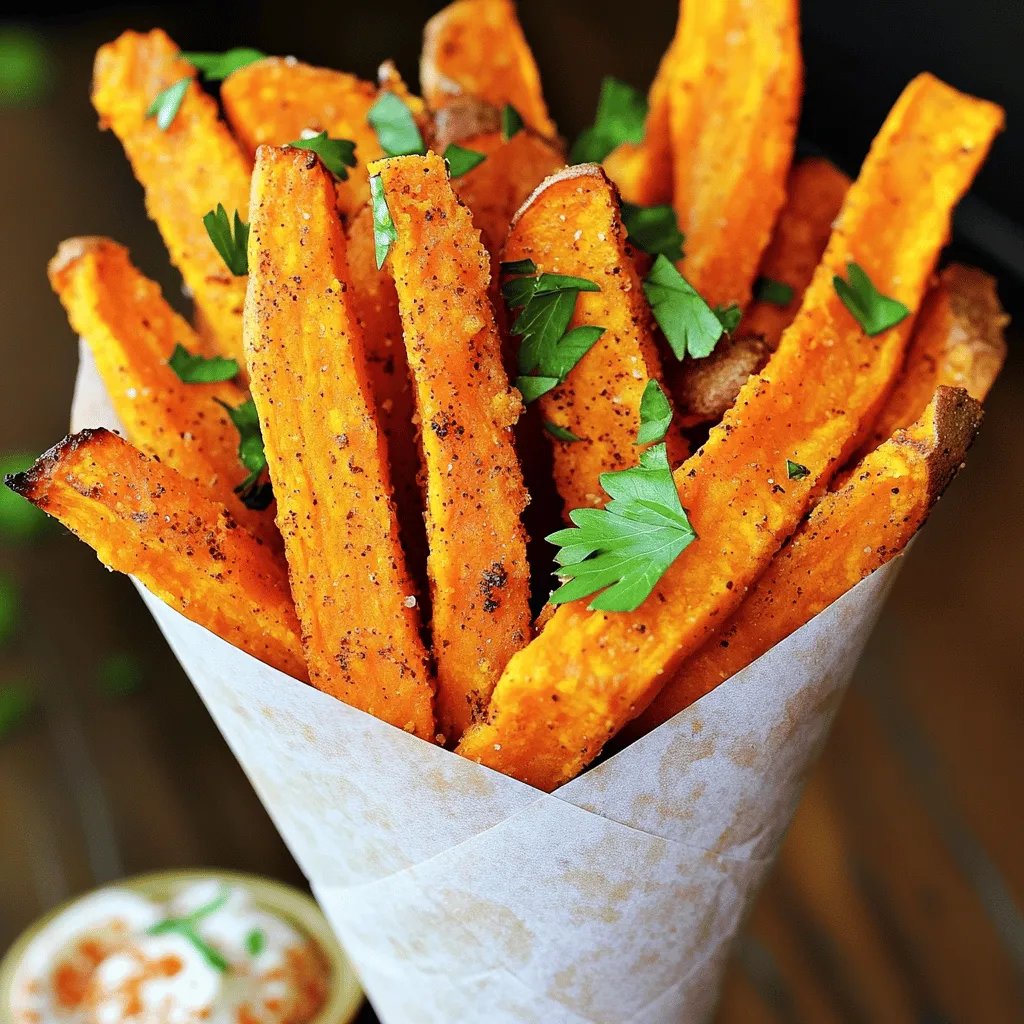
Preheat your oven to 425°F (220°C). While it warms up, line a large baking sheet with parchment paper. Spread the coated fries out in a single layer on the sheet. Make sure not to crowd them; this helps them get crispy. Bake the fries for 25-30 minutes. Flip them halfway through for even browning. They are ready when they turn golden brown and crispy.
Once baked, let the fries cool for a few minutes. This helps them firm up. Garnish with finely chopped parsley for a colorful touch. Enjoy your crispy baked sweet potato fries as a tasty snack or side dish.
Tips & Tricks
How to Achieve Maximum Crispiness
To get the crispiest baked sweet potato fries, follow a few key steps. First, cut the fries evenly. This helps them cook at the same rate. Next, soak the cut fries in water for at least 30 minutes. This removes some starch and makes them crispier. After soaking, dry them well with a towel. Don’t skip this step! The drier the fries, the crunchier they will be. Finally, use cornstarch in the coating. It helps create that desired crispy layer.
Common Mistakes to Avoid
Many home cooks face common pitfalls when making sweet potato fries. One big mistake is overcrowding the baking sheet. When fries are too close, they steam instead of bake. This results in soggy fries. Always make sure there is space between each fry. Another mistake is not flipping the fries halfway through cooking. Flipping ensures even browning on both sides. Lastly, keep an eye on your oven temperature. If it’s too low, the fries won’t crisp up. Stick to the preheat temperature for the best results.
Recommended Baking Gear
Using the right tools can make a difference in your sweet potato fry game. A large baking sheet is essential. Choose one with a rim to catch any oil or seasoning. Parchment paper is your best friend. It prevents sticking and helps with cleanup. A mixing bowl is also important for coating the fries evenly. If you have a silicone spatula, use it to flip the fries gently. This tool minimizes breakage.
Variations
Different Seasoning Combinations
You can change up the flavor of your sweet potato fries easily. A dash of cinnamon and a pinch of brown sugar create a sweet treat. For a savory twist, try adding Italian herbs like oregano and thyme. You can also mix in some curry powder for a bold flavor. The options are endless, so feel free to experiment!
Sweet Potato Fries with a Twist (add-ins like cheese or herbs)
Adding cheese makes these fries even more delicious. Grated Parmesan or sharp cheddar melts beautifully on top. Fresh herbs like rosemary or thyme add a bright flavor. You can also sprinkle some crumbled feta for a Mediterranean vibe. Just add these toppings during the last few minutes of baking.
Air Fryer vs. Oven Baking
Both methods can create crispy fries, but they do differ. The air fryer cooks faster and gives a crispier texture. It uses hot air circulation, which means less oil. Oven baking, however, is perfect for larger batches. You can make more fries at once, and they still turn out great! If you have both, try each method to see what you prefer.
Storage Info
How to Store Leftover Sweet Potato Fries
Store leftover sweet potato fries in an airtight container. Let them cool first. Keep them in the fridge for up to three days. This helps maintain some of their texture. Just remember, they might lose some crispiness over time.
Reheating Tips for Maintaining Crispiness
To reheat the fries, use your oven or air fryer. Preheat your oven to 400°F (200°C). Spread the fries on a baking sheet in a single layer. Heat them for about 10-15 minutes. This method helps bring back their crispiness. Avoid using the microwave, as it can make them soggy.
Freezing Sweet Potato Fries
You can freeze sweet potato fries for longer storage.Let them cool completely, then place them in a freezer bag. Remove as much air as you can. They can stay frozen for up to three months. When ready to cook, bake them straight from the freezer. Adjust the cooking time for perfect crispiness.
FAQs
Can I make these fries ahead of time?
Yes, you can prepare sweet potato fries in advance. Slice the sweet potatoes and toss them with olive oil and seasonings. Store them in an airtight container in the fridge for up to 24 hours.This saves time and makes it easy to enjoy a tasty snack.
What type of sweet potatoes are best for baking?
For the best results, choose firm, medium-sized sweet potatoes. Look for smooth skin without bruises or soft spots. Varieties like Beauregard or Jewel work well. These types are sweet, creamy, and hold their shape during baking. Avoid using potatoes that are too small, as they may not cook evenly.
How can I make these fries spicier or milder?
Adjust the spice level by changing the cayenne pepper amount. For milder fries, use less or leave it out entirely. You can also add a pinch of paprika for a smoky flavor without heat. If you want a spicier kick, add more cayenne or try crushed red pepper flakes. Mix and match the spices to find your perfect balance!
In this post, I covered how to make crispy baked sweet potato fries. We explored the essential ingredients, seasonings, and fun variations. You learned step-by-step instructions for preparation and baking. I shared tips to avoid common mistakes and how to keep fries crispy. Don’t forget storage and reheating methods for leftovers. Enjoy experimenting with flavors and cooking methods. Crispy sweet potato fries can delight anyone, so go ahead and create your own version!


![- 1 ripe mango, diced - 2 ripe avocados, diced - 1 small red onion, finely chopped - 1 sweet red bell pepper, diced - 1 jalapeño, minced - 1/4 cup fresh cilantro, chopped - Juice of 2 limes - 1 tablespoon extra virgin olive oil - Salt and black pepper to taste How to choose the perfect mango Look for a mango that feels slightly soft when you press it. The skin should have a nice golden hue. A ripe mango smells sweet at the stem end. Choosing the best avocados Pick avocados that yield to gentle pressure. The skin should be dark green or black, depending on the variety. Avoid hard or overly mushy avocados. Signs of a fresh jalapeño A fresh jalapeño should be firm and glossy. Look for bright green skin without wrinkles. A fresh pepper has a crisp feel and a spicy aroma. These tips will help you find the best ingredients for your salsa. Fresh produce makes your dish more vibrant and tasty. For the full recipe, check the details above. - Start by washing all your fresh produce. - Dice the ripe mango into small cubes. - Carefully cut the avocados into bite-sized pieces. - Finely chop the red onion for sharp flavor. - Dice the red bell pepper for sweetness. - Mince the jalapeño, adjusting to your heat preference. Next, in a large mixing bowl, combine the diced mango, avocado, chopped onion, red bell pepper, and minced jalapeño. Gently fold in the chopped cilantro, spreading the fresh herb throughout. Squeeze the juice of two fresh limes over the mix, along with a tablespoon of olive oil. This adds richness. Use a spatula to carefully toss the ingredients. Keep the avocado pieces intact to maintain texture. Season the salsa with salt and freshly cracked black pepper, mixing lightly to combine. Resting time is key for great flavor. Let the salsa sit for about 10 minutes at room temperature. This duration allows the ingredients to blend and the flavors to develop. When you let the salsa rest, the lime juice and olive oil soak in. This process enhances the taste and makes every bite burst with flavor. Enjoy this fresh, vibrant dish as a wonderful side or topping. For the full recipe, check out the details above. - How to keep avocados from browning: To stop avocados from turning brown, use lime juice. The acid in lime juice slows oxidation. Squeeze fresh lime juice right after cutting the avocado. Mix it in well to cover all the flesh. You can also store the salsa in an airtight container to keep it fresh longer. - Using lime juice effectively: Lime juice brightens the flavors in your salsa. Use freshly squeezed lime juice rather than bottled juice. It tastes better and adds a nice zing. Aim for about two limes for this recipe. Adjust based on your taste! - Importance of ingredient proportions: Balance is key to great salsa. Use equal parts of mango and avocado for a good mix. Too much onion can overpower the other flavors. Keep the jalapeño mild if you prefer less heat. Taste as you go, and adjust the ingredients to suit your own palate. - Pairing with tortilla chips: Serve your mango avocado salsa with crispy tortilla chips. The crunch of the chips pairs well with the smoothness of the salsa. It makes for a perfect snack or appetizer at parties. - Using as a topping for grilled meats: This salsa works great as a topping for grilled chicken or fish. The sweet and spicy flavors complement the meat beautifully. Just spoon it on right before serving for the best taste. - Incorporating into tacos or burritos: Use this salsa to add freshness to tacos or burritos. It enhances your meal with vibrant flavors. Just add a scoop in your taco or wrap it up in a burrito, and enjoy! For the full recipe, check out the complete method to create this delicious dish. {{image_4}} You can make mango avocado salsa even better with new flavors. Try adding tropical fruits like pineapple or papaya. These fruits bring a sweet twist and a fun texture. You can also mix in fresh herbs like mint or basil. These herbs give a fresh taste that brightens the salsa. Want more heat? You can swap out the jalapeño for a serrano or habanero pepper. These peppers can make your salsa spicy and exciting. Just remember to taste as you go! Making mango avocado salsa fit your diet is easy. If you're vegan, this recipe is already perfect. It has no animal products and is full of healthy fats. If you need a low-sodium option, skip the added salt. The fresh lime juice and other ingredients give plenty of flavor. For those with allergies, check each ingredient. You can always swap out foods that cause issues for you. This salsa is a versatile dish that everyone can enjoy. Try these ideas to make it your own! For the full recipe, check out the [Full Recipe]. To keep your mango avocado salsa fresh, put it in the fridge. Use an airtight container. This helps prevent the salsa from browning. The salsa stays good for about 2 to 3 days in the fridge. If you see browning, it’s best to toss it. Yes, you can freeze mango avocado salsa! However, know that the texture might change. For best results, freeze it without the avocado. This keeps the salsa tasting fresh. When you're ready to use it, transfer it to the fridge for a slow thaw. To freeze, use a freezer-safe container. Leave some space at the top for expansion. You can also use freezer bags. Squeeze out the air before sealing. When thawing, avoid using a microwave. This can make the salsa mushy. Instead, let it sit in the fridge overnight. Once thawed, mix it well before serving. If it seems dry, add a splash of lime juice for extra flavor. Enjoy your mango avocado salsa fresh and flavorful! How long does mango avocado salsa last? Mango avocado salsa lasts about 2 to 3 days in the fridge. To keep it fresh, store it in an airtight container. The avocado may brown, but it will still taste good. Can I make salsa ahead of time? You can make salsa ahead of time. Just prepare it a few hours before serving. This allows the flavors to mix well. If you make it too early, the avocado may brown. What can I substitute for cilantro? If you dislike cilantro, you can use parsley instead. Parsley adds a fresh taste without the strong flavor of cilantro. Green onions or basil are also good options. What are the health benefits of mangoes and avocados? Mangoes are high in vitamins A and C. They support your immune system and promote healthy skin. Avocados contain healthy fats and fiber. They help with digestion and heart health. Is mango avocado salsa good for meal prep? Yes, mango avocado salsa is great for meal prep. It adds flavor to many meals. Use it on tacos, salads, or grilled meats for a fresh twist. Can I use canned ingredients instead of fresh? You can use canned ingredients, but fresh tastes better. Canned mango or avocado may change the texture. If you must use canned, pick options with no added sugar or salt. Mango avocado salsa is fresh, tasty, and easy to make. We covered how to choose ripe ingredients, prepare them, and enhance flavors. Remember to rest your salsa for the best taste. You can adjust it to fit your diet or add new ingredients. Store leftovers properly to enjoy later. This salsa pairs well with many dishes and adds great flavor. Enjoy your cooking and try new flavor combinations!](https://joymealplan.com/wp-content/uploads/2025/07/4f0b2596-afb2-4ef7-a95d-26c50b7bed60-768x768.webp)
