Ranch Chicken Tenders Crispy and Flavorful Delight
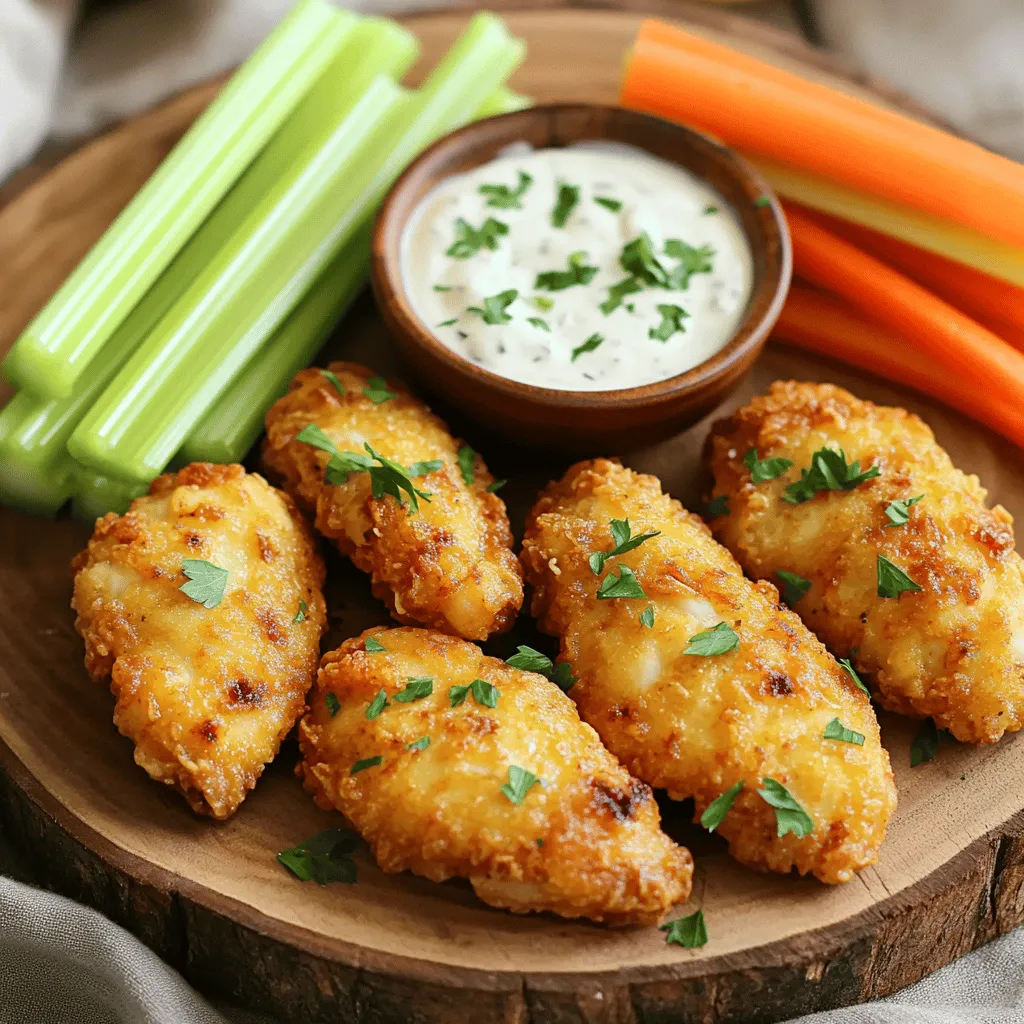
Are you ready for a crispy and flavorful treat? Ranch Chicken Tenders are the perfect dish for any occasion. In this article, I’ll guide you through each step, from gathering essential ingredients to achieving that perfect crunch. Whether you want to bake or fry, I’ve got tips and tricks that will make your tenders a hit. Get ready to enjoy a quick and easy meal everyone will love!
Ingredients
Essential Ingredients for Ranch Chicken Tenders
To make the best ranch chicken tenders, you need simple and fresh ingredients. Here’s what to gather:
– 1 lb chicken tenders
– 1 cup buttermilk
– 1 cup all-purpose flour
– 1/2 cup cornmeal
– 1 packet ranch seasoning mix (approximately 1 oz)
– 1 teaspoon garlic powder
– 1 teaspoon paprika
– Salt and pepper to taste
– Oil for frying (canola or vegetable oil)
– Fresh parsley, finely chopped (for garnish)
These ingredients come together to create a crispy and flavorful dish. The buttermilk helps the chicken stay moist. The ranch seasoning and spices add great taste.
Suggested Tools and Equipment
Having the right tools makes cooking easier. Here’s what I recommend:
– Large mixing bowl
– Whisk
– Skillet or frying pan
– Tongs or slotted spoon
– Paper towels
– Serving platter
These tools will help you mix, fry, and serve the chicken tenders perfectly.
Optional Add-ins for Extra Flavor
Want to kick up the flavor? Here are some fun add-ins:
– Crushed red pepper for heat
– Grated Parmesan cheese for a savory touch
– Lemon zest for brightness
– Chopped green onions for crunch
You can mix these into your breading for a unique twist. Enjoy experimenting with flavors!
Step-by-Step Instructions
Detailed Cooking Process
Making ranch chicken tenders is easy and fun. First, gather all your ingredients. You want everything ready to go. Start by marinating the chicken tenders in buttermilk. This step is crucial as it helps the chicken stay moist and tender. You should let it sit in the fridge for at least 30 minutes. This allows the flavors to soak in and makes the chicken taste great.
Marinating the Chicken Tenders
Take your chicken tenders and place them in a large mixing bowl. Pour in 1 cup of buttermilk. Make sure every piece is coated well. This buttermilk helps to break down the chicken’s fibers, making it juicy. Cover the bowl tightly and refrigerate. You can marinate them for up to 2 hours if you have the time. The longer, the better for flavor!
Preparing the Breading Mixture
While the chicken marinates, it’s time to make the breading. In a separate bowl, mix together 1 cup of all-purpose flour, 1/2 cup of cornmeal, and 1 packet of ranch seasoning. Add 1 teaspoon of garlic powder, 1 teaspoon of paprika, and some salt and pepper. Whisk it all together until it looks uniform. This mixture will give your chicken a crunchy and tasty crust.
Once the chicken is marinated, take it out and let any extra liquid drip off. Now, coat each tender in the breading mixture. Press down firmly so the breading sticks well. This is key for that crispy texture we all love!Enjoy making your ranch chicken tenders!
Tips & Tricks
How to Achieve Perfectly Crispy Chicken Tenders
To get your chicken tenders crispy, you need to focus on the breading. A good coating makes all the difference. First, allow the chicken to marinate in buttermilk. This adds moisture and flavor. After marinating, ensure you shake off any excess buttermilk. Dredge each tender in the breading mixture. Press down firmly to help the coating stick. The more you press, the crunchier your tenders will be. Fry them in hot oil to achieve that golden color. This high heat gives the perfect crispy finish.
Alternative Cooking Methods (Baking vs. Frying)
You can bake or fry your chicken tenders. Frying gives the best crispy texture. However, baking is a healthier option. To bake, preheat your oven to 425°F. Line a baking sheet with parchment paper. Place the breaded tenders on the sheet. Spray them lightly with cooking oil. Bake for about 20-25 minutes. Flip them halfway for even cooking. While they won’t be as crispy as frying, they will still be delicious.
Common Mistakes to Avoid
Avoid common mistakes to ensure great chicken tenders. First, don’t rush the marinating time. It’s key to flavor and tenderness. Next, don’t overcrowd the skillet when frying. This lowers the oil temperature and leads to soggy tenders. Always check the oil temperature. If it’s too low, the chicken will absorb oil instead of frying. Lastly, remember to let the cooked tenders rest on paper towels. This helps remove excess oil and keeps them crispy.
Variations
Spicy Ranch Chicken Tenders
To spice things up, add heat to your ranch chicken tenders. You can mix in cayenne pepper or hot sauce into the breading. This will give your tenders a nice kick. For an even bolder flavor, try using spicy ranch seasoning. It adds a layer of heat without losing the classic ranch taste. Serve these spicy tenders with a cooling dip, like sour cream or yogurt.
Healthy Alternatives for a Lighter Version
If you’re looking for a healthier option, try baking instead of frying. Coat the chicken tenders with a mix of whole wheat flour and crushed oats. This gives a crunchy texture with less fat. You can also use skinless chicken breasts for a leaner protein. Marinate the chicken in low-fat buttermilk and use less oil when cooking. Serve these tenders with a fresh salad for a lighter meal.
Serving Suggestions for Different Occasions
Think about how you want to serve your ranch chicken tenders. For a casual lunch, pair them with fries and a dipping sauce. For a party, serve them on skewers with veggies. You can also arrange them on a platter with various dips like BBQ, honey mustard, or ranch. This way, guests can mix and match their flavors. These tenders fit well for game day, family dinners, or even movie night!
Storage Info
Best Practices for Storing Leftovers
After you enjoy your ranch chicken tenders, store leftovers in a sealed container. This keeps them fresh and tasty. Let them cool down first. If you place warm food in the fridge, it can create moisture. Moisture can make your tenders soggy. Keep the tenders in the fridge for up to three days. Use parchment paper to separate layers if stacking.
Reheating Methods to Maintain Crispiness
To keep your ranch chicken tenders crispy when reheating, use an oven or an air fryer. Preheat the oven to 375°F. Place the tenders on a baking sheet lined with parchment paper. Heat for about 10-15 minutes or until hot. The air fryer is even faster. Set it to 350°F and heat for about 5-7 minutes. This method makes the coating nice and crunchy again.
Freezing Tips for Long-Term Storage
For long-term storage, you can freeze your chicken tenders. After cooking and cooling, place them in a freezer-safe bag. Remove as much air as possible to avoid freezer burn. They can last up to three months in the freezer. When ready to enjoy, thaw in the fridge overnight. Reheat using the oven or air fryer to restore their crispiness. This way, you can enjoy a quick meal anytime!
FAQs
How can I make homemade ranch seasoning for chicken tenders?
You can make ranch seasoning with simple spices. Combine these:
– 1 tablespoon dried parsley
– 1 teaspoon dried dill
– 1/2 teaspoon garlic powder
– 1/2 teaspoon onion powder
– 1/2 teaspoon salt
– 1/4 teaspoon black pepper
– 1/4 teaspoon paprika
Mix these well and store in an airtight jar. This mix adds great flavor to your chicken tenders.
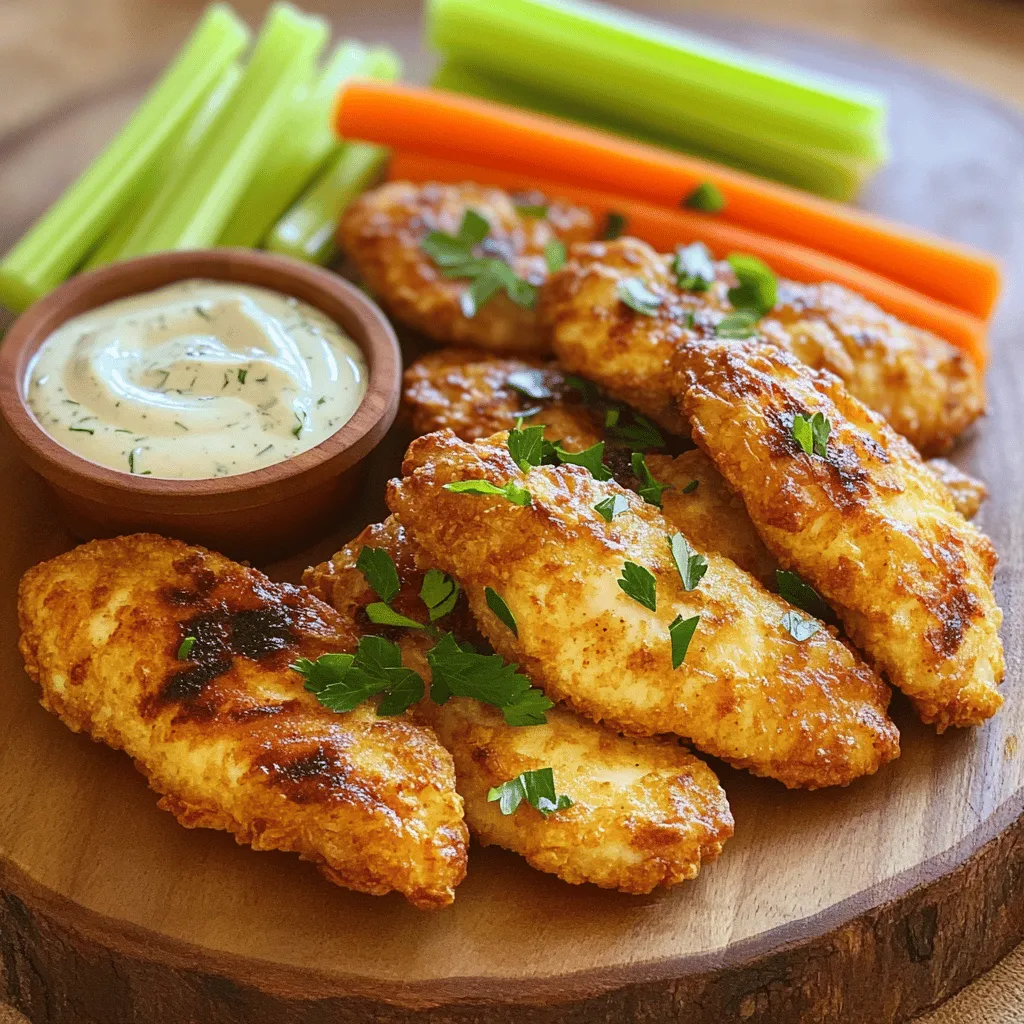
What to serve with ranch chicken tenders?
Ranch chicken tenders pair well with many sides. Here are some tasty ideas:
– Fresh carrot sticks
– Celery sticks
– Crispy fries
– A simple green salad
– A bowl of ranch dip for extra fun
These sides balance the flavors and make a complete meal.
Can I use chicken breasts instead of tenders?
Yes, chicken breasts work well too. Cut them into strips for even cooking. You may need to adjust cooking time. Ensure they reach an internal temperature of 165°F. This way, your chicken remains juicy and safe to eat.Marinate the Chicken: In a bowl, mix chicken tenders with buttermilk. Cover and refrigerate for 30 minutes.
2. Prepare the Breading: In another bowl, whisk flour, cornmeal, ranch seasoning, garlic powder, paprika, salt, and pepper.
3. Heat the Oil: In a large skillet, heat oil over medium-high until it covers the bottom.
4. Coat the Chicken: Remove tenders from buttermilk. Dredge each in the breading mix. Press to ensure it sticks well.
5. Fry the Tenders: Place breaded tenders into the hot oil. Cook 4-5 minutes on each side until golden brown. Check the internal temperature is 165°F.
6. Drain and Garnish: Transfer tenders to a paper towel-lined plate. Sprinkle with parsley before serving.
Nutritional Information and Serving Size
This recipe serves about four people. Each serving contains:
– Calories: Approximately 350
– Protein: 25g
– Carbohydrates: 30g
– Fat: 15g
These ranch chicken tenders are both tasty and filling! Enjoy them with a side of veggies or your favorite dip.
In this article, we explored how to make ranch chicken tenders. You learned the essential ingredients, tools, and optional flavors. The step-by-step instructions guide you through marinating and breading. We shared tips for crispy results, alternative cooking methods, and common mistakes to avoid. You also discovered variations, storage tips, and answers to your questions.
In conclusion, making ranch chicken tenders is fun and rewarding. You’ll enjoy tasty meals that everyone loves. Keep experimenting, and you’ll find your perfect version. Happy cooking!

. First, set your oven to 425°F (220°C). This temperature is key for roasting. A hot oven makes the broccoli crispy and tender. Preheating helps to lock in flavors too. In a large bowl, add the fresh broccoli florets. Then, mix in the minced garlic. Pour in the extra virgin olive oil, fresh lemon juice, and lemon zest. Add sea salt, black pepper, and crushed red pepper flakes if you want heat. Toss everything well. Make sure each floret is coated in the mixture. This step brings out the best flavor. Line a baking sheet with parchment paper for easy cleanup. Spread the broccoli mixture in a single layer. This helps it roast evenly. Place the sheet in the oven and roast for 20 to 25 minutes. Halfway through, use a spatula to toss the broccoli. Look for it to become tender and have crispy edges. If you like cheese, sprinkle on the grated Parmesan in the last 5 minutes. This adds a savory touch. When done, take it out and serve warm. Optionally, you can add more lemon zest on top. This brightens the dish and enhances the flavor. For the full recipe, check the details above. Enjoy your delicious Lemon Garlic Roasted Broccoli! To get the best roasted broccoli, start with a hot oven. I recommend 425°F (220°C). This high heat makes the broccoli tender and gives it crispy edges. Spread the florets on your baking sheet in a single layer. If they are crowded, they will steam instead of roast. Halfway through the cooking time, toss the broccoli gently. This helps it cook evenly and adds more crunch. Lemon and garlic shine in this dish. Use fresh garlic for a strong flavor. You can adjust the amount of garlic based on your taste. Adding crushed red pepper flakes brings extra heat. If you like cheese, sprinkle some grated Parmesan just before finishing. This adds a savory touch. Don’t forget to use the lemon zest; it brightens the dish. Serve your lemon garlic roasted broccoli hot. A colorful platter makes a big impact. Drizzle some extra olive oil or lemon juice on top. This adds shine and flavor. Pair it with lemon wedges for a zesty touch. This dish goes well with grilled meats, fish, or even pasta. It is a versatile side that complements many meals. Don't forget to check the full recipe for complete instructions. {{image_4}} You can boost the nutrition of your Lemon Garlic Roasted Broccoli. Try adding chickpeas for protein. They add a nice crunch too. Another option is to mix in nuts like almonds or walnuts. These add healthy fats and a satisfying texture. Toss in some cherry tomatoes for extra vitamins. They add a pop of color and sweetness. Each addition makes your dish even more nutritious. Feel free to experiment with different flavors. Instead of lemon, use lime for a twist. It gives a fresh taste that brightens the dish. You can also try balsamic vinegar for a rich, sweet flavor. Add smoked paprika for a hint of smokiness. For a simple yet tasty option, just use salt and pepper. Each change brings a new vibe to your roasted broccoli. If you want a vegan twist, skip the Parmesan cheese. Instead, sprinkle nutritional yeast on top. It gives a cheesy flavor without dairy. You can also add a splash of plant-based milk to the mix. This makes the broccoli creamy and delicious. For a richer taste, try tahini. It adds a nutty flavor that pairs well with garlic and lemon. These options keep your dish tasty and plant-friendly. You can find the full recipe to explore all these variations to your heart's content! Storing leftovers is easy. After cooking, let the broccoli cool down. Place it in an airtight container. This keeps it fresh for up to three days in the fridge. Reheating is simple. You can use the oven or a microwave. For the oven, heat to 350°F (175°C). Spread the broccoli on a baking sheet. Bake for about 10 minutes. If using a microwave, place the broccoli in a safe dish. Heat for one to two minutes or until warm. Freezing is a great option too. First, blanch the broccoli in boiling water for two minutes. Then, cool it quickly in ice water. Drain well and pack into freezer bags. Remove as much air as possible. Frozen broccoli lasts for about three months. When you want to use it, just cook straight from frozen. For the full recipe, check the section above. Enjoy your flavorful dish! You know roasted broccoli is done when it turns bright green and tender. The edges should be crispy and slightly browned. A fork should slide easily into the stem. This tells you it is ready to eat. If it looks dry or burnt, it may be overcooked. Roasting typically takes about 20-25 minutes, so keep an eye on it. Yes, you can use frozen broccoli. However, fresh broccoli gives the best taste and texture. Frozen broccoli may become soggy when roasted. If you use frozen, make sure to thaw it first and pat it dry. This step helps it roast better. Try to keep it in a single layer on your baking sheet for even cooking. Lemon Garlic Roasted Broccoli pairs well with many dishes. You can serve it with grilled chicken for protein. It also complements salmon or shrimp nicely. If you want a meatless option, try it with quinoa or brown rice. Adding a side of whole-grain bread can round out the meal. You can also mix it with pasta for a hearty dish. You can find the full recipe for Zesty Lemon Garlic Roasted Broccoli above. It includes detailed steps and ingredients to make this tasty side dish. In this post, we explored how to make tasty Lemon Garlic Roasted Broccoli. We covered key ingredients like fresh broccoli, garlic, and spices to boost flavor. The step-by-step guide included preheating the oven and roasting techniques. I shared tips to perfect your dish and variations for health and taste. Plus, we looked at how to store and reheat your leftovers. Try this recipe to enjoy a healthy side that’s quick to make and delicious.](https://joymealplan.com/wp-content/uploads/2025/07/2949f8fc-adf4-42c0-962a-019320107987-768x768.webp)
![- 2 pounds baby potatoes, halved - 4 tablespoons high-quality olive oil - 4 cloves garlic, finely minced - 1 teaspoon dried thyme - 1 teaspoon dried rosemary - ½ cup freshly grated Parmesan cheese - Salt and freshly ground black pepper to taste - Fresh parsley, finely chopped (for garnish) - Baking sheet - Parchment paper - Mixing bowl - Spatula or hands for tossing Gathering the right ingredients is key to making Garlic Parmesan Roasted Potatoes. I always choose small, fresh baby potatoes. Their size ensures they cook evenly and stay tender inside. You’ll need high-quality olive oil to help the potatoes crisp up nicely. Fresh garlic gives a strong flavor, while dried thyme and rosemary add warmth and depth. You can use pre-grated Parmesan, but fresh is best! It melts beautifully and enhances the taste. Don't forget salt and pepper; they really make the flavors pop. Finally, chop some fresh parsley. This adds a bright touch right before serving. As for equipment, a baking sheet lined with parchment paper makes cleanup easy and helps the potatoes roast evenly. A mixing bowl is essential for tossing the potatoes with oil and spices. You can use a spatula or your hands for this task. It’s important to coat each potato well for the best flavor. For more details and step-by-step guidance, check out the Full Recipe. Set your oven to 425°F (220°C). This high heat helps the potatoes become crispy. Preheating is key for even cooking. In a large mixing bowl, add 2 pounds of halved baby potatoes. Next, pour in 4 tablespoons of olive oil. Add 4 cloves of finely minced garlic, 1 teaspoon of dried thyme, and 1 teaspoon of dried rosemary. Sprinkle salt and pepper to taste. Toss everything well. Make sure each potato piece is coated in the tasty mix. This step makes all the flavors stick. Spread the seasoned potatoes on a lined baking sheet. Make sure they are in a single layer. If they are crowded, they won’t get crispy. Roast them for 25 minutes. They should start to soften and brown. After 25 minutes, carefully take the baking sheet out. Sprinkle ½ cup of grated Parmesan cheese over the potatoes. Gently toss to coat the potatoes with cheese. Return them to the oven for another 10-15 minutes. Watch for a golden brown color and crisp texture. Once done, let the potatoes cool for a few minutes. Sprinkle fresh parsley on top for a bright finish. For the complete guide, check the Full Recipe. To get your potatoes nice and crispy, keep them spread out on the baking sheet. If they are too close together, they will steam rather than roast. This can lead to soggy potatoes, which is not what you want. Check for doneness by piercing a potato with a fork. It should slide in easily when they are ready. You can make these potatoes even better by adding some herbs. Try fresh basil or oregano for a twist. If you love garlic, feel free to add more minced cloves. Just remember, balance is key. Too much garlic can overpower the dish. Garlic Parmesan Roasted Potatoes pair well with many dishes. They go great with grilled chicken or fish. You can also serve them alongside a fresh salad for a light meal. For a special touch, garnish with chopped parsley or a sprinkle of extra Parmesan. This adds color and makes the dish look fancy. Check out the full recipe for more tips on presentation! {{image_4}} Using fresh herbs can add more flavor than dried ones. Fresh herbs have a bright taste that brings life to your dish. If you use dried herbs, remember that they are stronger. Use about one-third the amount of dried herbs as fresh. Other herbs that pair well with garlic and Parmesan include: - Oregano - Basil - Chives - Dill These herbs can change the taste and make it your own. If you're looking for vegan options, try using vegan cheese. Many brands offer cheese that melts well and tastes great. For gluten-free needs, ensure your cheese is certified gluten-free. Potatoes are naturally gluten-free, making them a safe choice. For a quicker option, you can use an air fryer. The air fryer cooks potatoes fast and makes them super crispy. Cook them at 400°F for about 20 minutes, shaking the basket halfway through. Grilling the potatoes adds a smoky flavor. Toss halved potatoes with oil and seasonings, then wrap them in foil. Grill them over medium heat for 25-30 minutes. This method gives a delicious char and keeps the potatoes soft. Try these variations to make your Garlic Parmesan Roasted Potatoes even better! For the complete recipe, check out the [Full Recipe]. After enjoying your Garlic Parmesan Roasted Potatoes, store any leftovers in a safe way. Let the potatoes cool down before putting them in the fridge. This helps keep their taste and texture. Use an airtight container to keep them fresh. You can also use a zip-top bag, but make sure to remove as much air as possible. This keeps them from getting soggy. When it's time to eat leftovers, you have two good options: the oven or the microwave. The oven is best for keeping the crispiness. Preheat your oven to 375°F (190°C). Place the potatoes on a baking sheet and heat for about 10-15 minutes. Flip them halfway for even heating. If you're short on time, the microwave works, but it may make them soft. Heat in 30-second intervals until warm. To restore some crispiness in the microwave, use a plate lined with paper towels. This absorbs extra moisture. Enjoy your tasty dish again! For the full recipe, check out the details in the previous sections. To make Garlic Parmesan Roasted Potatoes crispy, follow these tips: - Use high heat: Preheat your oven to 425°F (220°C). High heat helps the potatoes crisp up. - Cut potatoes evenly: Halve the baby potatoes into similar sizes. This ensures they cook evenly. - Don’t overcrowd: Spread the potatoes in a single layer on the baking sheet. This allows air to circulate and helps them brown nicely. - Flip halfway: Toss the potatoes halfway through roasting. This promotes even browning and crispiness. - Add cheese at the right time: Sprinkle the Parmesan halfway through roasting. This helps it melt and form a crispy crust. Yes, you can use different types of potatoes. Here are some good options: - Yukon Gold: These are creamy and buttery. They roast well and have great flavor. - Red Potatoes: Their skin is thin and they hold their shape well when cooked. - Russet Potatoes: These are starchy and create a fluffy inside. They can also get nice and crispy. If you need a cheese alternative, consider these options: - Pecorino Romano: This cheese has a similar flavor and works well in this dish. - Nutritional Yeast: For a vegan option, sprinkle nutritional yeast for a cheesy flavor. - Grated Mozzarella: This cheese melts well, though it won't have the same sharpness. For the full recipe, check the Garlic Parmesan Roasted Potatoes section above. Garlic Parmesan Roasted Potatoes are easy and delicious. We covered the key ingredients, tools, and steps to roast your potatoes perfectly. You learned how to ensure crispiness and enhance flavor with herbs. I shared different variations to suit diets and cooking methods. Storing and reheating tips help keep leftovers tasty. With simple adjustments, you can enjoy this dish your way. Try making it for your next meal; it’s sure to impress. Enjoy the tasty results and happy cooking!](https://joymealplan.com/wp-content/uploads/2025/06/60840b92-dc9c-41ba-bef9-b9347b379e7b-768x768.webp)