
Lemon Herb Grilled Shrimp Flavorful and Simple Recipe
![- 1 pound large shrimp, peeled and deveined - 3 tablespoons extra virgin olive oil - Zest of 1 medium-sized lemon - 2 tablespoons freshly squeezed lemon juice - 2 cloves garlic, finely minced - 1 tablespoon fresh parsley, finely chopped - 1 tablespoon fresh dill, finely chopped - 1 teaspoon smoked paprika - Salt and freshly ground black pepper, to taste - 8 wooden skewers (soaked in water for at least 30 minutes) Using fresh ingredients makes a big difference in taste. The shrimp brings a sweet flavor, while lemon adds brightness. Olive oil gives a smooth touch that ties it all together. Fresh herbs like parsley and dill add aroma and depth. Garlic gives a nice kick, enhancing the taste. When you prepare the skewers, ensure your shrimp are spread out. This helps them cook evenly. The smoked paprika adds a hint of warmth that makes every bite special. Salt and pepper are key for balancing flavors. Soaking the wooden skewers prevents them from burning on the grill. For the complete recipe, check out the [Full Recipe]. It guides you step by step to make this dish shine. Enjoy the process and get ready for a tasty meal! In a mixing bowl, combine the following ingredients for a tasty marinade: - 3 tablespoons extra virgin olive oil - Zest of 1 medium-sized lemon - 2 tablespoons freshly squeezed lemon juice - 2 cloves garlic, finely minced - 1 tablespoon fresh parsley, finely chopped - 1 tablespoon fresh dill, finely chopped - 1 teaspoon smoked paprika - Salt and freshly ground black pepper, to taste Whisk these together until they blend well. This mix adds great flavor to the shrimp. Now, add the shrimp to your marinade. Make sure each shrimp is coated in the mix. Cover the bowl and place it in the fridge for 20-30 minutes. This time helps the shrimp soak up all the tasty flavors. While the shrimp marinates, preheat your grill to medium-high heat. If you use a grill pan, heat it on the stovetop until hot. Next, take the soaked wooden skewers and carefully thread the marinated shrimp onto them. Aim for about 4-5 shrimp per skewer. Once ready, place the skewers on the grill. Grill the shrimp for 2-3 minutes on each side. They should turn a lovely pink color and become opaque when they are done. Keep an eye on them; overcooking can make them rubbery. After grilling, remove the skewers and let them rest for a few minutes. This helps the shrimp stay juicy. For the full recipe, be sure to check the detailed instructions. To get the best grilled shrimp, focus on the right cooking time and temperature. Preheat your grill to medium-high heat. This temperature is key for juicy shrimp. Cook the shrimp for 2-3 minutes on each side. They will turn pink and opaque when done. Avoid cooking them too long. Overcooked shrimp get tough and rubbery. Marinating shrimp is a great way to boost flavor. I suggest letting them soak for 20-30 minutes. This time helps the shrimp absorb the tasty herbs and lemon. For even more flavor, try adding a splash of hot sauce or a dash of cayenne pepper to the marinade. This small change can add a nice kick. Serve your Lemon Herb Grilled Shrimp with fresh sides. Grilled vegetables are a perfect match. Try zucchini, bell peppers, or asparagus. A crisp green salad also pairs well. Toss in some avocado or nuts for extra texture. You can also serve the shrimp over rice or quinoa for a filling meal. For a refreshing touch, add lemon wedges and a sprinkle of herbs when serving. {{image_4}} You can change the herbs in this recipe. Instead of parsley and dill, try basil or cilantro. Each herb brings a new taste. Basil gives a sweet flavor, while cilantro adds a fresh one. You can mix and match to find your favorite. Experimenting with herbs makes the dish fun and unique. Don't have a grill? No problem! You can cook shrimp in the oven or on the stovetop. For oven broiling, preheat your broiler. Place the skewers on a baking sheet and broil for about 2-3 minutes per side. If using a stovetop grill pan, heat it over medium-high heat. Cook the shrimp as you would on an outdoor grill. Both methods will give you tasty results. Want to make this dish gluten-free? Simply check your smoked paprika for gluten. It's usually safe, but some brands may add gluten. For a low-carb option, skip any bread sides. Serve the shrimp with fresh veggies or a salad instead. This keeps your meal light and healthy. To keep leftover grilled shrimp fresh, place them in an airtight container. Make sure to cool them down first. Refrigerate them within two hours of cooking. Properly stored, they last for up to three days. If you want to enjoy them later, don’t forget to label the container. When it's time to reheat, don’t use the microwave if you can avoid it. Instead, heat a skillet over medium heat. Add a bit of olive oil to keep shrimp moist. Cook for about 2-3 minutes until warm. You can also reheat them on the grill for extra flavor. Just watch closely so they don’t overcook and become rubbery. Freezing grilled shrimp is a great way to save them for later. First, let them cool completely. Then, place them in a freezer-safe bag. Try to remove as much air as possible to prevent freezer burn. These shrimp can last for up to three months in the freezer. When you’re ready to eat, thaw them in the fridge overnight or use cold water for a quicker method. Shrimp cook quickly. Look for a bright pink color and opaque flesh. The shrimp should curl into a "C" shape. If they curl tightly into an "O," they may be overcooked. To avoid this, cook shrimp for just 2-3 minutes per side on a hot grill. Always check a few pieces to ensure even cooking. Yes, you can use frozen shrimp! Just remember to thaw them first. The best way is to place them in the fridge overnight. If you're in a hurry, run them under cold water for about 10-15 minutes. Once thawed, pat them dry with a paper towel. This helps the marinade stick better. You can use many herbs! Here are some great options: - Basil - Cilantro - Chives - Thyme - Oregano - Tarragon These herbs add unique flavors to your shrimp. Feel free to mix and match to find your favorite blend! For more ideas, check the Full Recipe for a guide on how to experiment with different herbs. In this article, we covered everything you need for Lemon Herb Grilled Shrimp. You learned about key ingredients, flavor enhancers, and step-by-step cooking instructions. We also explored tips to make the shrimp perfect and suggested delicious side dishes. Remember, these shrimp are versatile. You can adjust flavors or try different cooking methods. Enjoy grilling and make this dish your own. Happy cooking!](https://joymealplan.com/wp-content/uploads/2025/07/b27d11be-6f1b-4945-85cc-7eac089af2f5.webp)
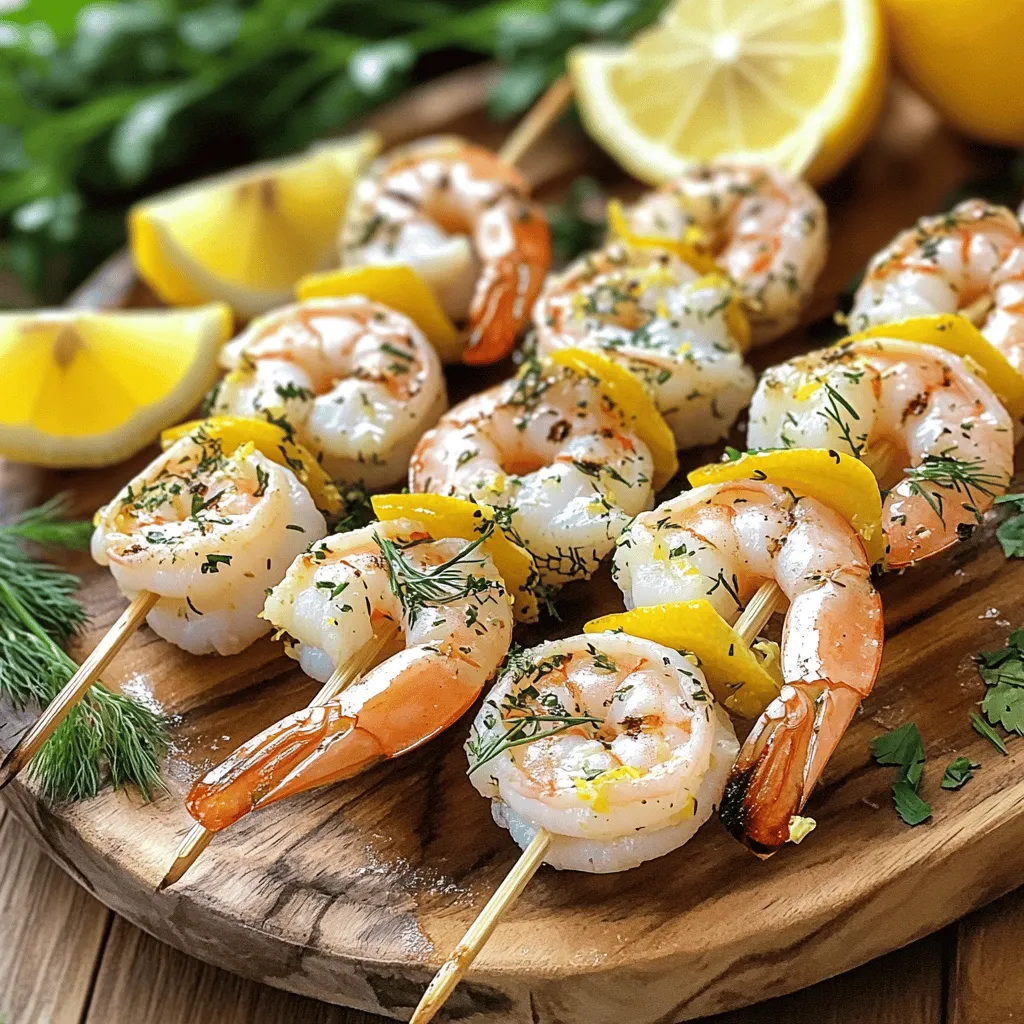
Are you ready to elevate your grilling game? My Lemon Herb Grilled Shrimp recipe is both simple and bursting with flavor. With just a handful of fresh ingredients, you can create mouthwatering shrimp skewers that will impress your family and friends. Follow my easy steps to master this dish, perfect for summer cookouts or weeknight dinners. Let’s dive into the ingredients that make this dish shine!
Ingredients
Main Ingredients for Lemon Herb Grilled Shrimp
– 1 pound large shrimp, peeled and deveined
– 3 tablespoons extra virgin olive oil
– Zest of 1 medium-sized lemon
Flavor Enhancers
– 2 tablespoons freshly squeezed lemon juice
– 2 cloves garlic, finely minced
– 1 tablespoon fresh parsley, finely chopped
Seasoning and Skewers
– 1 tablespoon fresh dill, finely chopped
– 1 teaspoon smoked paprika
– Salt and freshly ground black pepper, to taste
– 8 wooden skewers (soaked in water for at least 30 minutes)
Using fresh ingredients makes a big difference in taste. The shrimp brings a sweet flavor, while lemon adds brightness. Olive oil gives a smooth touch that ties it all together. Fresh herbs like parsley and dill add aroma and depth. Garlic gives a nice kick, enhancing the taste.
When you prepare the skewers, ensure your shrimp are spread out. This helps them cook evenly. The smoked paprika adds a hint of warmth that makes every bite special. Salt and pepper are key for balancing flavors. Soaking the wooden skewers prevents them from burning on the grill.It guides you step by step to make this dish shine. Enjoy the process and get ready for a tasty meal!
Step-by-Step Instructions
Preparing the Marinade
In a mixing bowl, combine the following ingredients for a tasty marinade:
– 3 tablespoons extra virgin olive oil
– Zest of 1 medium-sized lemon
– 2 tablespoons freshly squeezed lemon juice
– 2 cloves garlic, finely minced
– 1 tablespoon fresh parsley, finely chopped
– 1 tablespoon fresh dill, finely chopped
– 1 teaspoon smoked paprika
– Salt and freshly ground black pepper, to taste
Whisk these together until they blend well. This mix adds great flavor to the shrimp.
Marinating the Shrimp
Now, add the shrimp to your marinade. Make sure each shrimp is coated in the mix. Cover the bowl and place it in the fridge for 20-30 minutes. This time helps the shrimp soak up all the tasty flavors.
Grilling the Shrimp
While the shrimp marinates, preheat your grill to medium-high heat. If you use a grill pan, heat it on the stovetop until hot. Next, take the soaked wooden skewers and carefully thread the marinated shrimp onto them. Aim for about 4-5 shrimp per skewer.
Once ready, place the skewers on the grill. Grill the shrimp for 2-3 minutes on each side. They should turn a lovely pink color and become opaque when they are done. Keep an eye on them; overcooking can make them rubbery.
After grilling, remove the skewers and let them rest for a few minutes. This helps the shrimp stay juicy.
Tips & Tricks
Perfecting Your Grilled Shrimp
To get the best grilled shrimp, focus on the right cooking time and temperature. Preheat your grill to medium-high heat. This temperature is key for juicy shrimp. Cook the shrimp for 2-3 minutes on each side. They will turn pink and opaque when done. Avoid cooking them too long. Overcooked shrimp get tough and rubbery.
For Maximum Flavor
Marinating shrimp is a great way to boost flavor. I suggest letting them soak for 20-30 minutes. This time helps the shrimp absorb the tasty herbs and lemon. For even more flavor, try adding a splash of hot sauce or a dash of cayenne pepper to the marinade. This small change can add a nice kick.
Serving Suggestions
Serve your Lemon Herb Grilled Shrimp with fresh sides. Grilled vegetables are a perfect match. Try zucchini, bell peppers, or asparagus. A crisp green salad also pairs well. Toss in some avocado or nuts for extra texture. You can also serve the shrimp over rice or quinoa for a filling meal. For a refreshing touch, add lemon wedges and a sprinkle of herbs when serving.
Variations
Flavor Variations
You can change the herbs in this recipe. Instead of parsley and dill, try basil or cilantro. Each herb brings a new taste. Basil gives a sweet flavor, while cilantro adds a fresh one. You can mix and match to find your favorite. Experimenting with herbs makes the dish fun and unique.
Cooking Methods
Don’t have a grill? No problem! You can cook shrimp in the oven or on the stovetop. For oven broiling, preheat your broiler. Place the skewers on a baking sheet and broil for about 2-3 minutes per side. If using a stovetop grill pan, heat it over medium-high heat. Cook the shrimp as you would on an outdoor grill. Both methods will give you tasty results.
Dietary Modifications
Want to make this dish gluten-free? Simply check your smoked paprika for gluten. It’s usually safe, but some brands may add gluten. For a low-carb option, skip any bread sides. Serve the shrimp with fresh veggies or a salad instead. This keeps your meal light and healthy.
Storage Info
Storing Leftovers
To keep leftover grilled shrimp fresh, place them in an airtight container. Make sure to cool them down first. Refrigerate them within two hours of cooking. Properly stored, they last for up to three days. If you want to enjoy them later, don’t forget to label the container.
Reheating Tips
When it’s time to reheat, don’t use the microwave if you can avoid it. Instead, heat a skillet over medium heat. Add a bit of olive oil to keep shrimp moist. Cook for about 2-3 minutes until warm. You can also reheat them on the grill for extra flavor. Just watch closely so they don’t overcook and become rubbery.
Freezing Options
Freezing grilled shrimp is a great way to save them for later. First, let them cool completely. Then, place them in a freezer-safe bag. Try to remove as much air as possible to prevent freezer burn. These shrimp can last for up to three months in the freezer. When you’re ready to eat, thaw them in the fridge overnight or use cold water for a quicker method.
FAQs
How do I know when shrimp is fully cooked?
Shrimp cook quickly. Look for a bright pink color and opaque flesh. The shrimp should curl into a “C” shape. If they curl tightly into an “O,” they may be overcooked. To avoid this, cook shrimp for just 2-3 minutes per side on a hot grill. Always check a few pieces to ensure even cooking.
Can I use frozen shrimp for this recipe?
Yes, you can use frozen shrimp! Just remember to thaw them first. The best way is to place them in the fridge overnight. If you’re in a hurry, run them under cold water for about 10-15 minutes. Once thawed, pat them dry with a paper towel. This helps the marinade stick better.
What herbs can I use besides parsley and dill?
You can use many herbs! Here are some great options:
– Basil
– Cilantro
– Chives
– Thyme
– Oregano
– Tarragon
These herbs add unique flavors to your shrimp. Feel free to mix and match to find your favorite blend!
In this article, we covered everything you need for Lemon Herb Grilled Shrimp. You learned about key ingredients, flavor enhancers, and step-by-step cooking instructions. We also explored tips to make the shrimp perfect and suggested delicious side dishes.
Remember, these shrimp are versatile. You can adjust flavors or try different cooking methods. Enjoy grilling and make this dish your own. Happy cooking!
![- 1 pound large shrimp, peeled and deveined - 3 tablespoons extra virgin olive oil - Zest of 1 medium-sized lemon - 2 tablespoons freshly squeezed lemon juice - 2 cloves garlic, finely minced - 1 tablespoon fresh parsley, finely chopped - 1 tablespoon fresh dill, finely chopped - 1 teaspoon smoked paprika - Salt and freshly ground black pepper, to taste - 8 wooden skewers (soaked in water for at least 30 minutes) Using fresh ingredients makes a big difference in taste. The shrimp brings a sweet flavor, while lemon adds brightness. Olive oil gives a smooth touch that ties it all together. Fresh herbs like parsley and dill add aroma and depth. Garlic gives a nice kick, enhancing the taste. When you prepare the skewers, ensure your shrimp are spread out. This helps them cook evenly. The smoked paprika adds a hint of warmth that makes every bite special. Salt and pepper are key for balancing flavors. Soaking the wooden skewers prevents them from burning on the grill. For the complete recipe, check out the [Full Recipe]. It guides you step by step to make this dish shine. Enjoy the process and get ready for a tasty meal! In a mixing bowl, combine the following ingredients for a tasty marinade: - 3 tablespoons extra virgin olive oil - Zest of 1 medium-sized lemon - 2 tablespoons freshly squeezed lemon juice - 2 cloves garlic, finely minced - 1 tablespoon fresh parsley, finely chopped - 1 tablespoon fresh dill, finely chopped - 1 teaspoon smoked paprika - Salt and freshly ground black pepper, to taste Whisk these together until they blend well. This mix adds great flavor to the shrimp. Now, add the shrimp to your marinade. Make sure each shrimp is coated in the mix. Cover the bowl and place it in the fridge for 20-30 minutes. This time helps the shrimp soak up all the tasty flavors. While the shrimp marinates, preheat your grill to medium-high heat. If you use a grill pan, heat it on the stovetop until hot. Next, take the soaked wooden skewers and carefully thread the marinated shrimp onto them. Aim for about 4-5 shrimp per skewer. Once ready, place the skewers on the grill. Grill the shrimp for 2-3 minutes on each side. They should turn a lovely pink color and become opaque when they are done. Keep an eye on them; overcooking can make them rubbery. After grilling, remove the skewers and let them rest for a few minutes. This helps the shrimp stay juicy. For the full recipe, be sure to check the detailed instructions. To get the best grilled shrimp, focus on the right cooking time and temperature. Preheat your grill to medium-high heat. This temperature is key for juicy shrimp. Cook the shrimp for 2-3 minutes on each side. They will turn pink and opaque when done. Avoid cooking them too long. Overcooked shrimp get tough and rubbery. Marinating shrimp is a great way to boost flavor. I suggest letting them soak for 20-30 minutes. This time helps the shrimp absorb the tasty herbs and lemon. For even more flavor, try adding a splash of hot sauce or a dash of cayenne pepper to the marinade. This small change can add a nice kick. Serve your Lemon Herb Grilled Shrimp with fresh sides. Grilled vegetables are a perfect match. Try zucchini, bell peppers, or asparagus. A crisp green salad also pairs well. Toss in some avocado or nuts for extra texture. You can also serve the shrimp over rice or quinoa for a filling meal. For a refreshing touch, add lemon wedges and a sprinkle of herbs when serving. {{image_4}} You can change the herbs in this recipe. Instead of parsley and dill, try basil or cilantro. Each herb brings a new taste. Basil gives a sweet flavor, while cilantro adds a fresh one. You can mix and match to find your favorite. Experimenting with herbs makes the dish fun and unique. Don't have a grill? No problem! You can cook shrimp in the oven or on the stovetop. For oven broiling, preheat your broiler. Place the skewers on a baking sheet and broil for about 2-3 minutes per side. If using a stovetop grill pan, heat it over medium-high heat. Cook the shrimp as you would on an outdoor grill. Both methods will give you tasty results. Want to make this dish gluten-free? Simply check your smoked paprika for gluten. It's usually safe, but some brands may add gluten. For a low-carb option, skip any bread sides. Serve the shrimp with fresh veggies or a salad instead. This keeps your meal light and healthy. To keep leftover grilled shrimp fresh, place them in an airtight container. Make sure to cool them down first. Refrigerate them within two hours of cooking. Properly stored, they last for up to three days. If you want to enjoy them later, don’t forget to label the container. When it's time to reheat, don’t use the microwave if you can avoid it. Instead, heat a skillet over medium heat. Add a bit of olive oil to keep shrimp moist. Cook for about 2-3 minutes until warm. You can also reheat them on the grill for extra flavor. Just watch closely so they don’t overcook and become rubbery. Freezing grilled shrimp is a great way to save them for later. First, let them cool completely. Then, place them in a freezer-safe bag. Try to remove as much air as possible to prevent freezer burn. These shrimp can last for up to three months in the freezer. When you’re ready to eat, thaw them in the fridge overnight or use cold water for a quicker method. Shrimp cook quickly. Look for a bright pink color and opaque flesh. The shrimp should curl into a "C" shape. If they curl tightly into an "O," they may be overcooked. To avoid this, cook shrimp for just 2-3 minutes per side on a hot grill. Always check a few pieces to ensure even cooking. Yes, you can use frozen shrimp! Just remember to thaw them first. The best way is to place them in the fridge overnight. If you're in a hurry, run them under cold water for about 10-15 minutes. Once thawed, pat them dry with a paper towel. This helps the marinade stick better. You can use many herbs! Here are some great options: - Basil - Cilantro - Chives - Thyme - Oregano - Tarragon These herbs add unique flavors to your shrimp. Feel free to mix and match to find your favorite blend! For more ideas, check the Full Recipe for a guide on how to experiment with different herbs. In this article, we covered everything you need for Lemon Herb Grilled Shrimp. You learned about key ingredients, flavor enhancers, and step-by-step cooking instructions. We also explored tips to make the shrimp perfect and suggested delicious side dishes. Remember, these shrimp are versatile. You can adjust flavors or try different cooking methods. Enjoy grilling and make this dish your own. Happy cooking!](https://joymealplan.com/wp-content/uploads/2025/07/b27d11be-6f1b-4945-85cc-7eac089af2f5-300x300.webp)


![- 2 pounds baby potatoes, halved - 4 tablespoons high-quality olive oil - 4 cloves garlic, finely minced - 1 teaspoon dried thyme - 1 teaspoon dried rosemary - ½ cup freshly grated Parmesan cheese - Salt and freshly ground black pepper to taste - Fresh parsley, finely chopped (for garnish) - Baking sheet - Parchment paper - Mixing bowl - Spatula or hands for tossing Gathering the right ingredients is key to making Garlic Parmesan Roasted Potatoes. I always choose small, fresh baby potatoes. Their size ensures they cook evenly and stay tender inside. You’ll need high-quality olive oil to help the potatoes crisp up nicely. Fresh garlic gives a strong flavor, while dried thyme and rosemary add warmth and depth. You can use pre-grated Parmesan, but fresh is best! It melts beautifully and enhances the taste. Don't forget salt and pepper; they really make the flavors pop. Finally, chop some fresh parsley. This adds a bright touch right before serving. As for equipment, a baking sheet lined with parchment paper makes cleanup easy and helps the potatoes roast evenly. A mixing bowl is essential for tossing the potatoes with oil and spices. You can use a spatula or your hands for this task. It’s important to coat each potato well for the best flavor. For more details and step-by-step guidance, check out the Full Recipe. Set your oven to 425°F (220°C). This high heat helps the potatoes become crispy. Preheating is key for even cooking. In a large mixing bowl, add 2 pounds of halved baby potatoes. Next, pour in 4 tablespoons of olive oil. Add 4 cloves of finely minced garlic, 1 teaspoon of dried thyme, and 1 teaspoon of dried rosemary. Sprinkle salt and pepper to taste. Toss everything well. Make sure each potato piece is coated in the tasty mix. This step makes all the flavors stick. Spread the seasoned potatoes on a lined baking sheet. Make sure they are in a single layer. If they are crowded, they won’t get crispy. Roast them for 25 minutes. They should start to soften and brown. After 25 minutes, carefully take the baking sheet out. Sprinkle ½ cup of grated Parmesan cheese over the potatoes. Gently toss to coat the potatoes with cheese. Return them to the oven for another 10-15 minutes. Watch for a golden brown color and crisp texture. Once done, let the potatoes cool for a few minutes. Sprinkle fresh parsley on top for a bright finish. For the complete guide, check the Full Recipe. To get your potatoes nice and crispy, keep them spread out on the baking sheet. If they are too close together, they will steam rather than roast. This can lead to soggy potatoes, which is not what you want. Check for doneness by piercing a potato with a fork. It should slide in easily when they are ready. You can make these potatoes even better by adding some herbs. Try fresh basil or oregano for a twist. If you love garlic, feel free to add more minced cloves. Just remember, balance is key. Too much garlic can overpower the dish. Garlic Parmesan Roasted Potatoes pair well with many dishes. They go great with grilled chicken or fish. You can also serve them alongside a fresh salad for a light meal. For a special touch, garnish with chopped parsley or a sprinkle of extra Parmesan. This adds color and makes the dish look fancy. Check out the full recipe for more tips on presentation! {{image_4}} Using fresh herbs can add more flavor than dried ones. Fresh herbs have a bright taste that brings life to your dish. If you use dried herbs, remember that they are stronger. Use about one-third the amount of dried herbs as fresh. Other herbs that pair well with garlic and Parmesan include: - Oregano - Basil - Chives - Dill These herbs can change the taste and make it your own. If you're looking for vegan options, try using vegan cheese. Many brands offer cheese that melts well and tastes great. For gluten-free needs, ensure your cheese is certified gluten-free. Potatoes are naturally gluten-free, making them a safe choice. For a quicker option, you can use an air fryer. The air fryer cooks potatoes fast and makes them super crispy. Cook them at 400°F for about 20 minutes, shaking the basket halfway through. Grilling the potatoes adds a smoky flavor. Toss halved potatoes with oil and seasonings, then wrap them in foil. Grill them over medium heat for 25-30 minutes. This method gives a delicious char and keeps the potatoes soft. Try these variations to make your Garlic Parmesan Roasted Potatoes even better! For the complete recipe, check out the [Full Recipe]. After enjoying your Garlic Parmesan Roasted Potatoes, store any leftovers in a safe way. Let the potatoes cool down before putting them in the fridge. This helps keep their taste and texture. Use an airtight container to keep them fresh. You can also use a zip-top bag, but make sure to remove as much air as possible. This keeps them from getting soggy. When it's time to eat leftovers, you have two good options: the oven or the microwave. The oven is best for keeping the crispiness. Preheat your oven to 375°F (190°C). Place the potatoes on a baking sheet and heat for about 10-15 minutes. Flip them halfway for even heating. If you're short on time, the microwave works, but it may make them soft. Heat in 30-second intervals until warm. To restore some crispiness in the microwave, use a plate lined with paper towels. This absorbs extra moisture. Enjoy your tasty dish again! For the full recipe, check out the details in the previous sections. To make Garlic Parmesan Roasted Potatoes crispy, follow these tips: - Use high heat: Preheat your oven to 425°F (220°C). High heat helps the potatoes crisp up. - Cut potatoes evenly: Halve the baby potatoes into similar sizes. This ensures they cook evenly. - Don’t overcrowd: Spread the potatoes in a single layer on the baking sheet. This allows air to circulate and helps them brown nicely. - Flip halfway: Toss the potatoes halfway through roasting. This promotes even browning and crispiness. - Add cheese at the right time: Sprinkle the Parmesan halfway through roasting. This helps it melt and form a crispy crust. Yes, you can use different types of potatoes. Here are some good options: - Yukon Gold: These are creamy and buttery. They roast well and have great flavor. - Red Potatoes: Their skin is thin and they hold their shape well when cooked. - Russet Potatoes: These are starchy and create a fluffy inside. They can also get nice and crispy. If you need a cheese alternative, consider these options: - Pecorino Romano: This cheese has a similar flavor and works well in this dish. - Nutritional Yeast: For a vegan option, sprinkle nutritional yeast for a cheesy flavor. - Grated Mozzarella: This cheese melts well, though it won't have the same sharpness. For the full recipe, check the Garlic Parmesan Roasted Potatoes section above. Garlic Parmesan Roasted Potatoes are easy and delicious. We covered the key ingredients, tools, and steps to roast your potatoes perfectly. You learned how to ensure crispiness and enhance flavor with herbs. I shared different variations to suit diets and cooking methods. Storing and reheating tips help keep leftovers tasty. With simple adjustments, you can enjoy this dish your way. Try making it for your next meal; it’s sure to impress. Enjoy the tasty results and happy cooking!](https://joymealplan.com/wp-content/uploads/2025/06/60840b92-dc9c-41ba-bef9-b9347b379e7b-768x768.webp)
. Yes, you can prepare Classic Caprese Skewers in advance. Assemble the skewers up to a few hours ahead of time. Just keep them in the fridge. To keep them fresh, cover them with plastic wrap. Avoid adding olive oil or balsamic glaze until you are ready to serve. This keeps the skewers from getting soggy. Right before serving, drizzle the oils and season with salt and pepper. To serve Caprese Skewers, presentation matters. Arrange them upright in a jar or glass. This creates a lovely display. You can add extra basil leaves around them for color. A small bowl of balsamic glaze on the side is a great touch. It invites guests to dip the skewers. Make sure each skewer is easy to grab. This helps keep the party fun and relaxed. You now have all the steps to create delicious Caprese skewers. From gathering fresh ingredients to assembling and serving them, it’s simple and fun. Remember to choose quality produce and experiment with variations to keep things exciting. These skewers not only look great but taste amazing too. Serve them at your next gathering, and watch your guests enjoy every bite. Enjoy your kitchen adventure, and savor the delicious results!](https://joymealplan.com/wp-content/uploads/2025/06/97cab98c-e756-45a3-bf7b-ace4126d32cb-768x768.webp)