Buffalo Cauliflower Bites Crispy and Flavorful Snack
![To make Buffalo Cauliflower Bites, you'll need the following ingredients. Each item plays a key role in creating that crispy and flavorful snack we all love. - 1 large head of cauliflower, cut into bite-sized florets - 1 cup all-purpose flour - 1 cup almond milk (or your choice of non-dairy milk) - 1 teaspoon garlic powder - 1 teaspoon onion powder - 1 teaspoon smoked paprika - 1/2 teaspoon salt - 1/2 teaspoon black pepper - 1 cup buffalo sauce (store-bought or homemade) - 2 tablespoons coconut oil, melted When choosing your ingredients, I suggest using fresh cauliflower. It gives the best texture and taste. For flour, any brand works, but all-purpose is great for a crispy batter. Almond milk adds a nice touch, but feel free to use your favorite non-dairy option. For buffalo sauce, you can buy it or make your own. Homemade sauce allows you to adjust the heat. Using high-quality spices, like smoked paprika, can elevate your dish. I recommend checking for freshness on all spices. This ensures your bites are packed with flavor. If you want a unique twist, try different sauces or spices. You can even add a little more garlic powder if you love that flavor. Now that you have your list ready, let's move on to the next steps in the recipe! 1. Start by preheating your oven to 450°F (230°C). This heat will make the cauliflower crispy. Line a baking sheet with parchment paper. This step helps with easy clean-up. 2. In a large bowl, combine the all-purpose flour, almond milk, garlic powder, onion powder, smoked paprika, salt, and black pepper. Use a whisk to mix until you have a smooth batter. The batter should not be too thick or too runny. 3. Now, take each cauliflower floret and dip it into the batter. Make sure it is coated well on all sides. Place the battered florets on the baking sheet in a single layer. Repeat until all florets are coated. 1. Bake the cauliflower in the oven for 20 minutes. This will make the florets tender. The batter will also start to get crispy. 2. While the cauliflower bakes, mix the buffalo sauce and melted coconut oil in another bowl. Stir well to combine. This sauce will give the bites their famous flavor. 3. After 20 minutes, take the baking sheet out of the oven. Carefully toss the baked cauliflower in the buffalo sauce mixture. Make sure each piece is coated evenly. 4. Spread the coated florets back onto the baking sheet. Return them to the oven for another 10 to 15 minutes. Keep an eye on them for your desired crispiness. 5. Once they are baked to your liking, take them out of the oven. Let the cauliflower bites cool for a few minutes before serving. This resting time helps the flavors settle. Now you're ready to enjoy these crispy and flavorful buffalo cauliflower bites! Check out the Full Recipe for more details. To make the batter just right, start with the flour. Use all-purpose flour for a good base. Then mix in your almond milk slowly. This helps you see the thickness. You want it to be smooth, not too thick or thin. A good batter will stick well to the cauliflower. For crispier bites, try a few tricks. First, bake the cauliflower for a little longer. Keep an eye on them; you want them golden brown. Another tip is to space the florets well on the baking sheet. This lets hot air flow around and makes them crispier. If you want an extra crunch, you can sprinkle some breadcrumbs before the final bake. To add more flavor, consider extra spices. A pinch of cayenne pepper gives a nice kick. You might also enjoy adding some cumin for a smoky taste. Mixing in these spices can create new flavors that excite your taste buds. When it comes to dipping, ranch or blue cheese dressing works great. If you like a sweeter touch, try honey mustard. You can even mix some sriracha with your ranch for a spicy twist. These sauces can make your buffalo cauliflower bites even more tasty. For the best experience, serve your bites hot and fresh! For the full recipe, check out the detailed steps above. {{image_4}} You have options for cooking buffalo cauliflower bites. The air fryer is a great choice. It can make the bites crispy without much oil. Here’s how to do it: 1. Preheat your air fryer to 400°F (200°C). 2. Coat the cauliflower florets with the batter just like in the oven method. 3. Place the florets in the air fryer basket. Make sure they are in a single layer. 4. Cook them for about 12-15 minutes, shaking the basket halfway through for even cooking. Grilling is another fun option. It adds a smoky flavor that pairs well with buffalo sauce. Here’s how to grill them: 1. Preheat your grill to medium-high heat. 2. Use skewers to hold the cauliflower florets. This makes flipping easier. 3. Brush the florets with oil and sprinkle with salt. 4. Grill for about 10-12 minutes, turning them until they are charred and tender. You can spice things up with sauce variations. If you love heat, add more hot sauce or cayenne pepper to your buffalo sauce. This will give your bites an extra kick. You can also try different sauces for unique flavors. A honey mustard sauce offers sweetness that balances the heat. You can mix honey, mustard, and a dash of hot sauce for a tasty alternative. Another option is a barbecue sauce for a smoky flavor. Simply toss your baked cauliflower bites in the sauce after baking. For more ideas, check the [Full Recipe]. These variations keep things interesting and let you customize your snack for any occasion. To keep your buffalo cauliflower bites fresh, store them in an airtight container. Place a paper towel inside to absorb moisture. This helps maintain their crispy texture. You can store them in the fridge for up to three days. When it’s time to reheat, avoid using the microwave. Instead, use the oven. Preheat it to 350°F (175°C). Spread the bites on a baking sheet. Heat for about 10 minutes, or until they are warm and crispy again. You can freeze these bites, but there are two ways to do it. 1. Freezing uncooked bites: Prepare the cauliflower bites, but do not bake them. Place the coated florets on a baking sheet and freeze them. Once frozen, transfer them to a freezer bag. They will last for about three months. 2. Freezing cooked bites: If you have leftover baked bites, let them cool completely. Then, store them in an airtight container or freezer bag. They can also last for about three months. To thaw, move them to the fridge overnight. For reheating, follow the same oven method as before. Bake at 350°F (175°C) for about 15 minutes, or until heated through. This keeps them crispy and tasty. You can serve buffalo cauliflower bites with many great sides. Some popular options include: - Ranch dressing - Blue cheese dressing - Celery sticks - Carrot sticks - Fresh parsley for garnish These options add crunch and flavor. They also make a nice contrast to the spicy bites. Yes, you can make this recipe gluten-free. Just replace the all-purpose flour with gluten-free flour. Almond flour or chickpea flour works well. The batter will still coat the cauliflower well and create that crispy texture. You will know the bites are done when they are golden brown. They should have a crispy texture. Check them after 20 minutes of baking and then again after the second bake. A fork should easily pierce the cauliflower. Absolutely! You can use other vegetables like: - Broccoli florets - Brussels sprouts - Zucchini slices These veggies will absorb the buffalo sauce flavor too. Just adjust the baking time as needed. Enjoy experimenting! For the full recipe, click here: [Full Recipe]. In this post, you learned how to make buffalo cauliflower bites. We covered each ingredient, from measurements to brand suggestions. The step-by-step instructions helped you prepare and bake for crispiness. Tips for enhancing flavor and storing leftovers were also shared. Remember, you can also try cooking methods like air frying or grilling. Feel free to mix up sauces for new tastes. Enjoy your cooking adventure, and have fun experimenting!](https://joymealplan.com/wp-content/uploads/2025/07/3e0c7ac8-f5c4-4624-a75b-d39bdd09bf1f.webp)
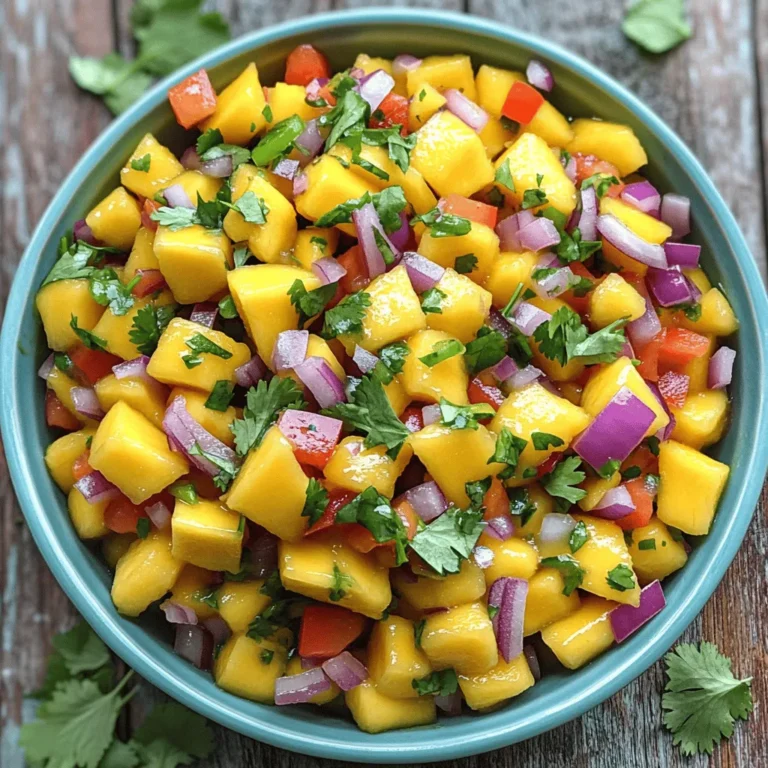
Looking for a tasty snack that’s both crispy and flavorful? You’ve found it! Buffalo cauliflower bites are the perfect plant-based alternative to wings. They’re easy to make and packed with flavor. I’ll walk you through each step, from selecting the right ingredients to baking the perfect batch. Get ready to impress your friends and family with these delicious bites that everyone will love!
Ingredients
To make Buffalo Cauliflower Bites, you’ll need the following ingredients. Each item plays a key role in creating that crispy and flavorful snack we all love.
List of Ingredients
– 1 large head of cauliflower, cut into bite-sized florets
– 1 cup all-purpose flour
– 1 cup almond milk (or your choice of non-dairy milk)
– 1 teaspoon garlic powder
– 1 teaspoon onion powder
– 1 teaspoon smoked paprika
– 1/2 teaspoon salt
– 1/2 teaspoon black pepper
– 1 cup buffalo sauce (store-bought or homemade)
– 2 tablespoons coconut oil, melted
When choosing your ingredients, I suggest using fresh cauliflower. It gives the best texture and taste. For flour, any brand works, but all-purpose is great for a crispy batter. Almond milk adds a nice touch, but feel free to use your favorite non-dairy option. For buffalo sauce, you can buy it or make your own. Homemade sauce allows you to adjust the heat.
Using high-quality spices, like smoked paprika, can elevate your dish. I recommend checking for freshness on all spices. This ensures your bites are packed with flavor.
If you want a unique twist, try different sauces or spices. You can even add a little more garlic powder if you love that flavor. Now that you have your list ready, let’s move on to the next steps in the recipe!
Step-by-Step Instructions
Preparation Steps
1. Start by preheating your oven to 450°F (230°C). This heat will make the cauliflower crispy. Line a baking sheet with parchment paper. This step helps with easy clean-up.
2. In a large bowl, combine the all-purpose flour, almond milk, garlic powder, onion powder, smoked paprika, salt, and black pepper. Use a whisk to mix until you have a smooth batter. The batter should not be too thick or too runny.
3. Now, take each cauliflower floret and dip it into the batter. Make sure it is coated well on all sides. Place the battered florets on the baking sheet in a single layer. Repeat until all florets are coated.
Baking Process
1. Bake the cauliflower in the oven for 20 minutes. This will make the florets tender. The batter will also start to get crispy.
2. While the cauliflower bakes, mix the buffalo sauce and melted coconut oil in another bowl. Stir well to combine. This sauce will give the bites their famous flavor.
3. After 20 minutes, take the baking sheet out of the oven. Carefully toss the baked cauliflower in the buffalo sauce mixture. Make sure each piece is coated evenly.
4. Spread the coated florets back onto the baking sheet. Return them to the oven for another 10 to 15 minutes. Keep an eye on them for your desired crispiness.
5. Once they are baked to your liking, take them out of the oven. Let the cauliflower bites cool for a few minutes before serving. This resting time helps the flavors settle.
Now you’re ready to enjoy these crispy and flavorful buffalo cauliflower bites!
Tips & Tricks
Cooking Tips
To make the batter just right, start with the flour. Use all-purpose flour for a good base. Then mix in your almond milk slowly. This helps you see the thickness. You want it to be smooth, not too thick or thin. A good batter will stick well to the cauliflower.
For crispier bites, try a few tricks. First, bake the cauliflower for a little longer. Keep an eye on them; you want them golden brown. Another tip is to space the florets well on the baking sheet. This lets hot air flow around and makes them crispier. If you want an extra crunch, you can sprinkle some breadcrumbs before the final bake.
Flavor Enhancements
To add more flavor, consider extra spices. A pinch of cayenne pepper gives a nice kick. You might also enjoy adding some cumin for a smoky taste. Mixing in these spices can create new flavors that excite your taste buds.
When it comes to dipping, ranch or blue cheese dressing works great. If you like a sweeter touch, try honey mustard. You can even mix some sriracha with your ranch for a spicy twist. These sauces can make your buffalo cauliflower bites even more tasty. For the best experience, serve your bites hot and fresh!

Variations
Different Cooking Methods
You have options for cooking buffalo cauliflower bites. The air fryer is a great choice. It can make the bites crispy without much oil. Here’s how to do it:
1. Preheat your air fryer to 400°F (200°C).
2. Coat the cauliflower florets with the batter just like in the oven method.
3. Place the florets in the air fryer basket. Make sure they are in a single layer.
4. Cook them for about 12-15 minutes, shaking the basket halfway through for even cooking.
Grilling is another fun option. It adds a smoky flavor that pairs well with buffalo sauce. Here’s how to grill them:
1. Preheat your grill to medium-high heat.
2. Use skewers to hold the cauliflower florets. This makes flipping easier.
3. Brush the florets with oil and sprinkle with salt.
4. Grill for about 10-12 minutes, turning them until they are charred and tender.
Sauce Variations
You can spice things up with sauce variations. If you love heat, add more hot sauce or cayenne pepper to your buffalo sauce. This will give your bites an extra kick.
You can also try different sauces for unique flavors. A honey mustard sauce offers sweetness that balances the heat. You can mix honey, mustard, and a dash of hot sauce for a tasty alternative. Another option is a barbecue sauce for a smoky flavor. Simply toss your baked cauliflower bites in the sauce after baking.These variations keep things interesting and let you customize your snack for any occasion.
Storage Info
Storage Guidelines
To keep your buffalo cauliflower bites fresh, store them in an airtight container. Place a paper towel inside to absorb moisture. This helps maintain their crispy texture. You can store them in the fridge for up to three days.
When it’s time to reheat, avoid using the microwave. Instead, use the oven. Preheat it to 350°F (175°C). Spread the bites on a baking sheet. Heat for about 10 minutes, or until they are warm and crispy again.
Freezing Tips
You can freeze these bites, but there are two ways to do it.
1. Freezing uncooked bites: Prepare the cauliflower bites, but do not bake them. Place the coated florets on a baking sheet and freeze them. Once frozen, transfer them to a freezer bag. They will last for about three months.
2. Freezing cooked bites: If you have leftover baked bites, let them cool completely. Then, store them in an airtight container or freezer bag. They can also last for about three months.
To thaw, move them to the fridge overnight. For reheating, follow the same oven method as before. Bake at 350°F (175°C) for about 15 minutes, or until heated through. This keeps them crispy and tasty.
FAQs
What can I serve with buffalo cauliflower bites?
You can serve buffalo cauliflower bites with many great sides. Some popular options include:
– Ranch dressing
– Blue cheese dressing
– Celery sticks
– Carrot sticks
– Fresh parsley for garnish
These options add crunch and flavor. They also make a nice contrast to the spicy bites.
Can I make this recipe gluten-free?
Yes, you can make this recipe gluten-free. Just replace the all-purpose flour with gluten-free flour. Almond flour or chickpea flour works well. The batter will still coat the cauliflower well and create that crispy texture.
How do I know when the cauliflower bites are done?
You will know the bites are done when they are golden brown. They should have a crispy texture. Check them after 20 minutes of baking and then again after the second bake. A fork should easily pierce the cauliflower.
Can I use other vegetables instead of cauliflower?
Absolutely! You can use other vegetables like:
– Broccoli florets
– Brussels sprouts
– Zucchini slices
These veggies will absorb the buffalo sauce flavor too. Just adjust the baking time as needed. Enjoy experimenting!
In this post, you learned how to make buffalo cauliflower bites. We covered each ingredient, from measurements to brand suggestions. The step-by-step instructions helped you prepare and bake for crispiness. Tips for enhancing flavor and storing leftovers were also shared.
Remember, you can also try cooking methods like air frying or grilling. Feel free to mix up sauces for new tastes. Enjoy your cooking adventure, and have fun experimenting!
![To make Buffalo Cauliflower Bites, you'll need the following ingredients. Each item plays a key role in creating that crispy and flavorful snack we all love. - 1 large head of cauliflower, cut into bite-sized florets - 1 cup all-purpose flour - 1 cup almond milk (or your choice of non-dairy milk) - 1 teaspoon garlic powder - 1 teaspoon onion powder - 1 teaspoon smoked paprika - 1/2 teaspoon salt - 1/2 teaspoon black pepper - 1 cup buffalo sauce (store-bought or homemade) - 2 tablespoons coconut oil, melted When choosing your ingredients, I suggest using fresh cauliflower. It gives the best texture and taste. For flour, any brand works, but all-purpose is great for a crispy batter. Almond milk adds a nice touch, but feel free to use your favorite non-dairy option. For buffalo sauce, you can buy it or make your own. Homemade sauce allows you to adjust the heat. Using high-quality spices, like smoked paprika, can elevate your dish. I recommend checking for freshness on all spices. This ensures your bites are packed with flavor. If you want a unique twist, try different sauces or spices. You can even add a little more garlic powder if you love that flavor. Now that you have your list ready, let's move on to the next steps in the recipe! 1. Start by preheating your oven to 450°F (230°C). This heat will make the cauliflower crispy. Line a baking sheet with parchment paper. This step helps with easy clean-up. 2. In a large bowl, combine the all-purpose flour, almond milk, garlic powder, onion powder, smoked paprika, salt, and black pepper. Use a whisk to mix until you have a smooth batter. The batter should not be too thick or too runny. 3. Now, take each cauliflower floret and dip it into the batter. Make sure it is coated well on all sides. Place the battered florets on the baking sheet in a single layer. Repeat until all florets are coated. 1. Bake the cauliflower in the oven for 20 minutes. This will make the florets tender. The batter will also start to get crispy. 2. While the cauliflower bakes, mix the buffalo sauce and melted coconut oil in another bowl. Stir well to combine. This sauce will give the bites their famous flavor. 3. After 20 minutes, take the baking sheet out of the oven. Carefully toss the baked cauliflower in the buffalo sauce mixture. Make sure each piece is coated evenly. 4. Spread the coated florets back onto the baking sheet. Return them to the oven for another 10 to 15 minutes. Keep an eye on them for your desired crispiness. 5. Once they are baked to your liking, take them out of the oven. Let the cauliflower bites cool for a few minutes before serving. This resting time helps the flavors settle. Now you're ready to enjoy these crispy and flavorful buffalo cauliflower bites! Check out the Full Recipe for more details. To make the batter just right, start with the flour. Use all-purpose flour for a good base. Then mix in your almond milk slowly. This helps you see the thickness. You want it to be smooth, not too thick or thin. A good batter will stick well to the cauliflower. For crispier bites, try a few tricks. First, bake the cauliflower for a little longer. Keep an eye on them; you want them golden brown. Another tip is to space the florets well on the baking sheet. This lets hot air flow around and makes them crispier. If you want an extra crunch, you can sprinkle some breadcrumbs before the final bake. To add more flavor, consider extra spices. A pinch of cayenne pepper gives a nice kick. You might also enjoy adding some cumin for a smoky taste. Mixing in these spices can create new flavors that excite your taste buds. When it comes to dipping, ranch or blue cheese dressing works great. If you like a sweeter touch, try honey mustard. You can even mix some sriracha with your ranch for a spicy twist. These sauces can make your buffalo cauliflower bites even more tasty. For the best experience, serve your bites hot and fresh! For the full recipe, check out the detailed steps above. {{image_4}} You have options for cooking buffalo cauliflower bites. The air fryer is a great choice. It can make the bites crispy without much oil. Here’s how to do it: 1. Preheat your air fryer to 400°F (200°C). 2. Coat the cauliflower florets with the batter just like in the oven method. 3. Place the florets in the air fryer basket. Make sure they are in a single layer. 4. Cook them for about 12-15 minutes, shaking the basket halfway through for even cooking. Grilling is another fun option. It adds a smoky flavor that pairs well with buffalo sauce. Here’s how to grill them: 1. Preheat your grill to medium-high heat. 2. Use skewers to hold the cauliflower florets. This makes flipping easier. 3. Brush the florets with oil and sprinkle with salt. 4. Grill for about 10-12 minutes, turning them until they are charred and tender. You can spice things up with sauce variations. If you love heat, add more hot sauce or cayenne pepper to your buffalo sauce. This will give your bites an extra kick. You can also try different sauces for unique flavors. A honey mustard sauce offers sweetness that balances the heat. You can mix honey, mustard, and a dash of hot sauce for a tasty alternative. Another option is a barbecue sauce for a smoky flavor. Simply toss your baked cauliflower bites in the sauce after baking. For more ideas, check the [Full Recipe]. These variations keep things interesting and let you customize your snack for any occasion. To keep your buffalo cauliflower bites fresh, store them in an airtight container. Place a paper towel inside to absorb moisture. This helps maintain their crispy texture. You can store them in the fridge for up to three days. When it’s time to reheat, avoid using the microwave. Instead, use the oven. Preheat it to 350°F (175°C). Spread the bites on a baking sheet. Heat for about 10 minutes, or until they are warm and crispy again. You can freeze these bites, but there are two ways to do it. 1. Freezing uncooked bites: Prepare the cauliflower bites, but do not bake them. Place the coated florets on a baking sheet and freeze them. Once frozen, transfer them to a freezer bag. They will last for about three months. 2. Freezing cooked bites: If you have leftover baked bites, let them cool completely. Then, store them in an airtight container or freezer bag. They can also last for about three months. To thaw, move them to the fridge overnight. For reheating, follow the same oven method as before. Bake at 350°F (175°C) for about 15 minutes, or until heated through. This keeps them crispy and tasty. You can serve buffalo cauliflower bites with many great sides. Some popular options include: - Ranch dressing - Blue cheese dressing - Celery sticks - Carrot sticks - Fresh parsley for garnish These options add crunch and flavor. They also make a nice contrast to the spicy bites. Yes, you can make this recipe gluten-free. Just replace the all-purpose flour with gluten-free flour. Almond flour or chickpea flour works well. The batter will still coat the cauliflower well and create that crispy texture. You will know the bites are done when they are golden brown. They should have a crispy texture. Check them after 20 minutes of baking and then again after the second bake. A fork should easily pierce the cauliflower. Absolutely! You can use other vegetables like: - Broccoli florets - Brussels sprouts - Zucchini slices These veggies will absorb the buffalo sauce flavor too. Just adjust the baking time as needed. Enjoy experimenting! For the full recipe, click here: [Full Recipe]. In this post, you learned how to make buffalo cauliflower bites. We covered each ingredient, from measurements to brand suggestions. The step-by-step instructions helped you prepare and bake for crispiness. Tips for enhancing flavor and storing leftovers were also shared. Remember, you can also try cooking methods like air frying or grilling. Feel free to mix up sauces for new tastes. Enjoy your cooking adventure, and have fun experimenting!](https://joymealplan.com/wp-content/uploads/2025/07/3e0c7ac8-f5c4-4624-a75b-d39bdd09bf1f-300x300.webp)
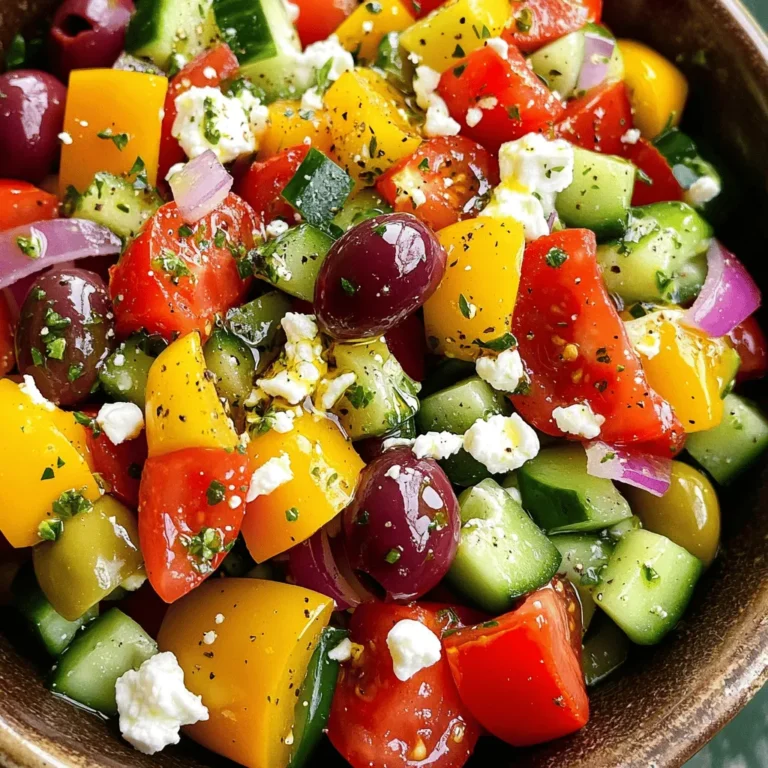

![This Zesty Lemon Tahini Dressing is a bright and tasty addition to many dishes. It takes just 10 minutes to make and serves four people. You can use it on salads, grain bowls, or as a dip for veggies. The balanced mix of flavors will make your meals pop! - 1/4 cup tahini paste - 1/4 cup freshly squeezed lemon juice (approximately 2 medium lemons) - 2 tablespoons extra virgin olive oil - 1 garlic clove, finely minced - 1 tablespoon maple syrup or honey (to taste) - 2-3 tablespoons filtered water (adjust for desired consistency) - Sea salt and freshly cracked black pepper, to taste - Zest of 1 lemon (for an aromatic finish) - Tahini paste provides healthy fats and protein, making it creamy and rich. - Lemon juice adds vitamin C and a bright, zesty flavor that lifts your dishes. - Extra virgin olive oil is a heart-healthy fat with a smooth taste that enhances the dressing. - Garlic brings flavor and has health benefits like boosting immunity. - Maple syrup or honey adds a hint of sweetness, balancing the tang of lemon. - Sea salt and black pepper enhance all the flavors, making every bite enjoyable. - Lemon zest gives an aromatic finish that deepens the lemon taste. This dressing is not only simple to make, but it also packs a punch of flavor and nutrition. You can easily adjust the sweetness and thickness to fit your taste. To make Zesty Lemon Tahini Dressing, start with the right ingredients. Gather your tahini paste, lemon juice, olive oil, garlic, maple syrup, water, salt, pepper, and lemon zest. Use fresh lemons for the best taste. Squeeze enough juice to fill 1/4 cup. A good juicer helps extract the juice easily. In a medium mixing bowl, add the tahini paste first. This helps create a smooth base. Pour in the lemon juice, extra virgin olive oil, and minced garlic. Next, add the maple syrup or honey for sweetness. Use a whisk to mix these ingredients together until smooth. Make sure there are no lumps left in the tahini. This step is key for a creamy dressing. Once the mixture is smooth, it’s time to adjust the consistency. Slowly add filtered water, one tablespoon at a time. If you want a thinner dressing, add more water. For a thicker dip, use less. Taste your dressing and decide if you need more salt, pepper, or lemon juice. The zest adds a nice aromatic touch. For best results, chill the dressing for about 10 minutes before serving. This enhances the flavors. This recipe makes about four servings of a fresh and zesty dressing. Enjoy experimenting with it on salads or as a dip! To make the best Zesty Lemon Tahini Dressing, I focus on balance. Each ingredient plays a role. The tahini brings creaminess, while the lemon adds bright zest. Use fresh lemon juice for the best taste. The garlic gives a nice kick, and sweet maple syrup rounds it out. Taste your dressing as you mix. Adjust the sweetness or tartness as needed. If it's too thick, add more water slowly. This dressing shines on salads. It pairs well with leafy greens or roasted veggies. I love to drizzle it over grain bowls with quinoa or farro. Use it as a dip for fresh veggies or pita chips. You can even spread it on wraps for extra flavor. The options are endless, so get creative with your meals! How you present the dressing matters. I like to serve it in a small, stylish bowl. Drizzle a little extra olive oil on top for shine. Sprinkle sesame seeds for texture and a nice look. You can also add lemon slices around the bowl for a colorful touch. This makes it eye-catching and fun to enjoy. For a truly gourmet touch, pair it with your favorite dishes and watch everyone enjoy! {{image_4}} You can tweak this recipe to suit your tastes. Try using sunflower seed butter in place of tahini. This adds a nutty flavor without sesame. If you're allergic to nuts, sunflower butter is a good choice. You can also use lime juice for a different citrus kick. It gives the dressing a unique twist. For a creamier texture, try adding Greek yogurt. This will thicken the dressing and add protein. Want to boost the flavor? Add fresh herbs like parsley, cilantro, or dill. These herbs bring freshness and color. For a spicy kick, mix in red pepper flakes or a dash of hot sauce. This adds heat and complexity. If you love garlic, increase the amount or add roasted garlic for a sweeter taste. A pinch of cumin can also deepen the flavor profile. This dressing works with many cuisines. It pairs well with Mediterranean dishes like falafel or grilled vegetables. Drizzle it over a fresh Greek salad for a zesty touch. You can also use it in Asian dishes, like a cold noodle salad. The lemon tahini dressing complements sesame flavors well. It is perfect for drizzling on grain bowls filled with quinoa or brown rice. For a fun twist, use it as a dip for fresh spring rolls. Explore the [Full Recipe] for all the delicious details! Store your Zesty Lemon Tahini Dressing in an airtight container. Glass jars work great. Make sure the lid is tight. This keeps the flavors fresh. Always use a clean spoon to scoop out the dressing. This way, you avoid adding germs. Keep your dressing in the fridge. It helps maintain its zesty flavor. If you leave it out, it can spoil quickly. Always chill it right after you make it. The colder it is, the better it tastes. Your dressing lasts up to a week in the fridge. After that, it may not taste good. Watch for changes in color or smell. If it smells sour or looks odd, throw it away. Trust your senses; they guide you well. This dressing is already vegan! It uses tahini, lemon juice, and maple syrup or honey. If you prefer, just stick with maple syrup. It gives a sweet touch and keeps everything plant-based. I don’t recommend freezing this dressing. Freezing can change its texture. When thawed, it may separate and lose its creamy feel. Instead, store it in the fridge for fresh use. This dressing shines on salads, grain bowls, and roasted veggies. Try it with fresh greens, quinoa, or as a dip for crisp veggies. It adds a zesty kick to any meal. To cut calories, reduce the olive oil or use less tahini. You can also add more water for a thinner dressing. This keeps the flavor while lowering the calorie count. For the full recipe, check the details above. In this post, we explored the key ingredients, step-by-step instructions, and helpful tips for Zesty Lemon Tahini Dressing. You learned about the benefits of each ingredient and how to achieve the perfect flavor balance. We also discussed variations and storage tips. To wrap up, this dressing is versatile and easy to make. With the right approach, you can impress your guests and enjoy tasty meals. Use this dressing often to enhance your dishes.](https://joymealplan.com/wp-content/uploads/2025/06/f654f103-f68b-4d89-afc0-0ab326df6c5a-768x768.webp)