
Chickpea Shawarma Bowls Flavorful and Filling Meal
Looking for a meal that’s both tasty and filling? Chickpea Shawarma Bowls are the answer! Packed with spices and fresh veggies, this dish delights every bite. Whether you’re a busy parent, a student, or just love good food, you can whip these up easily. Join me as I guide you through a simple recipe that will transform your meals and impress your guests. Let’s dive into the world of flavor!
Ingredients
Main Ingredients
– 1 can (15 oz) chickpeas, rinsed and drained
– 2 tablespoons extra virgin olive oil
– 2 teaspoons ground cumin
– 2 teaspoons smoked paprika
– 1 teaspoon ground turmeric
– ½ teaspoon ground cinnamon
– ½ teaspoon cayenne pepper (or to preferred spice level)
– Salt and freshly ground black pepper to taste
– 1 cup cooked quinoa or brown rice
– 1 cup cherry tomatoes, cut in half
– 1 medium cucumber, diced into bite-sized pieces
– 1 large carrot, shredded
– ½ medium red onion, thinly sliced
– 1 small bunch fresh parsley or cilantro, finely chopped
– ½ cup tahini
– 2 tablespoons freshly squeezed lemon juice
– Water, as needed for dressing consistency
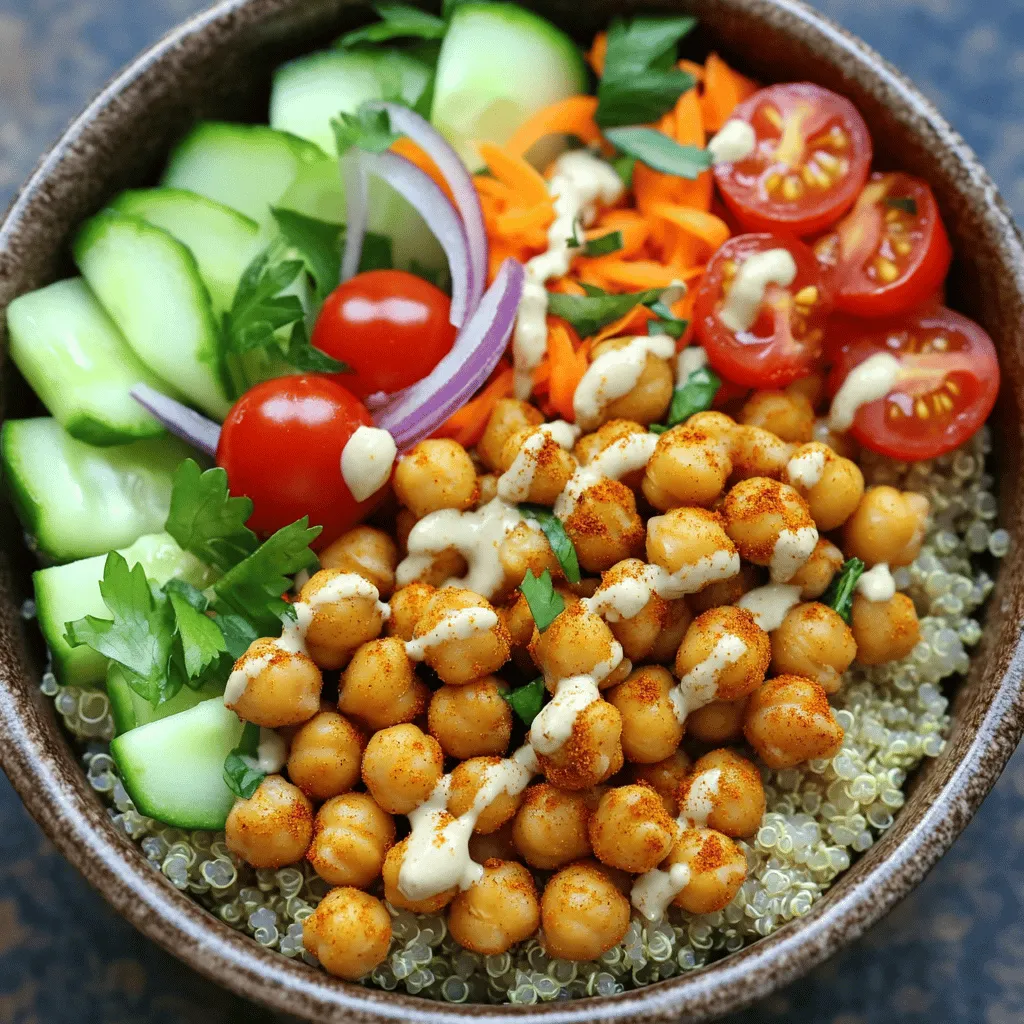
I love using chickpeas as the star of this dish. They bring protein and fiber, which makes the meal filling. When you roast the chickpeas with spices, they gain a crunchy texture and a warm flavor. The spices, like cumin and smoked paprika, give life to the dish.
I add quinoa or brown rice as a base. They provide a nice, chewy texture. You can also mix in other veggies for color and crunch. Cherry tomatoes and cucumbers are my favorites. They add freshness and balance the spices.
To finish, I drizzle tahini dressing over the top. It’s creamy and tangy, which ties all the flavors together. I like to squeeze fresh lemon juice on top too. It brightens everything up and makes each bite special.
Step-by-Step Instructions
Preparation of Chickpeas
1. Preheat your oven to 400°F (200°C). This step is key for roasting.
2. In a bowl, mix your rinsed chickpeas with olive oil, cumin, paprika, turmeric, cinnamon, cayenne, salt, and pepper. Toss well until every chickpea is coated.
3. Spread them on a baking sheet in a single layer. Roast for 25 to 30 minutes. Stir halfway through to get a crispy texture.
Making the Base
1. While the chickpeas roast, cook quinoa or brown rice as the package says. This will be the base of your bowl. Once cooked, set it aside to cool slightly.
Assembling the Bowls
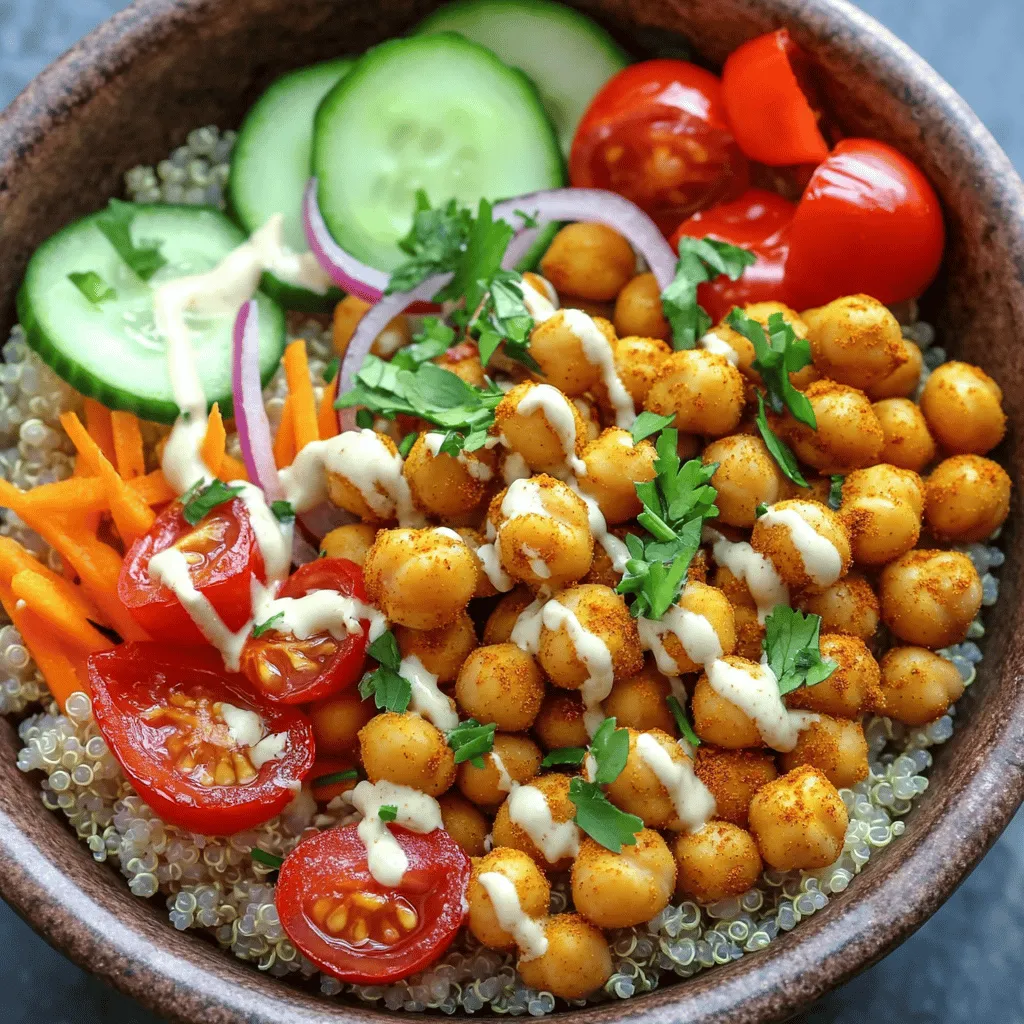
1. Start with a generous scoop of quinoa or brown rice in each bowl.
2. Add your roasted chickpeas on top. Then layer in cherry tomatoes, cucumber, shredded carrot, and red onion.
3. Drizzle with tahini dressing. Use a spoon to evenly distribute it.
4. Top with fresh parsley or cilantro for a colorful finish.
This method creates a vibrant, filling meal that pleases your taste buds and looks stunning.
Tips & Tricks
Perfecting the Chickpeas
To get crispy chickpeas, start with dry chickpeas. Rinse and drain them well. Pat them dry with a towel. This step helps remove extra moisture. Next, toss them in olive oil and spices. Spread them out in a single layer on a baking sheet. Bake at 400°F for 25 to 30 minutes. Stir them halfway to get an even crisp. If you want extra crunch, roast them a bit longer. Remember, they will crisp up as they cool.
Dressings and Sauces
A tahini dressing adds great flavor. You can change it up easily. Add garlic for a punchy taste. Mix in some herbs like dill or parsley for freshness. Want more zing? Try adding a splash of hot sauce or extra lemon juice. You can also mix in yogurt for creaminess. Adjust the water to get your desired thickness. A thicker sauce clings better to the chickpeas and veggies.
Serving Suggestions
Presentation makes a big difference. Use colorful bowls to make your meal pop. Layer the ingredients neatly for a beautiful display. Start with the quinoa or rice at the base. Add the chickpeas on top, then the veggies. Finish with the tahini drizzle. A sprinkle of fresh herbs adds a nice touch. You can also add lemon wedges for extra brightness. Serve your bowls warm for the best flavor. If you want a crunch, sprinkle some nuts or seeds on top.
Variations
Protein Alternatives
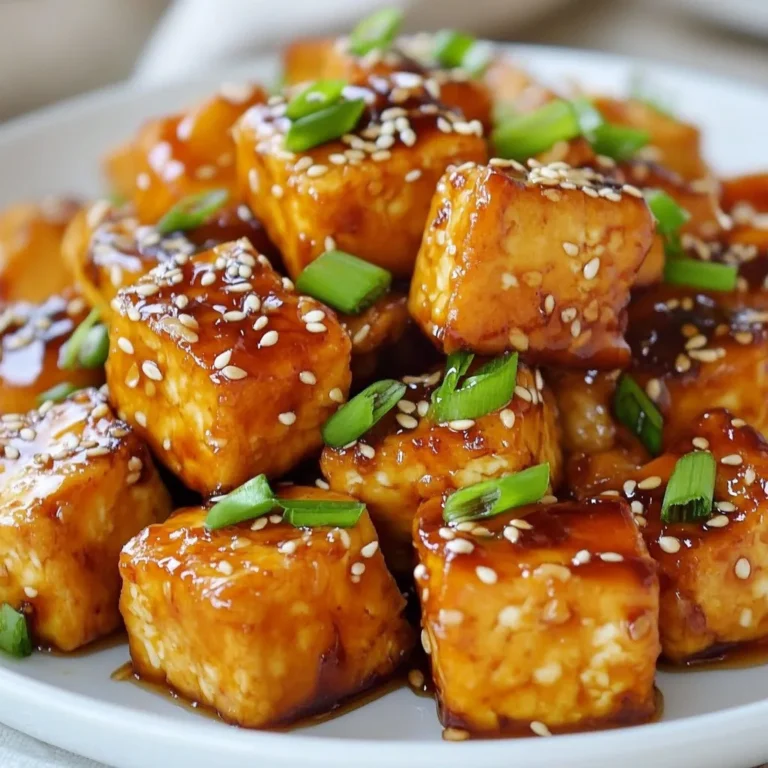
You can add more protein to your Chickpea Shawarma Bowls. Tofu and tempeh work great. They soak up flavors well. Use firm tofu for a nice texture. Press it to remove extra moisture. Cut it into cubes and season like chickpeas. Roast until golden and crispy. Tempeh is another good choice. Slice it thin, marinate, and roast. This adds a nutty flavor and great crunch. Both options make your meal heartier.
Grain Substitutions
Rice and quinoa are common bases, but you can mix it up. Try farro for a chewy texture. It adds a nutty taste that pairs well with spices. Couscous is another quick option. It cooks fast and soaks up flavors nicely. For a gluten-free choice, use cauliflower rice. It adds volume and freshness to your bowl. Each grain gives a different experience, so feel free to experiment!
Seasonal Ingredients
Using seasonal veggies makes your bowls fresh and colorful. In spring, add asparagus or snap peas for crunch. Summer brings ripe tomatoes and sweet corn. Fall is perfect for roasted squash, which adds warmth. In winter, use hearty greens like kale or chard. They add nutrients and bold flavors. Adjust your ingredients as seasons change. This keeps your meals exciting and tasty.
Storage Info
Refrigeration Tips
To keep your Chickpea Shawarma Bowls fresh, store leftovers in an airtight container. Place them in the fridge within two hours of serving. They last well for about three to four days. If you have leftover tahini dressing, store it separately. This keeps the grains and veggies crisp.
Freezing Chickpea Shawarma
You can freeze chickpeas and some other components. First, let the chickpeas cool completely. Spread them on a baking sheet in a single layer. Freeze them for about one hour until solid. Then, transfer them to a freezer bag. They can stay frozen for up to three months. For grains, cool them and place in a freezer-safe container.
Reheating Recommendations
To reheat, I suggest using an oven or an air fryer. Preheat the oven to 350°F (175°C). Spread the chickpeas on a baking sheet and heat for about 10-15 minutes. This helps restore their crispy texture. If you’re reheating grains, add a splash of water and cover to steam them. This keeps them moist and fluffy.
FAQs
Can I make this recipe ahead of time?
Yes, you can prep this dish in advance. First, roast the chickpeas. Store them in an airtight container for up to three days. You can also cook the quinoa or rice ahead of time. Keep it in the fridge for the same amount of time. Chop the veggies, like cucumbers and carrots, a day before serving. This way, you save time on busy days.
How can I adjust the spice level?
You can easily change the heat in this dish. Start with less cayenne pepper if you prefer mild flavors. Add a pinch and taste as you go. You can also include a bit of yogurt or sour cream on top. This will cool down the heat while adding creaminess.
What can I serve with Chickpea Shawarma Bowls?
These bowls pair well with several side dishes. Consider serving a simple salad with greens. You can also add pita bread or flatbreads for a fun touch. Hummus makes a great dip to enjoy on the side. For a refreshing drink, try lemonade or mint tea.
This blog post covered how to make delicious Chickpea Shawarma Bowls. We talked about key ingredients like chickpeas, olive oil, and spices. I shared steps for preparation, including roasting chickpeas and making the base. You learned tips for perfecting your dish, from crispy chickpeas to tasty dressings. We explored variations for added protein and grain choices. Finally, I outlined how to store and reheat leftover components.
Enjoy creating these bowls and make them your own. You have the tools to make a nutritious, tasty meal. Dive in and savor every bite!


![- 2 cups cooked chicken, shredded - 1 cup canned black beans, rinsed and drained - 1 cup fresh or frozen corn kernels The main ingredients create the heart of the chicken enchiladas. First, shredded chicken offers a tender and juicy base. I love using rotisserie chicken for ease. Black beans add protein and fiber, making the meal hearty. Corn brings sweetness and a pop of color. Each ingredient plays a role in making this dish satisfying. - 1 small red onion, finely chopped - 2 cloves garlic, minced - 1 teaspoon ground cumin - 1 teaspoon chili powder Aromatics and seasonings elevate the flavor. The red onion adds a sweet, savory taste. Garlic brings depth and aroma that fills your kitchen. Cumin provides a warm, earthy note. Chili powder adds a gentle kick. These elements create a rich base for the enchiladas. - 8 small corn tortillas - 2 cups shredded cheese (cheddar or Mexican blend) - ¼ cup fresh cilantro, chopped (for garnish) Tortillas hold everything together. I prefer corn tortillas for their authentic flavor. They warm up nicely, making them easy to roll. Cheese melts beautifully, creating a creamy topping. I recommend using a blend for extra flavor. Fresh cilantro adds brightness and a fresh touch. Together, these elements create a delightful finish to your enchiladas. For the full recipe, check out the Spicy Chicken Enchiladas. - Preheat your oven to 350°F (175°C). - Sauté red onion and garlic until fragrant. Start by heating a drizzle of oil in a large skillet over medium heat. Add the finely chopped red onion. Sauté for about 3-4 minutes until the onion turns soft and clear. Then, add the minced garlic and cook for another minute. This step makes your kitchen smell amazing and sets the stage for great flavor. - Combine chicken, black beans, corn, onion-garlic mixture, salsa, cumin, and chili powder. In a big mixing bowl, add the shredded chicken, rinsed black beans, and corn. Pour in the sautéed onion and garlic mixture, along with your choice of salsa. To spice it up, add cumin and chili powder. Mix everything well. This filling is packed with protein and flavor, making your enchiladas both tasty and hearty. - Warm tortillas and fill with chicken mixture. - Roll and arrange in baking dish. Now, warm the corn tortillas in a dry skillet or microwave. This makes them soft and easy to roll. Take about ¼ cup of the chicken mixture and place it in the center of each tortilla. Sprinkle a little cheese on top, then roll them up tightly. Place the rolled tortillas seam-side down in a greased 9x13 inch baking dish. This step is where the magic begins! - Cover with salsa and cheese, bake with foil, then uncovered. Pour any remaining salsa over the top of the enchiladas. Sprinkle the rest of the cheese evenly on top. Cover your baking dish with aluminum foil to keep the moisture in. Bake in the preheated oven for 20 minutes. After that, remove the foil and bake for another 10 minutes. You want the cheese to melt and bubble. Once done, let the enchiladas cool for a few minutes. Garnish with fresh cilantro before serving. This adds a fresh flavor and a lovely touch. Enjoy your homemade chicken enchiladas! For more detailed steps, check out the Full Recipe. - Ensure tortillas are pliable to prevent cracking. Warm them in a skillet or microwave. - Use a mix of cheeses for more flavor. Try combining cheddar and pepper jack. - Serve with sour cream and additional cilantro for extra zest. - Integrate sides like rice or refried beans to complete the meal. - Overfilling tortillas can make them hard to roll. Stick to ¼ cup of filling. - Not letting them cool before serving can lead to a messy plate. Give them a few minutes. {{image_4}} You can make your chicken enchiladas even better for you. - Swap out cheese for a low-fat version. This change cuts calories. - Use whole wheat tortillas for extra fiber. This option boosts nutrition. Want to spice things up? Add some fun flavors! - Add jalapeños for extra heat. This will make your dish lively! - Experiment with different salsas. Try mild, medium, or spicy. Each adds a unique taste. Need to adjust for dietary needs? No problem! - Make it vegetarian by using black beans only. This keeps it hearty and filling. - Use corn tortillas for gluten-free options. They work perfectly in this dish. Feel free to explore these variations and make the recipe your own! To keep your chicken enchiladas fresh, store them in an airtight container. This helps prevent moisture loss and keeps flavors intact. Place them in the fridge where they can stay good for about 3-4 days. Label the container with the date, so you remember when you made them. If you want to save some for later, freezing is a great option. Wrap each enchilada tightly in foil before placing them in a freezer bag. This protects them from freezer burn. They can last for up to 3 months in the freezer. When you're ready to eat, simply thaw them overnight in the fridge. For the best taste and texture, reheat your enchiladas in the oven. Preheat your oven to 350°F (175°C). Place the enchiladas in a baking dish, cover with foil, and heat for about 20-25 minutes. Remove the foil for the last 5 minutes to crisp up the cheese. Enjoy them warm! Chicken enchiladas last about 3-4 days when stored properly. Keep them in an airtight container to maintain freshness. Always check for any signs of spoilage before eating leftovers. Yes, you can assemble chicken enchiladas ahead of time. Just prepare them and place them in the fridge before baking. This is a great way to save time, especially on busy days. You can add many tasty toppings to your enchiladas. Some options include: - Avocado - Guacamole - Green onions - Olives Feel free to get creative with your toppings. They can add color and flavor. You can easily customize this recipe. Adjust the spices to fit your taste. Add your favorite vegetables to the filling, like bell peppers or spinach. This makes the dish more personal and fun. Yes, you can use a slow cooker for this dish. Cook the filling in the slow cooker first. Then, assemble the enchiladas and bake them as usual. This method adds rich flavors and makes cooking easier. For the full recipe, check [Full Recipe]. Chicken enchiladas are simple and fun to make. You need cooked chicken, black beans, corn, and cheese. Follow the steps to prepare, mix, and bake them to perfection. Use tips to avoid common mistakes and enjoy variations for your taste. Remember, leftovers are easy to store and reheat. You can customize this dish with your favorite toppings too. Enjoy this tasty meal with friends and family!](https://joymealplan.com/wp-content/uploads/2025/07/08f715d1-a8ab-4086-9fca-7ff252efa8d5-768x768.webp)
![To make a tasty sweet potato hash, gather these simple ingredients: - 2 medium sweet potatoes, peeled and diced into 1/2-inch cubes - 1 red bell pepper, finely diced - 1 green bell pepper, finely diced - 1 small red onion, finely diced - 2 cloves garlic, minced - 1 teaspoon smoked paprika - 1/2 teaspoon ground cumin - Salt and freshly ground black pepper to taste - 3 tablespoons extra-virgin olive oil - 4 large eggs (optional, for serving) - Fresh parsley, chopped (for garnish) Fresh herbs can brighten your hash. Try adding: - Chopped cilantro for a fresh kick - Thyme for an earthy flavor - Chives for a mild onion taste - Oregano for a hint of sweetness Experiment with spices too. You can add chili powder for heat or turmeric for color. Choosing the right cooking oil is key. I recommend: - Extra-virgin olive oil: Rich in healthy fats and flavor. - Avocado oil: Great for high heat and packed with vitamins. - Coconut oil: Adds a unique taste and is good for cooking. Each oil brings its own benefits, making your sweet potato hash even better. For the best result, use extra-virgin olive oil in this recipe. You will love the flavor! For the full recipe, check out the details above. 1. Start by heating 2 tablespoons of olive oil in a large skillet over medium heat. Wait until the oil shimmers. 2. Carefully add the diced sweet potatoes to the skillet. Season them with salt, pepper, smoked paprika, and cumin. Stir to coat the sweet potatoes evenly. 3. Let the sweet potatoes cook for 10-12 minutes. Stir them occasionally. They should soften and turn golden-brown on the edges. 4. Next, add the diced red onion and bell peppers to the skillet. Cook while stirring for another 5-7 minutes. All the veggies should become tender and slightly caramelized. 5. In the last minute, add the minced garlic to the skillet. Stir well and cook until the garlic smells great, about 30 seconds. Taste and adjust seasoning if needed. 6. If you want to add eggs, heat the last tablespoon of olive oil in another pan over medium heat. Cook the eggs to your liking, either fried sunny-side-up or poached. 7. Serve by spooning the sweet potato hash onto plates or bowls. Top with a cooked egg and sprinkle fresh parsley for color. This recipe uses several key cooking techniques: - Sautéing: This method cooks the sweet potatoes and veggies quickly, creating a nice browning effect. - Seasoning: Adding spices like smoked paprika and cumin enhances the flavor. - Layering: Cooking veggies in stages helps build depth in taste and texture. - Garnishing: Adding fresh parsley brightens up the dish visually and adds freshness. - Use medium heat to ensure even cooking. High heat can burn the sweet potatoes. - Stir often, especially after adding the onions and bell peppers. This keeps them from sticking and burning. - Keep an eye on the garlic. It can burn quickly, so add it last. - If you see the veggies getting too dark, lower the heat and add a splash of water to steam them. For more details, check the Full Recipe. To achieve the best texture for your sweet potato hash, follow these tips: - Cut sweet potatoes into even 1/2-inch cubes. This helps them cook evenly. - Pre-cook sweet potatoes in the microwave for 3-4 minutes. This speeds up cooking. - Cook on medium heat. This prevents burning while allowing them to crisp up. - Stir occasionally, so they don’t stick to the pan. This keeps a nice texture. You can elevate the flavors of your sweet potato hash with these ideas: - Add fresh herbs like thyme or rosemary for a burst of freshness. - Include a splash of lime juice or vinegar for extra zing. - Experiment with different spices, like chili powder or turmeric, for warmth. - Top with avocado or feta cheese for creaminess and richness. Avoid these common mistakes for a perfect sweet potato hash: - Don’t overcrowd the skillet. This can lead to steaming instead of browning. - Avoid using old or dry sweet potatoes. Fresh ones yield better flavor and texture. - Don’t skip the seasoning early on. It helps build flavor from the start. - Be careful not to overcook the garlic. It can turn bitter if burned. For the full recipe, check out Savory Sweet Potato Hash . {{image_4}} You can change up your sweet potato hash with many vegetables. Adding spinach gives it a nice green touch. Kale is another great choice; it adds a hearty bite. Try zucchini for a mild taste. You can even toss in some corn for sweetness. Each vegetable adds its own flavor and texture. To make your hash more filling, add protein. Cooked bacon or sausage provides a savory kick. If you want a leaner option, try diced chicken. For a meatless choice, black beans work well. They add protein and a creamy texture. You can even sprinkle feta cheese on top for a salty finish. Making your hash vegan is easy. Simply skip the eggs and use olive oil for cooking. You can also add nutritional yeast for a cheesy flavor. For gluten-free, all the ingredients in the recipe are safe. Just ensure any added condiments are gluten-free. This way, everyone can enjoy your delicious sweet potato hash! For the complete recipe, check out the [Full Recipe]. To keep your sweet potato hash fresh, let it cool first. Place it in an airtight container. Store it in the fridge for up to four days. This keeps the flavors intact. Be sure to label the container with the date. This helps you track how long it has been stored. If you want to save some for later, freezing is a great option. Use a freezer-safe container or bag. Portion it out to make reheating easier. Make sure to squeeze out as much air as possible. This helps prevent freezer burn. Sweet potato hash can freeze well for up to three months. When it’s time to eat your leftovers, reheating is easy. You can use a skillet or microwave. If using a skillet, add a splash of olive oil. Heat it on medium until warmed through. Stir occasionally to avoid sticking. If using a microwave, cover your dish to keep moisture in. Heat in short bursts, stirring in between. This helps keep the flavors fresh and vibrant. For more detailed instructions, check out the Full Recipe. Yes, you can make sweet potato hash in advance. Cook it fully and let it cool. Store it in an airtight container in the fridge. It stays fresh for up to three days. When ready to eat, just reheat it in a skillet. This keeps the flavors intact and makes serving easy. Sweet potato hash is super versatile. You can serve it for breakfast, lunch, or dinner. Top it with fried or poached eggs for a hearty breakfast. Add avocado slices for creaminess. For lunch, pair it with a green salad. You can also serve it as a side dish with grilled chicken or fish. The options are endless! You can customize your sweet potato hash in many fun ways. Try adding different vegetables like zucchini or mushrooms. For a spicy kick, toss in jalapeños. You can mix in cooked sausage or bacon for added flavor. If you prefer a vegan option, skip the eggs and add chickpeas. Use herbs like thyme or cilantro to enhance the taste. Get creative and make it your own! For the full recipe, check out the savory sweet potato hash section. This article covered how to make sweet potato hash. We discussed ingredients, cooking steps, and tips for perfect texture. You learned about variations, storage, and common questions. Each section helps you craft a tasty dish. As you make your hash, remember to experiment with flavors and textures. This dish is versatile and can fit many diets. Enjoy your cooking, and don't hesitate to make it your own!](https://joymealplan.com/wp-content/uploads/2025/06/a9a4856f-e5e6-4dd7-b1d4-7d775511eecc-768x768.webp)