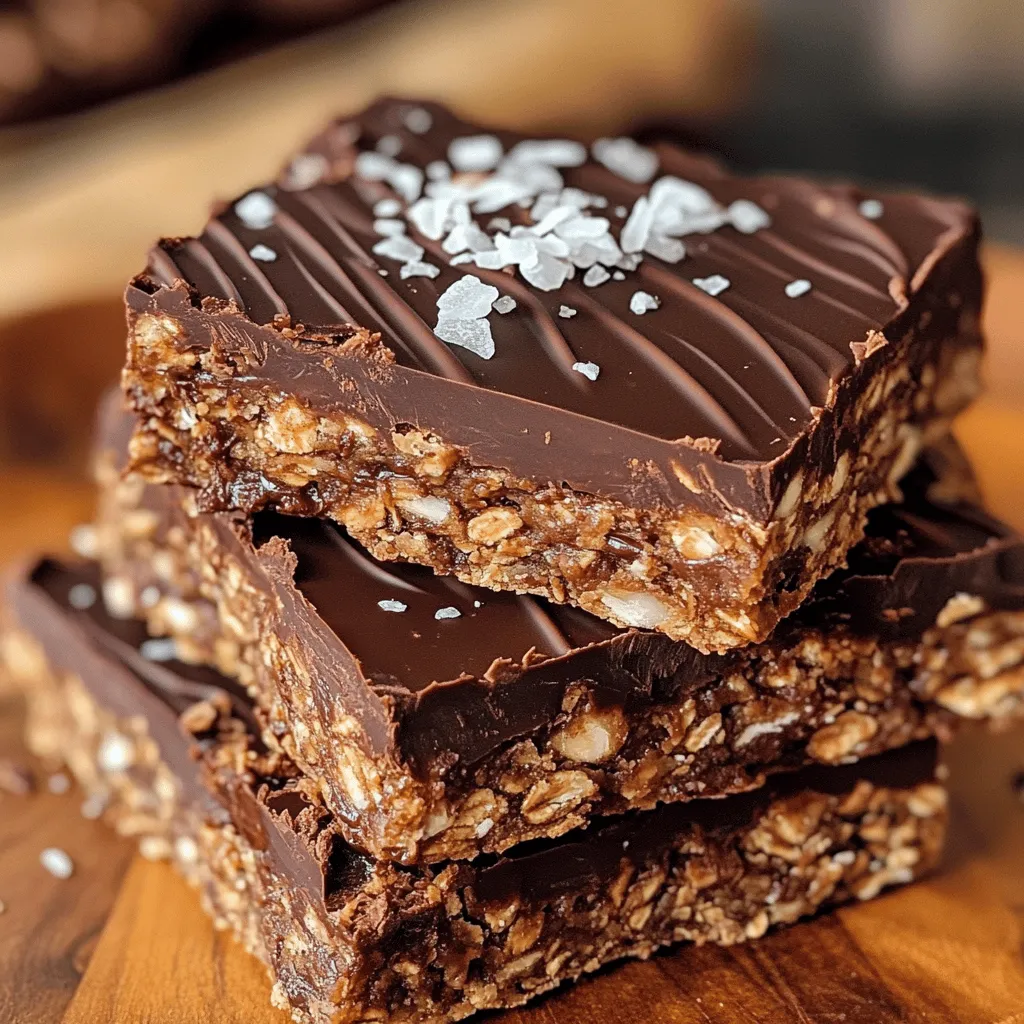
No Bake Chocolate Oat Bars Easy and Delicious Treat

Looking for a tasty treat that’s easy to make? Try my No Bake Chocolate Oat Bars! These bars are simple and packed with flavor. With just a few ingredients like oats, almond butter, and cocoa, you can whip them up in no time. Perfect for a snack or dessert, they are safe for kids too. Ready to satisfy your sweet tooth? Let’s dive into the delicious details!
Ingredients
Detailed List of Ingredients
– 2 cups rolled oats
– 1 cup almond butter (or alternative nut butter)
– 1/2 cup honey or agave syrup
– 1/2 cup unsweetened cocoa powder
– 1/4 cup dark chocolate chips
– 1/4 cup chopped nuts (walnuts, almonds, or pecans)
– 1/2 teaspoon pure vanilla extract
– A pinch of sea salt
These ingredients make a tasty base for our no bake chocolate oat bars. The rolled oats give a nice texture. Almond butter adds healthy fats and flavor. Honey or agave syrup sweetens the mix. Cocoa powder brings that rich chocolate taste. Dark chocolate chips add a melty treat. Chopped nuts give a crunchy bite. Vanilla extract rounds it all out. A pinch of sea salt enhances the sweetness.
Optional Ingredients for Customization
– Other nut butters (peanut butter, cashew butter)
– Dried fruits (raisins, cranberries)
– Seeds (chia, flaxseeds)
You can mix things up with optional ingredients. Different nut butters can change the flavor. Try adding dried fruits for sweetness. Seeds are a great way to add texture and nutrition. Each addition makes these bars unique. You can create your perfect no bake chocolate oat bar.
Step-by-Step Instructions
Preparation Steps
1. In a large mixing bowl, combine the rolled oats, unsweetened cocoa powder, and a pinch of sea salt. Stir until the dry mix is well blended.
2. In a small saucepan, melt the almond butter and honey over low heat. Stir continuously until smooth and mixed well.
3. Remove the saucepan from heat. Stir in the pure vanilla extract. Add the dark chocolate chips and mix gently until they begin to melt into the warm almond butter.
Assembling the Bars
1. Pour the warm almond butter mixture over the oat mixture in the large bowl. Stir until all the oats are coated. If you want, fold in the chopped nuts for added crunch.
2. Line an 8×8-inch baking dish with parchment paper, leaving some overhang. Pour the mixture into the dish. Use a spatula or your hands to press it down firmly.
3. Refrigerate the bars for at least 1-2 hours, or until they feel firm to the touch. Once set, lift the bars out using the parchment paper and cut them into squares or rectangles.
Tips & Tricks
Pro Tips for Perfect Bars
– Even Mixing: Start by mixing the dry ingredients well. This helps blend the oats and cocoa. It prevents clumps and ensures every bite is tasty.
– Check Consistency: Before you press the mixture, check its consistency. It should be sticky and hold together well. If it feels too dry, add a tiny bit more almond butter or honey.
– Melting Almond Butter: Melt almond butter on low heat. High heat can burn it and change the flavor. Stir it until smooth and creamy. This keeps your bars rich and delicious.
Presentation Tips
– Arranging Bars: Once cut, place the bars neatly on a plate. This makes them look inviting and ready to eat.
– Drizzling with Chocolate: Melt some chocolate and drizzle it over the bars. This adds a nice shine and extra chocolate flavor.
– Adding Garnishes: Sprinkle a little sea salt or shredded coconut on top. This adds a pop of color and makes the bars more appealing.
Variations
Dietary Variations
You can easily change the recipe to fit your diet. Here are some ideas:
– Gluten-free options: Use gluten-free oats. This small change makes the bars safe for those with gluten issues.
– Vegan adaptations using maple syrup: Swap honey for maple syrup. This keeps the bars sweet and plant-based.
– Nut-free versions using sunbutter: If you avoid nuts, use sunbutter. It gives a nice flavor without nuts.
Flavor Variations
Feel free to play with flavors. Here are some fun options:
– Adding spices: Sprinkle in some cinnamon or nutmeg. These spices add warmth and depth to the taste.
– Swapping out cocoa for carob powder: If you want a different taste, use carob powder. It offers a sweet, earthy flavor.
– Incorporating protein powder for an extra boost: Stir in some protein powder. This makes the bars a great snack after exercise.Enjoy your tasty treats!
Storage Info
Storing No Bake Chocolate Oat Bars
To keep your no bake chocolate oat bars fresh, use airtight jars or bags. These containers help maintain moisture and prevent the bars from drying out. You can store them in the fridge for up to a week. If you want to save them longer, freeze them for up to three months. Just make sure to wrap them well to avoid freezer burn.
Reheating and Serving Suggestions
When you take out a frozen bar, thaw it in the fridge overnight. This method keeps the texture nice and smooth. After thawing, cut the bars with a sharp knife for clean edges. You can serve them as is or warm them slightly in the microwave for a gooey treat. Enjoy your delicious snack!
FAQs
How long do No Bake Chocolate Oat Bars last?
No Bake Chocolate Oat Bars last about one week when stored in the fridge. Keep them in an airtight container to keep them fresh. You can also freeze them for up to three months. Just wrap them well before freezing.
Can I substitute the almond butter?
Yes, you can easily substitute almond butter with other nut butters. Peanut butter and cashew butter work well too. Just choose your favorite nut butter. This change will still give you tasty bars.
What can I use instead of honey?
If you want to skip honey, agave syrup is a great option. Maple syrup can also replace honey. Both choices will give your bars a sweet taste.
Are these bars suitable for kids?
Absolutely! These bars are great for kids. They are easy to make and have healthy ingredients. Plus, kids love the chocolate flavor, making them a fun treat.
How do I know when the bars are set properly?
You can tell the bars are set when they feel firm to the touch. After refrigerating for 1-2 hours, check if they hold their shape. If they do, they are ready to enjoy!
This blog post shared a simple recipe for No Bake Chocolate Oat Bars. You learned about the key ingredients and how to mix them. I provided tips for perfect bars and ways to customize the recipe. Remember, these bars are easy to store and great for any meal. You can switch ingredients to fit your needs. I hope you enjoy making and sharing these tasty treats!


![For my Lemon Poppy Seed Zucchini Muffins, I use these ingredients: - 1 cup grated zucchini (squeeze out excess moisture) - 1 cup all-purpose flour - 1/2 cup whole wheat flour - 1/4 cup poppy seeds - 1 teaspoon baking powder - 1/2 teaspoon baking soda - 1/2 teaspoon salt - 1/2 teaspoon ground cinnamon - 1/2 cup granulated sugar - 1/4 cup brown sugar, packed - 2 large eggs - 1/2 cup vegetable oil - 1/4 cup plain Greek yogurt - Zest of 1 lemon (about 1 tablespoon) - 2 tablespoons fresh lemon juice Using fresh zucchini is key. It keeps your muffins moist. Fresh lemon juice and zest add bright flavors. These ingredients work together to create a light and fluffy treat. If you have dietary needs, you can substitute some ingredients: - For gluten-free muffins, replace all-purpose flour with a gluten-free blend. - Use almond milk or coconut milk in place of Greek yogurt for a dairy-free option. - You can swap the granulated sugar with coconut sugar for a lower glycemic option. To enhance flavor, consider adding: - 1/2 cup chopped nuts, like walnuts or pecans. - 1/2 cup chocolate chips for a sweet twist. - A pinch of nutmeg or ginger for a warm spice note. Feel free to experiment! These small changes can lead to new and exciting flavors in your muffins. For the complete recipe, check out the [Full Recipe]. 1. Preheat your oven to 350°F (175°C). This step is key for even baking. 2. Prepare a muffin tin by lining it with paper liners or lightly greasing it with cooking spray. I like to use liners for easy removal and cleanup. 3. Mix the dry ingredients in a medium bowl. Combine all-purpose flour, whole wheat flour, poppy seeds, baking powder, baking soda, salt, and ground cinnamon. Whisk until well blended. This helps mix the leavening agents evenly. 4. In a large bowl, blend the granulated sugar and brown sugar. Add the lemon zest and whisk until mixed. This adds a bright flavor to your muffins. 5. Add the eggs one at a time, whisking well after each. This helps create a smooth, fluffy batter. Then, pour in the vegetable oil, Greek yogurt, and lemon juice. Mix until smooth. 1. Carefully fold the dry ingredients into the wet mixture. Stir gently until just combined. Avoid overmixing to keep your muffins tender. 2. Fold in the grated zucchini. Make sure it is evenly distributed without overworking the batter. The zucchini adds moisture and flavor. 1. Divide the batter evenly among the muffin cups. Fill each cup about two-thirds full. This allows space for the muffins to rise. 2. Bake in the preheated oven for 18-22 minutes. Check for doneness by inserting a toothpick into the center. If it comes out clean, your muffins are ready. 3. Let the muffins cool in the tin for about 5 minutes. Then, transfer them to a wire rack to cool completely. This helps them maintain their shape and texture. For the complete recipe, check the [Full Recipe]. Enjoy the delightful taste of lemon poppy seed zucchini muffins! To make moist lemon poppy seed zucchini muffins, focus on a few key techniques: - Squeeze the Zucchini: Grate your zucchini, then squeeze out the excess moisture. This step prevents the batter from becoming too wet. - Measure Accurately: Use measuring cups for both dry and wet ingredients. This helps your muffins rise and stay light. When you measure, remember that even small variations can change the texture. Accurate measurements make a big difference in your results. Avoid these common missteps to keep your muffins light and fluffy: - Overmixing: When you combine the dry and wet ingredients, mix gently. Overmixing can lead to tough muffins. - Filling Too Full: Fill the muffin cups about two-thirds full. If you fill them too high, they might sink in the middle. By following these tips, you can make sure your lemon poppy seed zucchini muffins turn out perfectly every time. For the complete recipe, check out the [Full Recipe]. {{image_4}} You can make lemon poppy seed zucchini muffins even more exciting by adding spices. Try mixing in 1/2 teaspoon of nutmeg or 1/2 teaspoon of ginger for a warm twist. These spices add depth and enhance the citrus flavor. Fruits can also change the taste of your muffins. You might consider adding 1/2 cup of blueberries or 1/2 cup of cranberries. These fruits will bring a burst of sweetness and tartness. Just fold them into the batter gently to keep the muffins fluffy. If you want to make vegan lemon poppy seed zucchini muffins, it's easy. Substitute the eggs with 1/2 cup of unsweetened applesauce or 1/4 cup of ground flaxseed mixed with 1/2 cup of water. Both options work well for binding the ingredients. For those wanting lower sugar options, you can use 1/4 cup of honey or 1/4 cup of maple syrup instead of granulated sugar. If you need a sugar-free version, try a sugar substitute that measures like sugar. These variations help you enjoy the muffins while fitting your dietary needs. You can still delight in the great taste of lemon poppy seed zucchini muffins. For the full recipe, check out the details provided earlier. To keep your lemon poppy seed zucchini muffins fresh, store them in an airtight container at room temperature. If you add a paper towel inside, it helps absorb moisture. This method keeps the muffins soft and tasty. When stored this way, they can last for about 2 to 3 days. After that, they may start to dry out or lose their flavor. If you want to save muffins for later, freezing is a great option. Allow the muffins to cool completely, then wrap each muffin tightly in plastic wrap. Place them in a freezer-safe bag or container. They can stay fresh in the freezer for up to 3 months. When you’re ready to eat a muffin, take it out of the freezer. Let it thaw in the fridge overnight or at room temperature for a few hours. For the best taste, reheat them in the oven at 350°F for about 10 minutes. You can also use the microwave for about 20-30 seconds. This warms them up and brings back their soft texture. Enjoy your muffins just like the day you baked them! To make lemon poppy seed zucchini muffins, start by prepping your oven and muffin tin. 1. Preheat your oven to 350°F (175°C). 2. Grate 1 cup of zucchini and squeeze out extra moisture. 3. In one bowl, mix 1 cup all-purpose flour, 1/2 cup whole wheat flour, 1/4 cup poppy seeds, 1 teaspoon baking powder, 1/2 teaspoon baking soda, 1/2 teaspoon salt, and 1/2 teaspoon ground cinnamon. 4. In another bowl, combine 1/2 cup granulated sugar, 1/4 cup brown sugar, and the zest of 1 lemon. 5. Add 2 large eggs, followed by 1/2 cup vegetable oil, 1/4 cup Greek yogurt, and 2 tablespoons of lemon juice. 6. Mix until smooth. Fold in the dry ingredients, then add the zucchini. 7. Fill muffin cups two-thirds full. Bake for 18-22 minutes. This quick overview gives you all the steps needed to create delicious muffins. Check the Full Recipe for more details. Yes, you can freeze these muffins. Here’s how: - Let the muffins cool completely after baking. - Place them in an airtight container or a freezer bag. - Label the bag with the date and type of muffin. - Store in the freezer for up to 3 months. When ready to eat, thaw them in the fridge overnight or on the counter for a few hours. You can warm them in the oven for a fresh-baked taste. Dense muffins can happen for a few reasons: - Overmixing the batter can create too much gluten. - Not using enough leavening agents like baking powder or baking soda can also lead to density. - Using too much zucchini without squeezing out moisture may add extra weight. To prevent dense muffins, mix the batter gently and ensure you measure ingredients correctly. Following these tips will help you achieve light and fluffy muffins. In summary, we covered how to make Lemon Poppy Seed Zucchini Muffins. You learned about the key ingredients and possible substitutions for dietary needs. I shared step-by-step instructions, tips to perfect your muffins, and various flavor options. Remember, measuring accurately and not overmixing are key for success. These muffins can be stored well, either short-term or long-term, for your convenience. With a bit of practice, you can enjoy delicious muffins tailored to your taste preferences. Happy baking!](https://joymealplan.com/wp-content/uploads/2025/07/b4c3b954-0106-4660-8231-7250b8c7a63e-768x768.webp)