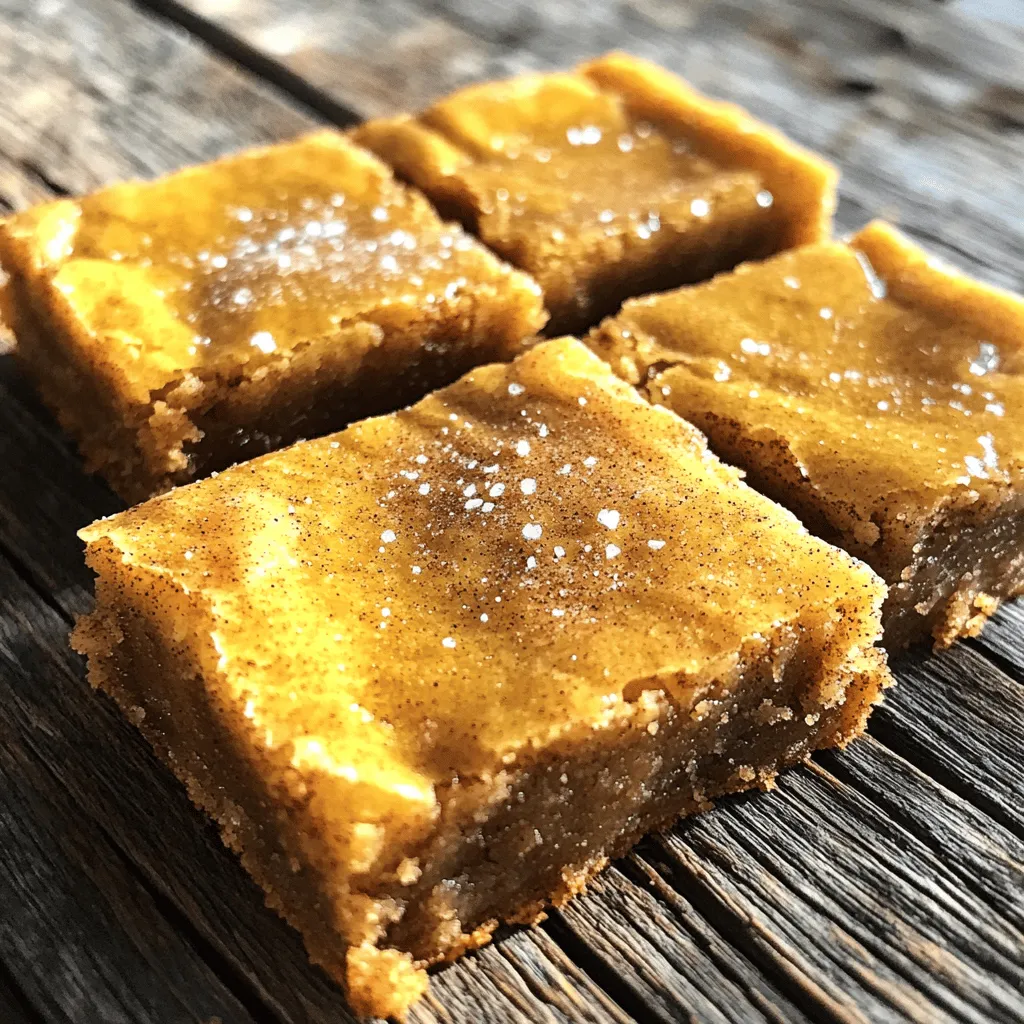
Ultra Chewy Snickerdoodle Blondies Delightful Treat

Are you ready to indulge in a sweet treat that will take your taste buds on a delightful adventure? Let me introduce you to my Ultra Chewy Snickerdoodle Blondies! This recipe combines buttery goodness with a hint of cinnamon, creating a soft and chewy dessert you can’t resist. Perfect for parties or a cozy night in, these blondies are so easy to make. Dive in and discover how to make this mouthwatering treat today!
Ingredients
To make Ultra Chewy Snickerdoodle Blondies, you will need simple ingredients. Here’s the list of what you need:
– 1 cup unsalted butter, melted
– 1 1/2 cups brown sugar, packed firmly
– 2 large eggs
– 2 teaspoons pure vanilla extract
– 2 cups all-purpose flour
– 1 teaspoon baking powder
– 1/2 teaspoon baking soda
– 1/2 teaspoon fine sea salt
– 2 teaspoons ground cinnamon
– 1/4 cup granulated sugar (for topping)
– Flaky sea salt (for final garnish)
These ingredients create the rich, chewy texture that makes these blondies a delight. The brown sugar adds a deep flavor, while the cinnamon gives a warm touch. Make sure your butter is melted, as this helps with that chewy texture.
You can also play with this recipe by adding mix-ins like chocolate chips or nuts.
Step-by-Step Instructions
Preparation Steps
1. Preheat your oven to 350°F (175°C). Prepare a 9×13 inch baking pan. You can grease it or use parchment paper for easy removal.
2. In a large mixing bowl, combine 1 cup of melted butter with 1 1/2 cups of packed brown sugar. Whisk until the mixture looks smooth and glossy.
3. Add 2 large eggs, one at a time, mixing well after each. Stir in 2 teaspoons of pure vanilla extract until everything is well combined.
Mixing Dry Ingredients
1. In a separate bowl, whisk together 2 cups of all-purpose flour, 1 teaspoon of baking powder, 1/2 teaspoon of baking soda, 1/2 teaspoon of fine sea salt, and 2 teaspoons of ground cinnamon. Make sure these dry ingredients are evenly mixed.
Combined Batter
1. Slowly fold the dry mixture into the wet ingredients. Mix gently until just combined. The batter should be thick, giving it that chewy texture.
2. Pour the batter into your prepared baking pan. Use a spatula to spread it evenly.
3. In a small bowl, mix 1/4 cup of granulated sugar with some cinnamon. Sprinkle this blend over the top of the batter in the pan.
Baking Process
1. Bake for 23-25 minutes. Check for doneness by inserting a toothpick in the center. It should come out with a few moist crumbs. This means they are done but still chewy.
2. After baking, let the blondies cool in the pan for about 15 minutes. This cooling time helps them set and makes cutting easier.
Tips & Tricks
Achieving the Perfect Chewy Texture
– Avoid overmixing: Stir just until combined to keep the blondies soft and chewy. Overmixing makes them tough.
– Use fresh ingredients: Fresh eggs and flour enhance flavor and texture. Check your pantry for old ingredients.
Serving Suggestions
– Pairings or toppings: Try serving with vanilla ice cream or a drizzle of caramel. A sprinkle of extra cinnamon also adds great flavor.
– Ideal occasions: These blondies are perfect for parties, picnics, or cozy nights at home. They’re a hit at bake sales too.
Ingredient Substitutions
– Dairy-free or vegan alternatives: Use coconut oil instead of butter, and flax eggs instead of regular eggs for a vegan version.
– Gluten-free options: Substitute all-purpose flour with gluten-free flour blends. Ensure all other ingredients are gluten-free as well.Enjoy baking these delightful treats!
Variations
Flavor Add-Ins
You can easily change the taste of your blondies. Adding nuts or chocolate chips creates a fun twist. I love using walnuts or pecans for a crunchy bite. You can also mix in dark chocolate or white chocolate chips. This adds richness to each bite.
Another way to spice things up is by trying different spices. You can add a pinch of nutmeg or ginger for warmth. If you want a kick, a dash of cayenne pepper gives a nice surprise.
Seasonal Variations
Seasonal changes inspire new flavors. In fall, try making pumpkin spice blondies. Just add pumpkin puree and cinnamon to the mix. This gives your blondies a warm, cozy feel. For the holidays, peppermint makes a great choice. Swirl in some crushed candy canes for a festive touch. It adds a nice crunch and a burst of flavor.
Alternative Recipes
If you want to compare, traditional snickerdoodles use a different base. They are soft and chewy, with a crispy edge. Blondies have a denser texture and a rich taste. You can also try other blondie recipes. Brown butter blondies have a nutty flavor. Or you can make blondies with different types of chocolate, like butterscotch or peanut butter. Each variation brings its own unique charm.
Storage Info
Best Storage Practices
To keep your ultra chewy snickerdoodle blondies fresh, store them in an airtight container. This prevents them from drying out and helps maintain their chewy texture. Make sure the blondies are completely cool before sealing. You can store them at room temperature or in the fridge.
– Airtight containers: These are key for keeping cookies fresh.
– Refrigeration vs. room temperature: If you choose the fridge, the blondies stay fresh longer, but they may harden slightly.
How Long Do They Last?
The shelf life of these blondies is pretty good. At room temperature, they last about 3-4 days. Just make sure to keep them in a cool, dry place.
– Shelf life at room temperature: 3-4 days.
– Refrigerated storage duration: In the fridge, they can last up to a week.
Freezing Instructions
Freezing is a great option if you want to save some blondies for later. Here’s how to do it:
1. Steps for freezing blondies: Cut the blondies into squares. Wrap each piece in plastic wrap. Place them in a freezer bag or container. Label it with the date.
2. Thawing tips for best texture: To thaw, take them out of the freezer a few hours before eating. Leave them at room temperature. This helps them regain that chewy goodness!
FAQs
How do I know when my blondies are done baking?
You can use the toothpick test. Insert a toothpick into the center of the blondies. If it comes out with a few moist crumbs, they are ready. If it comes out clean, they may be overbaked. Aim for that perfect balance of chewy and soft.
Can I make these blondies in advance?
Yes, you can prep ahead of time. Mix the dry ingredients and store them in a bowl. You can also prepare the wet mixture and store it in the fridge. Just combine them when you are ready to bake. This saves time and makes baking easy!
What makes these blondies chewy?
The chewy texture comes from the right mix of ingredients. Using more brown sugar than white sugar helps. Brown sugar adds moisture and chewiness. Also, mixing just until combined keeps the blondies soft. Avoid overmixing to ensure they stay chewy.
Can I use a different type of sugar?
You can use other sugars, but it will change the blondies. If you use white sugar, the color will be lighter. The texture may also be less chewy. Brown sugar adds moisture, while granulated sugar makes it more cake-like. Choose wisely for your perfect blondie!
What’s the difference between blondies and brownies?
Blondies and brownies differ in texture and ingredients. Blondies use brown sugar, giving them a caramel flavor. They are chewy and soft. Brownies use cocoa powder, making them rich and fudgy. Both are delicious, but they have their unique tastes and textures!
This blog post shared a simple recipe for chewy blondies. You learned about essential ingredients, handy preparation steps, and tips for perfect results. We also explored fun variations and the best ways to store your treats. Remember, the key is not to overmix and use good ingredients.
Now, you can confidently bake these blondies for any occasion. Enjoy experimenting with flavors and share your tasty results! Happy baking!


![For my Lemon Poppy Seed Zucchini Muffins, I use these ingredients: - 1 cup grated zucchini (squeeze out excess moisture) - 1 cup all-purpose flour - 1/2 cup whole wheat flour - 1/4 cup poppy seeds - 1 teaspoon baking powder - 1/2 teaspoon baking soda - 1/2 teaspoon salt - 1/2 teaspoon ground cinnamon - 1/2 cup granulated sugar - 1/4 cup brown sugar, packed - 2 large eggs - 1/2 cup vegetable oil - 1/4 cup plain Greek yogurt - Zest of 1 lemon (about 1 tablespoon) - 2 tablespoons fresh lemon juice Using fresh zucchini is key. It keeps your muffins moist. Fresh lemon juice and zest add bright flavors. These ingredients work together to create a light and fluffy treat. If you have dietary needs, you can substitute some ingredients: - For gluten-free muffins, replace all-purpose flour with a gluten-free blend. - Use almond milk or coconut milk in place of Greek yogurt for a dairy-free option. - You can swap the granulated sugar with coconut sugar for a lower glycemic option. To enhance flavor, consider adding: - 1/2 cup chopped nuts, like walnuts or pecans. - 1/2 cup chocolate chips for a sweet twist. - A pinch of nutmeg or ginger for a warm spice note. Feel free to experiment! These small changes can lead to new and exciting flavors in your muffins. For the complete recipe, check out the [Full Recipe]. 1. Preheat your oven to 350°F (175°C). This step is key for even baking. 2. Prepare a muffin tin by lining it with paper liners or lightly greasing it with cooking spray. I like to use liners for easy removal and cleanup. 3. Mix the dry ingredients in a medium bowl. Combine all-purpose flour, whole wheat flour, poppy seeds, baking powder, baking soda, salt, and ground cinnamon. Whisk until well blended. This helps mix the leavening agents evenly. 4. In a large bowl, blend the granulated sugar and brown sugar. Add the lemon zest and whisk until mixed. This adds a bright flavor to your muffins. 5. Add the eggs one at a time, whisking well after each. This helps create a smooth, fluffy batter. Then, pour in the vegetable oil, Greek yogurt, and lemon juice. Mix until smooth. 1. Carefully fold the dry ingredients into the wet mixture. Stir gently until just combined. Avoid overmixing to keep your muffins tender. 2. Fold in the grated zucchini. Make sure it is evenly distributed without overworking the batter. The zucchini adds moisture and flavor. 1. Divide the batter evenly among the muffin cups. Fill each cup about two-thirds full. This allows space for the muffins to rise. 2. Bake in the preheated oven for 18-22 minutes. Check for doneness by inserting a toothpick into the center. If it comes out clean, your muffins are ready. 3. Let the muffins cool in the tin for about 5 minutes. Then, transfer them to a wire rack to cool completely. This helps them maintain their shape and texture. For the complete recipe, check the [Full Recipe]. Enjoy the delightful taste of lemon poppy seed zucchini muffins! To make moist lemon poppy seed zucchini muffins, focus on a few key techniques: - Squeeze the Zucchini: Grate your zucchini, then squeeze out the excess moisture. This step prevents the batter from becoming too wet. - Measure Accurately: Use measuring cups for both dry and wet ingredients. This helps your muffins rise and stay light. When you measure, remember that even small variations can change the texture. Accurate measurements make a big difference in your results. Avoid these common missteps to keep your muffins light and fluffy: - Overmixing: When you combine the dry and wet ingredients, mix gently. Overmixing can lead to tough muffins. - Filling Too Full: Fill the muffin cups about two-thirds full. If you fill them too high, they might sink in the middle. By following these tips, you can make sure your lemon poppy seed zucchini muffins turn out perfectly every time. For the complete recipe, check out the [Full Recipe]. {{image_4}} You can make lemon poppy seed zucchini muffins even more exciting by adding spices. Try mixing in 1/2 teaspoon of nutmeg or 1/2 teaspoon of ginger for a warm twist. These spices add depth and enhance the citrus flavor. Fruits can also change the taste of your muffins. You might consider adding 1/2 cup of blueberries or 1/2 cup of cranberries. These fruits will bring a burst of sweetness and tartness. Just fold them into the batter gently to keep the muffins fluffy. If you want to make vegan lemon poppy seed zucchini muffins, it's easy. Substitute the eggs with 1/2 cup of unsweetened applesauce or 1/4 cup of ground flaxseed mixed with 1/2 cup of water. Both options work well for binding the ingredients. For those wanting lower sugar options, you can use 1/4 cup of honey or 1/4 cup of maple syrup instead of granulated sugar. If you need a sugar-free version, try a sugar substitute that measures like sugar. These variations help you enjoy the muffins while fitting your dietary needs. You can still delight in the great taste of lemon poppy seed zucchini muffins. For the full recipe, check out the details provided earlier. To keep your lemon poppy seed zucchini muffins fresh, store them in an airtight container at room temperature. If you add a paper towel inside, it helps absorb moisture. This method keeps the muffins soft and tasty. When stored this way, they can last for about 2 to 3 days. After that, they may start to dry out or lose their flavor. If you want to save muffins for later, freezing is a great option. Allow the muffins to cool completely, then wrap each muffin tightly in plastic wrap. Place them in a freezer-safe bag or container. They can stay fresh in the freezer for up to 3 months. When you’re ready to eat a muffin, take it out of the freezer. Let it thaw in the fridge overnight or at room temperature for a few hours. For the best taste, reheat them in the oven at 350°F for about 10 minutes. You can also use the microwave for about 20-30 seconds. This warms them up and brings back their soft texture. Enjoy your muffins just like the day you baked them! To make lemon poppy seed zucchini muffins, start by prepping your oven and muffin tin. 1. Preheat your oven to 350°F (175°C). 2. Grate 1 cup of zucchini and squeeze out extra moisture. 3. In one bowl, mix 1 cup all-purpose flour, 1/2 cup whole wheat flour, 1/4 cup poppy seeds, 1 teaspoon baking powder, 1/2 teaspoon baking soda, 1/2 teaspoon salt, and 1/2 teaspoon ground cinnamon. 4. In another bowl, combine 1/2 cup granulated sugar, 1/4 cup brown sugar, and the zest of 1 lemon. 5. Add 2 large eggs, followed by 1/2 cup vegetable oil, 1/4 cup Greek yogurt, and 2 tablespoons of lemon juice. 6. Mix until smooth. Fold in the dry ingredients, then add the zucchini. 7. Fill muffin cups two-thirds full. Bake for 18-22 minutes. This quick overview gives you all the steps needed to create delicious muffins. Check the Full Recipe for more details. Yes, you can freeze these muffins. Here’s how: - Let the muffins cool completely after baking. - Place them in an airtight container or a freezer bag. - Label the bag with the date and type of muffin. - Store in the freezer for up to 3 months. When ready to eat, thaw them in the fridge overnight or on the counter for a few hours. You can warm them in the oven for a fresh-baked taste. Dense muffins can happen for a few reasons: - Overmixing the batter can create too much gluten. - Not using enough leavening agents like baking powder or baking soda can also lead to density. - Using too much zucchini without squeezing out moisture may add extra weight. To prevent dense muffins, mix the batter gently and ensure you measure ingredients correctly. Following these tips will help you achieve light and fluffy muffins. In summary, we covered how to make Lemon Poppy Seed Zucchini Muffins. You learned about the key ingredients and possible substitutions for dietary needs. I shared step-by-step instructions, tips to perfect your muffins, and various flavor options. Remember, measuring accurately and not overmixing are key for success. These muffins can be stored well, either short-term or long-term, for your convenience. With a bit of practice, you can enjoy delicious muffins tailored to your taste preferences. Happy baking!](https://joymealplan.com/wp-content/uploads/2025/07/b4c3b954-0106-4660-8231-7250b8c7a63e-768x768.webp)