
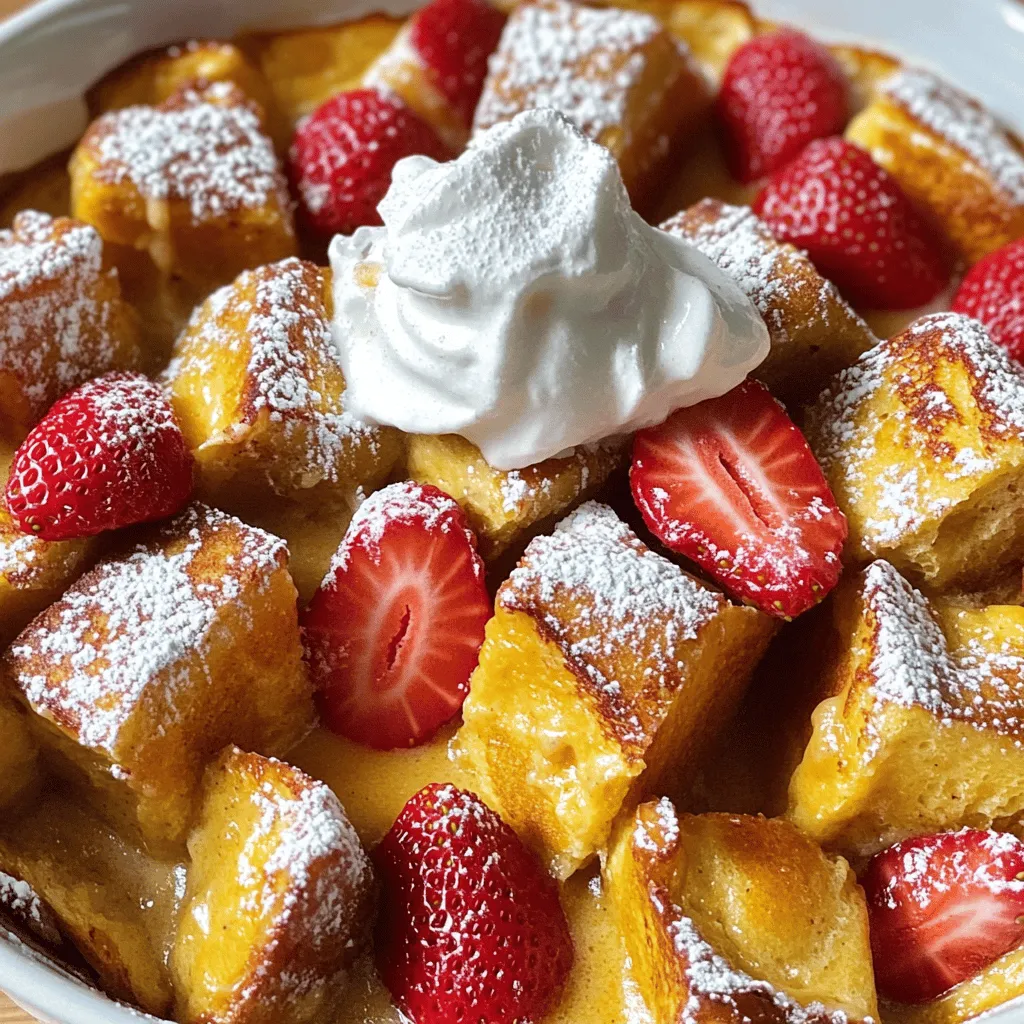
Strawberry Cheesecake French Toast Bake Delight
![Gather these ingredients to make your Strawberry Cheesecake French Toast Bake a hit. Each one plays a key role in bringing that creamy, fruity flavor to life. - 1 loaf of brioche bread, cut into 1-inch cubes - 8 ounces cream cheese, softened to room temperature - 1/2 cup granulated sugar - 1/4 cup sour cream - 3 large eggs - 1 cup whole milk - 1 teaspoon pure vanilla extract - 1 teaspoon ground cinnamon - 2 cups fresh strawberries, hulled and sliced - 1/4 cup powdered sugar (for dusting) - Whipped cream (for serving) Using brioche bread gives the dish a soft and rich base. Cream cheese adds that cheesecake flavor we love. Granulated sugar and sour cream create a sweet, creamy mixture. Eggs and whole milk bind everything together and add fluffiness. Don’t forget the vanilla and cinnamon for added warmth. Finally, fresh strawberries bring bright, juicy bites. For a complete guide, check the [Full Recipe]. - Preheating the Oven and Preparing the Baking Dish: Start by preheating your oven to 350°F (175°C). Grease a 9x13-inch baking dish with non-stick spray to stop sticking. - Making the Cream Cheese Mixture: In a large bowl, add 8 ounces of softened cream cheese, 1/2 cup of granulated sugar, and 1/4 cup of sour cream. Use a hand mixer or whisk to blend until smooth and creamy. - Incorporating the Wet Ingredients: Add 3 large eggs, 1 cup of whole milk, 1 teaspoon of vanilla extract, and 1 teaspoon of ground cinnamon to the bowl. Mix on medium speed until everything is well combined. - Assembling the French Toast Bake: Place your cubed brioche bread evenly in the greased baking dish. Pour the cream cheese mixture over the bread cubes, making sure all pieces are soaked. - Adding the Strawberries: Gently fold in 2 cups of sliced strawberries. Ensure they are spread evenly, adding sweet bursts of flavor to the dish. - Resting and Baking the Dish: Cover the dish tightly with aluminum foil and let it sit at room temperature for at least 20 minutes. To deepen the flavor, you can refrigerate it overnight. Bake the covered dish for 30 minutes, then remove the foil. Continue baking for another 15-20 minutes until golden brown and set. For the full recipe, check out the detailed steps! Choosing the Right Bread I love using brioche bread for this dish. Its soft texture makes it perfect for soaking up the creamy mix. You can also use challah or a sturdy white bread. Just make sure it’s fresh for the best taste. Ensuring Smooth Cream Cheese Mixture To get a smooth cream cheese mixture, let the cream cheese sit out before you start. It should be soft, not cold. Use a hand mixer or whisk to blend it until there are no lumps. This step is key for a creamy texture. Letting It Rest for Flavor Enhancement Resting the mixture is crucial. After you assemble everything, cover it and let it sit for at least 20 minutes. This lets the bread soak up all the flavors. For a richer taste, refrigerate it overnight. Ideal Toppings and Garnishes When serving, top each piece with whipped cream. Add some fresh strawberries for color and taste. A dusting of powdered sugar also makes it look fancy. You can even add a drizzle of maple syrup if you want extra sweetness. Pairing with Beverages This dish pairs well with coffee or a light tea. You can also serve it with a glass of fresh orange juice. The bright flavor of the juice complements the richness of the bake. For a special touch, consider a mimosa for brunch. If you want the full experience, check out the [Full Recipe]. It’s packed with all the details you need to make this dish a hit! {{image_4}} You can have fun with different fruits in this dish. Blueberries and raspberries work great too! They add a nice tartness that complements the sweet cream cheese. Try mixing in chopped bananas for a new twist. You can also add nuts like walnuts or pecans for crunch. Chocolate chips can bring a sweet surprise in every bite. Just sprinkle them in with the strawberries. If you need a gluten-free option, use gluten-free bread. Many brands offer tasty choices that work well. For a dairy-free version, swap the cream cheese for a dairy-free cream cheese. Almond or coconut milk can replace whole milk easily. This way, everyone can enjoy this dish without worry! For the full recipe, check out the Strawberry Cheesecake French Toast Bake . To store leftovers, let the dish cool to room temperature. Cover the baking dish tightly with plastic wrap or aluminum foil. This helps keep the moisture in. You can store it in the fridge for up to three days. For reheating, preheat your oven to 350°F (175°C). Place the covered dish in the oven for about 15-20 minutes. This warms it up without drying it out. Alternatively, you can microwave individual portions for about one to two minutes. If you want to save it for later, freezing is a great option. First, let the dish cool completely. Cut it into squares and wrap each piece tightly in plastic wrap. Then, place the wrapped pieces in a freezer-safe bag or container. You can freeze it for up to three months. When it's time to enjoy again, take out a piece and place it in the fridge overnight to thaw. If you're in a hurry, you can also thaw it in the microwave. Just be sure to do it on a low setting to keep the texture nice. Can I make this recipe ahead of time? Yes, you can! Prepare the dish the night before. Cover it and place it in the fridge. Letting it sit overnight helps the bread soak up the flavors. The next morning, just bake it as usual. What can I use instead of cream cheese? You can use Greek yogurt or mascarpone cheese. Both options will give a creamy texture. However, the flavor will change a bit. Try to choose a rich option for the best taste. How do I know when it's done baking? Look for a golden brown top. The center should be firm, not jiggly. You can also insert a knife in the middle. If it comes out clean, the bake is ready. What to do if it’s too soggy? If your French toast bake is too soggy, it might have soaked too long. You can bake it a bit longer. Cover it loosely with foil to avoid burning the top. How to fix burnt edges? If the edges burn, cover them with foil. This will keep them from getting worse. If the center is still not set, keep baking until it firms up. This French toast bake uses simple ingredients like brioche, cream cheese, and strawberries. You learned each step to prepare, assemble, and bake this delicious dish. We also explored tips for success, tasty variations, and storage options. Enjoy this recipe any time, and don't shy away from experimenting with flavors. Bake it for breakfast or brunch, and savor the sweet, creamy delight. With these easy steps, you will impress your family and friends. Happy cooking!](https://joymealplan.com/wp-content/uploads/2025/07/d3f26ead-c14c-48e2-ba51-186e07c440ec.webp)
Craving a sweet, creamy breakfast treat? Let me introduce you to my Strawberry Cheesecake French Toast Bake! This dish marries rich cream cheese with fluffy brioche bread and fresh strawberries. It’s a perfect way to impress family or friends at brunch. Plus, it’s easy to prepare. Get ready to dive into this step-by-step guide, filled with tips, variations, and storage tips. You’ll want seconds!
Ingredients
Gather these ingredients to make your Strawberry Cheesecake French Toast Bake a hit. Each one plays a key role in bringing that creamy, fruity flavor to life.
– 1 loaf of brioche bread, cut into 1-inch cubes
– 8 ounces cream cheese, softened to room temperature
– 1/2 cup granulated sugar
– 1/4 cup sour cream
– 3 large eggs
– 1 cup whole milk
– 1 teaspoon pure vanilla extract
– 1 teaspoon ground cinnamon
– 2 cups fresh strawberries, hulled and sliced
– 1/4 cup powdered sugar (for dusting)
– Whipped cream (for serving)
Using brioche bread gives the dish a soft and rich base. Cream cheese adds that cheesecake flavor we love. Granulated sugar and sour cream create a sweet, creamy mixture. Eggs and whole milk bind everything together and add fluffiness. Don’t forget the vanilla and cinnamon for added warmth. Finally, fresh strawberries bring bright, juicy bites.
Step-by-Step Instructions
Preparation Steps
– Preheating the Oven and Preparing the Baking Dish: Start by preheating your oven to 350°F (175°C). Grease a 9×13-inch baking dish with non-stick spray to stop sticking.
– Making the Cream Cheese Mixture: In a large bowl, add 8 ounces of softened cream cheese, 1/2 cup of granulated sugar, and 1/4 cup of sour cream. Use a hand mixer or whisk to blend until smooth and creamy.
– Incorporating the Wet Ingredients: Add 3 large eggs, 1 cup of whole milk, 1 teaspoon of vanilla extract, and 1 teaspoon of ground cinnamon to the bowl. Mix on medium speed until everything is well combined.
Assembly Steps
– Assembling the French Toast Bake: Place your cubed brioche bread evenly in the greased baking dish. Pour the cream cheese mixture over the bread cubes, making sure all pieces are soaked.
– Adding the Strawberries: Gently fold in 2 cups of sliced strawberries. Ensure they are spread evenly, adding sweet bursts of flavor to the dish.
– Resting and Baking the Dish: Cover the dish tightly with aluminum foil and let it sit at room temperature for at least 20 minutes. To deepen the flavor, you can refrigerate it overnight. Bake the covered dish for 30 minutes, then remove the foil. Continue baking for another 15-20 minutes until golden brown and set.
Tips & Tricks
Best Practices for Preparation
Choosing the Right Bread
I love using brioche bread for this dish. Its soft texture makes it perfect for soaking up the creamy mix. You can also use challah or a sturdy white bread. Just make sure it’s fresh for the best taste.
Ensuring Smooth Cream Cheese Mixture
To get a smooth cream cheese mixture, let the cream cheese sit out before you start. It should be soft, not cold. Use a hand mixer or whisk to blend it until there are no lumps. This step is key for a creamy texture.
Letting It Rest for Flavor Enhancement
Resting the mixture is crucial. After you assemble everything, cover it and let it sit for at least 20 minutes. This lets the bread soak up all the flavors. For a richer taste, refrigerate it overnight.
Serving Suggestions
Ideal Toppings and Garnishes
When serving, top each piece with whipped cream. Add some fresh strawberries for color and taste. A dusting of powdered sugar also makes it look fancy. You can even add a drizzle of maple syrup if you want extra sweetness.
Pairing with Beverages
This dish pairs well with coffee or a light tea. You can also serve it with a glass of fresh orange juice. The bright flavor of the juice complements the richness of the bake. For a special touch, consider a mimosa for brunch.It’s packed with all the details you need to make this dish a hit!
Variations
Flavor Variations
You can have fun with different fruits in this dish. Blueberries and raspberries work great too! They add a nice tartness that complements the sweet cream cheese. Try mixing in chopped bananas for a new twist. You can also add nuts like walnuts or pecans for crunch. Chocolate chips can bring a sweet surprise in every bite. Just sprinkle them in with the strawberries.
Dietary Modifications
If you need a gluten-free option, use gluten-free bread. Many brands offer tasty choices that work well. For a dairy-free version, swap the cream cheese for a dairy-free cream cheese. Almond or coconut milk can replace whole milk easily. This way, everyone can enjoy this dish without worry!
Storage Info
Short-Term Storage
To store leftovers, let the dish cool to room temperature. Cover the baking dish tightly with plastic wrap or aluminum foil. This helps keep the moisture in. You can store it in the fridge for up to three days.
For reheating, preheat your oven to 350°F (175°C). Place the covered dish in the oven for about 15-20 minutes. This warms it up without drying it out. Alternatively, you can microwave individual portions for about one to two minutes.
Long-Term Storage
If you want to save it for later, freezing is a great option. First, let the dish cool completely. Cut it into squares and wrap each piece tightly in plastic wrap. Then, place the wrapped pieces in a freezer-safe bag or container. You can freeze it for up to three months.
When it’s time to enjoy again, take out a piece and place it in the fridge overnight to thaw. If you’re in a hurry, you can also thaw it in the microwave. Just be sure to do it on a low setting to keep the texture nice.
FAQs
Common Questions
Can I make this recipe ahead of time?
Yes, you can! Prepare the dish the night before. Cover it and place it in the fridge. Letting it sit overnight helps the bread soak up the flavors. The next morning, just bake it as usual.
What can I use instead of cream cheese?
You can use Greek yogurt or mascarpone cheese. Both options will give a creamy texture. However, the flavor will change a bit. Try to choose a rich option for the best taste.
How do I know when it’s done baking?
Look for a golden brown top. The center should be firm, not jiggly. You can also insert a knife in the middle. If it comes out clean, the bake is ready.
Troubleshooting
What to do if it’s too soggy?
If your French toast bake is too soggy, it might have soaked too long. You can bake it a bit longer. Cover it loosely with foil to avoid burning the top.
How to fix burnt edges?
If the edges burn, cover them with foil. This will keep them from getting worse. If the center is still not set, keep baking until it firms up.
This French toast bake uses simple ingredients like brioche, cream cheese, and strawberries. You learned each step to prepare, assemble, and bake this delicious dish. We also explored tips for success, tasty variations, and storage options.
Enjoy this recipe any time, and don’t shy away from experimenting with flavors. Bake it for breakfast or brunch, and savor the sweet, creamy delight. With these easy steps, you will impress your family and friends. Happy cooking!
![Gather these ingredients to make your Strawberry Cheesecake French Toast Bake a hit. Each one plays a key role in bringing that creamy, fruity flavor to life. - 1 loaf of brioche bread, cut into 1-inch cubes - 8 ounces cream cheese, softened to room temperature - 1/2 cup granulated sugar - 1/4 cup sour cream - 3 large eggs - 1 cup whole milk - 1 teaspoon pure vanilla extract - 1 teaspoon ground cinnamon - 2 cups fresh strawberries, hulled and sliced - 1/4 cup powdered sugar (for dusting) - Whipped cream (for serving) Using brioche bread gives the dish a soft and rich base. Cream cheese adds that cheesecake flavor we love. Granulated sugar and sour cream create a sweet, creamy mixture. Eggs and whole milk bind everything together and add fluffiness. Don’t forget the vanilla and cinnamon for added warmth. Finally, fresh strawberries bring bright, juicy bites. For a complete guide, check the [Full Recipe]. - Preheating the Oven and Preparing the Baking Dish: Start by preheating your oven to 350°F (175°C). Grease a 9x13-inch baking dish with non-stick spray to stop sticking. - Making the Cream Cheese Mixture: In a large bowl, add 8 ounces of softened cream cheese, 1/2 cup of granulated sugar, and 1/4 cup of sour cream. Use a hand mixer or whisk to blend until smooth and creamy. - Incorporating the Wet Ingredients: Add 3 large eggs, 1 cup of whole milk, 1 teaspoon of vanilla extract, and 1 teaspoon of ground cinnamon to the bowl. Mix on medium speed until everything is well combined. - Assembling the French Toast Bake: Place your cubed brioche bread evenly in the greased baking dish. Pour the cream cheese mixture over the bread cubes, making sure all pieces are soaked. - Adding the Strawberries: Gently fold in 2 cups of sliced strawberries. Ensure they are spread evenly, adding sweet bursts of flavor to the dish. - Resting and Baking the Dish: Cover the dish tightly with aluminum foil and let it sit at room temperature for at least 20 minutes. To deepen the flavor, you can refrigerate it overnight. Bake the covered dish for 30 minutes, then remove the foil. Continue baking for another 15-20 minutes until golden brown and set. For the full recipe, check out the detailed steps! Choosing the Right Bread I love using brioche bread for this dish. Its soft texture makes it perfect for soaking up the creamy mix. You can also use challah or a sturdy white bread. Just make sure it’s fresh for the best taste. Ensuring Smooth Cream Cheese Mixture To get a smooth cream cheese mixture, let the cream cheese sit out before you start. It should be soft, not cold. Use a hand mixer or whisk to blend it until there are no lumps. This step is key for a creamy texture. Letting It Rest for Flavor Enhancement Resting the mixture is crucial. After you assemble everything, cover it and let it sit for at least 20 minutes. This lets the bread soak up all the flavors. For a richer taste, refrigerate it overnight. Ideal Toppings and Garnishes When serving, top each piece with whipped cream. Add some fresh strawberries for color and taste. A dusting of powdered sugar also makes it look fancy. You can even add a drizzle of maple syrup if you want extra sweetness. Pairing with Beverages This dish pairs well with coffee or a light tea. You can also serve it with a glass of fresh orange juice. The bright flavor of the juice complements the richness of the bake. For a special touch, consider a mimosa for brunch. If you want the full experience, check out the [Full Recipe]. It’s packed with all the details you need to make this dish a hit! {{image_4}} You can have fun with different fruits in this dish. Blueberries and raspberries work great too! They add a nice tartness that complements the sweet cream cheese. Try mixing in chopped bananas for a new twist. You can also add nuts like walnuts or pecans for crunch. Chocolate chips can bring a sweet surprise in every bite. Just sprinkle them in with the strawberries. If you need a gluten-free option, use gluten-free bread. Many brands offer tasty choices that work well. For a dairy-free version, swap the cream cheese for a dairy-free cream cheese. Almond or coconut milk can replace whole milk easily. This way, everyone can enjoy this dish without worry! For the full recipe, check out the Strawberry Cheesecake French Toast Bake . To store leftovers, let the dish cool to room temperature. Cover the baking dish tightly with plastic wrap or aluminum foil. This helps keep the moisture in. You can store it in the fridge for up to three days. For reheating, preheat your oven to 350°F (175°C). Place the covered dish in the oven for about 15-20 minutes. This warms it up without drying it out. Alternatively, you can microwave individual portions for about one to two minutes. If you want to save it for later, freezing is a great option. First, let the dish cool completely. Cut it into squares and wrap each piece tightly in plastic wrap. Then, place the wrapped pieces in a freezer-safe bag or container. You can freeze it for up to three months. When it's time to enjoy again, take out a piece and place it in the fridge overnight to thaw. If you're in a hurry, you can also thaw it in the microwave. Just be sure to do it on a low setting to keep the texture nice. Can I make this recipe ahead of time? Yes, you can! Prepare the dish the night before. Cover it and place it in the fridge. Letting it sit overnight helps the bread soak up the flavors. The next morning, just bake it as usual. What can I use instead of cream cheese? You can use Greek yogurt or mascarpone cheese. Both options will give a creamy texture. However, the flavor will change a bit. Try to choose a rich option for the best taste. How do I know when it's done baking? Look for a golden brown top. The center should be firm, not jiggly. You can also insert a knife in the middle. If it comes out clean, the bake is ready. What to do if it’s too soggy? If your French toast bake is too soggy, it might have soaked too long. You can bake it a bit longer. Cover it loosely with foil to avoid burning the top. How to fix burnt edges? If the edges burn, cover them with foil. This will keep them from getting worse. If the center is still not set, keep baking until it firms up. This French toast bake uses simple ingredients like brioche, cream cheese, and strawberries. You learned each step to prepare, assemble, and bake this delicious dish. We also explored tips for success, tasty variations, and storage options. Enjoy this recipe any time, and don't shy away from experimenting with flavors. Bake it for breakfast or brunch, and savor the sweet, creamy delight. With these easy steps, you will impress your family and friends. Happy cooking!](https://joymealplan.com/wp-content/uploads/2025/07/d3f26ead-c14c-48e2-ba51-186e07c440ec-300x300.webp)
. Start by preheating the air fryer to 350°F (175°C). This step helps your donuts cook evenly. It only takes a few minutes, so don’t skip this part! In a mixing bowl, combine the dry ingredients. You’ll need: - 1 cup all-purpose flour - 1/2 cup granulated sugar - 1 1/2 teaspoons baking powder - 1/4 teaspoon salt - 1/2 teaspoon ground cinnamon - 1/4 teaspoon ground nutmeg (optional) Whisk these ingredients together until there are no lumps left. This ensures a smooth donut texture. Next, grab another bowl to mix the wet ingredients. You’ll need: - 1/2 cup milk - 1 large egg - 2 tablespoons unsalted butter, melted - 1 teaspoon vanilla extract Whisk these until the mixture is smooth. This adds flavor and moisture to your donuts. Now, slowly add the wet mixture to the dry ingredients. Stir gently until a soft dough starts to form. Be careful not to overmix. A delicate touch gives your donuts their light texture. Lightly flour your countertop. Roll the dough out to about 1/2 inch thick. Use a donut cutter or two round cutters to cut out the donuts. If you have dough scraps, reroll them to make more donuts. Place the shaped donuts in the air fryer basket. Make sure you don’t overcrowd them. Cook for 5-6 minutes until they turn golden brown. Flip them halfway through for even cooking. While your donuts cook, mix the cinnamon sugar in a shallow dish. Combine: - 1/4 cup granulated sugar - 1 tablespoon ground cinnamon This will give your donuts that sweet and spicy touch. Once the donuts are done, take them out of the air fryer. While they are still warm, roll each donut in the cinnamon sugar mixture. Make sure they are coated on all sides for a tasty finish. Let the coated donuts cool for a few minutes on a wire rack. This helps them set. Serve them warm or at room temperature. They are perfect for sharing or enjoying with a cup of coffee! For the full recipe, check out the details above. To make great donuts, the dough must be soft but not sticky. After mixing, it should feel smooth. If it’s too wet, add a little more flour. If it’s too dry, add a splash of milk. Remember, don’t overmix! This keeps the donuts light and fluffy. Use a donut cutter or two different-sized round cutters. Press straight down without twisting. Twisting can seal the edges and stop the donuts from rising. If you don’t have a cutter, use a glass for the larger circle. A small bottle cap works for the center hole. Preheat your air fryer to 350°F (175°C). Cook the donuts for 5-6 minutes. Flip them halfway to ensure they brown evenly. Keep an eye on them! Every air fryer cooks a bit differently, so check for a golden color. For a lovely look, serve your donuts on a pretty plate. Dust them with extra cinnamon for a nice touch. You can also put some cinnamon sugar in a small bowl for dipping. This makes it fun and tasty for everyone! Enjoy your homemade treats! {{image_4}} You can make chocolate glazed donuts with this base recipe. After cooking the donuts, melt some chocolate chips in a bowl. Dip each warm donut into the melted chocolate. Let excess chocolate drip off before placing them on a wire rack. You can add sprinkles on top for some fun color and texture. This adds a rich flavor that pairs well with the cinnamon sugar. To create pumpkin spice donuts, swap out some of the milk with pumpkin puree. Add a tablespoon of pumpkin pie spice to the dry ingredients. This gives the donuts a warm, fall flavor. The result is a moist donut that is perfect for autumn. Serve them fresh with a light dusting of cinnamon sugar. If you need nut-free donuts, just ensure all your ingredients are nut-free. Use regular all-purpose flour, which is safe for most people. For gluten-free donuts, you can use a gluten-free flour blend. Make sure the blend has xanthan gum to help with texture. This way, everyone can enjoy these tasty treats without worry. For more ideas, check out the Full Recipe. To keep your donuts fresh, place them in an airtight container. They can stay at room temperature for up to two days. For longer storage, refrigerate them. Just remember, cold donuts can lose some of their charm. If you want to save some donuts for later, freezing is a great option. Wrap each donut in plastic wrap and place them in a freezer-safe bag. They can last for up to three months in the freezer. Label the bag with the date so you know when to enjoy them! When you’re ready to enjoy your frozen donuts, take them out of the freezer. Let them thaw in the fridge overnight. You can warm them in the air fryer at 350°F for about 3 to 5 minutes. This will make them soft and tasty again, just like fresh! For more details, check the Full Recipe. Yes, you can use self-rising flour. Just skip the baking powder and salt. Self-rising flour has these ingredients already mixed in. Your donuts will still taste great! You can use unsweetened applesauce or mashed banana. About 1/4 cup works well as a replacement for one egg. This keeps your donuts moist and adds a bit of sweetness. To make the donuts healthier, you can reduce the sugar. Try using a sugar alternative like stevia or monk fruit. You can also add more whole grains by using whole wheat flour. It’s an easy swap! Yes, you can bake them! Just preheat your oven to 350°F (175°C). Place the donuts on a baking sheet and bake for about 10-12 minutes. They will not be as crispy, but they’ll still be tasty! These donuts stay fresh for about two days at room temperature. If you want them to last longer, store them in an airtight container in the fridge. You can also freeze them for up to three months. Just reheat when you're ready to enjoy! For the full recipe, check the details in the previous sections! This blog post covers everything you need to make air fryer donuts. We discussed the ingredients, step-by-step instructions, helpful tips, and fun variations. Remember to store your donuts well for freshness, and feel free to try different flavors. Donut-making can be simple and fun. I hope you enjoy making these tasty treats! Now go ahead and create your delicious batch!](https://joymealplan.com/wp-content/uploads/2025/07/9fe56699-c2ee-4d7f-b420-cb85b6682c39-768x768.webp)
![- 1 cup rolled oats - 2 ripe bananas - 1 cup almond milk - 1 teaspoon baking powder - 1 teaspoon vanilla extract - 1 tablespoon honey or maple syrup (optional) - 1/2 teaspoon ground cinnamon - Pinch of salt - Coconut oil or cooking spray for greasing Using rolled oats is key. They give your pancakes a hearty texture. Bananas add natural sweetness and moisture. Almond milk keeps it light and dairy-free. If you want sweetness, use honey or maple syrup. A touch of cinnamon gives warmth and flavor. Coconut oil or cooking spray is important to keep the pancakes from sticking. Choose either based on your preference. This recipe is simple. You can find the full recipe above to guide you through the steps. Enjoy making these delicious pancakes! Start by blending 1 cup of rolled oats. You want to blend them until they are fine and powdery. This oat flour acts as the main ingredient. Next, add 2 ripe bananas that you have mashed well. Then, pour in 1 cup of almond milk. This mix gives your pancakes a nice texture. Now it’s time to make the batter. Add 1 teaspoon of baking powder, 1 teaspoon of vanilla extract, and 1 tablespoon of honey or maple syrup if you want them sweeter. Don’t forget to add 1/2 teaspoon of ground cinnamon and a pinch of salt. Blend everything together until it is smooth and uniform. The batter should look nice and creamy. Let the batter rest for about 5-10 minutes. This helps it thicken. While the batter rests, heat a skillet over medium heat. Grease it with coconut oil or cooking spray to prevent sticking. Once hot, pour about 1/4 cup of batter for each pancake. Cook until bubbles form on top, which takes about 2-3 minutes. Then, flip them over. Cook for another 2-3 minutes until they are golden brown. Repeat this with the rest of the batter. You can find the full recipe [here]. To get the best texture, let the batter rest for 5-10 minutes. This helps it thicken. A thicker batter makes fluffier pancakes. Adjust the heat on your skillet. Cook on medium heat to avoid burning. If the pan is too hot, the outside cooks fast while the inside stays raw. You can change the sweetness. Instead of honey, try maple syrup or agave. Each will give a unique taste. For more flavor, think about adding spices. Nutmeg and ginger are great choices. They add warmth and depth. A pinch of each can really enhance the pancakes. For a beautiful plate, stack your pancakes high. Top them with fresh banana slices. A drizzle of honey or syrup makes them shine. You can also sprinkle crunchy nuts on top. For a creamy touch, serve with Greek yogurt. It adds richness and pairs well with the pancakes. {{image_4}} You can easily make these pancakes gluten-free. Use certified gluten-free oats. This ensures you avoid cross-contamination. Many brands offer oats that fit this need. If you are lactose intolerant, try almond milk or coconut milk. Both options work great in this recipe. They add a nice creaminess without the dairy. Want to add more fun to your pancakes? Toss in some chocolate chips or nuts. They give a sweet crunch that’s hard to resist. You can also use walnuts or pecans for added texture. You might like to incorporate fruit purees too. Applesauce or pumpkin puree can boost flavor and moisture. Vanilla or almond extract can add depth to the taste. Meal prep is easy with these pancakes. You can make a big batch and freeze extras. Just stack them with parchment paper between each pancake. This keeps them from sticking together. These pancakes pair well with yogurt or fresh fruit. A dollop of Greek yogurt adds protein. Fresh berries or banana slices on top make a lovely presentation. For the full recipe, check it out above. Enjoy your delicious and healthy banana oat pancakes! To keep your pancakes fresh, store them properly. If you have leftover pancakes, place them in an airtight container. You can refrigerate them for up to three days. This keeps them soft and tasty. For longer storage, freeze your pancakes. Lay them flat on a baking sheet. Once they freeze, transfer them to a freezer bag. This way, they won't stick together. You can freeze them for up to three months. When you're ready to enjoy your pancakes again, reheating is simple. The best way is to use a toaster or a skillet. If you choose a skillet, heat it on low. Add a tiny bit of coconut oil or spray. Place the pancakes in the skillet for about one minute on each side. This keeps them warm and fluffy. If you're in a hurry, you can use the microwave. Heat the pancakes for about 20-30 seconds. But be careful, as this may make them a bit chewy. For the best taste, always try to reheat them gently. Enjoy your Healthy Banana Oat Pancakes! For the full recipe, check out the details above. Yes, you can use quick oats. Quick oats are thinner and cook faster. This can affect the texture of your pancakes. Rolled oats give a heartier feel. If you use quick oats, your pancakes may be softer. You might also need less liquid since quick oats absorb liquid differently. Experiment and see what you like best. To make these pancakes vegan, swap out the milk and honey. Use almond milk or any plant-based milk. For sweetness, try maple syrup instead of honey. You can skip the egg, as this recipe is already egg-free. These changes keep the pancakes tasty and plant-based. If the batter is too thick, add a bit more milk to loosen it. Start with one tablespoon at a time. Blend it again after each addition. This helps keep the flavor strong while adjusting the texture. A good batter should pour easily, but not be runny. These pancakes last about 3 to 5 days in the fridge. Keep them in an airtight container to stay fresh. You can reheat them in the microwave or on a skillet. Just make sure they are heated through for the best taste. Yes, you can make the batter ahead of time. Store it in the fridge for up to 24 hours. If you wait longer, the oats may absorb too much liquid. Just add a little milk before cooking to get the right consistency. This makes breakfast quick and easy! For the full recipe, check out the detailed guide. To make these healthy banana oat pancakes, start by blending the rolled oats until they turn into a fine flour. Then mix in the mashed bananas and almond milk. This creates a smooth batter. It is important to let the batter rest for 5-10 minutes. This helps thicken the batter and improves texture. Here are some key points to remember for successful pancakes: - Always blend the oats until fine for the best texture. - Use ripe bananas for natural sweetness. - Let the batter rest; it makes a big difference. - Grease your skillet well to prevent sticking. - Cook until bubbles form, then flip carefully. These tips will help you create pancakes that are light, fluffy, and full of flavor. Enjoy making them! You learned about making delicious pancakes with simple, healthy ingredients. We covered the essential items, step-by-step cooking instructions, and helpful tips. We also explored variations to fit diets and preferences. Lastly, we discussed how to store leftovers and answered common questions. With these insights, you can create tasty pancakes that everyone will enjoy. Get cooking and delight your family or friends with these easy-to-make treats!](https://joymealplan.com/wp-content/uploads/2025/07/586e6978-884d-467f-992a-f783d71f0243-768x768.webp)
![This cinnamon roll casserole is simple and fun. It combines cinnamon rolls, eggs, and milk. You can whip it up in just 10 minutes. This dish is great for breakfast or brunch. You can serve it warm and drizzled with icing. - 1 can (16 oz) refrigerated cinnamon rolls - 6 large eggs - 1 cup milk - 1/2 cup packed brown sugar - 1 teaspoon vanilla extract - 1 teaspoon ground cinnamon - 1/4 teaspoon salt - 1/2 cup chopped pecans or walnuts - 1/2 cup raisins These optional add-ins make the casserole richer. You can mix in nuts for crunch or raisins for sweetness. Feel free to customize it to your taste! To make this tasty cinnamon roll casserole, gather your ingredients first. You need a few easy items. The process is simple and quick, perfect for busy mornings. 1. Preheat the Oven: Start by preheating your oven to 350°F (175°C). This helps the casserole cook evenly. 2. Prepare the Cinnamon Rolls: Open the can of cinnamon rolls. Take each roll and cut it into quarters. This makes them easier to mix. 3. Mix the Egg Mixture: In a big bowl, add the eggs, milk, brown sugar, vanilla, ground cinnamon, and salt. Whisk until it’s smooth. This mix gives flavor and richness. 4. Combine with Cinnamon Rolls: Gently fold the cut cinnamon rolls into the egg mixture. Stir carefully so you don’t break them. If you like nuts or raisins, add them now. 5. Transfer to Casserole Dish: Pour the mixture into a greased 9x13-inch casserole dish. Spread it out evenly with a spatula. 6. Bake to Perfection: Place the casserole in the oven. Bake for 25-30 minutes. It’s ready when the center is set and the top is golden brown. 7. Cool Slightly: Take the casserole out of the oven. Let it cool for about 5 minutes. This helps it firm up for easy serving. 8. Add Icing: Drizzle the icing from the can over the warm casserole. This sweet touch makes it even better. You can find the full recipe for this delightful dish above. Now, let’s get cooking! To make your casserole fluffy, use fresh cinnamon rolls. The fresher the rolls, the better the rise. When mixing, fold the rolls gently into the egg mixture. Avoid pressing down too hard, as you want to keep air pockets. Bake at 350°F for the right texture. If your oven runs hot, check early to prevent overbaking. Serve the casserole warm, just out of the oven. This helps the icing melt and adds to the flavor. If you let it cool too much, it may become dense. A warm casserole is best for a cozy breakfast. You can also reheat leftovers in the microwave for 20-30 seconds if needed. One common mistake is cutting the rolls too small. If you chop them too tiny, they won’t hold their shape during baking. Also, don’t skip the resting time after baking. Letting it cool for five minutes helps it set. Lastly, remember not to overload with extra ingredients. Stick to the recipe for the best results. {{image_4}} You can change the flavor of your cinnamon roll casserole easily. Try adding fresh fruit like apples or berries for a sweet twist. You can also use different flavored cinnamon rolls, like caramel or orange, to surprise your taste buds. If you love chocolate, mix in some mini chocolate chips. They melt and create gooey pockets of goodness. If you need to make the dish healthier, swap regular eggs for egg whites or a flaxseed mixture. Use almond milk instead of regular milk for a dairy-free option. You can also replace the brown sugar with maple syrup or a sugar substitute. This keeps the dish tasty while fitting your needs. Make your casserole special for the season. In the fall, add pumpkin puree and pumpkin spice to the mix. For winter, mix in crushed peppermint candies for a festive flavor. In the spring, consider using lemon zest for a bright and fresh taste. You can even make it a summer dish by adding strawberries or peaches. For the complete recipe, check the [Full Recipe]. To keep your cinnamon roll casserole fresh, store leftovers in an airtight container. Make sure it cools completely before you seal it. You can keep it in the fridge for up to three days. If you want to enjoy it later, freezing is a good option. Always label your container with the date for easy tracking. When you're ready to enjoy leftovers, preheat your oven to 350°F (175°C). Place the casserole in an oven-safe dish and cover it with foil. Heat it for about 15-20 minutes or until warm. You can also use the microwave. Just heat a portion on medium for about 1-2 minutes. Make sure it’s warm throughout. To freeze, cut the casserole into portions and wrap each piece tightly in plastic wrap. Then, place them in a freezer-safe bag or container. You can freeze the casserole for up to two months. When you're ready to eat, thaw it overnight in the fridge, then reheat as mentioned above. Enjoy the sweet flavors even after freezing! Yes, you can make this casserole ahead of time. Prepare it the night before. Just follow the steps until you pour it into the dish. Cover it tightly with plastic wrap and store it in the fridge. In the morning, take it out and let it sit for 10-15 minutes. Then, bake it as directed. This saves time and gives you an easy breakfast! To check if the casserole is done, look for a golden brown top. You can also insert a toothpick in the center. If it comes out clean, it is ready. The center should be set, not jiggly. Baking should take about 25-30 minutes in a preheated oven. You can serve this casserole with a variety of sides. Fresh fruit adds a nice touch. Sliced strawberries or blueberries work well. You might also enjoy it with yogurt for creaminess. If you like a heartier meal, pair it with scrambled eggs or bacon. These choices make a complete and tasty breakfast! For the full recipe and more details, check out the [Full Recipe]. In this post, we explored how to make a delicious Cinnamon Roll Casserole. We covered the key ingredients, cooking steps, and tips for a fluffy dish. You learned how to customize flavors and find the best storage practices. Remember, you can alter the recipe for different diets. Avoid common mistakes to make the best casserole. With these steps, you will create a treat everyone will love. Enjoy the cooking process and share your tasty results!](https://joymealplan.com/wp-content/uploads/2025/06/38cd94bd-2978-4cba-9687-581b6c0fa5a5-768x768.webp)
![- 1 cup unsalted butter - 2 cups granulated sugar - 4 large eggs - 1 teaspoon vanilla extract To make the best fudgy brownies, you need these core ingredients. Unsalted butter gives the brownies a rich, smooth base. Granulated sugar adds sweetness and helps create that perfect crust. The eggs provide moisture, binding everything together. Lastly, vanilla extract enhances the overall flavor with its warm notes. - 1 cup all-purpose flour - 1 cup unsweetened cocoa powder - 1 teaspoon baking powder - 1/2 teaspoon salt Dry ingredients play a key role in the texture. All-purpose flour forms the structure. Cocoa powder gives that deep chocolate flavor. Baking powder helps the brownies rise a bit, creating a tender bite. Salt balances the sweetness and brings out the chocolate flavor. - 1 cup chocolate chips - 1/2 cup chopped walnuts or pecans You can take these brownies to the next level with add-ins. Chocolate chips add extra gooeyness. You can choose milk or dark chips based on your taste. Nuts, like walnuts or pecans, add crunch and flavor. However, you can skip them if you prefer a smooth brownie. For the complete recipe, check the Full Recipe section. - Preheat oven to 350°F (175°C). - Grease or line the baking pan. Start by getting your oven nice and hot. This helps the brownies bake evenly. You can use butter or parchment paper to prepare your baking pan. This makes it easy to take the brownies out later. - Melt butter and combine with sugar. - Whisk in eggs and vanilla extract. Next, melt the butter in a medium saucepan over low heat. Once it’s melted, mix in the granulated sugar really well. It should look smooth and creamy. After that, let it cool a bit. Then, whisk in the eggs one by one. Finish by adding vanilla extract for extra flavor. - Sift and mix dry ingredients. - Fold dry into wet without overmixing. In another bowl, sift together the flour, cocoa powder, baking powder, and salt. This helps break up any lumps. Now, gently fold the dry mix into the wet mixture. Be careful not to overmix it. This step is key for that fudgy texture you want. - Incorporate chocolate chips and nuts. - Pour batter into prepared pan. Now comes the fun part! Fold in the chocolate chips and nuts if you choose to add them. They create little pockets of flavor. Once everything is mixed, pour the batter into your prepared pan. Use a spatula to spread it evenly. - Bake for 25-30 minutes. - Cool before cutting. Put the pan in the oven and bake for 25 to 30 minutes. Check if they’re done by inserting a toothpick in the center. If it comes out with a few moist crumbs, they are perfect! Allow the brownies to cool in the pan for about 10 minutes. Then, move them to a wire rack to cool completely. This helps them set up nicely for cutting. For the full recipe, check out the complete guide above. To get that fudgy texture, avoid overmixing the batter. When you mix too much, air gets in. This makes brownies more cake-like. Instead, mix just until you see no dry flour. Quality cocoa powder matters too. Choose a rich, unsweetened cocoa for deep flavor. Brands like Valrhona or Ghirardelli work great. This will give you the best taste and color. How do you check for doneness? Insert a toothpick into the center. If it comes out with a few moist crumbs, they’re ready! If it’s clean, you may have overbaked them. Ovens can vary, so adjust the baking time. If your oven runs hot, start checking at 20 minutes. This way, you’ll catch them at the right time for that fudgy finish. For a show-stopping treat, serve brownies warm. Add a scoop of ice cream on top. The warm brownie and cold ice cream create a tasty contrast. Drizzle with chocolate sauce for extra indulgence. You can also sprinkle some sea salt on top. This adds a nice flavor kick. Feel free to add toppings like nuts, caramel, or fresh berries for more fun. Want to explore more ideas? Check out the Full Recipe for more serving tips! {{image_4}} You can twist the classic fudgy brownie in fun ways. Here are some ideas: - Mint chocolate brownies: Add 1 teaspoon of mint extract to the batter. This gives a fresh taste that pairs well with chocolate. - Peanut butter swirl: Create swirls by adding 1/2 cup of creamy peanut butter. Drop spoonfuls on top and use a knife to swirl it in. - Espresso-infused brownies: Mix in 1 tablespoon of instant espresso powder. This will deepen the chocolate flavor and add a rich taste. Not everyone can eat regular brownies. Here are a few options: - Gluten-free options: Replace all-purpose flour with almond flour or gluten-free flour blend. This keeps the texture fudgy and delicious. - Vegan adaptations: Substitute eggs with 1/4 cup of applesauce or flaxseed meal mixed with water. Use dairy-free butter and dark chocolate for a great result. How you serve brownies can change the whole experience. Try these ideas: - Brownie sundaes: Serve warm brownies with a scoop of vanilla ice cream. Top it with chocolate sauce and nuts for crunch. - Brownie bites for parties: Cut brownies into small squares. Arrange them on a tray for easy snacking and sharing. Explore these fun variations to enjoy your ultimate fudgy brownies even more! For the full recipe, refer to the earlier section. To keep your brownies fresh, store them in an airtight container. This helps maintain their moisture. You can also wrap them tightly in plastic wrap. This keeps them soft and fudgy. Place the container at room temperature for up to four days. If you want to keep them longer, the fridge is a good choice. Just remember, chilling can change their texture a bit. Freezing brownies is simple. First, let them cool completely. Then, cut them into squares. Wrap each square in plastic wrap. After that, place them in a freezer-safe bag. Make sure to remove all the air. Your brownies can stay in the freezer for up to three months. When you’re ready to enjoy them, take them out. Thaw them in the fridge overnight for best results. You can also warm them in the microwave for a few seconds. Brownies last about four days at room temperature. In the fridge, they can stay fresh for a week. Look for signs of spoilage. If they smell off or have a dry texture, it’s best to toss them. Fresh brownies should be soft and have a rich chocolate smell. Enjoy your Ultimate Fudgy Brownies while they’re at their best! For the complete recipe, check the [Full Recipe]. Fudgy brownies have more fat than flour. The high fat helps create a dense texture. This means using more butter and chocolate in your mix. The key is to mix gently. This keeps the brownies moist and rich. Cakey brownies use more flour and less fat. They rise more and are lighter. Yes, you can! Feel free to swap chocolate types in this recipe. You can use dark, milk, or even semi-sweet chocolate. Each type will change the taste a bit. Dark chocolate gives a rich flavor. Milk chocolate makes it sweeter. It’s all about what you like the most. Check the brownies at 25 minutes. Insert a toothpick into the center. If it comes out with a few moist crumbs, they’re ready. Don’t worry if it’s not clean. A few crumbs mean they will be fudgy. If it’s all wet, bake for a few more minutes. Absolutely! You can add nuts like walnuts or pecans for crunch. You can also add toppings like caramel or sea salt. Get creative! Just remember to mix them in gently. This keeps the fudgy texture while adding fun flavors. To reheat brownies, use your oven. Preheat to 350°F (175°C). Place the brownies on a baking sheet. Heat them for about 10 minutes. You want them warm but not dried out. You can also microwave them for 15-20 seconds. Enjoy them warm for a gooey treat! In this blog post, we covered the key ingredients and steps to make fudgy brownies. We explored essential ingredients, optional add-ins, and tips for the perfect texture. You can try fun variations such as mint or peanut butter. Remember to store your brownies well to keep them fresh. With these tips and recipes, you can bake brownies that everyone will love. Dive in and enjoy your delicious creations!](https://joymealplan.com/wp-content/uploads/2025/06/0df86677-361d-4dfc-89fb-f08daaeec0f4-768x768.webp)