Maple Dijon Glazed Salmon Flavorful and Easy Recipe
Looking for a quick and tasty way to impress at dinner? This Maple Dijon Glazed Salmon recipe is easy and packed with flavor. You’ll use fresh ingredients, and in just a matter of minutes, you can serve up a dish that delights. Let’s dive into this deliciously simple recipe that will leave you and your guests wanting more. Trust me; it’s a meal you won’t forget!
Ingredients
List of Ingredients
– 4 salmon fillets (6 ounces each)
– 1/4 cup pure maple syrup
– 2 tablespoons Dijon mustard
– 2 tablespoons soy sauce (tamari for gluten-free)
– 1 tablespoon extra virgin olive oil
– 2 cloves garlic, finely minced
– 1 tablespoon freshly squeezed lemon juice
– Salt and pepper to taste
– Fresh sprigs of thyme or chopped parsley for garnish
Gathering the right ingredients is key for this recipe. You will need fresh salmon fillets. Look for ones that are bright in color. The maple syrup gives a lovely sweetness. Dijon mustard adds a nice tang. Soy sauce brings depth. Extra virgin olive oil keeps the salmon moist. Fresh garlic gives it a kick. Lemon juice brightens the dish.
Don’t forget salt and pepper for seasoning. They balance all the flavors. Fresh thyme or parsley adds a pop of color. This makes your dish look even better. You can find these ingredients at any grocery store.
When you have everything ready, it’s time to start cooking!
Step-by-Step Instructions
Marinade Preparation
– Create the Marinade: In a medium bowl, mix together the maple syrup, Dijon mustard, soy sauce, olive oil, minced garlic, and lemon juice. Whisk it well until smooth. This marinade adds great flavor and moisture.
– Coat the Salmon: Place the salmon fillets in a shallow dish or a plastic bag. Pour the marinade over the salmon. Make sure each piece is well coated. Cover the dish or seal the bag and refrigerate for 30 minutes to 2 hours. This time helps the flavors soak into the fish.
Baking Process
– Preheat the Oven: Set your oven to 400°F (200°C). This high heat will help caramelize the glaze on the salmon.
– Prepare the Baking Sheet: Line a baking sheet with parchment paper or grease it lightly. This makes cleanup easy. Remove the salmon from the marinade, but save the leftover marinade for later. Place the fillets skin-side down on the baking sheet.
– Bake the Salmon: Put the baking sheet in the oven and bake for 12-15 minutes. The time depends on how thick your fillets are. Every 5 minutes, brush the salmon with the reserved marinade. This keeps it moist and flavorful.
Finish and Serve
– Check for Doneness: The salmon is done when it flakes easily with a fork. It should reach an internal temperature of 145°F (63°C).
– Garnish and Serve: Once baked, take the salmon out of the oven and let it rest for about a minute. Before serving, add fresh thyme or chopped parsley for a pop of color. Enjoy your delicious Maple Dijon Glazed Salmon!
Tips & Tricks
Perfecting the Glaze
Achieving a Balanced Flavor
To make a great glaze, mix the maple syrup and Dijon mustard well. The sweet syrup balances the tangy mustard. Use fresh garlic for an extra kick. This mix will coat the salmon nicely. Taste it before you use it. Adjust salt and pepper to your liking.
Ensuring Even Cooking
Even cooking is key for the best salmon. Place fillets skin-side down on the baking sheet. Space them apart so heat moves around. Brush the glaze over the salmon every five minutes. This keeps the fish moist and tasty.
Selecting Salmon
Choosing Fresh Salmon
When picking salmon, look for bright colors. The flesh should be firm and shiny. Avoid fish with a strong fishy smell. Fresh salmon makes a big difference in taste. If you can, ask your fishmonger for the catch of the day.
Sustainable Seafood Options
Choose salmon from sustainable sources. Look for labels like “wild-caught” or “responsibly farmed.” These choices help protect our oceans. They also ensure the fish is healthy and tasty.
Serving Suggestions
Pairing with Side Dishes
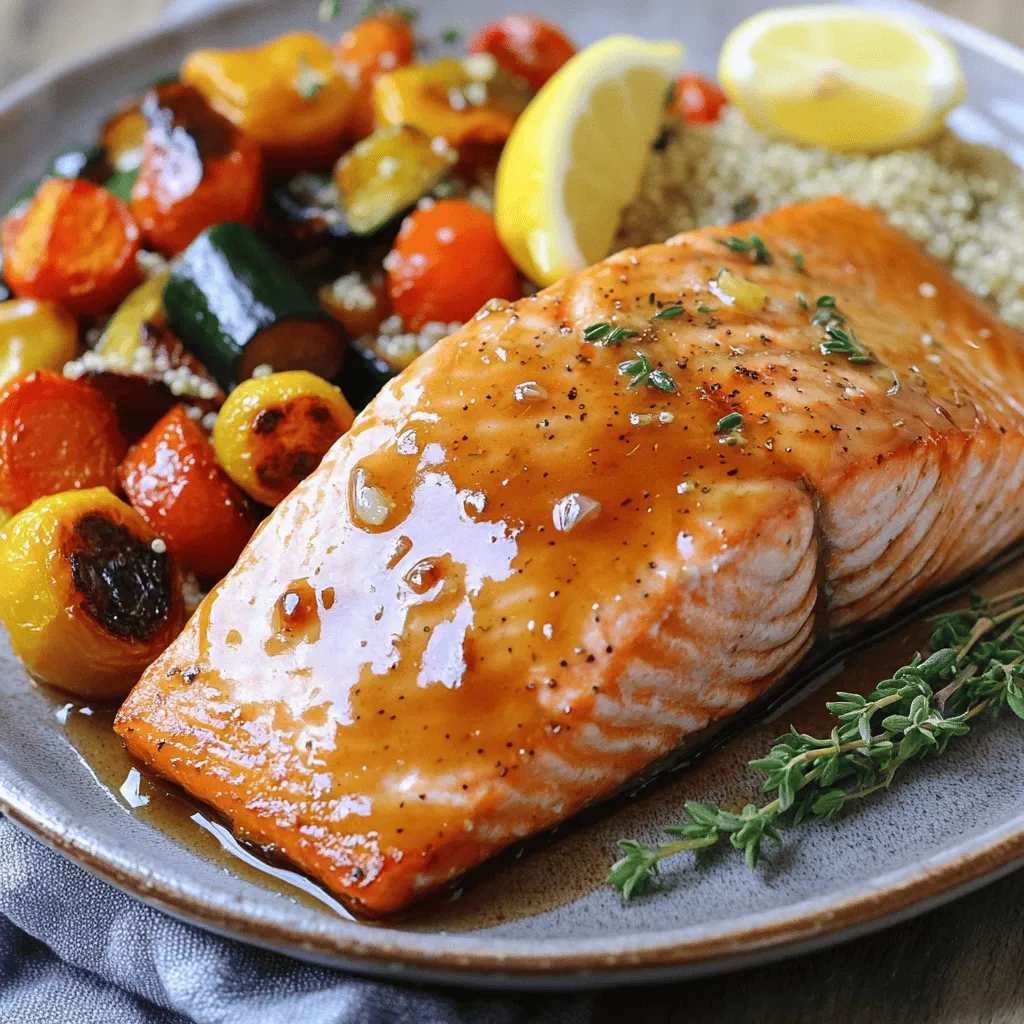
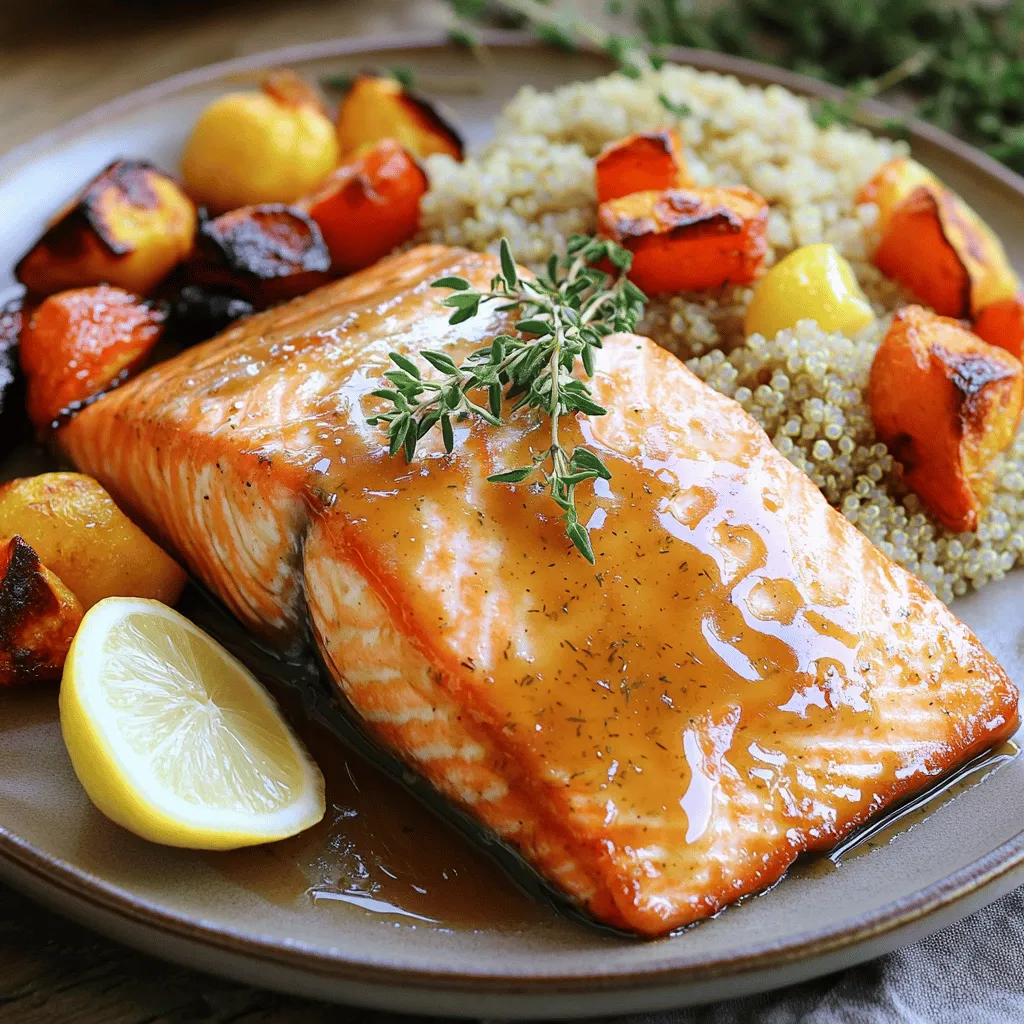
Maple Dijon glazed salmon pairs well with many sides. Roasted vegetables add color and flavor. Quinoa or rice gives a nice base. You can also serve it with a fresh salad for crunch.
Presentation Tips
For a beautiful plate, use a warm, white dish. Add a colorful side, like green beans or carrots. Drizzle any leftover glaze over the fish. Finish with a lemon wedge for a fresh look. This makes your meal not just tasty but also pretty!
Variations
Flavor Variations
You can change the taste of your Maple Dijon Glazed Salmon with a few tweaks. Adding spices or herbs can make a big difference. Try adding red pepper flakes for heat. A pinch of smoked paprika can add depth. Fresh herbs like dill or basil can bring a bright note.
Different sweeteners can also change the flavor. Instead of maple syrup, use honey or agave nectar. Each sweetener adds its unique touch. Experiment to find your favorite mix.
Cooking Methods
You can cook this salmon in different ways. Grilling gives it a smoky flavor. Brush the fillets with the marinade while grilling. Baking is easier and keeps the salmon moist. Both methods work well, so choose what you like.
Other cooking techniques include broiling or pan-searing. Broiling cooks the salmon from above, giving it a crispy top. Pan-searing adds a nice crust while keeping the inside tender. Try these methods for variety.
Ingredient Substitutes
If you need gluten-free options, use tamari instead of soy sauce. It has a similar taste and works great in the glaze. For dairy-free options, this recipe is already dairy-free. Enjoy it without worrying about milk or cream.
You can also swap out the salmon. Try using trout or cod. Each fish has its flavor and texture. Adjust the cooking time based on thickness. Feel free to add your twist to this delicious dish!
Storage Info
Refrigeration
– To store leftovers, place salmon in an airtight container.
– Keep the container in the fridge.
– The recommended shelf life for cooked salmon is 3 days.
Freezing
– For freezing, wrap the salmon in plastic wrap.
– Place it in a freezer-safe bag or container.
– It can last up to 3 months in the freezer.
Reheating
– When reheating, use the oven for best results.
– Preheat the oven to 350°F (175°C).
– Place the salmon on a baking sheet and cover it with foil.
– Heat for about 10-15 minutes, or until warmed through.
FAQs
Can I make the marinade ahead of time?
Yes, you can prepare the marinade ahead. Just mix the maple syrup, Dijon mustard, soy sauce, olive oil, garlic, and lemon juice in a bowl. Store it in the fridge for up to three days. This saves time on busy days!
How do I know when salmon is cooked perfectly?
Salmon is ready when it flakes easily with a fork. The internal temperature should reach 145°F (63°C). If you can gently pull apart the layers, it’s done. I often check it at the thickest part to be sure.
What side dishes pair well with Maple Dijon Glazed Salmon?
Many sides go well with this dish. Try roasted vegetables, quinoa, or a fresh salad. Garlic mashed potatoes and steamed asparagus also work great. They balance the sweet and tangy glaze nicely.
Can I use a different type of fish for this recipe?
Absolutely! You can use trout, tilapia, or even halibut. Just keep an eye on the cooking time. Thinner fish may cook faster, while thicker ones may need more time. Adjust the bake time as needed.
What adjustments should I make for cooking on a grill?
For grilling, preheat your grill to medium heat. Use the same marinade and marinate the fish as usual. Place the salmon skin-side down on the grill. Cook for about 6-8 minutes on each side. Baste it with marinade for added flavor. Enjoy the smoky taste!
This post covers a delicious Maple Dijon Glazed Salmon recipe. You learned about key ingredients and how to prepare the dish step by step. Tips on flavor balance and cooking methods ensure great results. I shared variations and storage tips to help you get the most out of your meal.
Enjoying a healthy dinner can be simple and tasty. Now, get cooking and impress your family!

. To start, you need to whisk the eggs. Take a medium bowl and crack in 4 large eggs. Add 1/2 cup of milk. Whisk them together until they are smooth. Then, season this mixture with a little salt and freshly cracked pepper. This adds flavor to your eggs. Next, we need to cook the vegetables. Heat 2 tablespoons of olive oil in a large non-stick skillet over medium heat. Once the oil is hot, add 1 small yellow onion and 1 small red bell pepper, both finely diced. Sauté them for about 4-5 minutes. You want them tender and fragrant. Now comes the fun part. Add in 1/2 cup of black beans that you’ve rinsed and drained. Sprinkle in 1 teaspoon of ground cumin for a warm flavor. Stir everything together and cook for another 2-3 minutes. This warms the beans and brings the flavors together. Then, it’s time to cook the eggs. Pour the whisked egg mixture into the skillet. Gently stir them as they begin to set. Cook for about 3-4 minutes or until the eggs are fully cooked, fluffy, and light. Once done, remove the skillet from heat. To assemble your burritos, lay a whole wheat tortilla flat on your workspace. Spoon a generous portion of the egg and bean mixture into the center. Next, top it with a few slices of avocado and a sprinkle of shredded cheese. You can choose either cheddar or pepper jack. Now, let’s fold and roll the burrito. Carefully fold the sides of the tortilla over the filling. Then, roll it up from the bottom, tucking it tightly. Repeat this with the remaining tortillas and filling. For a crispy finish, return the burritos to the skillet, seam-side down. Toast them for 1-2 minutes on each side over medium heat. This will make them golden brown and slightly crisp. Serve the burritos warm, garnished with fresh cilantro leaves and a side of salsa or hot sauce. Enjoy! Achieving Fluffy Eggs To get fluffy eggs, whisk them well with milk. Air makes the eggs rise. Cook them gently over medium heat. Stir slowly as they cook. This keeps them light and fluffy. Avoiding Overcooking Watch your eggs closely while they cook. Eggs can go from soft to dry in seconds. Remove them from heat when they are just set. They will continue to cook after being taken off the stove. Adding More Vegetables or Proteins Feel free to add more veggies like spinach or mushrooms. You can also add proteins like cooked sausage or diced ham. This makes the burrito more filling and fun. Spice Variations If you like heat, add jalapeños or a dash of hot sauce. For a different flavor, try smoked paprika or chili powder. These spices can make your breakfast so exciting. Ideal Accompaniments Serve your burritos with salsa or fresh avocado. A side of fruit adds a nice touch, too. You could even add a dollop of sour cream for creaminess. Presentation Ideas Place the burritos on a colorful plate. Add a sprinkle of cilantro on top for color. Cut them in half to show off the filling. This makes your meal look tasty and fresh. For the full recipe, check out the detailed instructions. {{image_4}} For a tasty twist, you can make vegetarian sunrise burritos. Just swap the meat for tofu or extra veggies. Tofu adds protein and absorbs flavors well. You can use bell peppers, zucchini, or spinach. This way, you still enjoy a filling meal without meat. If you want more protein, try adding sausage or bacon. Cook the sausage until it's browned and crumbled. For bacon, fry until crispy, then crumble over the eggs. This gives the burritos a hearty flavor. You can even mix both for a double protein boost. For gluten-free options, consider using corn tortillas or other gluten-free wraps. They hold the filling well and add a different taste. You can also check for store-bought gluten-free tortillas. This way, everyone can enjoy your sunrise breakfast burritos. Feel free to explore these variations to make your breakfast exciting! For the full recipe, be sure to check out the provided details. To keep your burritos fresh, follow these steps: - Refrigeration Tips: Place leftover burritos in an airtight container. Store them in the fridge. They stay good for up to three days. - Freezing Instructions: If you want to keep them longer, wrap each burrito in foil. Then, put them in a freezer bag. They can last for up to three months in the freezer. To enjoy your burritos again, use these methods: - Best Methods for Preserving Texture: The oven works best. Preheat it to 350°F. Place the burrito on a baking sheet. Heat for about 15-20 minutes. This keeps the tortilla crispy. You can also use a microwave. Wrap the burrito in a damp paper towel. Heat it for 1-2 minutes. This method is quick but may make the tortilla soft. To make Sunrise Breakfast Burritos vegetarian, just leave out the eggs. Instead, use tofu or extra veggies. You can add mushrooms, spinach, or zucchini for a tasty option. Season them well with spices like cumin and paprika to keep the flavor strong. Yes, you can make these burritos ahead of time. Prepare the filling and store it in the fridge for up to three days. You can also wrap the burritos tightly in foil and freeze them. Just reheat them in the oven or microwave when you’re ready to eat! Many sauces go well with Sunrise Breakfast Burritos. Salsa is a classic choice. It adds freshness and a bit of spice. You can also try hot sauce for heat or avocado crema for creaminess. A drizzle of ranch dressing adds a tasty twist too. To change the spice level, adjust the amount of cumin and add chili powder. For more heat, include diced jalapeños or a dash of cayenne pepper. If you prefer mild flavors, skip the spicy ingredients and focus on herbs like cilantro for freshness. Yes, there are a few good ways to warm tortillas. You can heat them in a dry skillet for about 30 seconds on each side. Alternatively, wrap them in a damp paper towel and microwave for 15-20 seconds. This keeps them soft and pliable for wrapping. In this article, we explored how to create delicious Sunrise Breakfast Burritos. You learned about essential ingredients like eggs, black beans, and fresh veggies. We broke down the steps for mixing, cooking, and assembling, plus tips for perfect eggs and custom flavors. You can also modify these burritos to fit dietary needs or preferences. Remember, these burritos are easy to store and reheat well. Enjoy your cooking journey and share your tasty results!](https://joymealplan.com/wp-content/uploads/2025/07/3ee2e162-623e-4153-8713-e8e5adb7d2c4-768x768.webp)