Raspberry Chocolate Chip Scones Simple and Tasty Treat
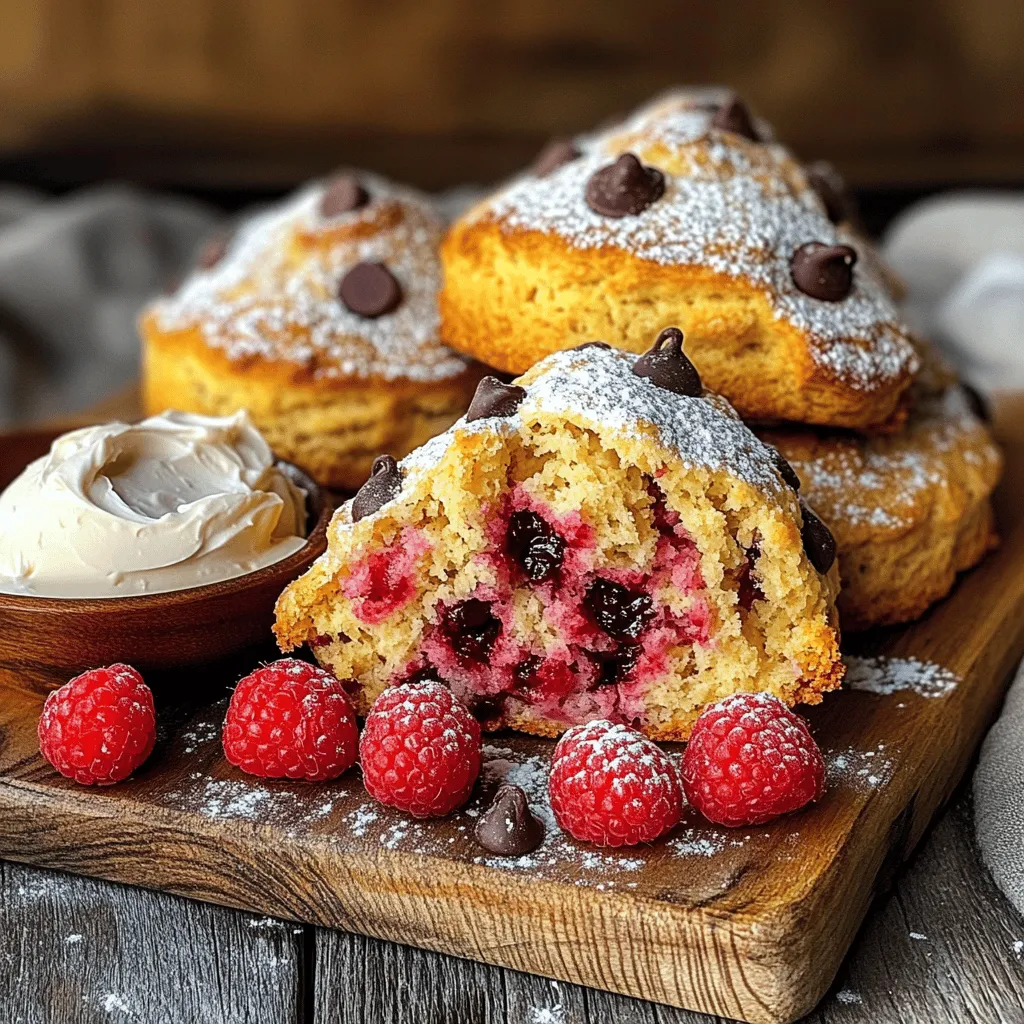
Looking for a quick and tasty treat? You’ll love these Raspberry Chocolate Chip Scones! With just a few simple ingredients, you can whip up a batch that balances sweet berries with rich chocolate. Perfect for breakfast or a snack, these scones are easy to make and even easier to enjoy. Let’s dive into how to create this delightful recipe that will have everyone asking for seconds!
Ingredients
Essential Ingredients for Raspberry Chocolate Chip Scones
– 2 cups all-purpose flour
– 1/4 cup granulated sugar
– 1 tablespoon baking powder
– 1/2 teaspoon salt
– 1/2 cup unsalted butter, cold and cubed
– 1/2 cup heavy cream
– 1 large egg
– 1 teaspoon vanilla extract
– 1 cup fresh raspberries
– 1/2 cup chocolate chips
The base of these scones starts with flour, sugar, and butter. The flour gives structure, while the sugar adds sweetness. Baking powder helps them rise, creating a soft texture. Salt balances the flavors.
Cold butter is key. It makes the scones flaky. You want those little bits of butter to stay intact. Mixing it well with the dry ingredients until it looks like crumbs is a must.
Heavy cream, egg, and vanilla extract bring moisture and flavor. The cream adds richness, and the egg helps bind everything together. You can’t forget the star players: fresh raspberries and chocolate chips. They add bursts of flavor and sweetness.
Optional Add-ins
– Different types of chocolate (dark, milk, or white)
– Citrus zest for added flavor
Feel free to switch up the chocolate. Dark chocolate gives a rich taste, while white chocolate adds a sweet touch. A little lemon or orange zest can brighten the flavor, making your scones even more delightful.
Ingredient Substitutions
– Dairy-free butter for a vegan option
– Almond flour for a gluten-free version
If you want a vegan scone, swap regular butter for dairy-free butter. For a gluten-free option, almond flour works well. Just remember, these changes can alter the texture a bit. Adjustments might be needed to get that perfect scone.
Step-by-Step Instructions
Preparing the Dough
– Preheat your oven to 400°F (200°C). This helps the scones bake evenly.
– In a large bowl, mix together 2 cups of all-purpose flour, 1/4 cup of granulated sugar, 1 tablespoon of baking powder, and 1/2 teaspoon of salt. Whisk these dry ingredients well until they are blended.
– Add 1/2 cup of cold, cubed unsalted butter to the dry mix. Use your fingers or a pastry cutter to blend the butter until the mix looks like coarse crumbs. This step is key to getting that flaky texture.
– In another bowl, whisk together 1/2 cup of heavy cream, 1 large egg, and 1 teaspoon of vanilla extract. Make sure it is fully mixed and frothy.
– Pour the wet mix into the dry ingredients. Gently stir with a spatula until just combined. It’s okay if there are small lumps; don’t overmix!
– Carefully fold in 1 cup of fresh raspberries and 1/2 cup of chocolate chips. Make sure to handle the berries gently so they don’t break.
Shaping and Baking the Scones
– Turn the dough out onto a lightly floured surface. Use your hands to shape it into a circle about 1 inch thick.
– With a sharp knife, cut the dough into 8 wedges. Space them out on a baking sheet lined with parchment paper. Leave about 2 inches between each scone.
– Bake in the preheated oven for 15-20 minutes. Look for a light golden brown around the edges. A toothpick inserted in the center should come out clean.
Cooling and Serving
– Once baked, transfer the scones to a wire rack. Let them cool for a few minutes before serving.
– For the best taste, serve them warm. You can dust them lightly with powdered sugar or pair with clotted cream or softened butter. For an extra touch, add fresh raspberries and a sprig of mint on the side.
Tips & Tricks
Achieving Flaky Scones
To make your scones flaky, use cold ingredients. Cold butter is key. It helps create pockets of air in the dough. When you mix in the butter, aim for pea-sized pieces. This gives your scones a light texture.
Do not overmix the dough. Mix gently until you see no dry flour. Small lumps are okay. Overmixing will make your scones tough and dense.
Timing and Temperature
Bake your scones at 400°F (200°C). This high heat helps them rise and brown nicely. The scones need about 15 to 20 minutes in the oven.
To tell if they are done, look for a light golden color. Insert a toothpick in the center. If it comes out clean, your scones are ready.
Enhancing Flavor
You can boost flavor with extracts and spices. A touch of almond extract adds a nice twist. Consider adding cinnamon for warmth.
Pair your scones with tea or coffee. They go well with a light fruit jam too. A dollop of clotted cream makes them even more special!

Variations
Fruit Variations
You can change up the fruit in your scones easily. Blueberries and strawberries work great. Just swap raspberries with the fruit of your choice. For mixed flavors, combine different fruits. Try half raspberries and half blueberries for a colorful treat. The flavors blend well and make for a tasty bite.
Chocolate Variations
Want to change the chocolate? You can add chocolate chunks or even cocoa powder. This adds a rich flavor to your scones. If you like variety, use flavored chocolate, like mint or orange. It gives a twist that’s fun and unique. Experimenting with chocolate keeps each batch fresh and exciting.
Savory Adaptations
Not in the mood for sweet? Try a savory version! Mixing in cheese or herbs can create a new flavor. Cheddar cheese pairs well with herbs like rosemary. Adjust the sugar and salt to balance the taste. Less sugar makes these scones great for breakfast or brunch. These adaptations make scones versatile for any meal.
Storage Info
Storing Scones
To keep your scones fresh, store them in an airtight container. This prevents air from making them dry. Place a piece of parchment paper between layers if you stack them. You can keep them at room temperature for a short time.
– Best methods for keeping scones fresh:
– Use airtight containers.
– Add parchment paper between stacks.
– Recommended containers and environments:
– Use a plastic or glass container.
– Keep in a cool, dry place.
Freezing Scones
You can freeze both unbaked and baked scones. For unbaked scones, shape them first and place them on a baking sheet. Freeze until firm, then transfer to a freezer bag. For baked scones, cool them first, then wrap them tightly.
– How to freeze unbaked and baked scones:
– Unbaked: Shape, freeze on a sheet, then bag.
– Baked: Cool, wrap, and freeze.
– Thawing and reheating tips:
– Thaw unbaked scones in the fridge overnight before baking.
– Reheat baked scones in the oven at 350°F (175°C) for 10 minutes.
Shelf Life
Scones stay fresh for about 2-3 days at room temperature. If stored properly, they can last longer in the fridge.
– How long scones stay fresh at room temperature:
– 2-3 days in an airtight container.
– Signs that scones have gone bad:
– Look for mold or a sour smell.
– Texture becomes dry and hard.
FAQs
Can I make Raspberry Chocolate Chip Scones in advance?
Yes, you can prepare these scones ahead of time. Here are some tips:
– Make the Dough: You can mix the dough a day before. Keep it covered in the fridge.
– Shape the Scones: After shaping the dough, place the scones on a baking sheet. Freeze them for about 30 minutes. Then, transfer them to an airtight container.
– Bake Later: When you’re ready to bake, just add a few extra minutes to baking time.
What can I serve with Raspberry Chocolate Chip Scones?
These scones taste great on their own, but you can add some fun toppings:
– Jam: Raspberry or strawberry jam adds a sweet touch.
– Cream: Clotted cream or whipped cream gives a rich flavor.
– Butter: A pat of softened butter melts nicely on warm scones.
How can I make these scones healthier?
You can easily tweak this recipe for a healthier version:
– Reduce Sugar: Cut down the sugar by a quarter. The scones will still taste good.
– Whole Grains: Use whole wheat flour instead of all-purpose flour. This adds fiber and nutrients.
– Fruit Boost: Add more raspberries to increase vitamins and flavor without extra sugar.
Raspberry Chocolate Chip Scones are simple and fun to make. Start with key ingredients like flour, sugar, and berries. Follow the step-by-step instructions to create perfectly flaky scones. Remember, choosing optional add-ins can change the flavor. Store and freeze them properly for later enjoyment.
In the end, experimenting with variations keeps this recipe fresh and exciting. Try new fruits or savory items to meet your taste. Enjoy the process and savor each bite of your homemade scones!

![To make the best Chocolate Lava Mug Cake, you need a few simple ingredients. Here is the list: - 4 tablespoons all-purpose flour - 4 tablespoons granulated sugar - 2 tablespoons unsweetened cocoa powder - 1/8 teaspoon baking powder - A pinch of salt - 3 tablespoons milk - 2 tablespoons vegetable oil - 1/4 teaspoon vanilla extract - 1 square (approximately 1 ounce) of semi-sweet chocolate or a handful of chocolate chips - Optional: Ice cream or whipped cream for serving These ingredients come together to create a rich and gooey dessert. The all-purpose flour gives structure, while the sugar adds sweetness. Cocoa powder brings that deep chocolate flavor. Baking powder helps the cake rise, and salt balances the taste. Milk and oil keep it moist, and vanilla adds a lovely aroma. The star of the show is the semi-sweet chocolate, which melts in the center. If you want to make it extra special, consider adding ice cream or whipped cream on top when you serve it. These toppings add a creamy contrast to the warm cake. For the full recipe, check out the detailed instructions in the next section. Enjoy your cooking! 1. Combining dry ingredients Start with a large mug. Add 4 tablespoons of all-purpose flour, 4 tablespoons of granulated sugar, 2 tablespoons of unsweetened cocoa powder, 1/8 teaspoon of baking powder, and a pinch of salt. Stir these dry ingredients well with a fork. Make sure there are no lumps. 2. Mixing wet ingredients and creating the batter Next, pour in 3 tablespoons of milk, 2 tablespoons of vegetable oil, and 1/4 teaspoon of vanilla extract. Mix these wet ingredients into the dry ones until the batter is smooth. You want it to be creamy and free of dry spots. 3. Inserting the chocolate for the molten center Now, take your chocolate square or a handful of chocolate chips. Push it gently into the center of the batter. Make sure it is mostly covered but still visible. This will create that gooey center we love. 4. Cooking in the microwave Place the mug in the microwave. Cook on high for 30 to 40 seconds. Start checking after 30 seconds. The cake should rise and look set, but the center must remain soft. Avoid cooking too long; we want that lava! 5. Cooling and serving suggestions Carefully remove the mug from the microwave. It will be hot! Let it cool for about one minute. This helps it set a bit. For serving, top your cake with ice cream or whipped cream. This adds flavor and makes it even more special. For the full recipe, check out the detailed instructions above. To get the best lava cake, timing is key. Start with 30 seconds in the microwave. Check it, and if it’s not done, add 10 seconds. You want the sides firm and the center soft. The mug you use matters too. Pick a large mug, about 12 ounces. This size gives the cake room to rise. A small mug may overflow or cook unevenly. Smooth batter is a must for the best cake. Mix the dry ingredients well first. Then, add the wet ingredients slowly. Stir until there are no lumps. This helps the cake cook evenly and keeps it nice and soft. Toppings can take your cake to the next level. Ice cream is a classic choice. The cold creaminess pairs well with the warm cake. Whipped cream adds a light, airy contrast. For drinks, coffee or milk works great. The rich flavors of coffee enhance the chocolate. Milk softens the sweetness, making it perfect for any palate. Enjoy your cake with these simple but delicious pairings. For the complete recipe, refer to the [Full Recipe]. {{image_4}} You can easily switch some ingredients in your chocolate lava mug cake to fit your needs. Here are some ideas: - Gluten-free options: Use gluten-free flour instead of all-purpose flour. Almond flour or a gluten-free blend work well. - Vegan substitutions: Replace milk with almond milk or oat milk. Use coconut oil instead of vegetable oil. You can also swap the egg for a flaxseed egg if needed. - Using different chocolate types: Try dark chocolate or white chocolate for a unique twist. Each type offers its own flavor. Want to make your mug cake even more special? Consider adding extra flavors: - Adding nuts or fruit: Mix in chopped nuts like walnuts or pecans for crunch. You can also add berries or banana slices for a fresh taste. - Incorporating extracts for flavor enhancement: A drop of almond extract or peppermint extract can elevate the flavor. Just a little goes a long way! For the full recipe, check the earlier section. Enjoy making your chocolate lava mug cake with these fun variations! Store your leftover chocolate lava mug cake in the fridge. Use a clean, airtight container. This keeps the cake fresh for up to two days. If you want to reheat it, place it back in the microwave for about 10 to 15 seconds. Check the center to see if it's warm enough. You want to keep that gooey center! You can freeze the batter if you want to save time later. Just mix the ingredients as usual and pour the batter into a freezer-safe container. It will last for about a month. When you’re ready to bake, thaw it in the fridge overnight. Then, cook it in the microwave as per the [Full Recipe]. This way, you can enjoy a fresh chocolate lava mug cake whenever you want! Can I use a different type of chocolate? Yes, you can! You might try dark chocolate or milk chocolate. Both will give a rich flavor. Just ensure the chocolate is semi-sweet for the best lava effect. Is it possible to make this recipe in the oven? Absolutely! Preheat your oven to 350°F (175°C). Pour the batter into a small baking dish. Bake for about 10-12 minutes. Check the center to keep it gooey. How do I know when the cake is done cooking? Watch for the cake to rise. The edges should look set, but the center should jiggle a bit. If it's too firm, it may not have that lovely lava center. Can I make multiple cakes at once? Yes, you can. Just prepare each cake in its own mug. Cook them in batches, checking the time. You may need to add a few seconds for each additional mug. For the full recipe, check out the detailed instructions above! This blog post covered how to make a chocolate lava mug cake. We discussed the ingredients you need, from flour to chocolate chips. I shared step-by-step instructions for mixing and cooking. You learned tips for that perfect lava center and fun serving ideas. Always feel free to try different ingredients or toppings. Experimenting can make your cake even better. Enjoy your delicious treat, and happy baking!](https://joymealplan.com/wp-content/uploads/2025/07/50d0d175-347a-4c26-b8c0-a14731d5df33-768x768.webp)