
Tomato Cucumber Avocado Salad Simple and Fresh Delight
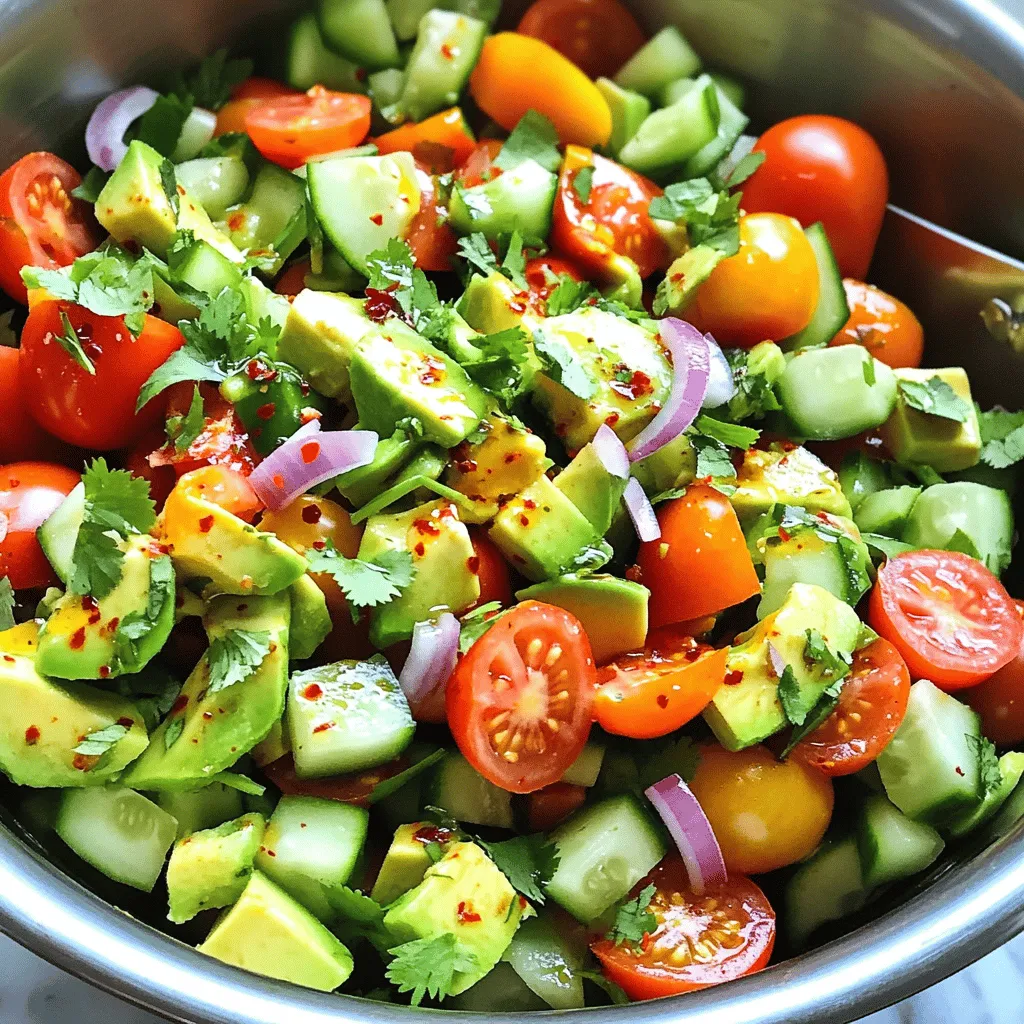
Are you looking for a simple and fresh salad to brighten your meals? Then you’ll love this Tomato Cucumber Avocado Salad! I’ll share easy steps to make this colorful dish in no time. With ripe tomatoes, cool cucumbers, and creamy avocados, each bite bursts with flavors. Plus, I’ll give you tips to enhance the taste and make variations that suit your style. Let’s dive into this delightful recipe!
Ingredients
Main Ingredients
– 2 large ripe tomatoes, diced into bite-sized pieces
– 1 medium cucumber, peeled (if desired) and diced
– 1 large avocado, pitted and diced
– 1/4 of a red onion, finely chopped
– 1/4 cup fresh cilantro, roughly chopped
Dressing Ingredients
– 2 tablespoons freshly squeezed lime juice
– 1 tablespoon extra virgin olive oil
– Salt and pepper, to taste
– 1 teaspoon honey (optional, to enhance sweetness)
– A pinch of chili flakes (optional, for a spicy kick)
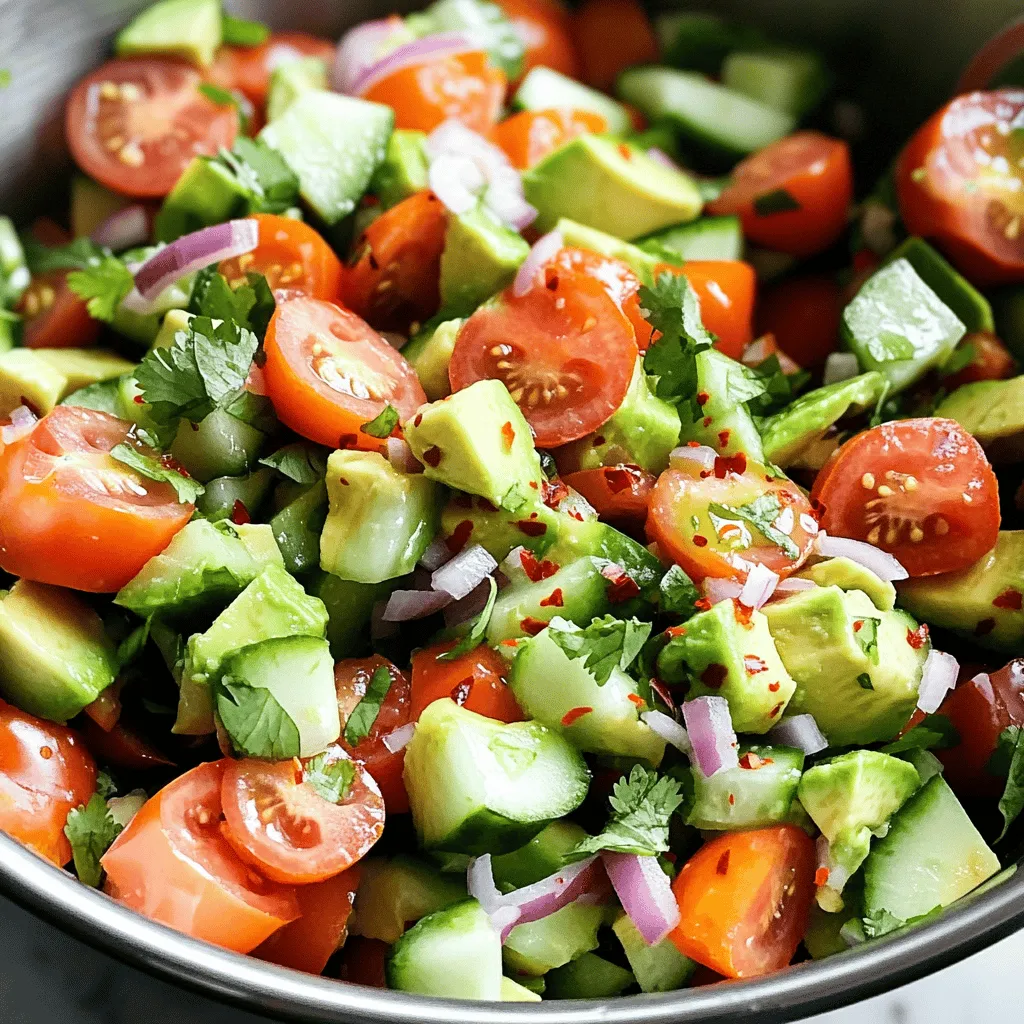
When you gather your ingredients, focus on freshness. Ripe tomatoes bring juicy flavor. Select a cucumber that feels firm and smooth. For the avocado, look for one that gives slightly when pressed. A good red onion adds a mild sweetness, while cilantro brightens the dish.
For the dressing, fresh lime juice is key. It brightens the entire salad. Extra virgin olive oil adds richness. Salt and pepper enhance all the ingredients. Honey is optional, but it balances acidity. Chili flakes can add a fun kick if you like heat.
With these ingredients, you’ll create a colorful and tasty salad.
Step-by-Step Instructions
Preparation of Vegetables
To start, you need to prepare the vegetables. First, dice the tomatoes into small, bite-sized pieces. Make sure they are ripe for the best flavor. Next, take the cucumber. You can peel it if you prefer a milder taste. Dice it into similar-sized pieces as the tomatoes.
Now, grab the avocado. Carefully cut it in half and remove the pit. Dice the avocado into chunks, but be gentle not to mash it. Once you have the diced avocado, add it to your bowl.
Finely chop 1/4 of a red onion. This will add a nice crunch and bite to the salad. Add the chopped onion to the bowl with your other veggies. Finally, roughly chop 1/4 cup of fresh cilantro and toss it in as well. This herb brings fresh, vibrant flavors to your salad.
Making the Dressing
In a small bowl, you will make the dressing. Start by whisking together 2 tablespoons of lime juice and 1 tablespoon of extra virgin olive oil. This mix gives the salad a zesty kick. Add salt and freshly cracked black pepper to taste.
If you like a bit of sweetness, add 1 teaspoon of honey. This will balance the tangy lime juice. Taste the dressing and adjust it as needed. You want it to be just right for your taste buds.
Combining the Ingredients
Now it’s time to bring everything together. Drizzle the dressing over the salad mixture. Using a large spoon or spatula, gently toss the salad. Be careful not to smash the avocado. You want those lovely chunks to stay intact.
If you enjoy a little heat, sprinkle a pinch of chili flakes on top. This adds a spicy kick that some might love. Let the salad rest for about 5 minutes at room temperature. This step allows the flavors to mingle and enhances the overall taste.
Tips & Tricks
Flavor Enhancements
To boost the flavor of your salad, fresh herbs are key. I love using cilantro. It adds a bright taste. You can try other herbs too, like parsley or basil. Mix and match to find your favorite blend.
Adjusting the dressing is also important. Start with lime juice and olive oil. Taste as you go. If you want it sweeter, add honey. If you like spice, sprinkle in chili flakes. Make it your own!
Perfecting Texture
Texture matters in a salad. When you mix in the avocado, be gentle. You want to keep those creamy chunks intact. If you mash them, you lose that great mouthfeel.
Serving the salad right away is best. If you let it sit too long, it may get soggy. But if you want to let the flavors meld, wait just five minutes. This short time enhances the taste without ruining the texture.
Visual Presentation
Presentation can make your salad shine. Use a large bowl or individual plates. This way, each serving looks special. Garnish with whole cilantro leaves for color. A sprinkle of chili flakes adds a nice touch too.
Think about the dish you use. A colorful bowl can make your salad pop. People eat with their eyes first, so make it appealing!
Variations
Ingredient Substitutes
You can easily swap out vegetables in this salad. If you want crunch, try bell peppers or radishes. For a sweeter taste, add carrots or sweet corn. You can also mix in greens like spinach or arugula for extra nutrition.
When it comes to dressings, feel free to get creative. Instead of lime juice, use lemon or vinegar. A splash of balsamic or a dash of sesame oil can add a unique twist. You can even try yogurt or tahini for a creamy texture.
Dietary Adjustments
To make this salad vegan, skip the honey or use maple syrup instead. This change keeps it plant-based and just as tasty. If you’re gluten-free, you’re already in luck! This salad is naturally gluten-free, so you can enjoy it without worry.
For those watching calories, reduce the oil or skip it altogether. You can also use less avocado or substitute with a lower-calorie vegetable like zucchini.
Adding Proteins
Adding protein makes this salad more filling. You can toss in black beans or chickpeas for plant-based options. They add texture and flavor while keeping it healthy.
If you prefer meat, grilled chicken or shrimp works great. Just make sure the protein is well-seasoned to balance the fresh flavors. For a vegetarian option, diced tofu is a fantastic choice.
Mixing in proteins not only boosts nutrition but also adds depth to the salad. This way, every bite is full of flavor and satisfaction.
Storage Info
Best Practices for Storage
To keep your Tomato Cucumber Avocado Salad fresh, store leftovers in the fridge. Place the salad in an airtight container. This helps keep moisture in and prevents browning. You can use glass or plastic containers with tight-fitting lids. If you have extra dressing, keep it separate. This way, your salad remains crisp and tasty.
Shelf Life
You can store this salad in the refrigerator for up to three days. After this, the veggies may lose their crunch and flavor. Look for signs of spoilage like brown avocado or mushy tomatoes. If the salad smells off, it’s best to toss it out.
Reusing Leftovers
If you have leftover salad, think about using it in different dishes. You can add it to a wrap or serve it on top of grilled chicken. Mix it into scrambled eggs for a fresh breakfast twist. To keep the flavor, drizzle a little fresh lime juice over the leftovers. This will brighten up the taste and keep it enjoyable.
FAQs
How do I choose ripe avocados and tomatoes?
To pick ripe avocados, look for ones that feel slightly soft when you press them gently. The skin should be dark green or black. For tomatoes, choose ones that are firm and have a rich color, like red or yellow. Avoid any with bruises or soft spots.
Can I make the salad ahead of time?
Yes, you can prepare some of the salad ahead. Dice the tomatoes, cucumber, and avocado. Store them separately in airtight containers. Keep the dressing in another container. Mix everything just before serving for the best taste.
What are the nutritional benefits of this salad?
This salad is packed with vitamins. Tomatoes are high in vitamin C and antioxidants. Cucumbers help with hydration and provide fiber. Avocados offer healthy fats and potassium. Together, they support heart health and skin glow.
How can I make this salad spicier?
To add heat, sprinkle chili flakes on the salad. You can also mix in diced jalapeños or sliced serrano peppers. For even more kick, try adding a dash of hot sauce or cayenne pepper to the dressing.
This salad offers fresh flavors and simple steps. We explored key ingredients, from ripe tomatoes to creamy avocados, and made a zesty dressing. I shared tips to enhance flavor, improve texture, and present visually. You can also customize with different proteins or dressings, catering to your dietary needs. Remember, store extras correctly for freshness. This vibrant salad not only nourishes but also excites the palate. Enjoy making it your own, and bring health and taste to your table!

. In this blog post, we explored how to make delicious garlic butter steak bites. We discussed the key ingredients, from sirloin steak to fresh herbs. You learned step-by-step cooking tips for perfect doneness. We also covered variations, presentation ideas, and storage methods for leftovers. By following these tips, you can create a tasty dish your friends and family will love. With a little practice, you can master this recipe and impress everyone at your next meal.](https://joymealplan.com/wp-content/uploads/2025/06/dbdd8f16-fd7f-4bf6-8b38-aa3e7b5cdfe5-768x768.webp)


. {{image_4}} Vegetarian Mini Quiche Cups For a tasty vegetarian option, use only veggies. You can add spinach, mushrooms, and bell peppers. Mix in some cheese for creaminess. This keeps the dish light yet filling. You can also use fresh herbs like basil or oregano for extra flavor. Try to use seasonal veggies for the best taste. Meat Lovers' Option If you love meat, this option is for you. Use diced ham, crispy bacon, or cooked sausage. Combine these with your favorite cheese and veggies. This mix gives a hearty bite to each quiche cup. You will enjoy the rich, savory flavors in every bite. Gluten-Free Crust Alternatives If you need a gluten-free crust, use almond flour or cornmeal. You can also find ready-made gluten-free pie crusts at the store. Another idea is to make a crustless quiche. Just pour the filling into greased muffin tins. This way, you skip the crust but keep all the flavor. Dairy-Free Ingredient Swaps For a dairy-free version, use plant-based milk like almond or soy. Swap regular cheese for dairy-free cheese options. Nutritional yeast can add a cheesy flavor without dairy. Try these swaps to enjoy mini quiche cups without dairy. It keeps the recipe tasty and friendly for all diets. For the full recipe, check out the details in the previous section. To keep your mini quiche cups fresh, proper storage is key. - Refrigerating Leftovers: Place any leftover mini quiche cups in an airtight container. They will stay fresh for up to 3 days in the fridge. Just make sure they cool down before sealing. You can also wrap them tightly in plastic wrap for extra protection. - Freezing for Long-Term Storage: If you want to save them longer, freezing works well. First, let the quiche cups cool completely. Then, place them on a baking sheet and freeze until solid. After that, transfer them to a freezer-safe bag or container. They can last up to 2 months in the freezer. Remember to label the container with the date you made them. When you're ready to enjoy your mini quiche cups again, follow these tips for the best results. - Best Methods for Serving Again: The oven is the best way to reheat quiche cups. Preheat your oven to 350°F (175°C). Place the cups on a baking sheet and heat for about 10-15 minutes. This method keeps the crust crisp and the filling warm. - Retaining Flavor and Texture: Avoid using a microwave if you can. Microwaving can make the crust soggy and the filling rubbery. If you must use a microwave, heat them in short bursts of 30 seconds. Check often to ensure they don’t overcook. Following these tips will help you enjoy your mini quiche cups just like fresh! For the full recipe, check the [Full Recipe]. Bake Mini Quiche Cups for 18 to 20 minutes at 375°F (190°C). The tops should turn golden brown. You want the centers set but still moist. Keep an eye on them in the last few minutes. Each oven heats a bit differently. Yes, you can make Mini Quiche Cups ahead of time. Prepare them and store in the fridge for up to two days. You can also freeze them for up to a month. Just be sure to cool them completely before storing. To reheat, place them in the oven at 350°F (175°C) until warm. Great ingredients include: - 6 large eggs - 1 cup milk (whole or 2%) - 1 cup shredded cheese (like cheddar or mozzarella) - 1 cup diced vegetables (bell peppers, spinach, or mushrooms) - 1/2 cup cooked ham or crispy bacon (optional) - Garlic powder and onion powder for flavor These create a tasty base for your quiche cups. You can mix and match fillings easily. Try different cheeses or veggies. For a spicy kick, add jalapeños. If you love herbs, include fresh basil or thyme. Think about seasonal produce too. This makes your quiche cups unique and fun. Mini quiche cups are fun and easy to make. You can mix eggs, dairy, cheese, meats, and veggies to create tasty treats. Remember to preheat your oven and choose the right crust. I shared tips on filling them just right and baking them perfectly. Explore variations like vegetarian or gluten-free options, and learn how to store leftovers. With these steps and ideas, you have all you need for quiche success. Enjoy making your own mini quiche cups! They’ll be a hit with everyone.](https://joymealplan.com/wp-content/uploads/2025/06/d5cf7460-7b4e-43b3-accb-372b25b26cc9-768x768.webp)