
Mexican Street Corn Salad Fresh and Flavorful Dish
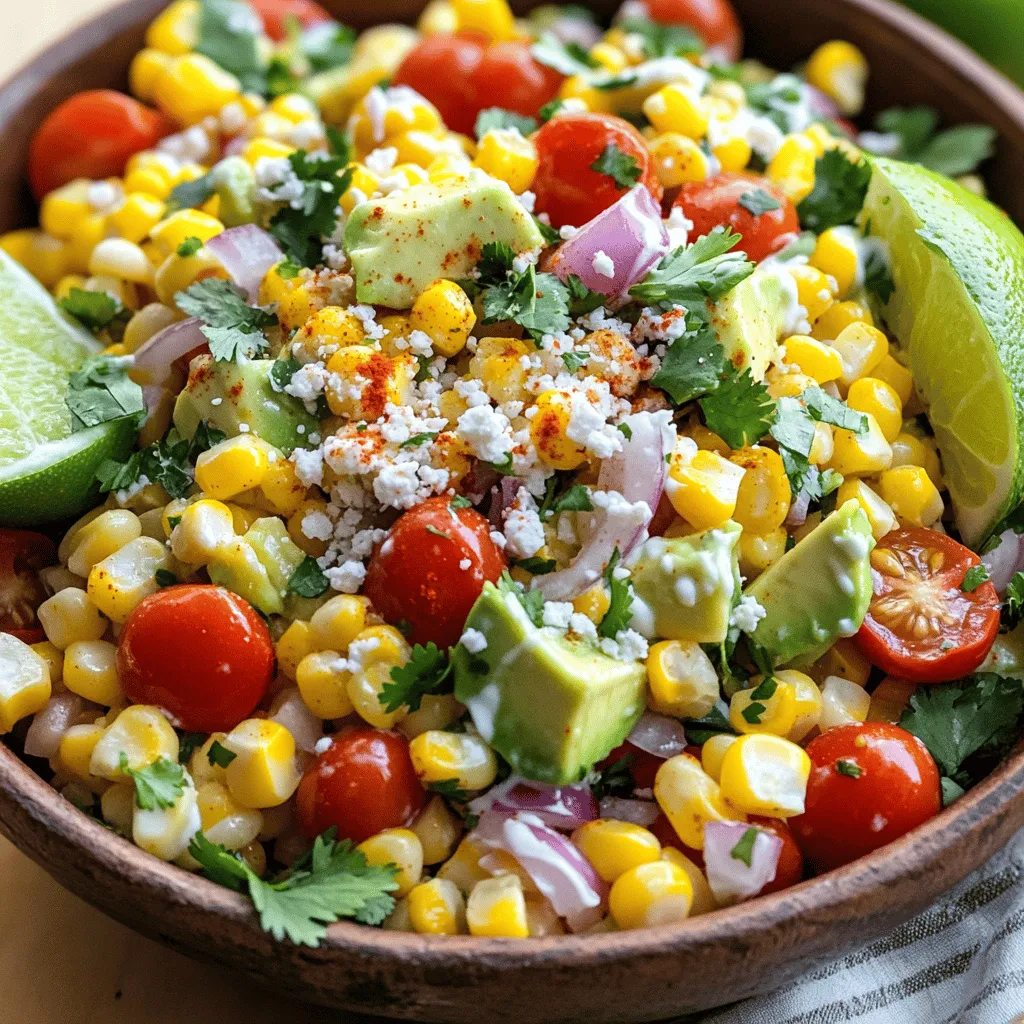
Craving a burst of flavor in your meals? Mexican Street Corn Salad is the answer! This fresh and vibrant dish mixes sweet corn, juicy tomatoes, and creamy avocado for a perfect summer treat. I’ll guide you through each step, from grilling corn to making the perfect dressing. Whether you’re looking for a side or a main, this salad delivers deliciousness. Let’s dive into making your new favorite dish!
Ingredients
List of Required Ingredients
– Fresh corn: 4 ears, shucked
– Cherry tomatoes: 1 cup, halved
– Red onion: 1/2, finely chopped
– Cotija cheese: 1/2 cup, crumbled
– Fresh cilantro: 1/4 cup, chopped
– Avocado: 1, diced
– Mayonnaise: 2 tablespoons
– Sour cream: 1 tablespoon
– Fresh lime juice: 1 tablespoon
– Chili powder: 1 teaspoon
– Salt and pepper: to taste
Gathering the right ingredients is the first step to making Mexican street corn salad. You want the freshest corn possible. Look for ears that feel firm and have bright green husks. Fresh cherry tomatoes add a nice sweetness. Use a red onion for a mild bite. Cotija cheese gives a salty kick that you won’t want to skip. Fresh cilantro adds a burst of flavor.
For creaminess, mayonnaise and sour cream blend beautifully. The lime juice brightens the dish and adds a zesty note. Chili powder brings warmth without too much heat. Salt and pepper help to enhance all the flavors in your salad.
When you have all these ingredients ready, you’re set to create a delicious and fresh dish. Each bite will take you straight to the streets of Mexico!
Step-by-Step Instructions
Preparing the Corn
First, preheat your grill or grill pan to medium-high heat. This step ensures the corn cooks evenly. Once it’s hot, place the shucked ears of corn directly on the grill. Cook for about 8 to 10 minutes. Turn the corn occasionally to get a nice char. The kernels should be tender and slightly charred. After grilling, take the corn off the heat and let it cool for a few minutes.
Mixing the Ingredients
Once the corn is cool enough to handle, carefully slice the kernels off the cob with a sharp knife. Gather the kernels in a large mixing bowl. To this bowl, add 1 cup of halved cherry tomatoes, 1/2 of a finely chopped red onion, 1/4 cup of chopped fresh cilantro, and 1 diced avocado. Gently mix all these ingredients to combine them well.
Making the Dressing
In a separate small bowl, whisk together 2 tablespoons of mayonnaise, 1 tablespoon of sour cream, 1 tablespoon of fresh lime juice, and 1 teaspoon of chili powder. Add a pinch of salt and pepper to taste. Keep whisking until the dressing is smooth and well-blended. Pour this creamy dressing over the corn mixture. Gently fold the dressing into the salad, ensuring all the ingredients get coated.
Final Touches
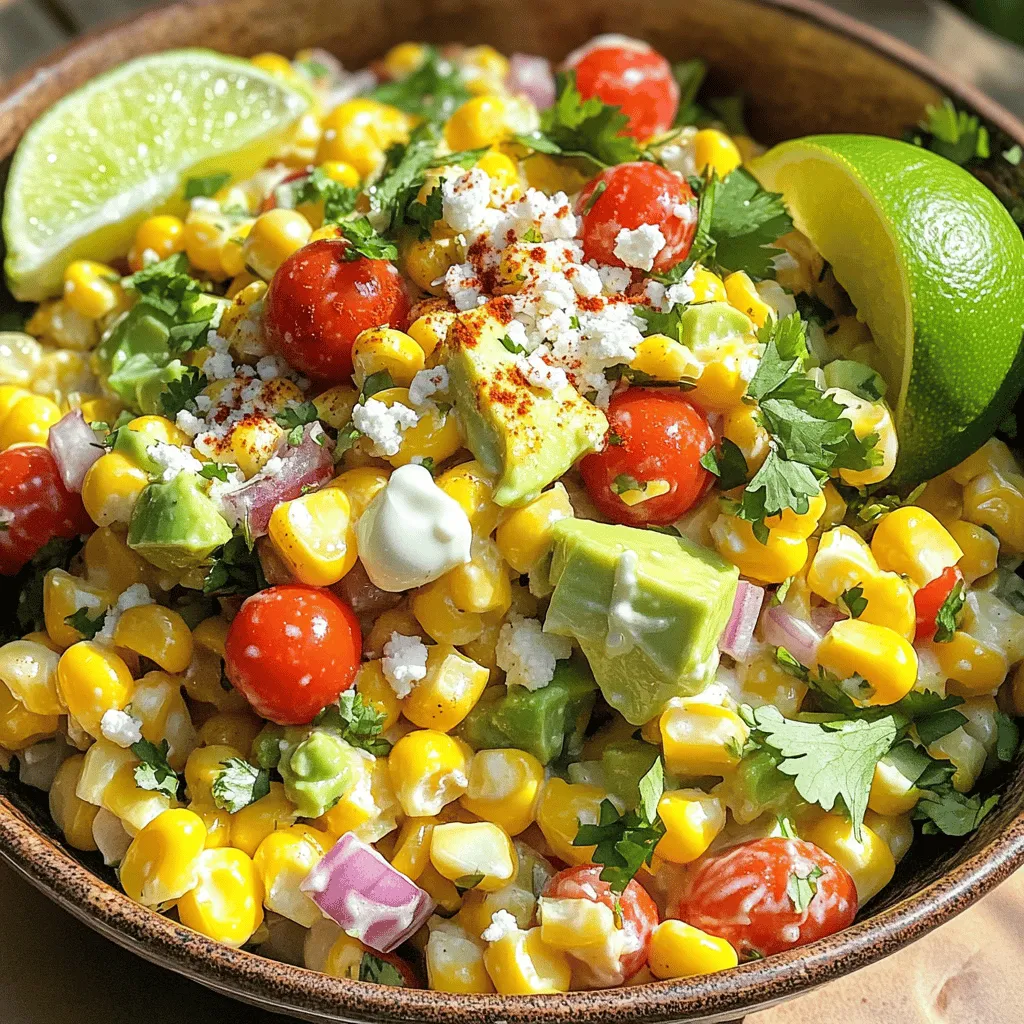
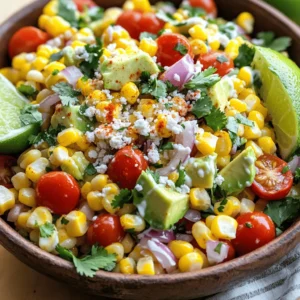
To finish, sprinkle 1/2 cup of crumbled cotija cheese over the top. Give it one last gentle mix to incorporate the cheese without mashing the avocado. Taste the salad and adjust the seasonings if needed. If you want more zing, add a bit more lime juice or chili powder. Serve the salad in a large bowl or on a colorful platter for a vibrant presentation.
Tips & Tricks
Enhancing Flavor
To make your Mexican street corn salad pop, adjust the lime and chili powder. If you want a tangy kick, add more lime juice. For a spicy twist, sprinkle in extra chili powder. Both will give your salad that authentic flavor.
Fresh herbs can also boost taste. I love adding more cilantro for a bright, fresh note. You can even try parsley or scallions to mix things up. These herbs enhance the overall flavor and add a nice touch.
Preparation Tips
Grilling corn perfectly is key. Preheat your grill to medium-high. Place the corn directly on the grill. Cook for about 8-10 minutes, turning it often. Look for nice char marks. This gives the corn that smoky flavor we love.
Handling avocados can be tricky. To prevent browning, cut them last. If you want to prep in advance, squeeze lime juice on the diced avocado. This helps keep the bright color and fresh taste.
Variations
Ingredient Substitutions
You can easily adjust this salad. If you’re dairy-free, replace cotija cheese with nuts or seeds. You can use cashew cream or tahini for the dressing. They add creaminess without dairy.
Want more protein? Add black beans or extra corn. Both options make the salad heartier. They also add flavor and color.
Spice Level Adjustments
Do you like heat? You can increase the spice with jalapeños. Dice them finely and mix them in. They will add a nice kick to your salad.
You can also experiment with different chili powders. Each type brings its own flavor. Smoked chili powder adds depth, while cayenne gives more heat. Adjust the spice to fit your taste!
Storage Info
Proper Storage Techniques
To store leftovers in the refrigerator, place the salad in an airtight container. This keeps it fresh and safe. Make sure to cover it tightly. It’s best to eat the salad within three days for the best taste. If you want to freeze any components, like the corn, do so before mixing. Freeze cooked corn in a freezer bag. Remove as much air as possible. You can also freeze the dressing separately but keep it in a sealed container.
Shelf Life
The salad stays fresh for about three days in the fridge. After that, the ingredients may spoil. Look for signs of spoilage like a sour smell or discoloration. If the avocado turns brown or mushy, it’s time to toss it. Always trust your senses; if it looks or smells off, don’t eat it!
FAQs
What is Mexican Street Corn Salad?
Mexican Street Corn Salad is a fresh dish that packs bold flavor. It features grilled corn, which gives it a smoky taste. This salad usually has cherry tomatoes, onions, cilantro, and creamy cotija cheese. The mix of lime juice, mayonnaise, and chili powder adds a zesty kick. It’s a simple yet vibrant dish, perfect for summer gatherings or barbecues.
Can I make this salad in advance?
Yes, you can make this salad ahead of time. Prepare the salad and store it in the fridge. The best time to serve it is within a few hours. If you make it too early, the avocado may brown. To prevent this, add the avocado just before serving. This keeps everything fresh and tasty.
Can I use canned corn instead of fresh?
You can use canned corn, but fresh corn shines in this recipe. Fresh corn has a sweet crunch that canned corn lacks. Canned corn may be softer and less flavorful. If you choose canned corn, rinse it well to remove the extra salt. This helps keep your salad light and bright.
What’s the best way to serve Mexican Street Corn Salad?
Serve the salad in a large bowl or a colorful platter. Garnish it with extra cilantro for a fresh look. You can add lime wedges on the side for extra zing. This salad pairs well with grilled meats or as a tasty side for tacos. Enjoy it chilled for the best taste.
This blog post shared how to make a tasty Mexican Street Corn Salad. We discussed key ingredients, like fresh corn and cherry tomatoes, and step-by-step instructions to create it. I offered tips to boost flavor and suggested ways to store your salad. Remember, you can adjust the spice or swap ingredients for your taste. Enjoy experimenting with this dish, and don’t hesitate to make it your own!

. {{image_4}} Vegetarian Mini Quiche Cups For a tasty vegetarian option, use only veggies. You can add spinach, mushrooms, and bell peppers. Mix in some cheese for creaminess. This keeps the dish light yet filling. You can also use fresh herbs like basil or oregano for extra flavor. Try to use seasonal veggies for the best taste. Meat Lovers' Option If you love meat, this option is for you. Use diced ham, crispy bacon, or cooked sausage. Combine these with your favorite cheese and veggies. This mix gives a hearty bite to each quiche cup. You will enjoy the rich, savory flavors in every bite. Gluten-Free Crust Alternatives If you need a gluten-free crust, use almond flour or cornmeal. You can also find ready-made gluten-free pie crusts at the store. Another idea is to make a crustless quiche. Just pour the filling into greased muffin tins. This way, you skip the crust but keep all the flavor. Dairy-Free Ingredient Swaps For a dairy-free version, use plant-based milk like almond or soy. Swap regular cheese for dairy-free cheese options. Nutritional yeast can add a cheesy flavor without dairy. Try these swaps to enjoy mini quiche cups without dairy. It keeps the recipe tasty and friendly for all diets. For the full recipe, check out the details in the previous section. To keep your mini quiche cups fresh, proper storage is key. - Refrigerating Leftovers: Place any leftover mini quiche cups in an airtight container. They will stay fresh for up to 3 days in the fridge. Just make sure they cool down before sealing. You can also wrap them tightly in plastic wrap for extra protection. - Freezing for Long-Term Storage: If you want to save them longer, freezing works well. First, let the quiche cups cool completely. Then, place them on a baking sheet and freeze until solid. After that, transfer them to a freezer-safe bag or container. They can last up to 2 months in the freezer. Remember to label the container with the date you made them. When you're ready to enjoy your mini quiche cups again, follow these tips for the best results. - Best Methods for Serving Again: The oven is the best way to reheat quiche cups. Preheat your oven to 350°F (175°C). Place the cups on a baking sheet and heat for about 10-15 minutes. This method keeps the crust crisp and the filling warm. - Retaining Flavor and Texture: Avoid using a microwave if you can. Microwaving can make the crust soggy and the filling rubbery. If you must use a microwave, heat them in short bursts of 30 seconds. Check often to ensure they don’t overcook. Following these tips will help you enjoy your mini quiche cups just like fresh! For the full recipe, check the [Full Recipe]. Bake Mini Quiche Cups for 18 to 20 minutes at 375°F (190°C). The tops should turn golden brown. You want the centers set but still moist. Keep an eye on them in the last few minutes. Each oven heats a bit differently. Yes, you can make Mini Quiche Cups ahead of time. Prepare them and store in the fridge for up to two days. You can also freeze them for up to a month. Just be sure to cool them completely before storing. To reheat, place them in the oven at 350°F (175°C) until warm. Great ingredients include: - 6 large eggs - 1 cup milk (whole or 2%) - 1 cup shredded cheese (like cheddar or mozzarella) - 1 cup diced vegetables (bell peppers, spinach, or mushrooms) - 1/2 cup cooked ham or crispy bacon (optional) - Garlic powder and onion powder for flavor These create a tasty base for your quiche cups. You can mix and match fillings easily. Try different cheeses or veggies. For a spicy kick, add jalapeños. If you love herbs, include fresh basil or thyme. Think about seasonal produce too. This makes your quiche cups unique and fun. Mini quiche cups are fun and easy to make. You can mix eggs, dairy, cheese, meats, and veggies to create tasty treats. Remember to preheat your oven and choose the right crust. I shared tips on filling them just right and baking them perfectly. Explore variations like vegetarian or gluten-free options, and learn how to store leftovers. With these steps and ideas, you have all you need for quiche success. Enjoy making your own mini quiche cups! They’ll be a hit with everyone.](https://joymealplan.com/wp-content/uploads/2025/06/d5cf7460-7b4e-43b3-accb-372b25b26cc9-768x768.webp)
![- 1 ripe mango, diced into small cubes - 2 ripe avocados, diced into small cubes - 1 small red onion, finely chopped - 1 jalapeño, minced - 1/4 cup fresh cilantro, finely chopped - Juice of 2 limes - Salt and pepper to taste - Optional: 1/2 teaspoon ground cumin To create a vibrant mango avocado salsa, you need fresh, tasty ingredients. First, pick a ripe mango. A ripe mango should feel slightly soft when you press it. Next, choose ripe avocados. They should also yield slightly to gentle pressure. The red onion adds a nice crunch and color. Finely chop it for the best texture. The jalapeño brings the heat. If you want less spice, remove the seeds. Fresh cilantro adds a bright flavor. Always choose fresh herbs for the best taste. Lime juice helps balance the sweetness of the fruits. It also keeps the avocados from browning. Salt and pepper enhance all the flavors. If you like a warm taste, add ground cumin. You can switch things up based on your taste. Try different types of onions, like white or green. They each bring a unique flavor. You can also add black beans or corn for extra texture and nutrition. If you love spice, add more jalapeño or try other peppers. Each choice lets you make this salsa your own. Explore and enjoy the creative process. Check out the Full Recipe for more details! - Start with a ripe mango. Cut it into small cubes. Place the mango in a large mixing bowl. - Next, take two ripe avocados. Dice them into small cubes, too. Add them gently to the bowl. - Now, grab a small red onion. Finely chop it and mix it into the bowl. - For some heat, use a jalapeño. Deseed it and mince it based on your spice level. - Chop 1/4 cup of fresh cilantro. This herb adds a bright flavor to the salsa. - Finally, squeeze the juice of two limes into the bowl. This keeps the avocados fresh. - Combine all the fresh ingredients carefully. Use a gentle folding motion. - This method keeps the avocados and mango intact. You want a nice texture in your salsa. - Pour in the lime juice and season with salt and pepper. If you like, add 1/2 teaspoon of ground cumin. - Mix everything together until well blended. Make sure not to break the avocado pieces. - Before serving, taste your salsa. Adjust the flavors if needed. - Add a pinch of salt or more lime juice for brightness. - Check the texture. It should be fresh and chunky, not mushy. You can find the Full Recipe for more details. Enjoy this fresh and vibrant salsa! Choosing the best mango and avocado is key. Look for a mango that feels slightly soft when you squeeze it. The skin should be mostly yellow with some red. For avocados, choose ones that yield to gentle pressure. They should feel soft but not mushy. Knowing when fruits are perfectly ripe matters. A ripe mango has a sweet smell at the stem end. The avocado should be dark green or nearly black. Check both fruits daily if you buy them unripe. To store salsa and preserve freshness, cover it tightly with plastic wrap. Press the wrap down to touch the salsa. This limits air exposure, keeping it bright. You can also store it in an airtight container. Best practices for flavor development overnight include letting the salsa sit in the fridge for at least an hour. This allows the flavors to marry. The lime juice helps keep the avocados from browning. Serve the salsa in a vibrant bowl for eye-catching appeal. A colorful dish makes the salsa pop on your table. Garnish with a sprig of cilantro on top for extra flair. Ideal accompaniments include crispy tortilla chips for dipping. You can also serve it with grilled meats like chicken or fish. Mango avocado salsa adds a fresh kick to any meal. Don’t forget to check the [Full Recipe] for more details! {{image_4}} You can change the fruits in this salsa. Try adding diced pineapple or peach for a sweet twist. These fruits bring a bright flavor and can make your salsa unique. If you want a vegan option, you can use black beans or corn. They add protein and make the salsa heartier. Many cultures have their own takes on salsa. You can add ingredients like mango or cilantro to reflect those flavors. For a spicy kick, adjust the jalapeño or add other peppers. For example, try using serrano peppers for more heat. Each region adds a special touch that can excite your taste buds. This salsa shines as a dip or topping. Serve it with crispy tortilla chips for a fun snack. You can also use it on grilled chicken or fish for a fresh meal. It adds color and flavor to your plate. Get creative with how you serve it, and enjoy the burst of flavors. For the full recipe, check out the complete guide above! To keep your Mango Avocado Salsa fresh, store it in the fridge. Place it in an airtight container. This helps prevent exposure to air, which can cause browning. Your salsa will last about 2 to 3 days in the fridge. Look for signs of spoilage, like an off smell or brown color in the avocados. If you see these signs, it's best to toss it out. Can you freeze Mango Avocado Salsa? Yes, but it's not the best option. Freezing can change the texture of avocados. If you choose to freeze it, do so right after making it. Use a freezer-safe container, leaving some space at the top for expansion. When you thaw it, the salsa might be watery. To fix this, drain any excess liquid before serving. Choose the best storage container for your salsa. Glass or BPA-free plastic containers work well. Airtight options are ideal because they keep air out. This helps maintain flavor and freshness. Using the right container can make a big difference in how long your salsa lasts. Mango Avocado Salsa stays fresh in the fridge for about 2 to 3 days. After that, the avocados may turn brown. You can freeze it, but it’s best to eat it fresh. If you freeze it, use it within a month for the best taste. Yes, you can swap ingredients based on your needs. If you're allergic to avocados, try using diced cucumbers instead. If you don’t like cilantro, fresh parsley works too. For a milder taste, skip the jalapeño or use sweet bell peppers. This salsa pairs well with many dishes. Serve it with tortilla chips for a crunchy snack. It’s also great on grilled chicken or fish. Try it on tacos or as a topping for burrito bowls for added flavor. The spice level depends on how much jalapeño you use. If you remove the seeds and ribs, it will be milder. If you like heat, add more jalapeño or try a spicier pepper. Adjusting the amount gives you control over the spice. Yes, you can prep it ahead! If you want to make it a day before, do so. Just add lime juice to keep the avocados bright. Store it in an airtight container in the fridge. This will help the flavors blend nicely. For the best taste, mix in the avocado right before serving. For the full recipe, check out the [Full Recipe]. Mango Avocado Salsa combines fresh ingredients for a tasty dish. We covered how to pick ripe fruits and mix flavors. You learned about variations, storage tips, and serving ideas. This salsa is perfect for gatherings or a light snack. It’s simple to make and adjust to your taste. Enjoy making it and share the joy of fresh flavors with others!](https://joymealplan.com/wp-content/uploads/2025/07/8dfe7157-a149-4f91-a822-36a2fad97dae-768x768.webp)