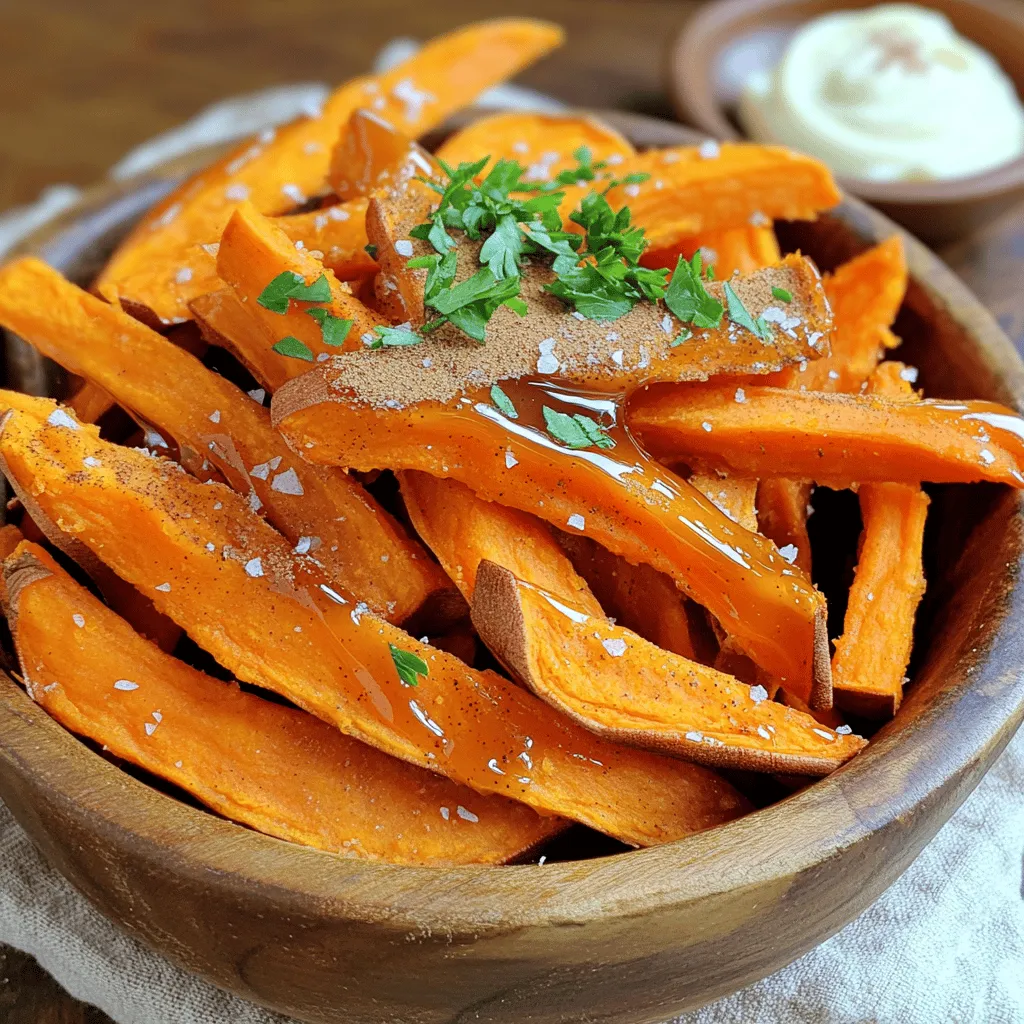
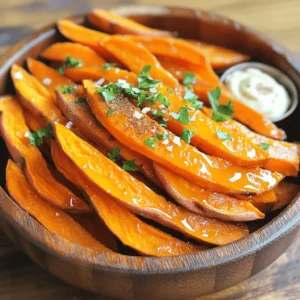
Maple Glazed Sweet Potato Fries Flavorful and Easy
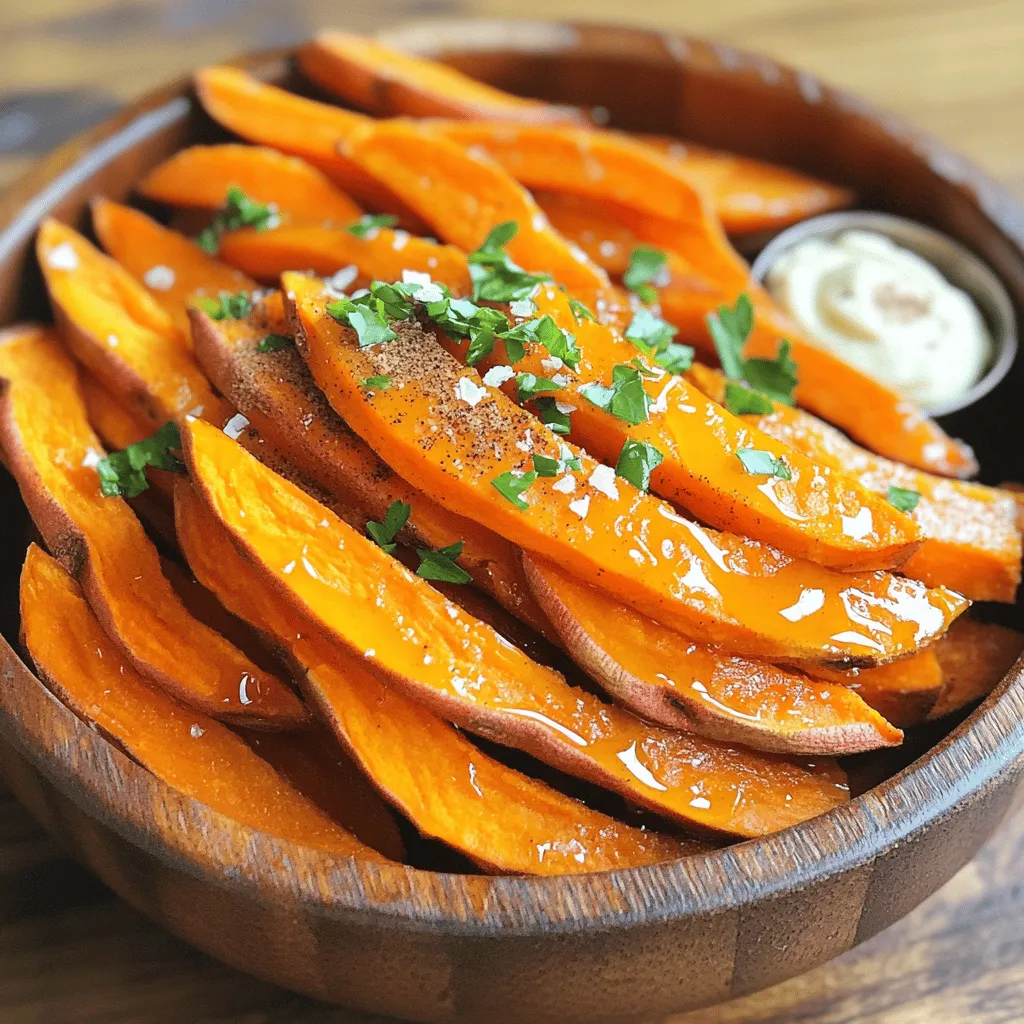
If you crave a tasty snack that’s also good for you, try my Maple Glazed Sweet Potato Fries! With just a few simple ingredients like sweet potatoes and maple syrup, this dish is easy to make. I’ll guide you through every step, from prep to bake, to ensure your fries come out crispy and full of flavor. Let’s dive in and make this delicious treat!
Ingredients
To make maple glazed sweet potato fries, you will need a few simple items. Here’s what you’ll gather:
– Sweet potatoes
– Olive oil
– Pure maple syrup
– Ground cinnamon
– Garlic powder
– Salt and black pepper
– Fresh parsley
These ingredients come together to create a sweet and savory treat. Sweet potatoes are packed with vitamins and give a great base. Olive oil helps them crisp up in the oven. Pure maple syrup adds a nice sweetness that pairs well with the spices. Ground cinnamon gives these fries a warm flavor. Garlic powder adds depth, while salt and black pepper enhance all the tastes. Finally, fresh parsley brings color and a fresh touch to the dish.
You’ll see how these ingredients work together to create a delicious snack or side dish. Enjoy picking them out!
Step-by-Step Instructions
Preheating the Oven
First, set your oven to 425°F (220°C). This heat makes the fries crisp and tasty. While the oven warms, prepare your baking sheet. Line it with parchment paper. This helps with cleanup and keeps the fries from sticking.
Preparing the Sweet Potatoes
Next, take two large sweet potatoes. Peel them and cut them into thin fry shapes. The thinner the fries, the crispier they get. Place these cut fries into a large mixing bowl.
Coating the Fries
In the bowl with the sweet potatoes, add three tablespoons of extra virgin olive oil. Then, pour in two tablespoons of pure maple syrup. Add one teaspoon of ground cinnamon and one teaspoon of garlic powder. Season with salt and freshly cracked black pepper. Use your hands to toss everything well. Ensure each fry gets a nice coating of the mix.
Baking the Sweet Potato Fries
Spread the fries evenly on the lined baking sheet. Make sure they don’t touch each other. This spacing is key for crispiness. Place the sheet in your preheated oven. Bake for 20-25 minutes. Halfway through, flip the fries with a spatula. This helps them brown evenly. Watch them closely, and take them out when they look golden brown and crispy.
Finishing Touches
After baking, let the fries cool for a few minutes. Then, drizzle a little more maple syrup over them for extra sweetness. Lastly, sprinkle some finely chopped fresh parsley on top. This adds a nice color and a fresh taste. Enjoy your delicious maple glazed sweet potato fries!
Tips & Tricks
Achieving Maximum Crispiness
To get the crispiest fries, cut sweet potatoes thin. Aim for about 1/4 inch. Thin fries cook faster and turn crispy. Toss them well with oil and maple syrup. The oil helps them crisp up. Spread fries out in a single layer on the baking sheet. Crowding them will cause steaming, not crisping. Flip the fries halfway through baking for even browning.
Flavor Enhancement
Add spices to boost flavor. Ground cinnamon gives a warm touch. Garlic powder adds a savory kick. You can also try smoked paprika for a smoky twist. For extra sweetness, drizzle more maple syrup after baking. Fresh parsley on top adds color and freshness. It makes the dish pop visually and tastefully.
Common Mistakes to Avoid
Don’t skip preheating the oven. A hot oven helps fries crisp up. Avoid cutting fries too thick. Thick fries take longer and may not cook evenly. Make sure to dry sweet potatoes after washing. Moisture can make fries soggy. Lastly, don’t rush the flipping. Wait until halfway through to flip them for best results.
Variations
Maple Glazed Sweet Potatoes with Different Spices
You can change the flavor by using different spices. Try adding smoked paprika for a smoky taste. You can also use cayenne pepper for a spicy kick. Mix in some cumin for a warm, earthy flavor. Each spice gives a unique twist to your fries.
Add-Ins and Pairings
For extra flavor, consider adding chopped nuts. Walnuts or pecans add crunch. You can also mix in some grated cheese. Feta or parmesan works well. Pair your fries with a yogurt dip or spicy aioli for a fun contrast. This makes every bite exciting.
Healthy Substitutions
Want to make it healthier? Swap olive oil for avocado oil. It has a high smoke point and healthy fats. Use less maple syrup or a sugar-free syrup if you want fewer calories. You can also bake the fries without oil for a lighter option. This way, you can enjoy the fries without the guilt.
Storage Info
Best Practices for Storing Leftovers
After you enjoy your maple glazed sweet potato fries, store any leftovers in an airtight container. Let the fries cool down first. This helps keep them crispy when stored. Place them in the fridge, where they can last for up to three days. If you want to keep them longer, freezing is a great option.
Reheating Instructions
To bring back the crispy goodness, reheat the fries in the oven. Preheat your oven to 400°F (200°C). Spread the fries on a baking sheet in a single layer. Heat them for about 10-15 minutes. This method keeps them crispy. You can also use an air fryer if you have one. Just set it to 375°F (190°C) and cook for around 5-7 minutes.
Freezing Maple Glazed Sweet Potato Fries
If you want to freeze your fries, start by cooling them completely. Spread the cooled fries on a baking sheet in a single layer. Place the sheet in the freezer for about 1-2 hours until they are firm. After that, transfer the fries to a freezer bag. Remove as much air as possible, and seal the bag. They can stay in the freezer for up to three months. When ready to eat, cook them straight from the freezer!
FAQs
Can I use other types of potatoes?
Yes, you can use other potatoes. Regular potatoes work well too. Yukon Gold or red potatoes are great options. They will not have the same sweetness, but they will still taste good. You may need to adjust cooking times based on the type you choose.
How can I make these fries spicier?
To add heat, try adding cayenne pepper or chili powder. A little goes a long way, so start small. You can also use a spicy dipping sauce. A sriracha mayo or spicy aioli adds a nice kick.
What can I serve with maple glazed sweet potato fries?
These fries pair well with many dishes. Serve them with grilled chicken, burgers, or fish. They are also great with a fresh salad. For dipping, try ranch dressing or a yogurt dip for a cool contrast.
How do I know when the fries are done baking?
The fries are done when they are crispy and golden brown. Baking takes about 20-25 minutes. Halfway through, flip them for even cooking. Keep an eye on them to prevent burning.
Are sweet potato fries healthier than regular fries?
Yes, sweet potato fries are often healthier. They have more vitamins and fiber than regular fries. They also have a lower glycemic index. This means they can help keep your blood sugar steady.
This blog post covered how to make delicious maple glazed sweet potato fries. We discussed key ingredients, steps for prepping and baking, and tips for the best results. I shared ways to store leftovers and some common questions to help you. Remember, you can adjust flavors to your taste. Enjoy these fries as a healthy side or snack! Get creative with spices and pairings for added flavor. Cooking should be fun and rewarding. Happy frying!
![To make this tasty roasted red pepper hummus, you need a few key items. Here’s what you’ll need: - 1 can (15 oz) chickpeas, thoroughly rinsed and well-drained - 2 large roasted red peppers, peeled and coarsely chopped - 3 tablespoons creamy tahini - 2 tablespoons extra virgin olive oil, plus more for drizzling - 2 cloves of garlic, finely minced - 1 tablespoon freshly squeezed lemon juice - 1 teaspoon ground cumin for warmth - Salt and freshly cracked black pepper, to taste - Cold water, as required for desired creaminess - Smoked paprika and freshly chopped parsley for an elegant finish Want to kick your hummus up a notch? Consider these fun add-ins: - A pinch of cayenne pepper for heat - Roasted garlic for a sweeter taste - A tablespoon of fresh herbs like basil or cilantro - A splash of balsamic vinegar for tanginess - A bit of feta cheese for creaminess Feel free to mix and match these options. Each one can add a unique twist to your hummus. The ingredients in this hummus are not just tasty; they pack a nutritious punch: - Chickpeas: High in protein and fiber, they help keep you full. - Tahini: Made from sesame seeds, it adds healthy fats and calcium. - Olive Oil: Rich in monounsaturated fats, it supports heart health. - Garlic: Offers immune-boosting properties and can help lower blood pressure. - Red Peppers: Full of vitamins A and C, they promote healthy skin and eyes. Each ingredient works together to create a dish that's not only delicious but also good for you. For the full recipe, check out the detailed cooking guide. Making roasted red pepper hummus is easy and quick. You need a food processor. Gather all your ingredients first. This helps keep things organized. Start by blending everything together until smooth. You can add water for creaminess. 1. Place the rinsed chickpeas, chopped roasted red peppers, tahini, olive oil, minced garlic, lemon juice, and ground cumin into your food processor. 2. Secure the lid tightly. Blend the mix on high speed. Stop to scrape the bowl down. This ensures everything mixes well. 3. If the hummus is too thick, add cold water. Do this one tablespoon at a time. Blend after each addition until you reach the right creaminess. 4. Taste your hummus. Add salt and freshly cracked black pepper to make it better. 5. Transfer the smooth hummus to a serving bowl. Drizzle olive oil on top for extra flavor. 6. Sprinkle smoked paprika and chopped parsley on top for color and flair. To get your hummus just right, focus on the blending time. Blend longer for a smoother texture. If it’s still thick, keep adding cold water slowly. Make sure to taste as you go. Adjust the seasoning to your liking. A little tweak can make a big difference. One big mistake is using dry chickpeas. Always use canned chickpeas for smoothness. Another pitfall is not rinsing the chickpeas. Rinsing helps reduce the canned taste. Avoid over-blending; you want a creamy texture, not a soup. Lastly, be careful with salt. Start with a little and taste as you go. To boost flavor, try adding lemon zest. It adds brightness and fresh taste. You can also mix in roasted garlic for a sweet, rich flavor. For extra heat, toss in a pinch of cayenne pepper. Experiment with herbs like cilantro or basil for unique twists. Each of these can make your hummus stand out. Presentation matters! Serve the hummus in a colorful bowl to catch the eye. Drizzle olive oil on top for a glossy finish. Sprinkle smoked paprika or fresh herbs for color. Pair it with warm pita bread and crunchy veggies. Arrange these on a large platter for a beautiful spread. Explore the [Full Recipe] for more ideas on serving this dish. {{image_4}} Want some heat? Add a kick to your hummus! Use sliced jalapeños or red pepper flakes. Blend them in with your other ingredients for a spicy twist. This adds depth and flavor. You can also drizzle with hot sauce before serving. It’s a perfect match for those who love bold flavors. Herbs can give your hummus a fresh taste. Try adding fresh basil, cilantro, or parsley. You can also mix in other roasted veggies. Think zucchini or eggplant for extra flavor. These additions make your hummus unique and vibrant. They bring in new textures and tastes, making it fun to try different combinations. This hummus is already vegan and gluten-free! You can enjoy it with confidence. It uses chickpeas, tahini, and olive oil, which fit both diets perfectly. If you want to make it even more exciting, serve it with gluten-free crackers or veggie sticks. This way, everyone can enjoy it at any gathering. For the full recipe, check the details mentioned earlier. To keep your hummus fresh, place it in an airtight container. This helps prevent air from drying it out. Make sure to seal the lid tightly. You can also drizzle a thin layer of olive oil on top. This adds flavor and keeps it moist. Store the container in the fridge. It will stay good for about 4 to 5 days. If you want to save hummus for later, freezing is a great option. Start by placing the hummus in a freezer-safe container. Leave some space at the top, as it may expand when frozen. You can also use ice cube trays for small portions. Once frozen, transfer the cubes to a zip-top bag. This method makes it easy to thaw just what you need. Homemade hummus can last up to 3 months in the freezer. Choose containers made of glass or BPA-free plastic. Glass containers are great for keeping flavors intact. They are also easy to clean. If you use plastic, make sure it is strong and safe for freezing. Avoid containers that are too large for small amounts. This helps keep your hummus fresh. For extra care, label your containers with the date. This way, you’ll know when to use them. For the full recipe, check out the Roasted Red Pepper Hummus Delight. Homemade roasted red pepper hummus can last about 5 to 7 days in the fridge. Make sure to store it in an airtight container. This keeps it fresh and tasty. If you notice any changes in smell or color, it's best to toss it out. Yes, you can use jarred roasted red peppers. They save time and add great flavor. Just drain them well before adding to your hummus. This helps keep the hummus from getting too watery. Roasted red pepper hummus pairs well with many foods. Here are some ideas: - Warm pita bread - Fresh vegetable sticks like carrots, cucumbers, and bell peppers - Crackers or tortilla chips - A colorful mezze platter with olives and herbs You can find the full recipe above. Enjoy your tasty hummus! In this post, we explored the key ingredients and step-by-step instructions for roasted red pepper hummus. We covered tips for flavor, common mistakes, and variations. You learned how to store hummus properly and answered your main questions. Remember, this dish is simple yet versatile. Enjoy making your own hummus using fresh ingredients. Try different flavors to find your favorite mix. Happy cooking!](https://joymealplan.com/wp-content/uploads/2025/06/a7fe634f-a62f-44e2-9912-8eb9edd9a507-768x768.webp)