Strawberry Banana Oat Smoothie Simple Refreshing Drink
If you’re craving a tasty and healthy drink, look no further. This Strawberry Banana Oat Smoothie is simple to make and packed with flavor. With just a few fresh ingredients, you can whip up a refreshing treat that’s perfect for breakfast or a snack. Join me as I guide you through making this delicious smoothie that not only tastes great but also fuels your day!
Ingredients
To make a Strawberry Banana Oat Smoothie, you need simple, fresh ingredients that blend well together. Here’s what you will need:
– 1 ripe banana, sliced
– 1 cup fresh strawberries, hulled
– 1/2 cup rolled oats
– 1 cup almond milk (or any milk of choice)
– 1 tablespoon honey or maple syrup (optional, for sweetness)
– 1 tablespoon chia seeds (optional, for added nutrition)
– 1/2 teaspoon vanilla extract
– Ice cubes (optional, for a chilled smoothie)
Each ingredient plays a key role in the smoothie. The ripe banana gives it a creamy texture. Fresh strawberries add sweetness and a nice color. Rolled oats not only thicken the drink but also boost fiber. Almond milk keeps it light and dairy-free, perfect for many diets.
If you want a touch of sweetness, add honey or maple syrup. Chia seeds are great for nutrition and help thicken your smoothie. The vanilla extract adds a warm flavor that pairs nicely with the fruits. Lastly, ice cubes make it extra refreshing if you use fresh strawberries.
Feel free to mix and match these ingredients based on your taste. Enjoy crafting your perfect smoothie!
Step-by-Step Instructions
Preparation of Ingredients
– Gather all ingredients: one ripe banana, one cup fresh strawberries, half a cup rolled oats, one cup almond milk, one tablespoon honey or maple syrup, one tablespoon chia seeds, half a teaspoon vanilla extract, and ice cubes if using fresh strawberries.
– Prepare ice if using fresh strawberries: fill your blender with ice for a cool and refreshing drink.
Blending the Smoothie
– Blend banana, strawberries, oats, almond milk, vanilla, and sweetener: start your blender on low, then increase the speed. Blend until everything is well mixed and smooth.
Adding Optional Ingredients
– Incorporate chia seeds and blend until smooth: adding chia seeds boosts nutrition and helps thicken the smoothie.
– Adjust consistency with additional almond milk if needed: if the smoothie is too thick, slowly add more almond milk until you reach your desired thickness.
Final Touches
– Taste and adjust sweetness: try your smoothie. If it needs more sweetness, add more honey or maple syrup and blend briefly.
– Blend in ice cubes if desired: for a frosty treat, add ice cubes now and blend until crushed.
Serving
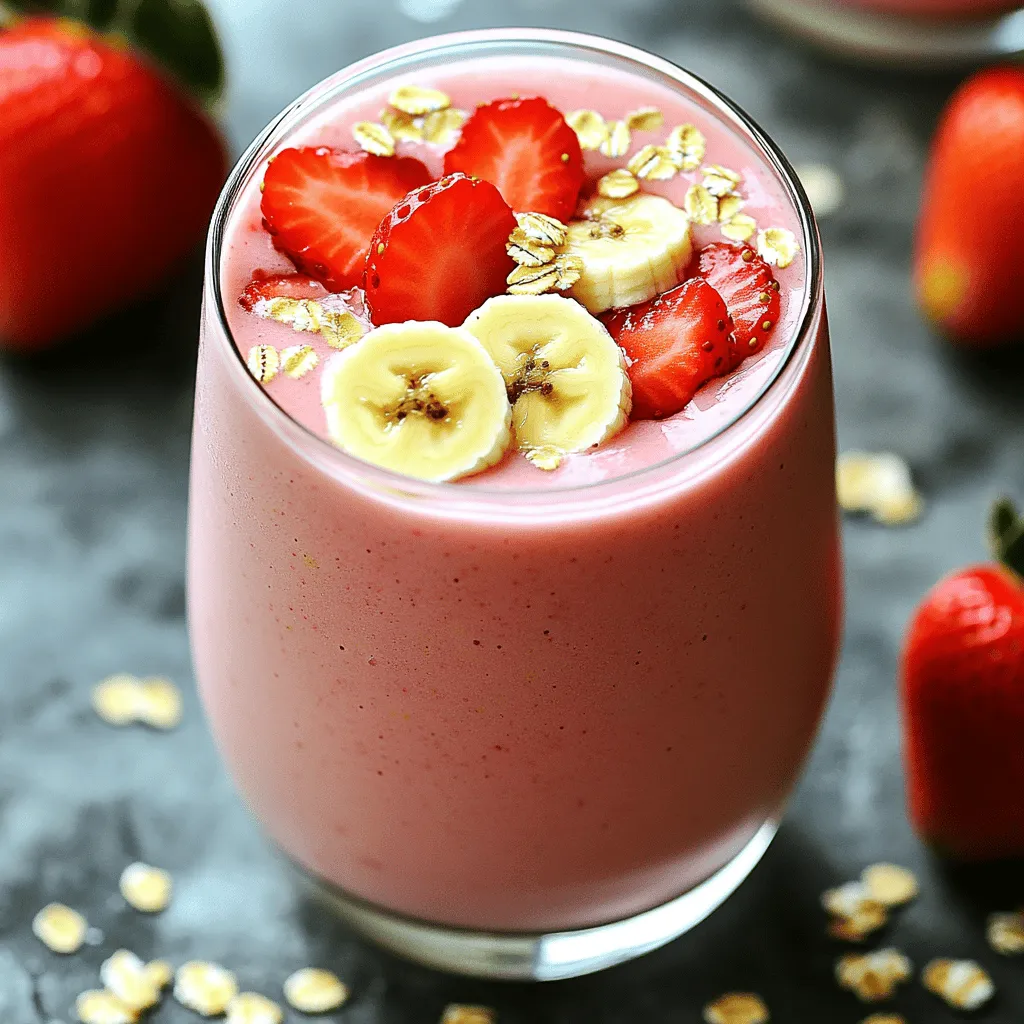
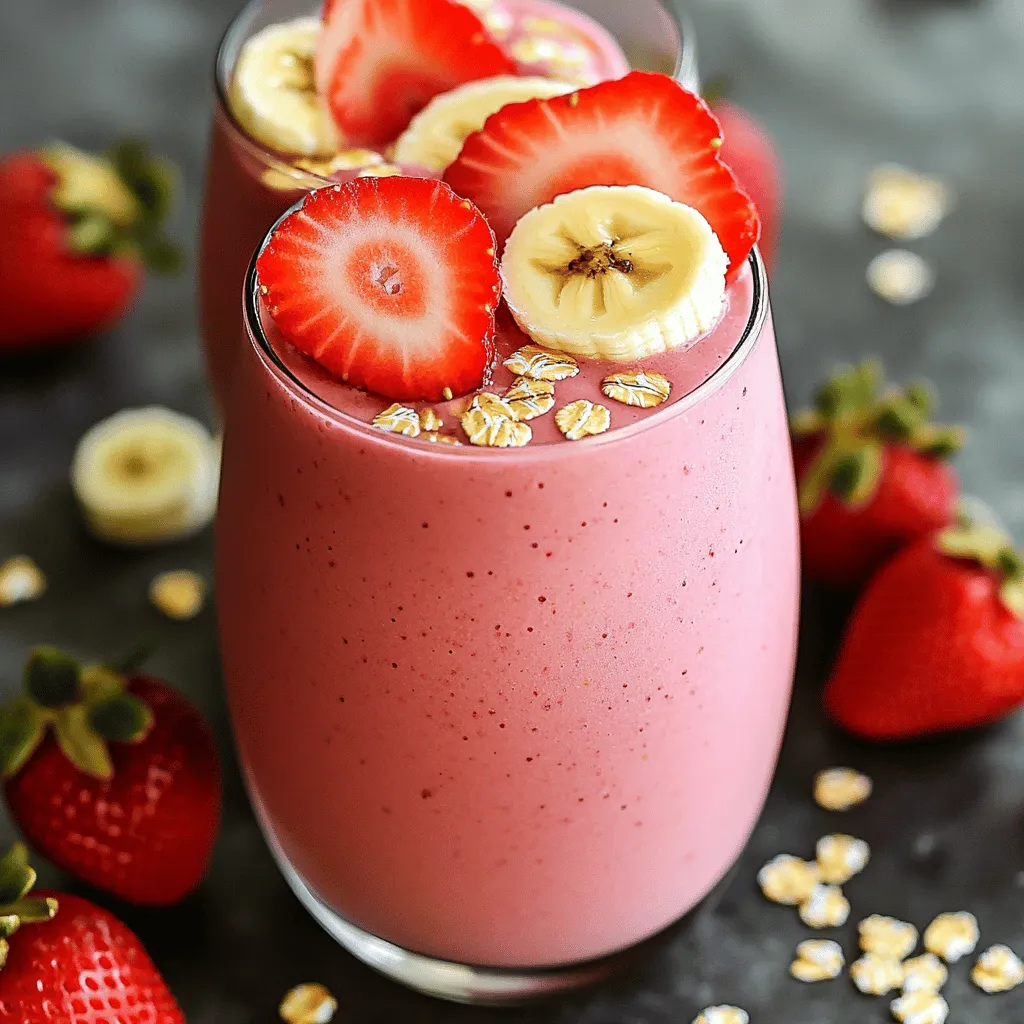
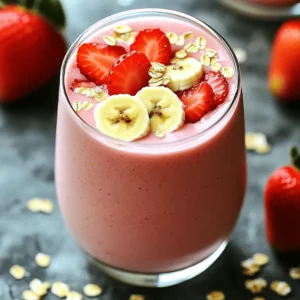
– Divide into glasses and present with garnishes: pour the smoothie into chilled glasses. Top with sliced strawberries and banana for a lovely look. Enjoy your delicious Strawberry Banana Oat Smoothie!
Tips & Tricks
Achieving the Perfect Consistency
To get the right thickness for your smoothie, adjust the almond milk. If you want a thicker drink, use less milk. For a thinner smoothie, add more almond milk slowly. Using frozen strawberries gives a creamier texture. They chill the drink and keep it thick without ice.
Enhancing Flavor
You can experiment with different types of milk. Try coconut milk for a rich taste or oat milk for creaminess. If you want more flavor, use flavored syrups. Maple or caramel syrups can add a fun twist.
Presentation Tips
Serve your smoothie in chilled glasses. This keeps it cool longer. For a stunning look, garnish with sliced strawberries and banana on top. Sprinkling extra rolled oats can add a nice crunch. These small touches make your drink more appealing and fun!
Variations
Fruit Alternatives
You can switch out the fruits in this smoothie. Substitute blueberries or raspberries for a new taste. These berries add a nice color and flavor. You can also mix in other fruits for a tropical twist. Try adding mango or pineapple for a fun change.
Nutritional Boosts
Want to make your smoothie even healthier? Add a handful of spinach or kale to pack in some greens. They blend well and you won’t even taste them! For a post-workout drink, include protein powder. This will help your body recover after exercise.
Sweetness Alternatives
If you want less sugar, use stevia or agave syrup as sweeteners. They give a nice touch without the calories. You can also try adding spices like cinnamon for extra flavor. This adds warmth and depth to your smoothie without extra sugar.
Storage Info
Refrigeration
To store leftover smoothie, pour it into a jar or bottle. Seal it tightly. Place it in the fridge. This keeps it fresh for up to 24 hours. When you want to drink it, give it a good shake. Smoothies can separate, so mixing helps.
Freezing Options
You can freeze smoothie portions for later use. Pour the smoothie into ice cube trays or freezer-safe bags. This way, you can enjoy them later. When you want a smoothie, remove a portion and let it thaw. Place it in the fridge overnight or leave it on the counter for a few hours.
Storage Container Recommendations
For smoothies, glass or plastic containers work well. Choose containers with tight seals. This helps keep the smoothie fresh longer. Avoid using metal containers, as they can alter the taste. Also, make sure your containers are easy to clean. This ensures you will use them often.
FAQs
Can I make the smoothie ahead of time?
Yes, you can prepare this smoothie ahead of time. To save time, blend all the ingredients except the ice. Store it in the fridge in a sealed container. When ready to drink, add ice and blend again. This keeps it fresh and tasty.
Is this smoothie suitable for a vegan diet?
Absolutely! This smoothie fits a vegan diet perfectly. Use almond milk or any plant-based milk instead of dairy milk. You can also skip honey and use maple syrup for sweetness. This way, you keep it dairy-free and still delicious.
How can I make the smoothie more filling?
To make your smoothie more filling, add protein-rich ingredients. Consider adding a scoop of protein powder, Greek yogurt, or nut butter. You can also top it with nuts or seeds. This will give you energy and keep you full longer.
What are the health benefits of this smoothie?
This smoothie is packed with health benefits. Here are some highlights:
– Strawberries: High in vitamin C and antioxidants.
– Bananas: Provide potassium and fiber.
– Rolled oats: Offer whole grains and help with digestion.
– Chia seeds: Add omega-3 fatty acids and protein.
– Almond milk: Low in calories and dairy-free.
Together, these ingredients make a nutritious drink that supports your health.
This blog post showed you how to create a delicious smoothie using simple ingredients. You learned about preparation, blending, and serving steps. We discussed tips for the perfect texture and flavor, plus fun variations to try. Finally, you explored storage methods to keep your smoothie fresh.
By following these steps, you can easily make a nutritious drink. Enjoy experimenting with new flavors and sharing this recipe with friends or family. Your perfect smoothie awaits!
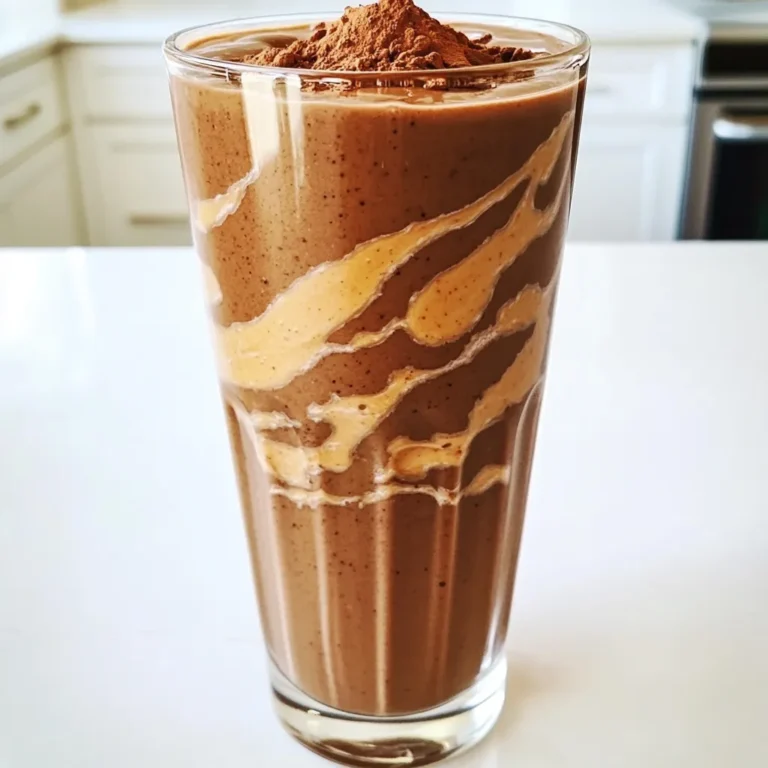
![- Ripe pears - Chai tea bags or loose chai tea - Milk options (dairy or non-dairy alternatives) The main ingredients are simple yet full of flavor. Ripe pears give the latte its sweet base. Choose chai tea bags or loose tea for that warm spice mix. For milk, you can use dairy or any non-dairy milk. Almond, oat, or soy milk all work nicely. - Honey or maple syrup - Vanilla extract - Ground spices (cinnamon, cardamom, ginger, black pepper) Flavor enhancers take this drink to the next level. Honey or maple syrup adds sweetness. Vanilla extract brightens the mix with a rich aroma. Ground spices like cinnamon and cardamom add warmth. Ginger brings a bit of zing, while black pepper adds a subtle kick. - Whipped cream or whipped coconut cream - Cinnamon stick for garnish For a fun touch, consider whipped cream on top. Whipped coconut cream is a great vegan choice. A cinnamon stick as a garnish makes the drink look pretty and adds extra flavor. For the full recipe, check out the [Full Recipe]. To start, you need to cook the pears. Take 2 ripe pears, peel and dice them. In a medium pot, add the diced pears and one cup of water. Bring this to a boil over medium heat. Once boiling, lower the heat and let it simmer for about 10 minutes. The pears should soften and be easy to pierce with a fork. Next, we need to puree the pears. Remove the pot from the heat. Use an immersion blender to blend the pears until smooth. If you don’t have one, you can transfer the pears to a regular blender. Blend them until smooth, then put the pear puree back in the pot. Now it’s time to mix our ingredients. Pour 2 cups of your choice of milk into the pot with the pear puree. Place the pot back on the stove over medium heat. Add the chai tea bags or 2 tablespoons of loose chai tea to the mix. Then, add one tablespoon of honey (or maple syrup if you want it vegan). Include one teaspoon of vanilla extract, half a teaspoon of ground cinnamon, a quarter teaspoon of ground cardamom, and a quarter teaspoon of ground ginger. Don’t forget a pinch of freshly ground black pepper! Stir everything well. Now, let’s heat this mixture. Keep stirring occasionally until it gets warm. Be careful not to let it boil. This should take about 5 minutes. If you used tea bags, remove them now. Finally, pour the spiced pear chai latte into cozy mugs. You can top it with whipped cream or whipped coconut cream if you like. Dust a little cinnamon on top or add a cinnamon stick for a lovely touch. For the full recipe, check out the [Full Recipe]. To get the best flavor, start with ripe pears. Look for pears that feel slightly soft when you press them. This means they are sweet and juicy. You can also choose pears that have a nice golden color. Adjust sweetness to your taste. If you like it sweeter, add more honey or maple syrup. If you prefer less sweetness, use less. Taste as you mix! Brewing the chai tea right is key. Start by placing your tea bags in hot water. Let them steep for about 5 minutes. This helps release all the yummy flavors. Avoid boiling the mixture. Boiling can make the chai bitter and spoil the pear flavor. Keep the heat low and gentle. For serving, clear glass mugs are perfect. They show off the beautiful color of the latte. You can also use cozy ceramic mugs for warmth. Pair your latte with a small cookie or a slice of spiced cake. This makes your drink feel even more special. It’s a delightful way to enjoy a cozy moment. For the full recipe, check out the detailed steps. {{image_4}} You can change up flavors to fit the season. Try adding pumpkin spice for a warm, fall taste. The mix of spices will give your latte a cozy feel. In the summer, think about using fresh fruits. Apples or peaches can add a fun twist to the drink. Just blend them in like you do with the pears. Do you want a vegan latte? Swap dairy milk for almond or oat milk. You can also replace honey with maple syrup. This makes it sweet and vegan-friendly. If you want to try different teas, rooibos is a great option. It has a sweet, earthy taste that works well with the pears. Iced drinks are perfect for hot days. To make an iced spiced pear chai latte, cool the mixture after heating it. Blend it with ice until it’s smooth. Serve it in a tall glass for a refreshing treat. You can also add whipped cream on top for a special touch. Enjoy it chilled, and savor the sweet pear and spice flavors! For the complete recipe, check out [Full Recipe]. To keep your spiced pear chai latte fresh, store it in the fridge. Use an airtight container for best results. This method helps to prevent any off-flavors from entering your drink. You can keep it for up to three days. After that, the flavor may fade, and the texture can change. When it’s time to enjoy your latte again, reheat it gently. Use a saucepan over low heat. Stir it often to ensure an even warmth. This method helps maintain the smooth texture and rich flavor. Avoid boiling it, as this can ruin the latte's creaminess. You can freeze your spiced pear chai latte if you want to save some for later. Pour it into freezer-safe containers, leaving some space for expansion. It can last up to one month in the freezer. To enjoy it, move it to the fridge to thaw overnight. Once thawed, reheat it using the stovetop method for the best taste. A spiced pear chai latte is a warm drink that blends sweet pears with spicy chai. This latte has a rich and creamy texture with a cozy flavor. You’ll taste hints of cinnamon, cardamom, and ginger. The pear adds a unique sweetness that pairs perfectly with the spices. Ingredients include: - 2 ripe pears, peeled and diced - 2 cups milk (dairy or non-dairy) - 1 cup water - 2 chai tea bags (or loose chai tea) - 1 tablespoon honey (or maple syrup) - 1 teaspoon vanilla extract - 1/2 teaspoon ground cinnamon - 1/4 teaspoon ground cardamom - 1/4 teaspoon ground ginger - A pinch of freshly ground black pepper Yes, you can make this drink in advance. First, prepare the pear puree as directed. Once cooled, store it in a sealed container in the fridge. You can keep it fresh for up to three days. When you’re ready to enjoy, simply heat it up, add milk, and spices again. This makes it easy for busy mornings or cozy gatherings. You can find spiced pear chai lattes at local cafes, especially those that focus on unique drinks. Many coffee shops offer seasonal specials, so be on the lookout. If you prefer to make it at home, you can buy chai tea and pears at most grocery stores. Some brands may even sell ready-made versions in stores. Absolutely! You can use any milk you prefer. Almond, oat, or soy milk all work well in this recipe. Each type will add its unique flavor and creaminess. If you want a richer taste, try whole milk or even coconut milk. Just keep in mind that some non-dairy milks may be sweeter, so adjust the honey to taste. This blog post covered how to make a spiced pear chai latte. We explored key ingredients like ripe pears and chai tea, plus flavor enhancers such as honey and spices. I shared step-by-step instructions for preparing, combining, and serving the drink. You learned tips for the best flavor and presentation, as well as variations, storage info, and answered common questions. Enjoy making this latte at home. Experiment with flavors and share your creations!](https://joymealplan.com/wp-content/uploads/2025/06/300236b5-0783-47ce-bc7a-6a028b80e161-768x768.webp)
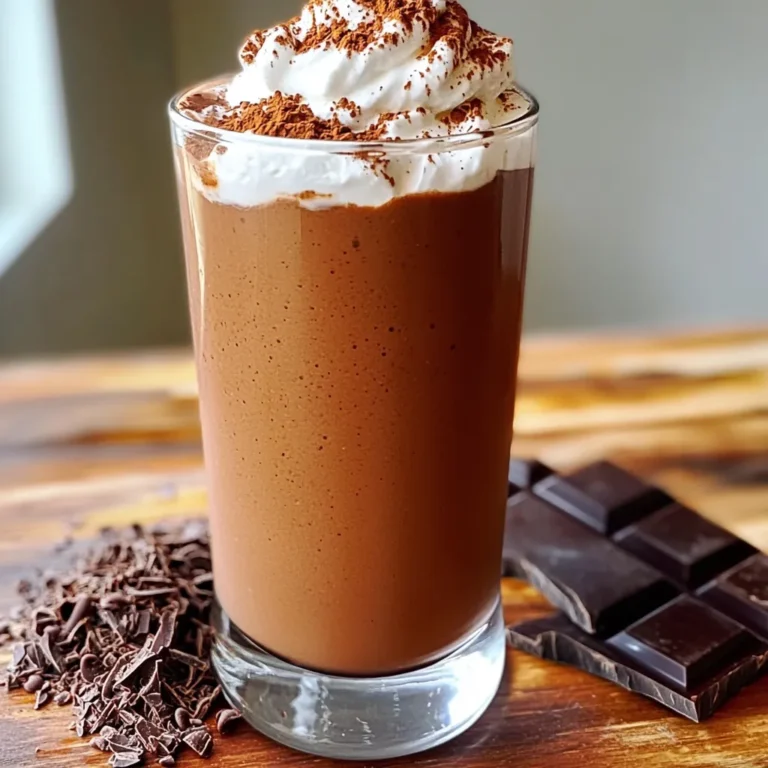
![The Banana Nutmeg Smoothie is simple and delightful. Here’s what you need to make it: - 2 ripe bananas, peeled and sliced - 1 cup almond milk (or any milk of your choice) - 1 tablespoon Greek yogurt (or a dairy-free alternative) - 1 tablespoon honey or maple syrup - 1/2 teaspoon ground nutmeg - 1/2 teaspoon pure vanilla extract - 1/4 cup rolled oats - Ice cubes (optional) These ingredients create a rich, creamy base for your smoothie. The ripe bananas give natural sweetness. Almond milk adds creaminess without dairy. Greek yogurt boosts protein and texture. Honey or maple syrup lets you adjust sweetness. Ground nutmeg adds a warm spice, while vanilla brings out the flavors. Oats add fiber and make it filling. You can use ice cubes for a frosty treat. Using the Full Recipe ensures you’ll get a perfectly blended smoothie every time. - Begin by measuring and slicing the bananas. Use ripe bananas for the best taste. - Gather all ingredients for easy access. This makes the process quick and fun. - Combine bananas, almond milk, Greek yogurt, sweetener, nutmeg, and vanilla in the blender. This mix gives a rich flavor. - Blend until smooth and creamy, ensuring no chunks remain. A good blend makes the drink silky. - Taste the smoothie and adjust sweetness if necessary. You might want it sweeter or less sweet. - Pour into glasses and garnish with nutmeg. This adds a lovely aroma and look to your drink. For the complete recipe, check the [Full Recipe]. To get the right thickness for your smoothie, adjust the almond milk. If you want a thicker smoothie, use less almond milk. For a thinner texture, add more. Frozen bananas can also help. They make the smoothie frostier and give it a nice chill. You can change the sweetness level easily. If you want it sweeter, add more honey or maple syrup. You can also try other natural sweeteners like agave nectar or stevia. Just remember to mix well after each addition to taste. The right glassware can make your smoothie look great. Tall, clear glasses work best. Add a fun straw for style. You can garnish with a slice of banana or a sprinkle of nutmeg on top. For snacks, serve with a handful of nuts or granola. These pair well and add crunch to your meal. For the full recipe, check out the detailed instructions provided above. {{image_4}} If you want a dairy-free option, try using oat milk or coconut milk. Both add a unique flavor and creaminess. You can also swap Greek yogurt for silken tofu or coconut yogurt. These alternatives keep your smoothie rich without dairy. For a protein boost, consider adding a scoop of plant-based protein powder. Pea protein works well and blends smoothly. You can also use nut butter like almond or peanut. It adds flavor and makes your smoothie more filling. To make your smoothie even tastier, try adding cinnamon or ginger. These spices pair well with banana and nutmeg. If you want to switch up the fruit, include berries or mango for a fresh twist. Both enhance sweetness and flavor, creating a delightful mix. To store leftover smoothie in the fridge, pour it into an airtight container. This helps keep the smoothie fresh. It’s best to consume it within 24 hours. If you notice any separation, just shake it before drinking. You can freeze smoothie leftovers for later. Pour the smoothie into ice cube trays or a freezer-safe container. This way, you can use it later in other smoothies or drinks. To thaw, leave it in the fridge overnight or blend it while still frozen. You can safely store banana nutmeg smoothie for about 1-2 days in the fridge. If it smells sour or looks off, throw it away. Trust your senses! Always check for signs that the smoothie is no longer good to consume. This smoothie offers many health benefits. Bananas are rich in potassium, which helps to keep your heart healthy. They also provide fiber, which aids digestion. Nutmeg adds a warm flavor and has antioxidants that support your body. Almond milk is low in calories and dairy-free, making it a great choice for many diets. Greek yogurt adds protein, which is key for muscle health. Together, these ingredients make a tasty and nutritious drink. Yes, you can make this smoothie ahead of time. Just follow these steps for the best results: - Make the smoothie and pour it into a jar. - Seal the jar tightly and store it in the fridge. - Consume it within 24 hours for the best taste and texture. If you want it chilled, add ice cubes before blending. This keeps it fresh and cool. Making this smoothie vegan is easy! Just swap a few ingredients: - Use any plant-based milk, like oat or soy milk. - Replace Greek yogurt with coconut yogurt or another dairy-free option. - Choose maple syrup instead of honey for sweetness. These simple changes let you enjoy a creamy and rich banana nutmeg smoothie without any animal products. In this blog post, we explored a simple banana nutmeg smoothie. You learned about the key ingredients, step-by-step blending instructions, and tips for an ideal texture. We also discussed delicious variations and storage tips to keep your smoothie fresh. Remember, a great smoothie is easy to make and fun to customize. Enjoy experimenting with flavors and ingredients. Your smoothie journey starts now, and I hope it brings you joy and health!](https://joymealplan.com/wp-content/uploads/2025/06/0b571da2-630d-4e34-a7cd-67cccb04eb80-768x768.webp)