Tomato Burrata Panzanella Salad Fresh and Flavorful
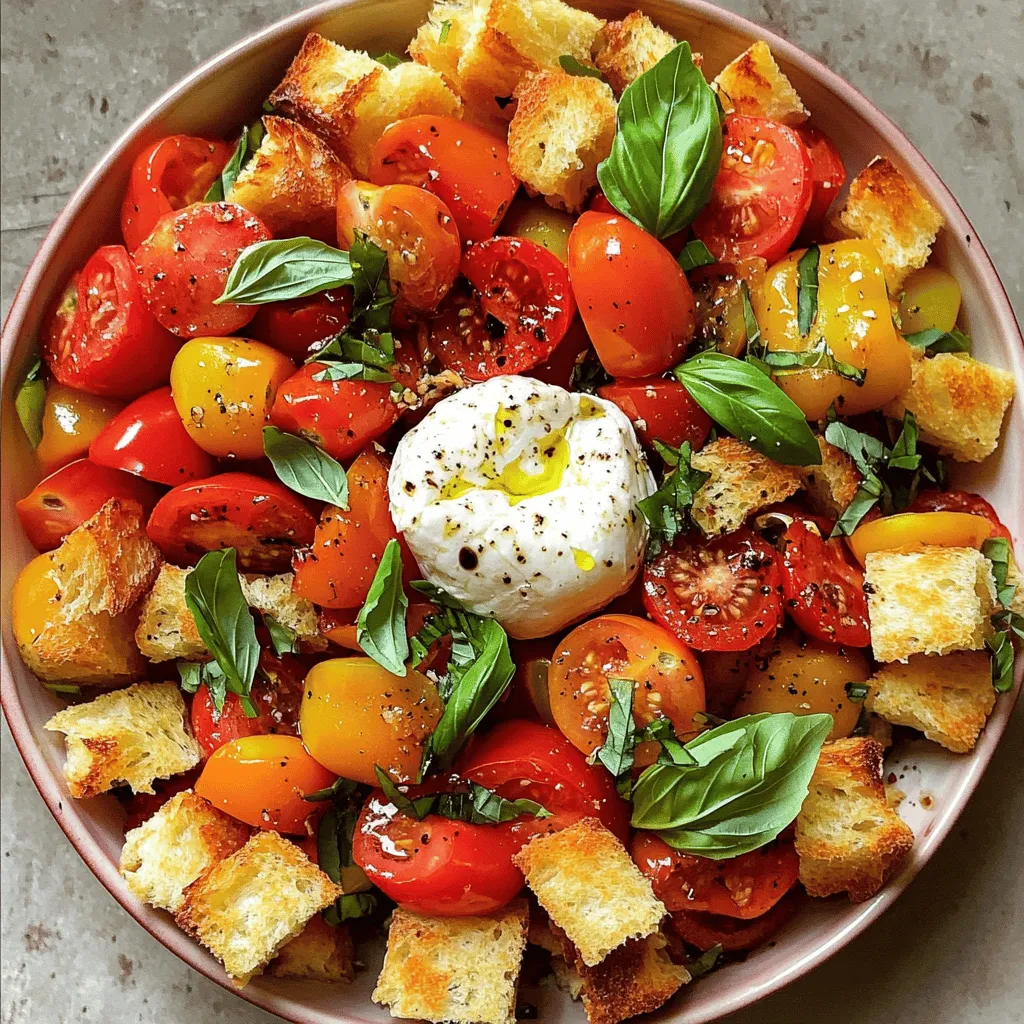
Ready to dive into a burst of summer flavors? My Tomato Burrata Panzanella Salad is a feast for the senses. With juicy heirloom tomatoes, creamy burrata cheese, and crunchy ciabatta croutons, this dish is as fresh as it gets. Whether you’re cooking for friends or treating yourself, I’ll guide you through each step to make this colorful salad shine. Let’s unlock the secrets to creating your best panzanella yet!
Ingredients
Fresh Ingredients for the Salad
– 4 cups mixed heirloom tomatoes, roughly chopped
– 1 ball (approximately 8 oz) fresh burrata cheese, well-drained
– 2 cups stale ciabatta bread, cut into 1-inch cubes
– 1 small red onion, finely sliced
– 1/2 cup fresh basil leaves, torn
Pantry Staples
– 1/4 cup high-quality extra-virgin olive oil
– 2 tablespoons aged balsamic vinegar
– Sea salt and freshly cracked black pepper
Serving Size and Nutritional Information
This recipe serves four people. It takes about 15 minutes to prep. The total time is 30 minutes. Each serving has approximately:
– Calories: 350
– Fat: 20g
– Carbohydrates: 30g
– Protein: 10g
This salad is fresh and light, making it perfect for warm days. The mix of sweet tomatoes, creamy burrata, and crunchy bread makes every bite a delight.
Step-by-Step Instructions
Preparing the Ciabatta Croutons
– Preheat your oven to 400°F (200°C). This step warms the oven, ensuring even baking.
– Spread the stale ciabatta cubes on a baking sheet. Drizzle half of the olive oil over them. Toss the cubes to coat them evenly. This helps to add flavor and crispiness.
– Bake the bread for about 10-12 minutes. Look for a golden brown color. Remove them from the oven and let them cool completely.
Mixing the Tomato Salad
– In a large mixing bowl, combine the chopped heirloom tomatoes, sliced red onion, and torn basil leaves. This mix offers great color and flavor.
– In a small bowl, whisk the remaining olive oil and balsamic vinegar together. Pour this dressing over the tomato mix. Toss gently to combine everything. Season with sea salt and black pepper to taste. This enhances all the flavors.
Assembling the Salad
– Add the toasted ciabatta cubes to the tomato salad. Toss gently to let the bread soak up the juicy flavors. This creates a delightful texture.
– Tear the burrata cheese into pieces and scatter it on top of the salad. This creamy cheese adds richness to every bite.
– Serve this salad right away. Enjoy the contrast of the crisp bread, juicy tomatoes, and creamy burrata.
Tips & Tricks
Enhancing Flavor
How do I balance acidity and seasoning?
To balance the flavors, use quality ingredients. The ripe tomatoes add natural sweetness. The extra-virgin olive oil and balsamic vinegar enhance the taste. Use sea salt and freshly cracked black pepper to boost flavor. Taste as you go to find the right balance.
What tomatoes should I choose?
I suggest using mixed heirloom tomatoes. They come in various colors and sizes. This variety not only looks great but also adds depth of flavor. Look for tomatoes that feel firm but have a slight give when pressed.
Presentation Suggestions
How can I arrange the salad visually?
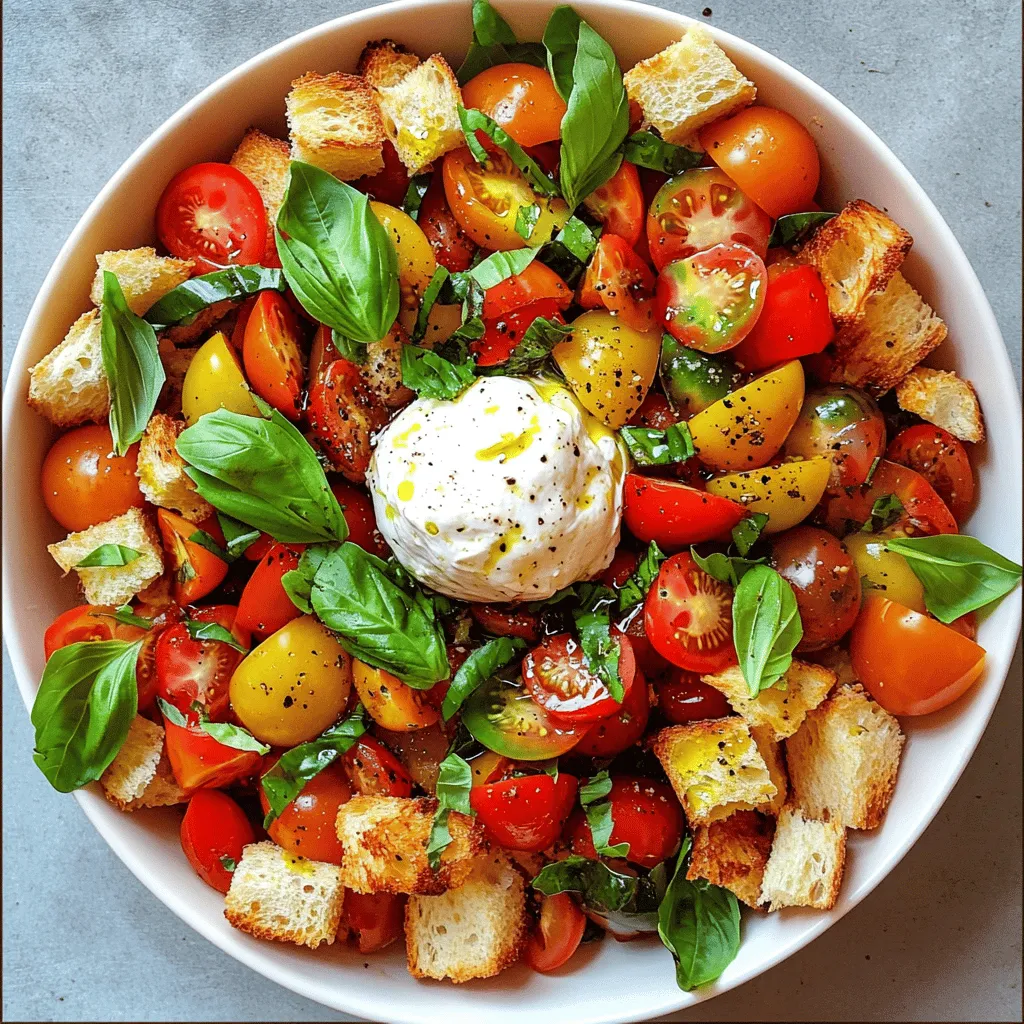
For a stunning look, use a large, shallow bowl. Start with the chopped tomatoes at the bottom. Layer the ciabatta croutons on top, then add torn basil leaves. Place the burrata in the center, showcasing its creaminess. This creates a beautiful focal point.
What garnishing ideas can I use with basil?
Torn basil leaves make a great garnish. They add a fresh aroma and vibrant color. You can also drizzle a little extra olive oil on top. This adds a glossy finish and enhances the dish’s appeal.
Time-Saving Tips
How can I use pre-cubed bread?
Using pre-cubed bread cuts down on prep time. You can find it in most grocery stores. Just toast it in the oven for that crunchy texture. This way, you save time without losing flavor.
What are shortcuts for slicing tomatoes and onions?
For quick slicing, use a sharp knife. Cut tomatoes in half, then slice into wedges. For onions, cut off the ends, then cut them in half. This method makes it easy to create even slices without tears.
Variations
Additions for Extra Flavor
You can make this salad even better with some fun extras. Try adding proteins like grilled chicken or shrimp. These meats add a hearty touch and make the salad a full meal.
You can also mix in more vegetables. Cucumbers add a cool crunch, while bell peppers bring a sweet flavor. These additions keep your salad fresh and exciting. Feel free to experiment with your favorites!
Dietary Modifications
If you need gluten-free options, use gluten-free bread for the croutons. They will still bring that crunchy texture.
For a dairy-free alternative, you can swap burrata for a nut-based cheese. This choice keeps the salad creamy without using dairy.
Seasonal Variations
Switch up the vegetables based on the season. In summer, mix in zucchini or radishes for a vibrant touch.
As fall approaches, consider adding roasted sweet potatoes or brussels sprouts. These hearty veggies make the salad warm and cozy. In winter, you can use kale or spinach for freshness during the colder months. This way, you can enjoy Panzanella all year long!
Storage Info
Storing Leftovers
To keep your Tomato Burrata Panzanella Salad fresh, store it properly. Use a sealed container for the best results. Avoid mixing all ingredients until you serve. This way, the croutons stay crunchy and the tomatoes remain juicy. I recommend using glass containers; they do not retain odors and are easy to clean. If you have leftover dressing, store it separately in a small jar.
Reheating Tips
You may want to restore the crispness of your croutons. To do this, preheat your oven to 350°F (175°C). Spread the croutons on a baking sheet. Bake for about 5-7 minutes until they are warm and crispy again. This helps revive that delicious crunch without making them soggy.
Shelf Life
The salad is best eaten right away, but you can store it for up to two days. After two days, the ingredients may lose their texture and flavor. So, enjoy it soon for the best taste!
FAQs
What is Panzanella Salad?
Panzanella salad is a classic Italian dish. It started in Tuscany, where people made it to use old bread. The salad has simple, fresh ingredients. It usually includes tomatoes, onions, and stale bread. You mix these with olive oil and vinegar. The bread soaks up the tomato juices. This gives the salad a great flavor. It’s colorful and full of texture. Heirloom tomatoes add a special touch with their different colors.
Can I prepare the salad in advance?
You can prep some parts early. Cut the tomatoes and onions ahead of time. Store them in the fridge. You can also make the dressing in advance. Just mix the olive oil and balsamic vinegar. Keep it in a jar. The stale ciabatta can be toasted a few hours before. However, wait to mix everything until right before serving. This keeps the bread crispy and the salad fresh.
What can I substitute for burrata?
If you can’t find burrata, try fresh mozzarella. It has a similar creamy taste. For vegan options, use avocado or a nut-based cheese. These give a rich flavor without dairy. You can also skip cheese entirely. The salad will still taste great with the fresh veggies and dressing.
This blog post covered all you need to know about making a fresh Panzanella salad. You learned about the best ingredients, like juicy heirloom tomatoes and creamy burrata. I shared step-by-step instructions and helpful tips for great flavor. Don’t forget the variations to suit your taste, whether you want proteins or seasonal veggies. Store leftovers properly for freshness. Enjoy creating this tasty salad, and remember, it’s easy and fun to make! Your next meal can be delicious and refreshing with these tips!


![- 1 cup fresh spinach, roughly chopped - 1 cup canned or jarred artichoke hearts, drained and diced - 1 cup cream cheese, softened - ½ cup sour cream - ½ cup mayonnaise - 1 cup shredded mozzarella cheese - ½ cup grated Parmesan cheese, divided - 2 cloves garlic, minced - ½ teaspoon onion powder - ½ teaspoon red pepper flakes (optional) - Salt and freshly cracked black pepper to taste I love gathering my ingredients before I start cooking. It makes the process smooth and fun. For this creamy spinach and artichoke dip, I use fresh spinach and canned artichokes. The fresh spinach adds a nice crunch. The artichokes bring a unique flavor that pairs perfectly with the creaminess of the cheeses. You want your cream cheese soft, so set it out ahead of time. The sour cream and mayonnaise keep the dip smooth and rich. I use mozzarella for its stretchy texture and Parmesan for a sharp bite. Don’t forget the garlic! It adds a lovely aroma and depth. The onion powder gives a subtle sweetness. If you like a little heat, add red pepper flakes. Finally, season with salt and freshly cracked black pepper to taste. These ingredients come together to create a delightful dish that everyone will love. Check out the Full Recipe for complete steps to bring this dip to life! - Preheat the oven to 350°F (175°C). This step is key for even cooking. - In a large bowl, blend cream cheese, sour cream, and mayonnaise until smooth. Use a hand mixer or spatula to get a creamy texture. - Next, fold in the chopped spinach, diced artichokes, minced garlic, and both cheeses. Use a gentle hand to keep the mix fluffy. - Transfer the mixture to a greased baking dish. Make sure it spreads evenly for nice cooking. - Sprinkle the remaining Parmesan cheese on top. This will give it a golden crust. - Bake for 25-30 minutes until it is golden and bubbly. Keep an eye on it so it doesn’t burn. Following these steps will help you create a creamy spinach and artichoke dip that is sure to impress. For the complete recipe, check out the [Full Recipe]. - Use full-fat cream cheese and sour cream. This makes the dip rich and smooth. - Add a splash of heavy cream for extra richness. This enhances the creamy texture. - Substitute Greek yogurt for sour cream and mayo. This keeps the dip creamy with less fat. - Use low-fat cheese options. This helps cut calories while still keeping flavor. These tips can help you tailor the dip to your liking. Try them out for a new twist! If you want the full recipe, check out the link. {{image_4}} You can give your dip a fun twist. First, try adding cooked bacon or sausage. This addition makes the dip heartier and adds a nice smoky flavor. Another option is to spice things up. Chopped jalapeños or a splash of hot sauce can bring some heat. This adds a kick that many guests will love. Feel free to mix up your greens. You can replace spinach with kale or Swiss chard. Both greens taste great and add a different texture. For cheese lovers, try experimenting with different types of cheese. Feta adds a tangy flavor, while cheddar gives a sharp taste. These swaps can change the dip's flavor profile entirely, making it uniquely yours. For the complete recipe, check the Full Recipe. Store any leftovers in an airtight container for up to 3 days. Make sure to let the dip cool before sealing it. This helps keep the dip fresh and tasty for your next snack. When you want to enjoy it again, simply reheat it in the oven or microwave. If you have more dip than you can eat, freeze it! Place the dip in a freezer-safe container for up to 2 months. To enjoy it later, just thaw it in the refrigerator overnight. Before baking, stir it well and add a little bit of cream if it looks dry. This way, you'll have a delicious dip ready to bake whenever you want. Check the [Full Recipe] for more details on how to prepare this tasty treat! You can prepare the dip and store it in the refrigerator before baking. This makes it easy to serve later. Just mix all the ingredients and put them in a dish. Cover the dish tightly with plastic wrap or a lid. When you are ready, bake it straight from the fridge. Yes, you can enjoy it cold as a spread too. This dip tastes great on crackers or bread. Just let it chill in the fridge until you are ready to serve. Cold or hot, it’s delicious! This dip pairs well with many snacks. It’s great with tortilla chips for a crunchy bite. You can also use sliced baguette for a softer touch. Fresh vegetable sticks add a nice crunch and color. Try carrots, celery, or bell peppers for a healthy option. This blog post explored a delicious spinach and artichoke dip. We covered all the key ingredients, simple steps, and tips for making it your own. You learned how to make it creamier and healthier, plus fun variations to try. In the end, this dip is perfect for sharing at any gathering. It’s easy, tasty, and can suit any flavor choice. Enjoy making it your way!](https://joymealplan.com/wp-content/uploads/2025/05/215b829f-066f-42c4-87e7-302b3fd8aa81-768x768.webp)