
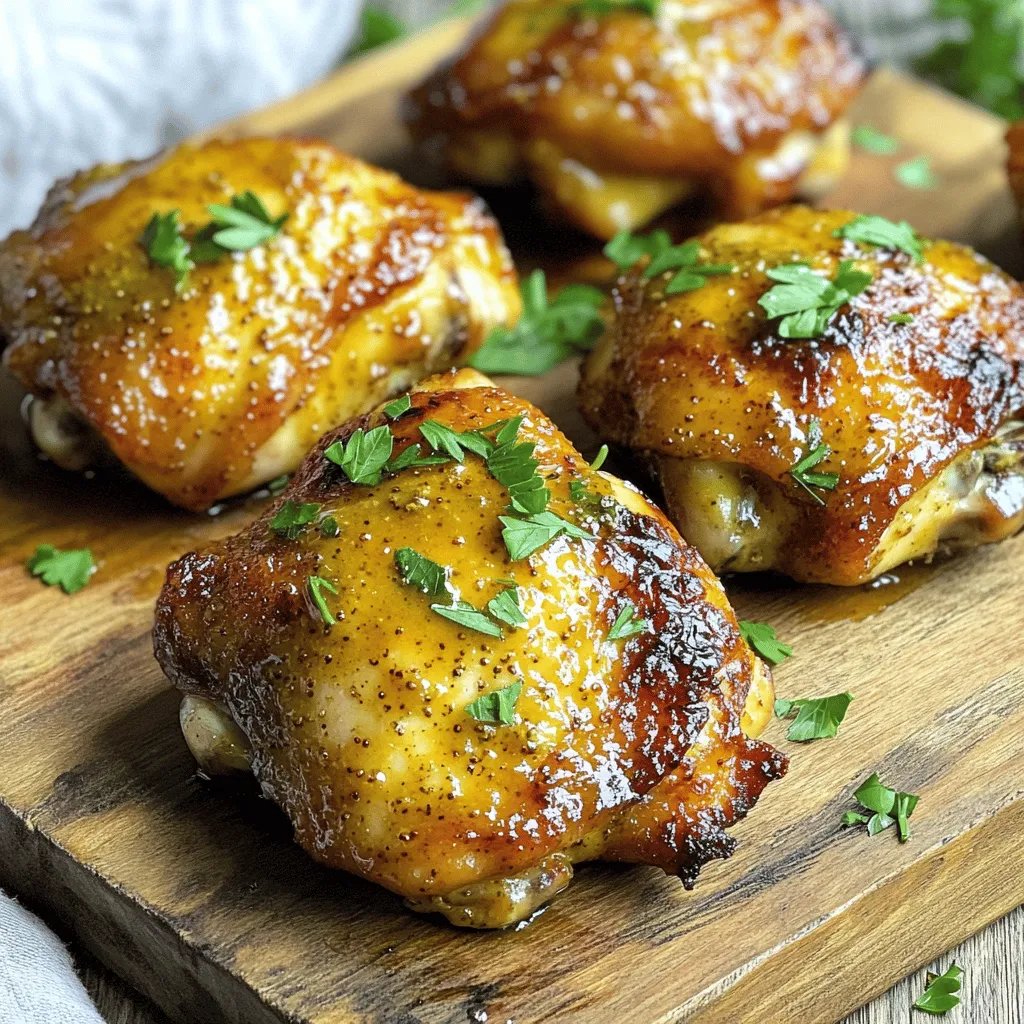
Air Fryer Honey Dijon Chicken Thighs Flavor Boost
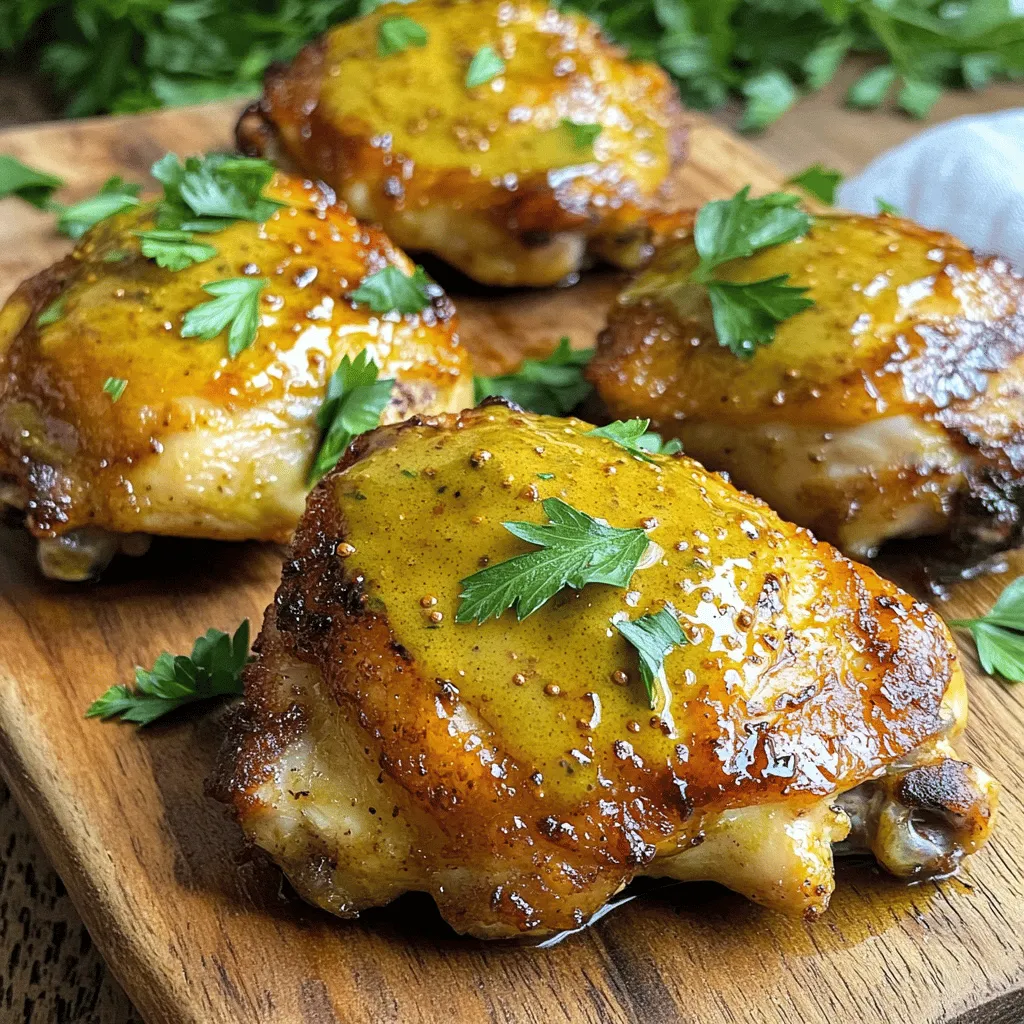
Are you ready to take your weeknight dinners to a whole new level? This Air Fryer Honey Dijon Chicken Thighs recipe is packed with flavor, easy to make, and uses just a handful of ingredients. You’ll love the sweet and tangy taste that comes from the honey and Dijon mustard blend. If you want quick, tasty chicken that pleases everyone, keep reading! Let’s get cooking!
Ingredients
Main Ingredients
– 4 skinless and boneless chicken thighs
– 3 tablespoons honey
– 2 tablespoons Dijon mustard
– 2 tablespoons extra virgin olive oil
– 2 cloves garlic, finely minced
The main ingredients create a tasty base for our dish. Chicken thighs are juicy and tender, perfect for air frying. Honey adds a natural sweetness, while Dijon mustard brings a nice tang. The olive oil helps the chicken crisp up. Garlic adds depth to the flavors.
Seasoning and Herbs
– 1 teaspoon dried thyme
– 1 teaspoon smoked paprika
– Salt and freshly ground black pepper, to taste
Seasoning is key to great flavor. Dried thyme gives an earthy note that complements the chicken. Smoked paprika adds a hint of warmth and smoke. Salt and black pepper enhance all the flavors, making everything pop.
Optional Garnish
– Fresh parsley, chopped (for garnish, optional)
Fresh parsley adds color and freshness. It brightens up the dish and makes it look appealing. A simple sprinkle can take your meal from good to great.
Step-by-Step Instructions
Preparing the Marinade
To start, gather your ingredients. You will need honey, Dijon mustard, olive oil, minced garlic, and spices. In a medium mixing bowl, add the honey, Dijon mustard, olive oil, minced garlic, dried thyme, smoked paprika, salt, and black pepper. Whisk these ingredients together until they are well-blended. This marinade is key to making your chicken packed with flavor.
Marinating the Chicken
Next, it’s time to marinate the chicken. Take your skinless and boneless chicken thighs and coat them in the marinade. Use your hands or a spatula to ensure each piece is covered. This step is crucial for flavor. Once coated, cover the bowl with plastic wrap or a lid. Place it in the fridge for at least 30 minutes. For the best taste, let it sit for up to 2 hours. The longer the chicken marinates, the more flavor it absorbs.
Cooking the Chicken
Now, let’s cook the chicken. Preheat your air fryer to 380°F (190°C). This ensures that the chicken cooks evenly. After preheating, remove the chicken from the fridge. Place the marinated chicken thighs in the air fryer basket in a single layer. Don’t crowd the basket; this allows hot air to circulate and gives you that crispy finish. Cook the chicken for 18–20 minutes. Flip the thighs halfway through the cooking time for even browning. They should turn golden and crispy and reach an internal temperature of 165°F (75°C).
Tips & Tricks
Achieving Optimal Flavor
To get the best taste, marinate your chicken thighs for up to 2 hours. This time helps the flavors seep in deeply. If you rush this step, the chicken might taste plain. After cooking, let your chicken rest for about 5 minutes. This resting lets the juices spread evenly, giving you juicy bites.
Ensuring Proper Cooking
Always check the internal temperature of your chicken. It should reach 165°F (75°C) to be safe and fully cooked. If you skip this step, you risk undercooked meat. Also, avoid overcrowding the air fryer basket. Too many pieces at once can lead to uneven cooking. Each piece needs space for the hot air to circulate.
Enhancing Texture
For a perfect, golden, and crispy exterior, make sure to flip the chicken halfway through cooking. This simple step helps both sides brown nicely. If you prefer your chicken more or less cooked, adjust the cooking time. Keep an eye on it; small changes can make a big difference in texture.
Variations
Alternative Marinades
You can change the flavor of your chicken by trying different marinades. Here are two fun ideas:
– Adding different herbs and spices: You can use fresh rosemary or oregano. Both herbs add a nice touch to the honey Dijon mix. If you like heat, add a pinch of red pepper flakes for a spicy kick.
– Introducing citrus flavors: Adding orange or lemon juice can make your dish bright and zesty. Just mix the juice with your marinade. It adds a fresh twist and balances the sweetness of the honey.
Modifying Cooking Methods
If you want to switch things up, try these cooking methods:
– Grilling vs. air frying: Grilling gives the chicken a smoky flavor. You can marinate the chicken as usual and then grill it for about 6-7 minutes on each side.
– Oven-baking option: You can also bake your chicken. Preheat your oven to 400°F (200°C). Place the marinated chicken on a baking sheet. Bake for 25-30 minutes, flipping halfway for golden skin.
Serving Suggestions
Pair your chicken with tasty sides to make a full meal:
– Suggested side dishes: Roasted vegetables are a great choice. Steamed broccoli or a fresh garden salad work well too. These add color and crunch.
– Creative plating ideas: For a beautiful plate, arrange the chicken on a large platter. Drizzle extra honey on top and sprinkle with parsley. This makes your dish look special and inviting!
Storage Info
Storing Leftovers
Store your honey Dijon chicken thighs in an airtight container. This keeps them fresh. Make sure to cool them first. Place the container in the fridge. They will last for up to three days. The flavors will still be great after a day or two.
Reheating Tips
To reheat, use the air fryer. Set it to 350°F (175°C). Cook for about 5-7 minutes. This helps maintain the crispy texture. You can also use a microwave. But be careful, as it can make the chicken soggy. For best results, stick to the air fryer.
Freezing Suggestions
You can freeze the marinated chicken. Just place it in a freezer bag. Remove as much air as possible. It can last for up to three months. To thaw, move it to the fridge overnight. You can also cook from frozen. Just add a few extra minutes to the cooking time in the air fryer.
FAQs
How long do I need to marinate the chicken?
For the best flavor, marinate the chicken for at least 30 minutes. I find that if you let it sit for 2 hours, the taste becomes even better. The honey and Dijon mustard soak into the chicken, making it super tasty.
Can I use bone-in chicken thighs?
Yes, you can use bone-in chicken thighs. Just remember, they will take longer to cook. I recommend adding about 5 to 10 minutes to the cooking time. Make sure to check that the internal temperature reaches 165°F (75°C) for safety.
What should I serve with honey Dijon chicken thighs?
These chicken thighs pair well with many sides. I like to serve them with a fresh salad or roasted veggies. You could also add some rice or mashed potatoes. For a fun twist, try a light drizzle of extra honey on your sides!
In this article, we covered the key steps for making honey Dijon chicken thighs. We discussed choosing main ingredients, preparing the marinade, and cooking tips. You learned how to achieve great flavor and texture while exploring variations and storage tips. This dish is simple and delicious. Experiment with different herbs or cooking methods. With the right care, your meals can impress everyone. Enjoy every bite of your honey Dijon chicken thighs!


![- 2 cups cooked chicken, shredded - 1 cup canned black beans, rinsed and drained - 1 cup fresh or frozen corn kernels The main ingredients create the heart of the chicken enchiladas. First, shredded chicken offers a tender and juicy base. I love using rotisserie chicken for ease. Black beans add protein and fiber, making the meal hearty. Corn brings sweetness and a pop of color. Each ingredient plays a role in making this dish satisfying. - 1 small red onion, finely chopped - 2 cloves garlic, minced - 1 teaspoon ground cumin - 1 teaspoon chili powder Aromatics and seasonings elevate the flavor. The red onion adds a sweet, savory taste. Garlic brings depth and aroma that fills your kitchen. Cumin provides a warm, earthy note. Chili powder adds a gentle kick. These elements create a rich base for the enchiladas. - 8 small corn tortillas - 2 cups shredded cheese (cheddar or Mexican blend) - ¼ cup fresh cilantro, chopped (for garnish) Tortillas hold everything together. I prefer corn tortillas for their authentic flavor. They warm up nicely, making them easy to roll. Cheese melts beautifully, creating a creamy topping. I recommend using a blend for extra flavor. Fresh cilantro adds brightness and a fresh touch. Together, these elements create a delightful finish to your enchiladas. For the full recipe, check out the Spicy Chicken Enchiladas. - Preheat your oven to 350°F (175°C). - Sauté red onion and garlic until fragrant. Start by heating a drizzle of oil in a large skillet over medium heat. Add the finely chopped red onion. Sauté for about 3-4 minutes until the onion turns soft and clear. Then, add the minced garlic and cook for another minute. This step makes your kitchen smell amazing and sets the stage for great flavor. - Combine chicken, black beans, corn, onion-garlic mixture, salsa, cumin, and chili powder. In a big mixing bowl, add the shredded chicken, rinsed black beans, and corn. Pour in the sautéed onion and garlic mixture, along with your choice of salsa. To spice it up, add cumin and chili powder. Mix everything well. This filling is packed with protein and flavor, making your enchiladas both tasty and hearty. - Warm tortillas and fill with chicken mixture. - Roll and arrange in baking dish. Now, warm the corn tortillas in a dry skillet or microwave. This makes them soft and easy to roll. Take about ¼ cup of the chicken mixture and place it in the center of each tortilla. Sprinkle a little cheese on top, then roll them up tightly. Place the rolled tortillas seam-side down in a greased 9x13 inch baking dish. This step is where the magic begins! - Cover with salsa and cheese, bake with foil, then uncovered. Pour any remaining salsa over the top of the enchiladas. Sprinkle the rest of the cheese evenly on top. Cover your baking dish with aluminum foil to keep the moisture in. Bake in the preheated oven for 20 minutes. After that, remove the foil and bake for another 10 minutes. You want the cheese to melt and bubble. Once done, let the enchiladas cool for a few minutes. Garnish with fresh cilantro before serving. This adds a fresh flavor and a lovely touch. Enjoy your homemade chicken enchiladas! For more detailed steps, check out the Full Recipe. - Ensure tortillas are pliable to prevent cracking. Warm them in a skillet or microwave. - Use a mix of cheeses for more flavor. Try combining cheddar and pepper jack. - Serve with sour cream and additional cilantro for extra zest. - Integrate sides like rice or refried beans to complete the meal. - Overfilling tortillas can make them hard to roll. Stick to ¼ cup of filling. - Not letting them cool before serving can lead to a messy plate. Give them a few minutes. {{image_4}} You can make your chicken enchiladas even better for you. - Swap out cheese for a low-fat version. This change cuts calories. - Use whole wheat tortillas for extra fiber. This option boosts nutrition. Want to spice things up? Add some fun flavors! - Add jalapeños for extra heat. This will make your dish lively! - Experiment with different salsas. Try mild, medium, or spicy. Each adds a unique taste. Need to adjust for dietary needs? No problem! - Make it vegetarian by using black beans only. This keeps it hearty and filling. - Use corn tortillas for gluten-free options. They work perfectly in this dish. Feel free to explore these variations and make the recipe your own! To keep your chicken enchiladas fresh, store them in an airtight container. This helps prevent moisture loss and keeps flavors intact. Place them in the fridge where they can stay good for about 3-4 days. Label the container with the date, so you remember when you made them. If you want to save some for later, freezing is a great option. Wrap each enchilada tightly in foil before placing them in a freezer bag. This protects them from freezer burn. They can last for up to 3 months in the freezer. When you're ready to eat, simply thaw them overnight in the fridge. For the best taste and texture, reheat your enchiladas in the oven. Preheat your oven to 350°F (175°C). Place the enchiladas in a baking dish, cover with foil, and heat for about 20-25 minutes. Remove the foil for the last 5 minutes to crisp up the cheese. Enjoy them warm! Chicken enchiladas last about 3-4 days when stored properly. Keep them in an airtight container to maintain freshness. Always check for any signs of spoilage before eating leftovers. Yes, you can assemble chicken enchiladas ahead of time. Just prepare them and place them in the fridge before baking. This is a great way to save time, especially on busy days. You can add many tasty toppings to your enchiladas. Some options include: - Avocado - Guacamole - Green onions - Olives Feel free to get creative with your toppings. They can add color and flavor. You can easily customize this recipe. Adjust the spices to fit your taste. Add your favorite vegetables to the filling, like bell peppers or spinach. This makes the dish more personal and fun. Yes, you can use a slow cooker for this dish. Cook the filling in the slow cooker first. Then, assemble the enchiladas and bake them as usual. This method adds rich flavors and makes cooking easier. For the full recipe, check [Full Recipe]. Chicken enchiladas are simple and fun to make. You need cooked chicken, black beans, corn, and cheese. Follow the steps to prepare, mix, and bake them to perfection. Use tips to avoid common mistakes and enjoy variations for your taste. Remember, leftovers are easy to store and reheat. You can customize this dish with your favorite toppings too. Enjoy this tasty meal with friends and family!](https://joymealplan.com/wp-content/uploads/2025/07/08f715d1-a8ab-4086-9fca-7ff252efa8d5-768x768.webp)