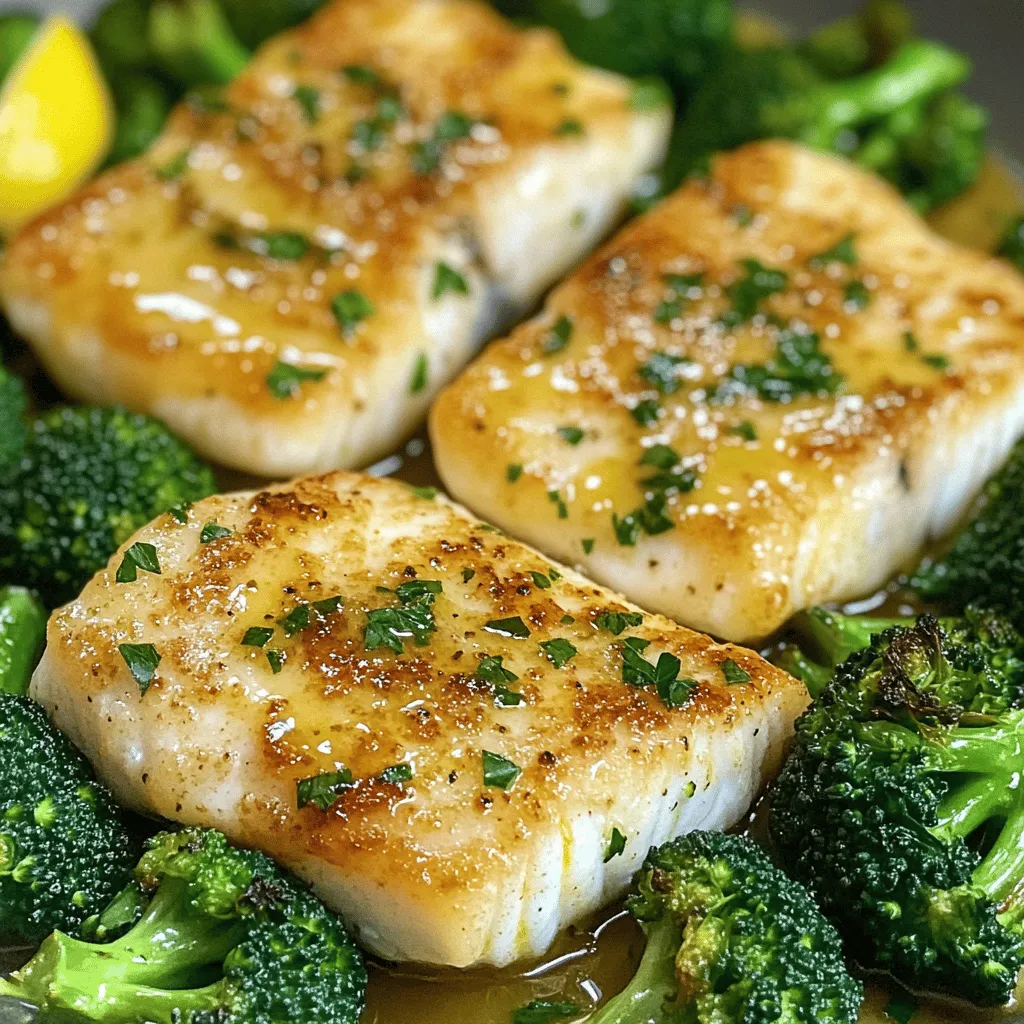
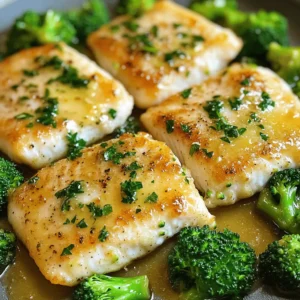
Sheet Pan Garlic Butter Tilapia & Broccoli Delight

Looking for a quick and tasty dinner? My Sheet Pan Garlic Butter Tilapia & Broccoli Delight recipe is here to save the day! This dish mixes tender tilapia and vibrant broccoli, all drenched in a rich, buttery garlic sauce. In under 30 minutes, you can enjoy a flavorful meal that is easy to make and clean up. Ready to dive into this deliciousness? Let’s get started!
Ingredients
List of Ingredients
– 4 tilapia fillets
– 3 cups broccoli florets
– 4 tablespoons unsalted butter, melted
– 4 cloves garlic, minced
– 1 teaspoon lemon zest (finely grated)
– 2 tablespoons fresh lemon juice
– 1 teaspoon smoked paprika
– Salt and freshly ground black pepper to taste
– Fresh parsley, chopped (for garnish)
Suggested Quality Tips for Ingredients
To make your dish shine, pick fresh ingredients. Choose bright green broccoli with firm florets. Look for tilapia fillets that are moist and smell clean. Always use unsalted butter for better control over saltiness. Fresh garlic enhances flavor, so skip the jarred version. Use fresh lemon for the best juice and zest. Smoked paprika adds depth, so don’t substitute it lightly.
Substitutions for Key Ingredients
If you can’t find tilapia, use another white fish like cod or haddock. For a dairy-free option, swap unsalted butter with olive oil or vegan butter. If you don’t have fresh garlic, garlic powder works but use less. You can replace lemon with lime for a different flavor. If you want more color, add bell peppers or carrots to the mix.
Step-by-Step Instructions
Preparation and Cooking Preheating
First, preheat your oven to 400°F (200°C). This step is key for even cooking. While the oven heats, line a large sheet pan with parchment paper. This makes cleanup easy and helps with sticking.
Mixing the Garlic Butter Sauce
Next, grab a medium mixing bowl. Add the melted butter, minced garlic, lemon zest, lemon juice, smoked paprika, salt, and black pepper. Whisk until all the ingredients blend well. This garlic butter sauce is the star of the dish. It adds flavor to both the fish and the broccoli.
Arranging on the Sheet Pan
Now it’s time to arrange the food. Place the tilapia fillets on one side of the sheet pan. Use a basting brush or spoon to coat them with half of the garlic butter sauce. Make sure each fillet gets a nice layer.
On the other side, spread out the broccoli florets. Drizzle the remaining garlic butter sauce over them. Toss the florets to coat them evenly. This will ensure every bite is tasty.
Now, you are ready to bake. Place the sheet pan in the preheated oven. Bake for 15-20 minutes. The tilapia is done when it flakes easily with a fork. The broccoli should be tender and slightly caramelized.
After baking, take the sheet pan out of the oven. Let it cool for a few minutes. Just before serving, sprinkle fresh chopped parsley over the tilapia and broccoli. This adds color and freshness. Enjoy your meal!
Tips & Tricks
Cooking Time Tips for Perfect Tilapia
To cook tilapia just right, aim for 15-20 minutes in the oven. The fish is done when it flakes easily with a fork. To check, gently poke the thickest part of the fillet. If it breaks apart easily, you’re good to go. If you like a bit of char, add a minute or two to the cooking time. Just keep an eye on it to avoid overcooking.
Broccoli Cooking Tips for Optimal Flavor
For the best flavor, spread the broccoli in a single layer on the pan. This helps it roast evenly. Toss it well with the garlic butter mix to coat every piece. This adds a nice depth of flavor. If you want a little crunch, pull it out when it is tender but still bright green.
How to Avoid Common Mistakes
One common mistake is overcrowding the pan. Leave space between the tilapia and broccoli. This helps them cook properly. Another tip is to ensure the garlic doesn’t burn. If you notice it browning too fast, cover the pan loosely with foil. Lastly, always taste for seasoning before serving. Add more salt or lemon juice if needed.
Variations
Adding Other Vegetables
You can make this dish more colorful and nutritious. Try adding bell peppers, carrots, or zucchini. These veggies cook well with tilapia and broccoli. Just chop them to a similar size as the broccoli. Toss them in the garlic butter sauce like the broccoli. This adds more flavor and texture to your meal.
Alternative Flavor Profiles
You can switch up the flavor with herbs and spices. Instead of smoked paprika, use chili powder for a kick. Fresh herbs like dill or thyme can add a nice twist too. You can also try a splash of soy sauce for a savory touch. Lemon pepper seasoning gives a bright and zesty flavor. Experiment and find what you love!
Different Cooking Methods
While baking is easy, other methods can be fun too. You can grill the tilapia and broccoli for a smoky taste. Just brush them with the garlic butter and place on a hot grill. Air frying is another quick method. It keeps the fish tender and the broccoli crisp. If you prefer stovetop cooking, pan-fry the tilapia in a skillet. Just ensure the broccoli is steamed or sautéed first. Each method gives a unique flavor and texture.
Storage Info
How to Properly Store Leftovers
After your meal, let the tilapia and broccoli cool. Place the leftovers in an airtight container. Make sure to cover the dish tightly. This step keeps the food fresh for later. You can store it in the fridge for up to three days. If you want to keep it longer, consider freezing.
Reheating Tips for Best Results
When you are ready to eat the leftovers, preheat your oven to 350°F (175°C). Place the tilapia and broccoli on a baking sheet. Cover it with foil to keep moisture in. Heat for about 10-15 minutes. This method helps maintain the dish’s flavor and texture. You can also reheat in the microwave. Use a microwave-safe plate and cover it. Heat in short bursts to avoid overcooking.
Freezing Options and Effects on Taste
You can freeze the tilapia and broccoli, but they may lose some texture. To freeze, wrap individual portions tightly in plastic wrap. Then place them in a freezer-safe bag. Label the bag with the date. They can last up to three months in the freezer. When you thaw and reheat, the taste will still be good, but the broccoli may become softer.
FAQs
What is the best way to know if tilapia is cooked?
You can tell if tilapia is cooked by checking its color and texture. Cooked tilapia turns from a translucent pink to a white, opaque color. It should flake easily with a fork when done. If it resists flaking, it needs more time in the oven. The fish should feel firm but not dry. Always check the thickest part for even cooking.
Can I use frozen tilapia for this recipe?
Yes, you can use frozen tilapia for this recipe. Just make sure to thaw it first. Place the frozen fillets in the fridge overnight or run them under cold water for faster thawing. Pat them dry before seasoning. This helps the garlic butter stick better and enhances the flavor.
How can I make this recipe low-carb?
To make this recipe low-carb, focus on the tilapia and broccoli. You can skip the butter or use a low-carb oil, like olive oil. Add more low-carb veggies, such as zucchini or bell peppers, to the mix. This keeps your meal balanced while reducing carbs.
Is tilapia a healthy choice?
Yes, tilapia is a healthy choice. It is low in calories and high in protein. It contains essential nutrients like omega-3 fatty acids, which are good for heart health. Tilapia is also low in saturated fat, making it a smart option for a healthy meal. Just be sure to source it from responsible suppliers for the best quality.
To wrap up, we explored the key ingredients for a great tilapia dish. I shared tips for selecting quality items and suggested substitutions. Then, I provided step-by-step cooking instructions, from preheating to mixing the sauce.
We also discussed cooking tips for tilapia and broccoli to enhance flavor. You learned variations to change the dish using different veggies or cooking methods. Finally, I covered how to store leftovers for future meals.
With these insights, you can now make a delicious tilapia meal that fits your taste.
![- 1 pound baby carrots (or 4 medium-sized regular carrots, sliced into uniform sticks or rounds) - 2 tablespoons unsalted butter - 3 tablespoons pure maple syrup - 1 tablespoon packed brown sugar - 1 teaspoon ground cinnamon - Salt and freshly cracked black pepper to taste - Fresh parsley, finely chopped, for garnish Each serving of maple glazed carrots has about 120 calories. You get roughly 30 grams of carbohydrates, with 15 grams of sugar. The dish has 4 grams of fat and 3 grams of fiber. These sweet carrots pack lots of flavor without too many calories, making them a great side. You might want to switch up ingredients for different diets. For a vegan option, use plant-based butter. If you want to lower sugar, try agave syrup or honey. Each choice can change the taste, but they all work well. To start, wash your carrots well. If you have baby carrots, just rinse them under cold water. For regular carrots, peel them first. Slice them into uniform sticks or rounds. This helps them cook evenly. Aim for pieces about the same size. This step is key for a great dish. Now, let’s cook! Heat a large skillet over medium heat. Add the unsalted butter and let it melt completely. Swirl the pan gently to coat the bottom. Once the butter is bubbly, add your prepared carrots. Sauté them for about 5 minutes. Stir occasionally to get even cooking. You want the carrots to start softening but not fully cooked yet. Next, sprinkle brown sugar and ground cinnamon over the carrots. Mix everything well so each carrot gets coated. This adds a sweet and warm flavor. Now, drizzle the pure maple syrup over the carrots. Cook for another 5-7 minutes, stirring often. This allows the glaze to thicken and the carrots to become tender. When your carrots are tender, season them with salt and black pepper to taste. Give everything one last gentle toss to combine. Carefully remove the skillet from the heat. Transfer the glazed carrots to a serving dish. Make sure to drizzle any leftover syrup from the skillet over the top. To add a finishing touch, garnish with finely chopped fresh parsley. This not only adds color but also a fresh taste. Serve your sweet maple glazed carrots warm. They look great on the plate and taste even better. You can find the complete recipe in the [Full Recipe]. To enhance the sweetness and aroma of your maple glazed carrots, always use pure maple syrup. This syrup has a rich taste that makes your dish shine. Combine it with a bit of brown sugar and cinnamon. This mix adds depth and warmth to the carrots. You can also try adding a pinch of nutmeg for extra flavor. This small tweak can make a big difference. For best results, use a large, heavy skillet. A cast-iron or non-stick pan works well. These types of pans heat evenly and help the carrots cook perfectly. If you have a sauté pan with high sides, that’s great too. This design keeps the glaze in the pan and helps it thicken faster. Maple glazed carrots pair well with many meals. They are a perfect side for roasted chicken or pork. You can also serve them with grilled fish for a fresh taste. If you want a vegetarian option, try them with quinoa or lentils. They add a sweet touch that balances savory dishes. For a festive look, serve them alongside other colorful veggies. For the full recipe, check out the Sweet Maple Glazed Carrots recipe above! {{image_4}} You can make your maple glazed carrots even better by adding other veggies. Try using baby potatoes, parsnips, or sweet potatoes. Cut them into similar sizes as the carrots for even cooking. This mix adds more color and flavor to your dish. When you add more vegetables, adjust the cooking time to ensure everything cooks well. Want to change the flavor? You can add herbs or spices to make your dish unique. Try adding fresh thyme or rosemary for an earthy taste. A pinch of nutmeg can also give a warm hint. If you like heat, sprinkle in some red pepper flakes. Mix and match these additions to find what you enjoy most. If you want to try different sweeteners, you have options! Honey works well and gives a floral note. Brown sugar adds a deeper flavor. Agave syrup is also a great choice for a lighter sweetness. Each sweetener will change the taste, so feel free to experiment with what you have on hand. For the full recipe, check the earlier section. To keep your maple glazed carrots fresh, store them in an airtight container. This helps prevent moisture loss and keeps them tasty. Place the cooled carrots in the container and seal tightly. You can keep them in the fridge for up to four days. If you want to enjoy them later, consider the next steps. When you are ready to eat the leftovers, you want to reheat them gently. The best way is to use a skillet. Heat the skillet over low heat. Add a splash of water or broth to help steam the carrots. Stir them often until they are warmed through. This method helps keep the carrots soft and the glaze flavorful. Avoid using a microwave, as it can make them mushy. If you want to store your maple glazed carrots for a long time, freezing is a good option. First, let them cool completely. Then, place the carrots in a freezer-safe bag or container. Remove as much air as possible to prevent freezer burn. They can last up to three months in the freezer. To use them, thaw in the fridge overnight before reheating. To make maple glazed carrots vegan, swap the butter for a plant-based oil or vegan butter. You can use coconut oil for a hint of tropical flavor. This keeps the dish rich and tasty while staying true to vegan standards. Remember to check the maple syrup as well; most brands are naturally vegan. Yes, you can use frozen carrots. They are convenient and can save time. However, frozen carrots may have a different texture than fresh ones. Thaw them first and drain excess water. Sauté them for a bit longer to ensure they cook through. Fresh carrots bring more crunch and flavor, but frozen can still work well in a pinch. To ensure your glazed carrots are tender, cook them over medium heat. Start with 5 minutes of sautéing before adding the glaze. After adding the maple syrup, cook for another 5-7 minutes. Stir often to coat them evenly. The key is to keep an eye on them and test for tenderness with a fork. Aim for a soft texture without losing their shape. This post covered how to make delicious maple glazed carrots. We discussed the key ingredients and their nutritional value. You learned tips for cooking and how to enhance flavors. I also shared ideas for variations and how to store your leftovers properly. Making these carrots is easy and fun. With simple swaps, you can adjust for dietary needs. Enjoy this dish as a side or experiment with different flavors. Happy cooking!](https://joymealplan.com/wp-content/uploads/2025/06/e145556d-f1e0-4204-89d9-54022a16ffd1-768x768.webp)