Apple Cinnamon Overnight Oats Easy and Healthy Recipe
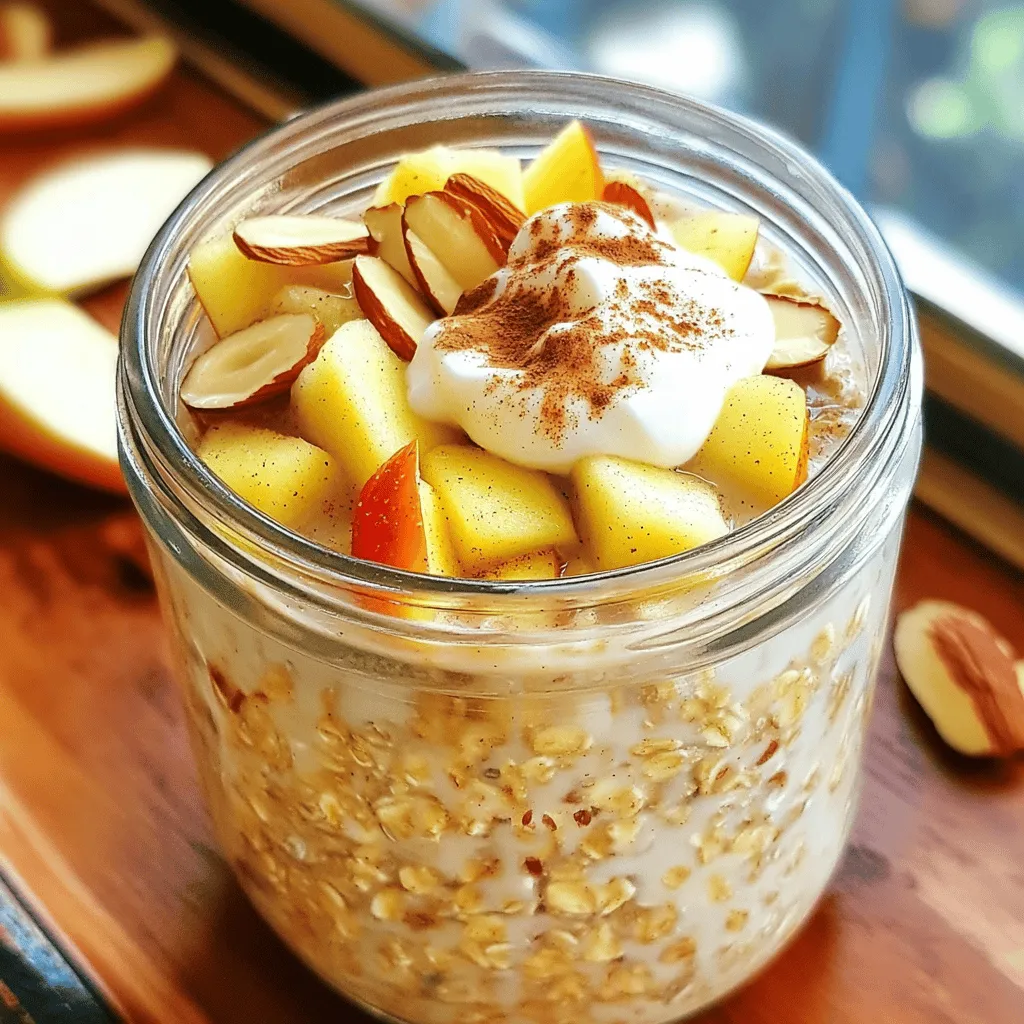
Looking for a simple, healthy breakfast? My Apple Cinnamon Overnight Oats are perfect for you! With just a few easy ingredients, you can create a tasty meal that saves time and keeps you full. In this recipe, I’ll walk you through the steps and share my favorite tips for customizing your oats. Let’s dive into making your mornings better, one spoonful at a time!
Ingredients
Main Ingredients List
To make Apple Cinnamon Overnight Oats, you need these simple ingredients:
– 1 cup rolled oats
– 1 ½ cups almond milk (or any milk you like)
– 1 medium apple, diced (try sweet types like Honeycrisp or Fuji)
– 1 tablespoon chia seeds
– 1 tablespoon maple syrup (you can swap this for honey)
– 1 teaspoon ground cinnamon
– ½ teaspoon vanilla extract
– A pinch of salt
Ingredient Substitutions
You can switch some ingredients if you need. Here are a few easy swaps:
– Milk: Use soy milk, oat milk, or regular cow’s milk instead of almond milk.
– Sweetener: Instead of maple syrup, use agave syrup or coconut sugar.
– Chia seeds: You can replace chia seeds with ground flax seeds for a different texture.
Optional Toppings for Customization
Make your oats even more special with these toppings:
– Sliced almonds for a crunchy bite
– Extra apple slices for freshness
– A dollop of your favorite yogurt for creaminess
– A sprinkle of extra cinnamon for a flavor boost
Feel free to mix and match these ideas to make your breakfast just the way you like it!
Step-by-Step Instructions
Preparation Steps Explained
Start by measuring 1 cup of rolled oats. Pour them into a large mixing bowl. Next, add 1 ½ cups of almond milk. You can use any milk you like. Then, add 1 tablespoon of chia seeds for fiber and nutrition. Measure 1 tablespoon of maple syrup or honey for sweetness. Sprinkle in 1 teaspoon of ground cinnamon for flavor. Don’t forget the ½ teaspoon of vanilla extract and a pinch of salt to enhance taste.
Mixing and Folding Techniques
Now, grab a spoon or spatula. Stir the mixture well. You want all the ingredients to blend fully. This step is key for flavor. After mixing, gently fold in the diced apple. Use a spatula to keep the apple pieces intact. This way, you get bites of fresh fruit in every spoonful.
Chilling and Serving Instructions
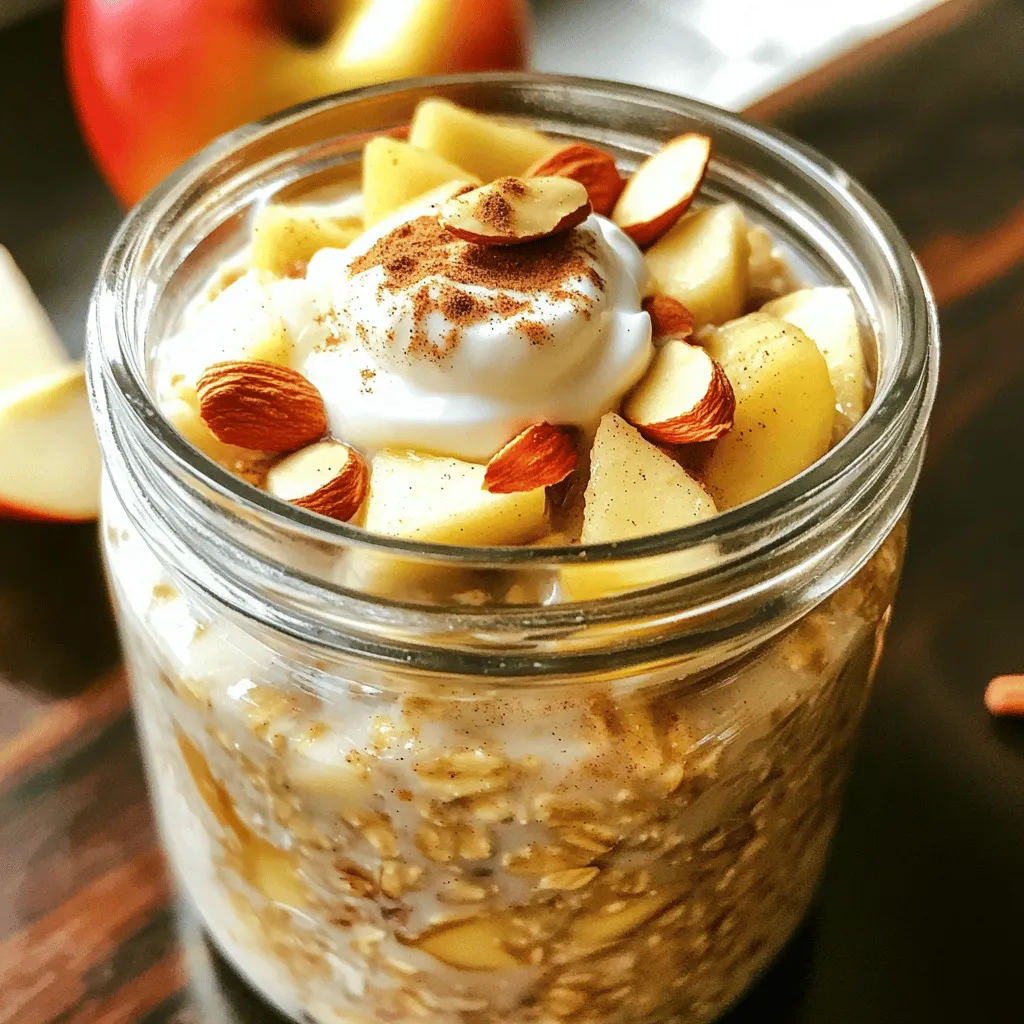
Once mixed, divide the oat mixture into two jars or containers. Seal them tightly to avoid spills. Place the jars in the fridge overnight or for at least 6 hours. This time lets the oats soak and swell. In the morning, take them out. Stir well, and if needed, add a splash of almond milk for creaminess. Now, it’s time to serve! Top your oats with sliced almonds, more apple slices, or a spoon of yogurt. Enjoy this easy and healthy treat!
Tips & Tricks
Best Practices for Creamy Oats
To make your oats creamy, always use rolled oats. They soak up the liquid well. Mix your oats with milk and chia seeds. Let the mixture sit overnight. This helps everything blend together smoothly. If you want it even creamier, add a splash of milk in the morning. Stir it well before serving for that perfect texture.
How to Achieve the Perfect Sweetness
Finding the right sweetness is easy! Use maple syrup for a nice flavor. If you prefer honey, that works too. The type of apple matters. Sweet apples like Honeycrisp or Fuji add natural sweetness. Taste your mixture before chilling. Adjust the sweetness if needed, so it’s just right for you.
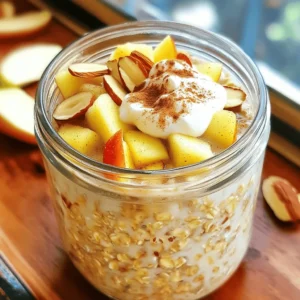
Recipe Presentation Ideas
Make your oats look appealing! Use clear jars for serving. Layer the oats and toppings to show off colors. Add sliced almonds and apple slices on top. A sprinkle of cinnamon adds a nice touch. This not only looks good, but it also makes your breakfast more fun to eat!
Variations
Flavor can take your apple cinnamon overnight oats to new heights. You can easily add spices like nutmeg or pumpkin spice. Just a dash can give a warm, cozy taste. Try mixing in a bit of cardamom for a unique twist. Experiment with these spices to find your favorite flavor blend.
Dietary needs are important too. You can make this recipe vegan by using almond milk and maple syrup. Both options fit well without any dairy. If you need gluten-free oats, choose certified gluten-free rolled oats. This ensures everyone can enjoy the dish without worry.
Seasonal fruits also add variety. In fall, swap the apple for pear. Pears add sweetness and a juicy bite. In summer, berries like strawberries or blueberries work great. They pair well with cinnamon and bring a fresh taste. You can mix and match fruits based on what is in season or what you enjoy most.
Storage Info
Storing Overnight Oats
To keep your apple cinnamon overnight oats fresh, store them in airtight containers. Glass jars work great as they are easy to clean and look nice. Ensure the lids are tightly closed. This keeps out air and moisture.
How Long They Last in the Fridge
When stored properly, these oats can last up to five days in the fridge. However, they taste best within the first three days. After that, the texture may change as the oats continue to absorb liquid. Always check for any signs of spoilage before eating.
Reheating Instructions
If you prefer warm oats, you can reheat them. Simply transfer the oats to a microwave-safe bowl. Heat them in short bursts, about 30 seconds at a time. Stir in between to ensure even heating. If they seem too thick, add a splash of almond milk to bring back creaminess. Enjoy them warm or cold!
FAQs
Can I use steel-cut oats instead of rolled oats?
Yes, you can use steel-cut oats. However, they need more time to soak. Steel-cut oats are less processed and have a chewier texture. If you use them, soak them for at least 12 hours, not just overnight. You may also need more liquid. Try using two cups of almond milk for each cup of oats.
How can I make Apple Cinnamon Overnight Oats vegan?
To make your oats vegan, use almond milk or another plant-based milk. Maple syrup is already vegan, but you can also use agave syrup. Ensure that any yogurt you add is dairy-free. You can find many great vegan yogurt options in stores.
What are the health benefits of chia seeds?
Chia seeds are tiny powerhouses. They are rich in fiber, protein, and healthy fats. These seeds help keep you full longer, which is great for breakfast. They also contain omega-3 fatty acids, which are good for your heart. Plus, chia seeds can absorb a lot of liquid, helping your oats become creamy. This makes them a perfect ingredient for overnight oats.
This blog post covered the key elements to make delicious overnight oats. You learned about the main ingredients, helpful substitutions, and tasty toppings. I explained how to prepare and chill your oats, ensuring the right texture. Remember to follow my tips for creaminess and sweetness. Don’t forget the fun variations to fit your taste and diet. Lastly, I shared storage details to keep your oats fresh. Embrace your creativity with overnight oats. Enjoy your tasty and healthy meals every day!
![- 1 ½ cups all-purpose flour - 1 cup coconut sugar - ½ cup unsweetened cocoa powder - ½ cup dairy-free chocolate chips (optional) The main ingredients in this vegan chocolate cake make it rich and delightful. The all-purpose flour provides structure. Coconut sugar adds a slight caramel flavor, enhancing the cake's taste. Unsweetened cocoa powder gives the cake its deep chocolate flavor. If you want an extra treat, add dairy-free chocolate chips. They melt beautifully and create pockets of chocolatey goodness. - Plant-based milk options - Sugar substitutes for a healthier cake - Oil alternatives If you need a milk substitute, try almond, soy, or oat milk. Each brings its unique flavor but stays creamy. For sugar, you can use maple syrup or agave nectar. They add sweetness without refined sugar. If you want to cut back on oil, use applesauce or mashed bananas. These swaps keep the cake moist while lowering fat. Each alternative keeps your cake tasty while meeting your diet needs. For a detailed look at the full recipe, check out the Full Recipe section. Grease your cake pan with a thin layer of oil. You can also line it with parchment paper. This step helps the cake come out easily after baking. Next, preheat your oven to 350°F (175°C). Preheating ensures your cake bakes evenly and rises well. Start by sifting your dry ingredients together. This process breaks up clumps and helps mix them well. Use a whisk to combine the all-purpose flour, coconut sugar, cocoa powder, baking soda, and salt. If you see clumps in the cocoa powder, sift it again. It makes your cake smoother and more delicious. Use room temperature ingredients for the best results. Cold ingredients can cause the batter to be lumpy. In a bowl, mix the almond milk, vegetable oil, vanilla extract, and apple cider vinegar. The vinegar helps the cake rise and adds a nice texture. Whisk these ingredients until they blend well. Pour the wet mixture into the dry ingredients. Stir gently until just combined. Pour the batter into your prepared pan. Bake for 30 to 35 minutes. Check for doneness by inserting a toothpick in the center. It should come out clean or with a few moist crumbs. Let the cake cool for about 10 minutes in the pan, then transfer it to a wire rack. This cooling step helps the cake set and makes it easier to frost later. For the full recipe, you can refer to the complete instructions above. To get the best texture, avoid overmixing the batter. When you mix too much, the cake can turn out dense. Just mix until the dry and wet ingredients blend. This keeps the cake light and fluffy. The temperature of your ingredients matters too. Use room temperature milk and oil. Cold ingredients can slow down the rising process, making your cake less airy. Adding spices can take your cake to the next level. A pinch of cinnamon or a dash of espresso powder adds depth. You can also try vanilla extract or almond extract for a flavor boost. For a more indulgent cake, fold in dairy-free chocolate chips. They add richness and texture that you will love. When your cake is baked and cooled, it's time to make it pretty. Lightly dust the top with powdered sugar. You can also top it with fresh berries for a pop of color. For serving, consider a dollop of coconut whipped cream. This adds flavor and impresses your guests. For the full recipe, check out the link. Enjoy the process and the delightful results! {{image_4}} You can easily change the flavor of your vegan chocolate cake. Adding fruits or nuts can make it exciting. Try folding in chopped bananas, apples, or walnuts into the batter. These additions bring a new texture and taste. You can also use different types of cocoa powder. Dark cocoa gives a richer flavor, while raw cocoa offers a lighter taste. Experiment with both to see what you like best! This cake can fit many diets. If you need a gluten-free option, swap out all-purpose flour for almond or oat flour. Both work well and keep the cake moist. If you need nut-free alternatives, use rice milk or oat milk instead of almond milk. You can also use sunflower oil instead of vegetable oil to keep it nut-free. There are fun ways to serve this cake. You can layer cakes or make cupcakes for easy sharing. Layer cakes look great and taste amazing. You can also create mini vegan chocolate cakes for individual servings. These are perfect for parties or special events. Each person gets their own cake, making it a delightful treat! To keep your vegan chocolate cake fresh, place it in an airtight container. This helps lock in moisture and flavor. If you have leftover slices, separate them with parchment paper. This prevents them from sticking together. Store the cake at room temperature for up to three days. If you want to keep it longer, consider freezing it. To freeze the cake, wrap it tightly in plastic wrap. Then, place it in a freezer-safe bag. This helps avoid freezer burn. You can freeze the cake for up to three months. When you are ready to eat, thaw it in the fridge overnight. For best results, let it come to room temperature before serving. Enjoy the same great taste and texture as the day you made it! Yes, you can! Here are some good substitutes for all-purpose flour: - Whole wheat flour - Almond flour - Oat flour - Gluten-free flour blend Each option will change the texture and taste. Whole wheat flour adds a nutty flavor. Almond flour makes the cake moist. Oat flour gives a soft texture. Gluten-free blends work well for those with gluten issues. Always check the ratio for the best results. Yes, vinegar plays a key role in vegan baking. It helps the cake rise and stay light. When mixed with baking soda, it creates a reaction that makes the cake fluffy. If you skip the vinegar, the cake may turn out dense. Apple cider vinegar is the best choice for this recipe. You can easily boost the chocolate flavor! Here are some options: - Add an extra ¼ cup of unsweetened cocoa powder to the batter. - Drizzle chocolate ganache on top after baking. Using dairy-free chocolate chips also enhances the chocolate flavor. Mixing in some melted dark chocolate can make it richer. Each option adds depth, so feel free to experiment! You have many tasty options for frosting! Here are a few suggestions: - Vegan chocolate ganache - Coconut whipped cream - Peanut butter frosting Chocolate ganache is rich and creamy. Coconut whipped cream adds a light, fluffy touch. Peanut butter frosting gives a nutty contrast. Choose what you love best for a perfect pairing! For the full recipe, check out the [Full Recipe]. In this post, we covered how to make a delicious vegan chocolate cake from start to finish. You learned about key ingredients, alternatives, and step-by-step instructions to bake it perfectly. I shared tips for texture and flavor, plus creative serving ideas. Remember, you can customize this cake to fit different diets and tastes easily. Whether you’re baking for yourself or others, this cake is sure to impress. Enjoy the process and the tasty results you create!](https://joymealplan.com/wp-content/uploads/2025/06/282c7cbd-7bac-4bac-839f-8ad7be604c23-768x768.webp)