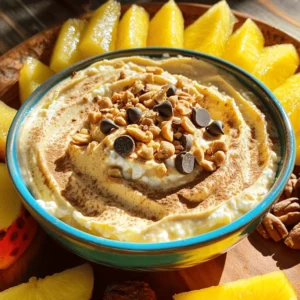
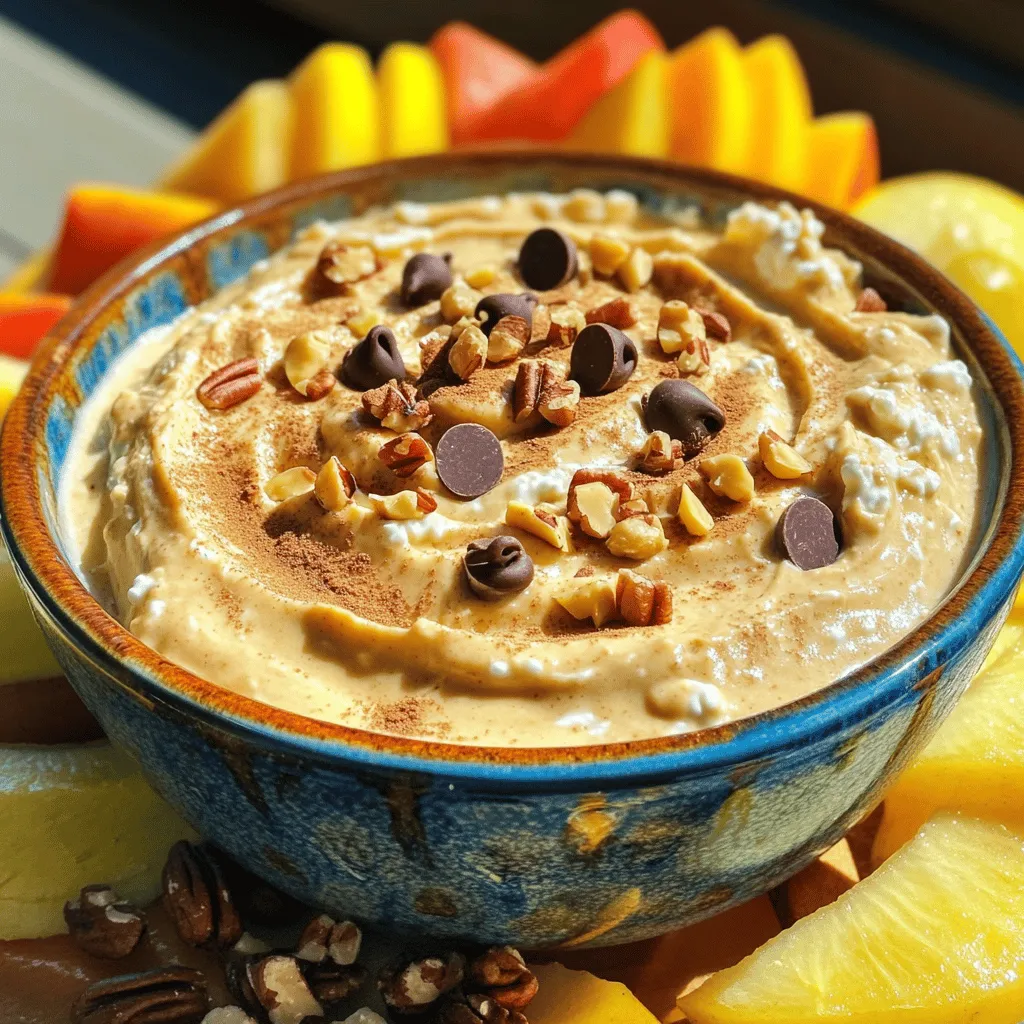
Cottage Cheese Peanut Butter Frosting Dip Delight
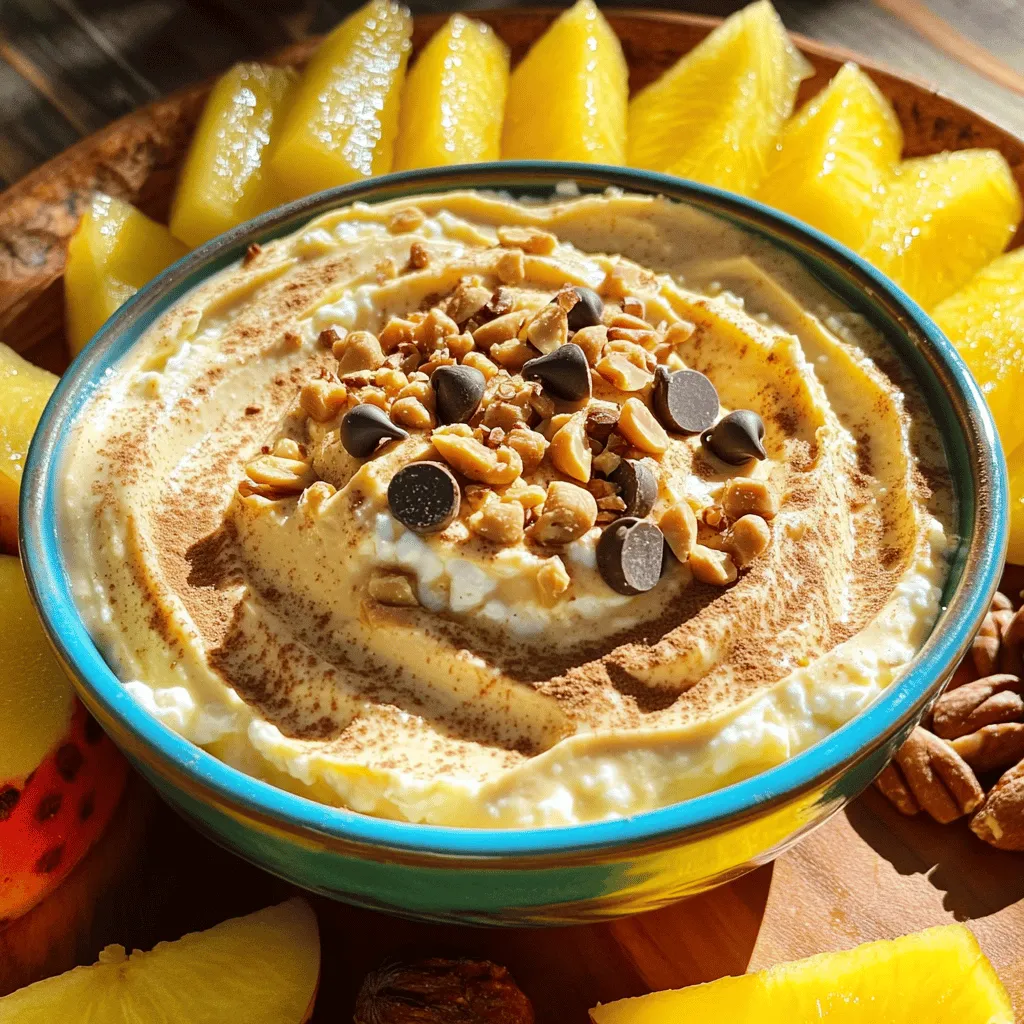
Craving a tasty treat that’s also good for you? Let me introduce you to Cottage Cheese Peanut Butter Frosting Dip Delight! This dip is creamy, sweet, and packed with protein. You can whip it up in minutes using just a few simple ingredients like cottage cheese, peanut butter, and honey. Plus, it’s fully customizable! From crunchy toppings to flavor twists, you can make it your own. Ready to dive in? Let’s get started!
Ingredients
Main Ingredients
– 1 cup cottage cheese
– 1/2 cup natural peanut butter
– 1/4 cup honey or maple syrup
The star of this dip is cottage cheese. It adds creaminess and protein. Natural peanut butter brings a rich, nutty flavor. Honey or maple syrup sweetens the dip just right.
Additional Flavorings
– 1 teaspoon vanilla extract
– 1/4 teaspoon ground cinnamon
– A pinch of salt
Vanilla extract boosts the overall taste. Ground cinnamon adds warmth and depth. A pinch of salt enhances all the flavors.
Optional Toppings
– Chopped nuts (e.g., almonds or walnuts)
– Chocolate chips
– Fresh banana slices
Toppings make your dip fun and tasty. Chopped nuts add crunch. Chocolate chips bring sweetness. Fresh banana slices add a fruity touch.
Step-by-Step Instructions
Preparation Steps
To start making the Cottage Cheese Peanut Butter Frosting Dip, gather your ingredients. In a mixing bowl, combine 1 cup of cottage cheese and 1/2 cup of natural peanut butter.
Blend these two ingredients using a hand mixer or whisk. Mix until the texture is smooth and creamy. You want to ensure there are no lumps in your mixture.
Next, it’s time to add some sweet flavor. Pour in 1/4 cup of honey or maple syrup, then add 1 teaspoon of vanilla extract, 1/4 teaspoon of ground cinnamon, and a pinch of salt. Mix everything until it becomes velvety and well combined.
Finalizing the Dip
Now, it’s time to taste your dip! Check if the sweetness works for you. If you want it sweeter, add a bit more honey or maple syrup. Mix again until it’s just right for your taste.
Once you’re happy with the flavor, carefully transfer the dip into a serving bowl. Smooth the top to make it look nice and appealing.
Serving Suggestions
To make your dip even more fun, consider adding toppings. You can sprinkle chopped nuts, chocolate chips, or fresh banana slices on top.
For the dippables, I suggest fresh fruit slices, crunchy pretzels, or graham crackers. These options will complement the dip nicely. You can serve it right away or refrigerate it until you’re ready to enjoy!
Tips & Tricks
Achieving the Perfect Texture
To get that smooth, creamy texture, blend your cottage cheese and peanut butter well. Use a hand mixer for the best results. If you prefer a thicker dip, start with less honey. If it feels too thick, add a splash of milk or water. This helps make it easier to dip.
Customization Suggestions
You can change the flavor of this dip to suit your taste. For a chocolate twist, mix in cocoa powder. If you like vanilla, just add a bit more vanilla extract. Want a healthier option? Swap cottage cheese for Greek yogurt. It gives a nice tang and packs in protein.
Presentation Ideas
Choosing the right dish can make your dip look great. Use a bright bowl to catch the eye. For garnishing, sprinkle some cinnamon on top. You can also add freshly sliced fruit around the bowl. This makes it colorful and fun for guests.
Variations
Nut-Free Options
If you need a nut-free option, you can replace peanut butter with sun butter. Sun butter comes from sunflower seeds and has a similar texture and taste. This swap keeps your dip creamy and delicious. Plus, it adds a nice nutty flavor without the nuts.
Sweetener Substitutes
For sweeteners, try using agave or stevia instead of honey or maple syrup. Agave gives a light sweetness and blends well. Stevia is low in calories and very sweet, so use a small amount. Both options can help meet different dietary needs while keeping your dip tasty.
Flavor Add-ins
Want to mix things up? Add cocoa powder for a chocolatey twist! Start with one or two tablespoons of cocoa powder. This will give your dip a rich, sweet flavor. It’s a fun way to make your dip even more exciting, especially for chocolate lovers.
Storage Info
Storing the Dip
To keep your Cottage Cheese Peanut Butter Frosting Dip fresh, store it in an airtight container. This helps prevent any odors from your fridge from seeping in. Make sure to seal the lid tightly. If you plan to use the dip later, it’s best to refrigerate it right after serving.
Shelf Life
This dip stays tasty in the fridge for about 5 to 7 days. If you notice any change in color or smell, it’s best to throw it away. Always check for freshness before serving again.
Freezing Instructions
You can freeze this dip if you want to save some for later. Just place it in a freezer-safe container. Make sure to leave some space at the top, as the dip can expand when frozen. To thaw, move it to the fridge overnight. Stir well before serving to bring back its creamy texture.
FAQs
How to make Cottage Cheese Peanut Butter Frosting Dip vegan?
To make this dip vegan, swap the cottage cheese for a plant-based yogurt. You can use almond, coconut, or soy yogurt. For sweetening, replace honey with maple syrup or agave nectar. These swaps keep the dip tasty while making it dairy-free.
Is this dip healthy?
Yes, this dip is healthy! Cottage cheese offers protein and calcium. Peanut butter provides healthy fats and energy. Honey or maple syrup adds natural sweetness without refined sugar. Together, these ingredients make a nutritious snack. You can enjoy this dip guilt-free.
Can I use flavored cottage cheese?
Yes, you can use flavored cottage cheese! Vanilla or honey-flavored options can add a fun twist. This choice may change the taste, so adjust the sweetener to your liking. Flavored cottage cheese makes the dip even more exciting and enjoyable.
How can I make the dip thicker or thinner?
To make the dip thicker, add more cottage cheese or peanut butter. If it’s too thick, mix in a little almond milk or water. Blend until you reach your desired consistency. This way, you can customize the dip just how you like it!
This blog post covered how to make a tasty and healthy dip using simple ingredients. You learned about the main ingredients, optional flavorings, and fun toppings. The step-by-step instructions made it easy to blend and serve. Tips helped you customize the dip’s taste and texture. With storage advice, you can keep it fresh for days. You can enjoy this dip in many ways, whether for a snack or dessert. Try your favorite flavors, and have fun with it!