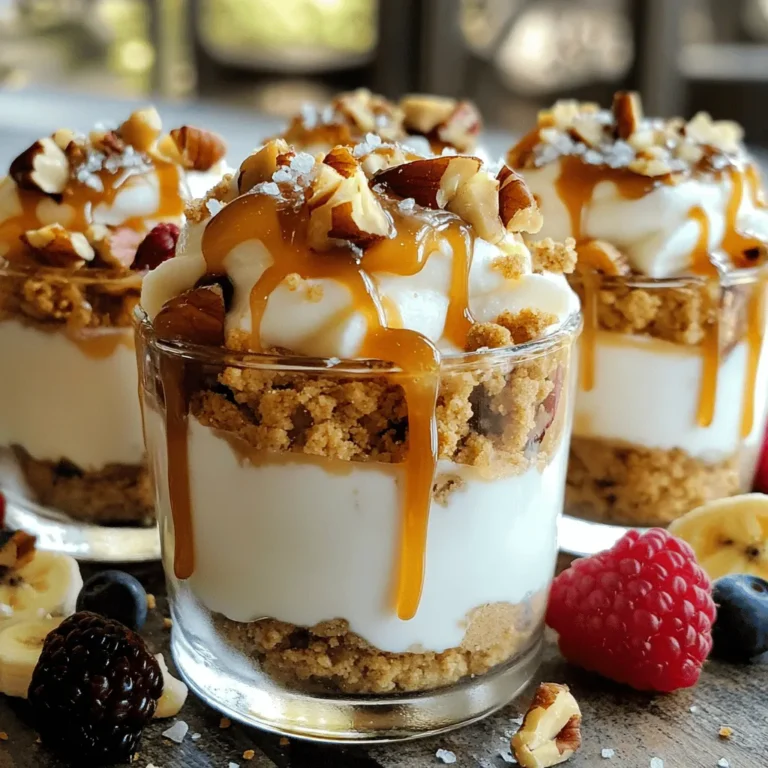
Protein Banana Cream Pie Parfaits for Easy Indulgence
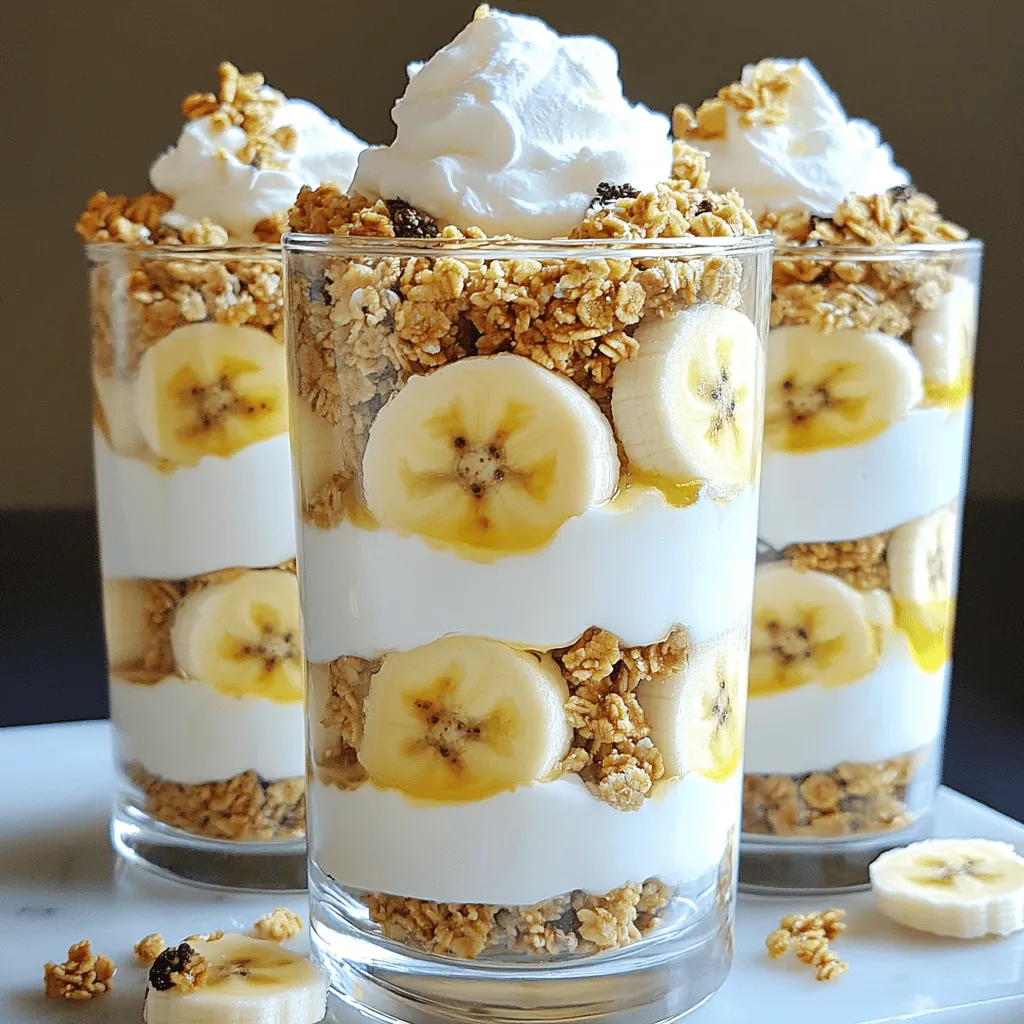
Are you craving a delicious dessert that won’t derail your healthy eating goals? Look no further! These Protein Banana Cream Pie Parfaits are the perfect blend of taste and nutrition. Made with ripe bananas, Greek yogurt, and a scoop of protein powder, they satisfy your sweet tooth while packing a punch of goodness. Ready to whip up this easy treat? Let’s dive into the fun and creamy layers that make this indulgence truly special!
Ingredients
Key Ingredients Overview
– Ripe bananas: Choose two ripe bananas for a sweet taste and creamy texture.
– Greek yogurt: Use one cup of Greek yogurt. You can pick vanilla or plain.
– Protein powder: Add one cup of vanilla-flavored protein powder for extra nutrition.
These three key ingredients form the base of your parfait. The ripe bananas add natural sweetness. Greek yogurt gives it a creamy texture and protein. The protein powder boosts the protein content, making this dessert healthier.
Optional Ingredient Additions
– Honey or maple syrup: One tablespoon adds sweetness. Use this if you like it sweeter.
– Flavor extract: Add half a teaspoon of pure vanilla extract for extra flavor.
These optional ingredients enhance the taste of your parfait. Honey or maple syrup can make it sweeter without much effort. The vanilla extract adds a lovely aroma that pairs well with bananas.
Garnishing Ingredients
– Whipped coconut cream: Use this for a tasty topping. It adds a nice finish.
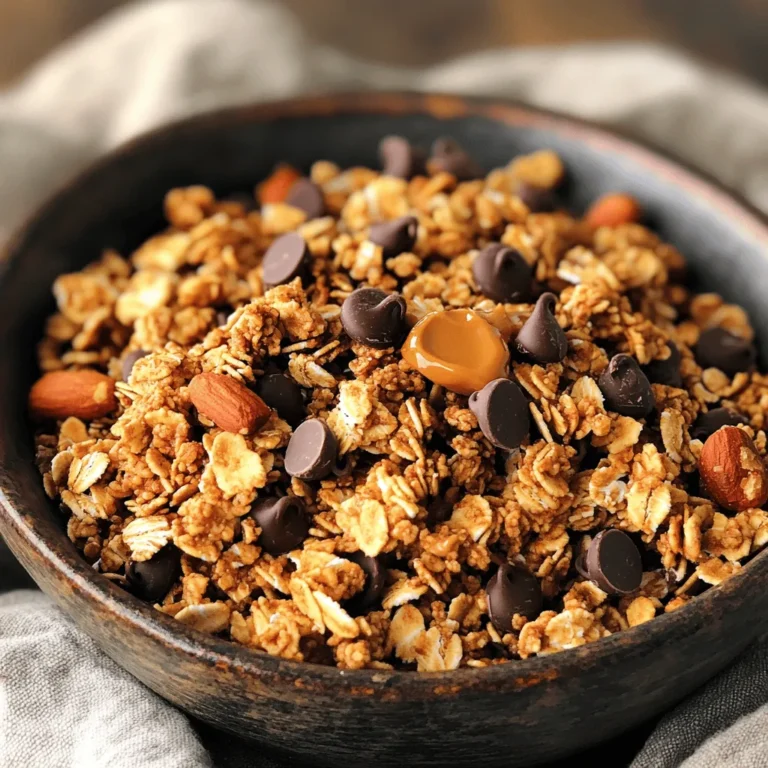
– Granola: Choose your favorite granola to sprinkle on top for crunch.
– Additional banana slices: Use extra banana slices for a fresh touch.
Garnishing is key to making your parfait look great. Whipped coconut cream adds a creamy layer on top. Adding more banana slices gives it a fresh look. The granola adds a satisfying crunch that contrasts the creamy layers.
Step-by-Step Instructions
Preparation of the Protein Yogurt Mixture
First, gather your ingredients. In a medium mixing bowl, combine the Greek yogurt and protein powder. Use a whisk to blend them together well. The goal is a smooth and creamy mix. If it feels too thick, add the almond milk. Start with a little, then add more if needed. You want a nice, spreadable texture. If you like it sweeter, mix in honey or maple syrup. Don’t forget the vanilla extract for extra flavor.
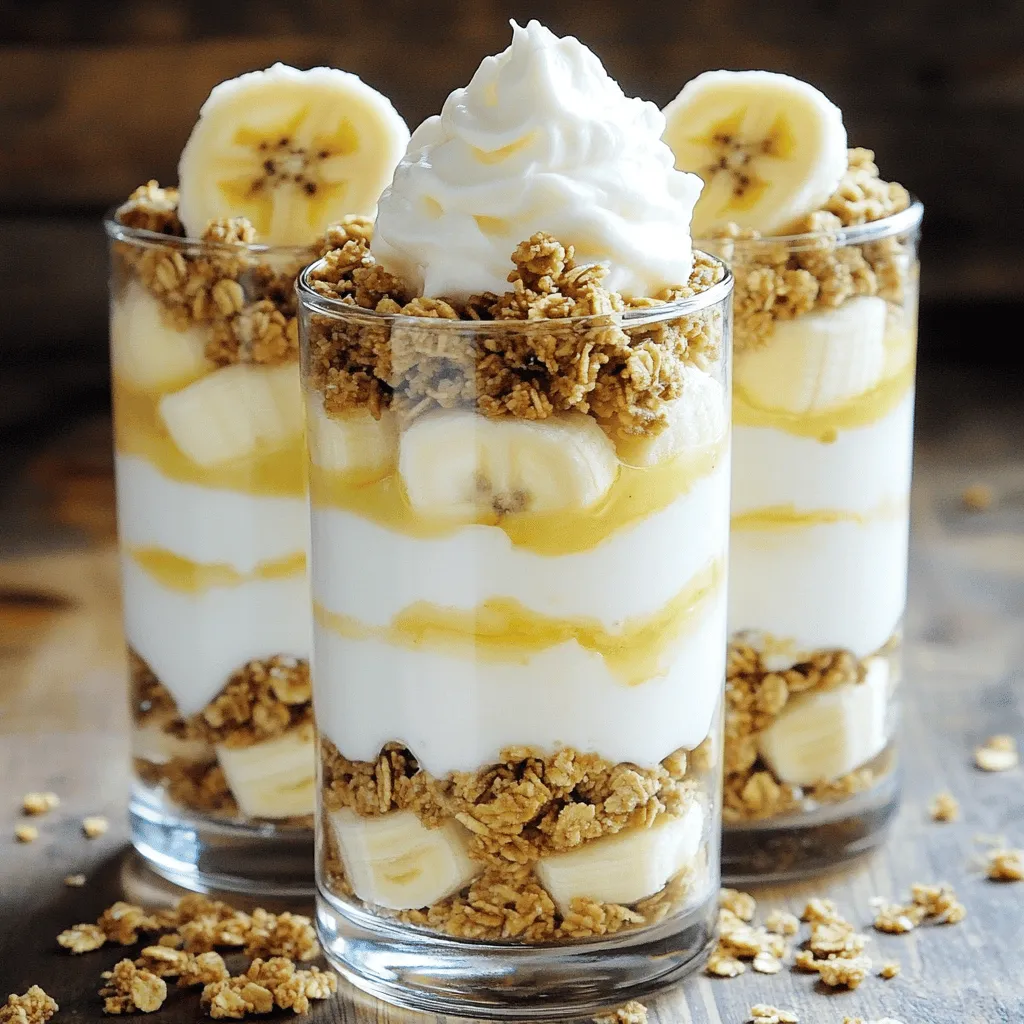
Layering the Parfaits
Next, prepare your serving glasses or bowls. Begin with a generous spoonful of the creamy yogurt mix as the first layer. Then, add a layer of sliced bananas. Follow this with a layer of granola. Repeat these layers until your glass is full. Make sure the top layer is the creamy yogurt mix. This makes for a lovely finish. To help with even layers, use a spoon to press down gently.
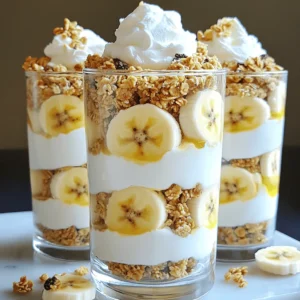
Final Touches
Now, it’s time for the fun part—topping the parfaits! Add a dollop of whipped coconut cream on each serving. This makes it look fancy. For a pretty garnish, add more banana slices and a sprinkle of granola on top. If you want, a mint leaf can add a pop of color. Your parfaits now look delicious and inviting!
Tips & Tricks
Achieving the Best Consistency
To get the perfect texture for your parfaits, adjust the almond milk. Start with half a cup, then add more if needed. If you want a thicker mix, use less milk. This step helps create that creamy layer we all love.
For mixing, I suggest you whisk vigorously. This makes the yogurt and protein powder blend smoothly. A hand mixer can also do the trick if you want a fluffier texture.
Serving Suggestions
The way you serve your parfaits makes a big difference. Use clear glassware to show off the beautiful layers. Tall glasses or small jars work well. They add a fun look to your dessert.
You can also play with flavors. Pair your parfaits with seasonal fruits like strawberries or blueberries. They add color and taste that makes each bite special.
Time-Saving Tips
Prepping your ingredients ahead of time is smart. Slice your bananas and mix the yogurt blend early. You can store them in the fridge. This way, you have less to do when it’s time to serve.
When you assemble, use a spoon to layer quickly. Start with the yogurt, then add bananas, and top with granola. This process is fast and fun. You’ll have your parfaits ready in no time.
Variations
Flavor Variations
You can make fun flavor twists with this parfait. Try adding cocoa powder for a chocolate banana parfait. Just mix in a tablespoon of cocoa with the yogurt. This gives a rich, chocolatey taste that pairs well with bananas.
Another tasty option is to use mixed berries. Swap out bananas for fresh strawberries, blueberries, or raspberries. This adds a burst of color and tartness to your dessert. You can layer the berries with the yogurt for a refreshing change.
Dietary Adjustments
If you want a vegan version, use plant-based yogurt. There are many tasty brands available today. Just replace Greek yogurt with your choice. You can still enjoy the creamy texture while keeping it dairy-free.
For those needing gluten-free options, choose gluten-free granola. Many brands offer delicious, crunchy varieties. This way, everyone can enjoy the parfait without worry.
Seasonal Themes
Make your parfaits special for the holidays. Add spices like cinnamon or nutmeg for a festive touch. This warms up the flavors and makes them perfect for winter gatherings.
In summer, switch to lighter fruits. Peaches or strawberries can make your parfaits bright and fresh. Their juicy sweetness pairs well with the creaminess. Enjoy these variations throughout the year for a tasty treat.
Storage Info
Short-term Storage
To keep your Protein Banana Cream Pie Parfaits fresh, store them in the fridge. Use airtight containers to prevent drying out. If you plan to eat them within a few days, just cover the parfaits with plastic wrap or a lid. This keeps the flavors strong and the layers intact.
Long-term Storage Options
If you want to save the yogurt mixture for later, freezing is a great option. Place the blended yogurt in freezer-safe containers. Remember to leave some space at the top for expansion. You can also freeze the banana slices separately. This way, you can assemble fresh parfaits whenever you want.
Shelf Life Expectations
In the fridge, parfaits last about three days while keeping their taste and texture. If you notice any off smells or discoloration, it’s best to toss them. Freshness is key for a great experience, so always check for spoilage signs.
FAQs
Can I use a different type of yogurt?
Yes, you can. If you want to switch from Greek yogurt, try regular yogurt, coconut yogurt, or soy yogurt. Each will change the flavor and texture. Regular yogurt is smoother but has less protein. Coconut yogurt adds a hint of coconut flavor, making it creamy. Soy yogurt is a great plant-based option. Choose what you like best!
Is there a low-calorie option for this recipe?
Absolutely! To make this parfait lighter, use low-fat yogurt instead of Greek yogurt. You can also skip the honey or maple syrup. For granola, choose a low-calorie or sugar-free option. You can even reduce the amount of granola in each layer. These swaps keep the taste while lowering calories.
How can I make this recipe kid-friendly?
To make this parfait fun for kids, let them help with layering. Kids love to build their food! Use bright, colorful fruits like strawberries or blueberries. You can also add chocolate chips or sprinkles for a sweet touch. Serve them in fun cups or jars. This way, kids enjoy making and eating their own treat!
This blog post covered how to create delicious and healthy parfaits. You learned about key ingredients like ripe bananas, Greek yogurt, and protein powder. I shared tips on achieving the best texture and presented variations for special diets. Remember, you can customize flavors and garnish for uniqueness.
Enjoying these parfaits can be a fun way to nourish your body. I hope you feel inspired to try making your own!
![To make classic banana pudding, you need these key ingredients: - 4 ripe bananas, sliced into rounds - 1 cup heavy cream - 1 cup whole milk - 1/2 cup granulated sugar - 1/4 cup cornstarch - 1/4 teaspoon kosher salt - 1 teaspoon pure vanilla extract - 2 large egg yolks - 1 package (approximately 200g) vanilla wafers - Whipped cream for topping (optional) - Additional banana slices for garnish These ingredients create the creamy base and the delightful layers that make banana pudding so special. The ripe bananas add a natural sweetness. The vanilla wafers provide crunch and texture. You can enhance your banana pudding with a few optional ingredients: - A hint of cinnamon for warmth - Chocolate chips for a sweet twist - A splash of rum extract for depth These additions can give your pudding a unique flavor. Experiment with them to find your favorite mix! If you’re missing a few ingredients, don’t worry. Here are some common substitutions you can use: - Use almond milk instead of whole milk for a dairy-free option. - Substitute coconut cream for heavy cream for a tropical flair. - Replace granulated sugar with honey or maple syrup for sweetness. These substitutions will still give you a tasty result. Just remember to adjust measurements based on taste. For the full recipe, check the [Full Recipe]. To start, gather all your ingredients. You need milk, cream, sugar, cornstarch, salt, and eggs. In a medium saucepan, mix the whole milk, heavy cream, sugar, cornstarch, and salt. Use a whisk to blend everything until smooth. Make sure there are no lumps from the cornstarch. Heat this mix over medium heat. Stir it often with a wooden spoon. You want it to thicken and bubble, which takes about 5 to 7 minutes. Next, crack the two large eggs, separating the yolks into a bowl. Whisk the yolks until they look smooth and pale. To temper the yolks, take a few spoonfuls of the hot mix and whisk them into the yolks. This step keeps the eggs from cooking too fast. After that, pour the yolk mix back into the saucepan. Cook for another 2 to 3 minutes while stirring. The pudding should be thick and creamy when done. Remove it from heat and stir in the vanilla extract. Let it cool for about 10 minutes. Now it’s time to build your pudding layers. Start with a large serving dish or individual cups. Place a layer of vanilla wafers at the bottom. Next, add a layer of sliced bananas. Pour a generous amount of pudding over the bananas and cookies. Repeat this layering until you use all ingredients. Make sure the last layer is pudding. This creates a beautiful top. After layering, cover the dish tightly with plastic wrap. This step helps keep the pudding moist. Next, place it in the fridge for at least 4 hours. This time lets the pudding chill and firm up. When you’re ready to serve, add a dollop of whipped cream on top. You can also garnish with extra banana slices for a nice touch. This dessert looks as good as it tastes! If you'd like to see the complete guide, check out the Full Recipe for more details. To get that smooth, creamy texture, follow these tips: - Whisk well: When mixing the milk and cornstarch, make sure to whisk until there are no lumps. - Stir constantly: While cooking the pudding base, stir it continuously to prevent sticking and burning. - Temper the eggs: Slowly add hot mixture to egg yolks. This helps keep them from cooking too fast. - Cool gradually: Let the pudding cool for about 10 minutes before layering. It will thicken more as it cools. To keep your pudding fresh: - Cover tightly: Use plastic wrap to seal the dish. This keeps moisture out. - Refrigerate: Always store it in the fridge. It stays good for 2-3 days. - Layer with care: If you have leftovers, keep layers separate. This avoids mushy bananas. Want to make your banana pudding even better? Try these ideas: - Add spices: A pinch of cinnamon or nutmeg can add warmth. - Use flavored wafers: Try lemon or chocolate wafers for a fun twist. - Incorporate extracts: Add a drop of almond extract for an extra layer of flavor. - Top it off: Fresh berries or nuts can give a nice crunch and taste contrast. For the full recipe, check out the details above! {{image_4}} To make chocolate banana pudding, simply add cocoa powder. Use 1/3 cup of unsweetened cocoa powder. Mix it into the milk mixture after combining the sugar and cornstarch. This gives your pudding a rich chocolate flavor. Layer it just like the classic recipe. The chocolate pairs well with bananas, creating a great dessert. For a nutty twist, add chopped pecans or walnuts. You can mix in 1/2 cup of nuts into the pudding. You can also sprinkle some on each layer. This adds a delightful crunch to each bite. The nuts contrast nicely with the creamy pudding and soft bananas. To create a vegan version, swap dairy for plant-based options. Use almond or coconut milk instead of whole milk and cream. Replace egg yolks with 1/4 cup of silken tofu blended until smooth. Sweeten with maple syrup or coconut sugar. This makes a tasty, dairy-free pudding that everyone can enjoy. Each of these variations adds a new twist to the classic banana pudding. They keep the spirit of the dessert while offering different flavors and textures. For the full recipe, make sure to check out the details above. Banana pudding has a rich history that dates back to the 19th century. This dish first appeared in American cookbooks in the late 1800s. It gained popularity in the Southern states, where fresh bananas were easy to find. The sweet, creamy dessert combined layers of pudding, bananas, and vanilla wafers. This simple yet delicious treat quickly became a staple at family gatherings and potlucks. Over the years, banana pudding has evolved in many ways. In the 1930s, brands like Nabisco made vanilla wafers popular in homes. Many cooks began using these cookies as a key ingredient. Today, you can find various versions, including chocolate and vegan options. Some recipes even add whipped cream or meringue on top for extra flavor and texture. This evolution shows how versatile and beloved banana pudding truly is. In Southern cuisine, banana pudding holds a special place. It represents comfort and warmth. Families often serve it at holidays, birthdays, and reunions. Many people have fond memories of enjoying this sweet treat with loved ones. This dessert is not just a dish; it’s a tradition passed down through generations. The combination of flavors and textures captures the essence of Southern hospitality, making it a cherished part of the culture. Yes, you can use other types of bananas. While ripe Cavendish bananas are common, you can try red or plantain bananas. Each type brings a unique flavor. Red bananas are sweeter and softer. Plantains are firmer and less sweet. Just remember, the texture and taste will change. To keep bananas from browning, you can use lemon juice. Just squeeze a little juice over the banana slices. This helps slow down oxidation. You can also cover the bananas tightly with plastic wrap. Keeping them chilled also helps. Serve the pudding soon for the best look. If you don’t have vanilla wafers, don’t worry! You can use graham crackers or shortbread cookies. Both options add a nice crunch. You can even use sponge cake for a softer layer. Get creative! The pudding will still taste great, no matter what you use. This blog shows you how to make classic banana pudding. We covered key ingredients, optional add-ins, and substitutions. I also shared simple steps for preparing, layering, and chilling the pudding. You learned tips for perfect texture and storing leftovers. Plus, I explored fun variations like chocolate and vegan options. Finally, we discussed the history and cultural roots of this dish. Banana pudding is more than a dessert; it's a beloved tradition. Enjoy creating your own version and sharing it with friends and family.](https://joymealplan.com/wp-content/uploads/2025/06/2270da16-0b21-4017-a800-73ddf1839134-768x768.webp)