Sheet Pan BBQ Chicken Nachos Great for Gatherings

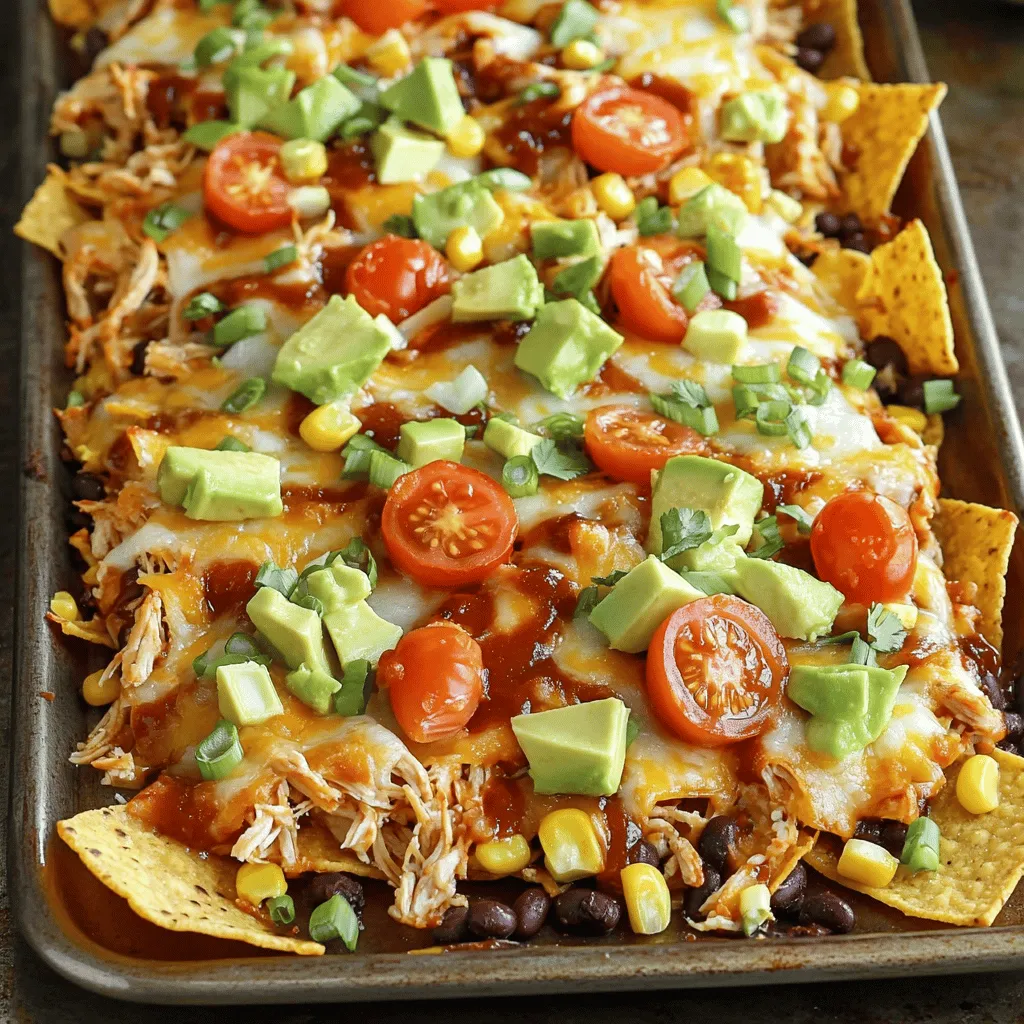
If you’re looking for a fun and easy dish for your next gathering, try these Sheet Pan BBQ Chicken Nachos! They’re loaded with flavor and perfect for sharing. You can mix things up with various toppings and make them your own. I’ll guide you through each step, from ingredient prep to baking and serving. Let’s dive in so you can impress your friends with this tasty treat!
Ingredients
List of Ingredients
– 2 cups cooked chicken, shredded
– 1 cup BBQ sauce (preferably homemade or your favorite brand)
– 1 large bag of tortilla chips
– 2 cups shredded sharp cheddar cheese
– 1 cup canned black beans, drained and rinsed
– 1 cup sweet corn (canned or frozen)
– 1 fresh jalapeño, thinly sliced (optional)
– 1 cup cherry tomatoes, halved
– 1 ripe avocado, diced
– ¼ cup green onions, finely chopped
– Sour cream and fresh cilantro for garnish (optional)
Optional Toppings and Garnishes
You can add many tasty toppings to your nachos. Here are some fun ideas:
– Sliced olives for a briny flavor
– Diced red onion for a crunchy bite
– Pickled jalapeños for extra heat
– Fresh lime juice for a zesty finish
– Fresh spinach or arugula for a green touch
Notes on Ingredient Substitutions
You can switch some ingredients based on your taste or what you have at home. Here are some easy swaps:
– Use store-bought rotisserie chicken instead of cooking your own.
– Swap the BBQ sauce for a spicy salsa or cheese sauce.
– Try different cheeses like pepper jack or mozzarella for a unique twist.
– Use tortilla strips if you can’t find chips.
– If you want a vegetarian option, replace chicken with sautéed mushrooms or jackfruit.
Feel free to play with these ingredients to make your perfect BBQ chicken nachos!
Step-by-Step Instructions
Preparation Steps
1. Start by preheating your oven to 400°F (200°C). A hot oven melts the cheese just right.
2. In a large bowl, mix 2 cups of shredded chicken with 1 cup of BBQ sauce. Stir well to coat all the chicken.
3. On a big baking sheet, spread out a large bag of tortilla chips. Lay them in a single layer for even topping distribution.
4. Add the BBQ chicken evenly over the chips. This ensures every bite is full of flavor.
5. Sprinkle 1 cup of black beans and 1 cup of sweet corn on top for extra taste and texture.
6. Grate 2 cups of sharp cheddar cheese and cover all the ingredients with it. Cheese is key for delicious nachos.
7. If you enjoy spice, top with thin slices of fresh jalapeño. Their heat pairs well with the sweet BBQ.
Baking Instructions
8. Place the baking sheet in the oven. Bake for 15-20 minutes. Watch closely until the cheese bubbles and is golden.
Serving Suggestions
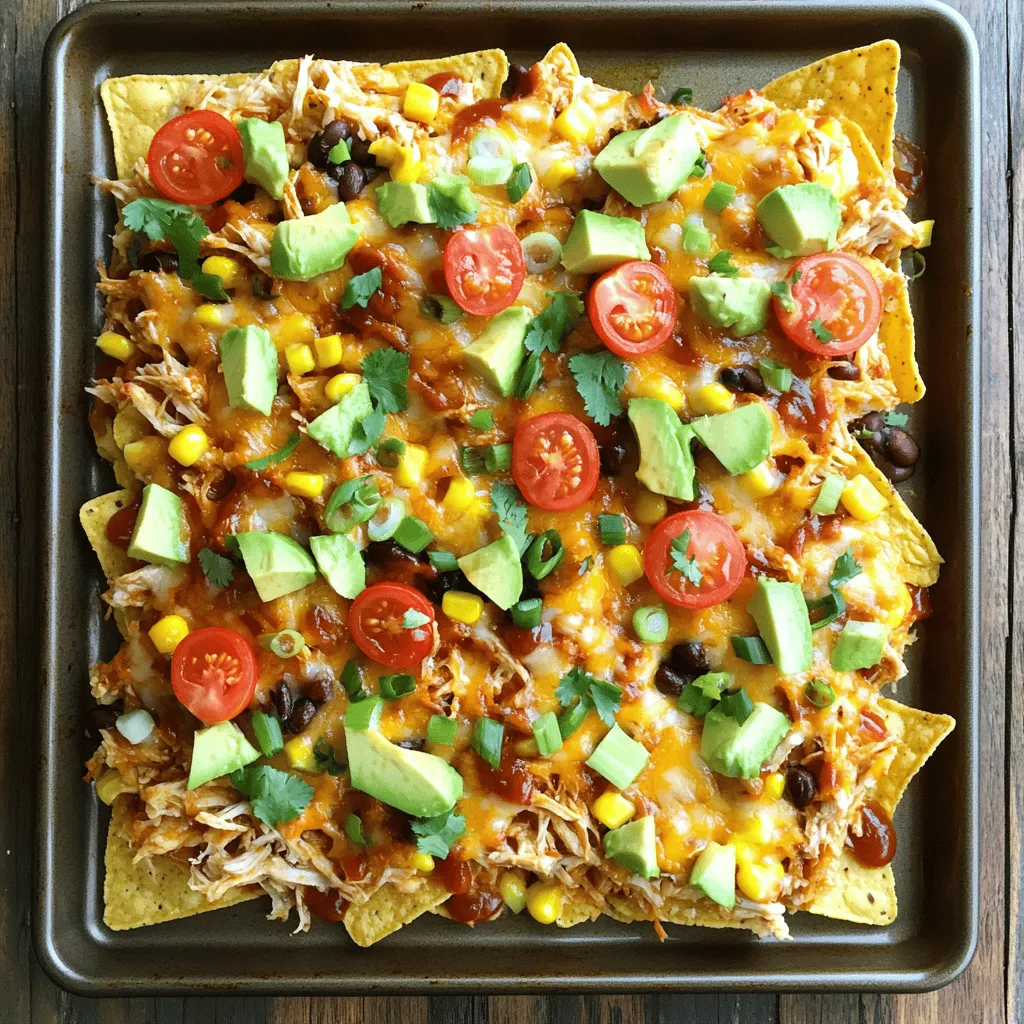
9. Once done, take the sheet out of the oven. Scatter halved cherry tomatoes and diced avocado on top for freshness.
10. Finish with chopped green onions. Add sour cream and cilantro for a tasty garnish.
11. Serve directly from the sheet pan. This makes it fun and easy for everyone to enjoy!
Tips & Tricks
How to Perfectly Shred Chicken
To get the best shredded chicken, start with cooked chicken. I often use rotisserie chicken for ease. Just let it cool slightly, then use two forks. Pull the meat apart in opposite directions to create nice shreds. This method works great for both chicken breasts and thighs. You can also use a stand mixer for faster shredding. Just place the chicken in the bowl and mix on low speed until shredded.
Cheese Melting Tips
A perfect cheese melt makes nachos amazing. For the best results, use sharp cheddar cheese. Ensure your oven is hot enough, set at 400°F (200°C). Spread cheese evenly over the nachos, covering all areas. This helps it melt uniformly. Keep an eye on the nachos while baking. You want the cheese bubbling, but not burnt. If you want extra cheese flavor, mix in some Monterey Jack or pepper jack.
Making Homemade BBQ Sauce
Homemade BBQ sauce is easy and tastes great. Start with simple ingredients: ketchup, vinegar, brown sugar, and spices. Mix them in a pot over medium heat. Let it simmer for at least 20 minutes to blend flavors. You can add ingredients like garlic powder or smoked paprika for a twist. Taste as you go to adjust sweetness or tanginess. This sauce will elevate your nachos and impress your guests.

Variations
Vegetarian or Vegan Options
You can easily make these nachos vegetarian. Instead of chicken, use black beans or lentils. These options add protein and flavor. Replace BBQ sauce with a vegan-friendly version. This way, everyone can enjoy the dish.
Different Flavor Profiles
Change the BBQ sauce for other sauces to mix things up. Try a spicy buffalo sauce for a kick. A sweet teriyaki sauce adds a different taste too. Experimenting with flavors keeps the dish fresh and fun.
Adding Additional Toppings
Toppings can take your nachos to the next level. Consider adding pickled red onions for a tangy crunch. Fresh herbs like cilantro or parsley brighten the flavors. You can also add a drizzle of hot sauce for heat. Each topping adds a unique twist to your nachos.
Storage Info
Storing Leftovers
After your nachos are gone, you might have some leftovers. Store any nachos in an airtight container. Keep them in the fridge for up to three days. If you have just the BBQ chicken left, store it separately. It lasts about four days in the fridge. Make sure the chicken is cool before sealing the container.
Reheating Instructions
To reheat nachos, place them on a baking sheet. Preheat your oven to 350°F (175°C). Bake for about 10 minutes or until warm. This helps the chips stay crispy. If you want to heat just the chicken, microwave it in a bowl for 1-2 minutes. Stir halfway to heat evenly.
Freezing Tips
You can freeze BBQ chicken for longer storage. Place the cooled chicken in a freezer-safe bag. It can last for up to three months. When ready to use, let it thaw in the fridge overnight. Avoid freezing the nachos, as the chips become soggy. Instead, prepare fresh nachos with the thawed chicken.
FAQs
Can I use rotisserie chicken for this recipe?
Yes, you can use rotisserie chicken for this recipe. It saves time and adds great flavor. Just shred the chicken and mix it with your BBQ sauce. This simple swap makes dinner easy, especially if you’re in a hurry.
How can I make nachos healthier?
To make nachos healthier, choose baked tortilla chips instead of fried ones. You can also add more veggies like bell peppers or spinach. Use reduced-fat cheese or less cheese overall. Lastly, top your nachos with fresh salsa or Greek yogurt instead of sour cream.
What type of cheese works best for nachos?
Shredded sharp cheddar cheese works best for nachos. It melts well and adds a bold flavor. You can also mix in Monterey Jack or pepper jack cheese for extra creaminess and a bit of spice. These cheeses create a delicious blend that makes every bite enjoyable.
This article covered all the essential steps for making great nachos. You learned about ingredients, optional toppings, and how to switch things up. We explored cooking methods and tips for perfect chicken and cheese. You saw different variations, storing tips, and answers to your burning questions. Nachos can be fun and delicious when you use the right ingredients and techniques. Now, you’re ready to create your own nacho masterpiece. Enjoy the process and the tasty results!


![To make tasty honey garlic meatballs, you need: - 1 pound ground beef (or a blend of beef and pork for extra flavor) - 1/2 cup fresh breadcrumbs (homemade or store-bought) - 1/4 cup grated Parmesan cheese (for richness) - 1 large egg (to bind the mixture) - 2 cloves garlic, finely minced (for depth) - 1 tablespoon fresh ginger, finely minced (adds warmth) - 1/4 cup chopped green onions (for freshness) - Salt and black pepper to taste These main ingredients create a rich and flavorful base for the meatballs. The garlic and ginger add a nice zing, while the egg helps hold everything together. The honey garlic sauce is where the magic happens. You’ll need: - 1/2 cup honey (natural sweetness) - 1/4 cup soy sauce (for savory flavor) - 1 tablespoon rice vinegar (adds tang) - 1 teaspoon sesame oil (for nuttiness) - 1 teaspoon cornstarch mixed with 1 tablespoon water (to thicken the sauce) This sauce blends sweet and savory flavors. The honey pairs well with soy sauce, creating a perfect glaze for the meatballs. Feel free to customize your meatballs! Here are some ideas: - Use ground turkey instead of beef for a lighter option. - Add chopped herbs like parsley or cilantro for extra freshness. - Swap in breadcrumbs for crushed crackers if you want a different texture. - For a spicy kick, mix in some red pepper flakes. These tweaks can help you make the recipe your own. Enjoy experimenting with flavors! For the complete recipe, check out the Full Recipe link. To make tasty meatballs, start by gathering your ingredients. In a big bowl, combine: - 1 pound ground beef (or beef and pork mix) - 1/2 cup fresh breadcrumbs - 1/4 cup grated Parmesan cheese - 1 large egg - 2 cloves garlic, finely minced - 1 tablespoon fresh ginger, finely minced - 1/4 cup chopped green onions - Salt and black pepper to taste Use your hands or a spatula to mix these well. Be gentle! Overmixing will make the meatballs tough. You want them soft and tender. Now, it’s time to bake. Preheat your oven to 400°F (200°C). This step helps the meatballs cook evenly. Line a baking sheet with parchment paper. This keeps them from sticking and makes cleaning easy. Next, use clean hands to scoop out the meat mixture. Roll it into small balls, about 1 inch wide. Place them on the baking sheet, leaving space between each one. Bake for 15 to 20 minutes. You’ll know they’re done when they turn golden brown and reach an internal temperature of 165°F. While the meatballs bake, prepare the delicious sauce. In a small saucepan, mix: - 1/2 cup honey - 1/4 cup soy sauce - 1 tablespoon rice vinegar - 1 teaspoon sesame oil Heat this mix over medium heat. Stir it gently until it simmers. In a small bowl, mix 1 teaspoon cornstarch with 1 tablespoon water. Stir this into the sauce to thicken it. Cook for 2-3 more minutes until the sauce is shiny and thick. Once the meatballs are ready, take them out of the oven. Place them in a serving dish. Drizzle the warm honey garlic sauce over them. Garnish with extra chopped green onions for a fresh look. Enjoy every bite! For the full recipe, check out the details above. To make tender meatballs, start by mixing the meat gently. Overmixing makes them tough. Add breadcrumbs and egg for moisture. Let the mixture rest for a few minutes before shaping. This helps flavors blend well. Use clean hands to form the meatballs. Aim for about one inch in size for even cooking. For a rich honey garlic sauce, combine honey and soy sauce in a small pan. Heat it slowly to keep the honey from burning. Adding rice vinegar brings a nice tang. Finally, mix cornstarch with a bit of water to thicken it. Stir this mixture into the sauce until it coats the back of a spoon. This step is key for a glossy finish. These honey garlic meatballs shine on their own. Serve them on a platter with toothpicks. Pair them with rice or noodles for a full meal. Fresh veggies, like steamed broccoli or a crisp salad, add color and crunch. For added flair, drizzle extra sauce over the meatballs and sprinkle sesame seeds. This makes for a lovely presentation. Check the [Full Recipe] for more details! {{image_4}} You can use many meats for honey garlic meatballs. Ground beef is classic, but ground pork adds great flavor. You can even mix beef and pork for a tasty twist. Ground turkey is a leaner choice. It still pairs well with honey garlic sauce. Chicken also works great if you prefer a lighter meat. The key is to choose a meat you love. If you want a meat-free option, try using plant-based ground meat. There are many brands available today. You can also make meatballs with lentils or chickpeas. Just mash them up and mix in the same ingredients. For a fun twist, use quinoa or rice as a base. They both add texture and make the dish hearty. You can add fun flavors to your meatballs. Try mixing in some grated carrots or chopped bell peppers for a veggie boost. Fresh herbs, like cilantro or basil, can give a fresh kick. If you like heat, add red pepper flakes or sriracha to the mix. For an Asian twist, toss in some chopped water chestnuts or sesame seeds. These add crunch and make your meatballs stand out. You can find the full recipe to try these variations. After enjoying your honey garlic meatballs, let them cool down. Place them in an airtight container. They will stay fresh in the fridge for about 3 to 4 days. Make sure to separate layers with parchment paper to avoid sticking. To reheat, use the oven for best results. Preheat it to 350°F (175°C). Place the meatballs on a baking sheet. Heat them for about 10 to 15 minutes. This keeps them juicy and warm. You can also use the microwave, but they might get soggy. If you do use the microwave, cover them with a damp paper towel to keep moisture in. For long-term storage, you can freeze the meatballs. First, let them cool completely. Then, place them on a baking sheet in a single layer. Freeze them for a couple of hours until firm. Once frozen, transfer them to a freezer bag. They can last up to 3 months. When ready to eat, thaw them in the fridge overnight before reheating. These steps will help you enjoy your honey garlic meatballs anytime! Check out the Full Recipe for more cooking tips. Yes, you can use ground turkey instead of beef. Ground turkey makes a lighter meatball. It has less fat, so you may want to add a bit more cheese or breadcrumbs. This keeps the meatballs moist and tasty. The flavor will change slightly, but they will still taste great. To check if your meatballs are done, use a meat thermometer. They need to reach 165°F inside. You can also cut one in half. The inside should be no longer pink. Look for a nice golden brown color on the outside. These signs show that your meatballs are safe to eat. Honey garlic meatballs pair well with many sides. Here are some ideas: - Steamed rice - Roasted vegetables - Noodles - Salad - Mashed potatoes These sides balance the sweet and savory flavors. You can mix and match for a fun meal. For more ideas, check out the Full Recipe for serving suggestions. Honey garlic meatballs are simple and tasty. We covered the main ingredients and how to mix them. You learned step-by-step instructions for baking and making the sauce. I shared tips for tender meatballs and perfect sauce. You can also explore meat options and vegetarian choices. Don’t forget about storing leftovers and reheating them. Try the variations for a new twist. Enjoy cooking, and have fun sharing these delightful bites with friends and family!](https://joymealplan.com/wp-content/uploads/2025/05/91b0df71-a0c5-411f-83a7-9789c0a24c3c-768x768.webp)

![- 8 oz rice noodles - 1 red bell pepper, thinly sliced - 1 cup shredded carrots - 1 cucumber, julienned - 1 cup bean sprouts - 1/4 cup fresh cilantro, roughly chopped - 1/4 cup roasted peanuts, coarsely crushed - 2 green onions, sliced - 3 tablespoons fish sauce (or vegetarian alternative, soy sauce) - 2 tablespoons freshly squeezed lime juice - 1 tablespoon brown sugar - 1 tablespoon toasted sesame oil - 1–2 tablespoons sriracha (adjust based on heat preference) This salad is light yet filling. It has about 250 calories per serving. The rice noodles provide carbs for energy. Fresh veggies add fiber, vitamins, and minerals. Peanuts offer healthy fats and protein. The dressing gives a zing with fish sauce and lime. You can swap fish sauce for soy sauce if needed. Eating this salad supports good health due to its fresh ingredients. The mix of flavors and textures makes it a delight. Enjoy every bite! Check out the Full Recipe for full details. Start by boiling water in a pot. Add 8 oz of rice noodles to the water. Cook them as per the package instructions. Once the noodles soften, drain them. Rinsing with cold water is key. This stops cooking and keeps them from getting sticky. Set the noodles aside until you need them. Grab a sharp knife and a cutting board. Thinly slice the red bell pepper. Shred the carrots with a grater. Julienne the cucumber into thin strips. Add 1 cup of bean sprouts. In a large bowl, mix all the veggies. Toss them gently to combine. This makes sure each vegetable is evenly mixed. In a smaller bowl, mix the dressing. Whisk together 3 tablespoons of fish sauce, 2 tablespoons of lime juice, and 1 tablespoon of brown sugar. Add 1 tablespoon of toasted sesame oil. For spice, include 1–2 tablespoons of sriracha. Taste the dressing and adjust as needed. You can make it sweeter or spicier based on your choice. Now, add the cooled rice noodles to the big bowl of vegetables. Pour the dressing over the top. Use gentle tossing motions to mix everything. This ensures each noodle and veggie gets coated with the tasty dressing. Transfer the salad to a colorful serving platter. Top it off with crushed roasted peanuts for crunch. Sprinkle fresh cilantro on top for flavor and color. For a nice touch, add lime wedges on the side. This salad looks great and tastes even better! Check the Full Recipe for more details. To boost flavor, add fresh lime juice. Lime brings great brightness. You can also add more herbs. Fresh mint or basil works well. If you want it spicier, adjust the sriracha. Start with one tablespoon and taste. Add more if you like heat! If you need gluten-free, choose rice noodles. They are a great alternative. For sauces, use tamari instead of soy sauce. If you want to skip fish sauce, use soy sauce or coconut aminos. These options keep the taste fresh. To make this salad in advance, cook the noodles and chop the veggies. Store ingredients separately in the fridge. This keeps everything crisp. When ready, mix them with dressing just before serving. This way, the salad tastes fresh. {{image_4}} You can add shrimp, chicken, or tofu to your Spicy Thai Noodle Salad. Each protein brings its own flavor and texture. For shrimp, cook them in a hot pan for just a few minutes until they turn pink. Use about 8 oz for a nice boost of protein. If chicken is your choice, grill or sauté about 1 cup of diced chicken until cooked through. For a plant-based option, use firm tofu. Cube about 8 oz and pan-fry until golden. Each of these options enhances the salad and makes it more filling. To make a vegan version, simply eliminate fish sauce and any meat. Replace fish sauce with soy sauce or a mix of soy and lime juice. This keeps the flavor rich while staying plant-based. You can add more vegetables like snap peas or radishes for crunch. Avocado is also a great addition for creaminess. Feel free to mix and match veggies based on what you love or have at home. Change your salad with the seasons by using fresh, local veggies. In spring, consider adding asparagus or peas. Summer is perfect for ripe tomatoes or zucchini. Fall brings hearty options like shredded Brussels sprouts or roasted squash. In winter, you can add kale or root vegetables. Adapting your recipe with seasonal ingredients keeps it exciting and fresh all year round. Explore new flavors and textures with each season. You can check the [Full Recipe] for more ideas to elevate your dish! To store leftovers properly, place the salad in an airtight container. Make sure to keep the salad separate from the dressing if you plan to eat it later. This helps maintain the crunch of the veggies. When stored this way, the salad lasts about three days in the fridge. If you mix the dressing in, aim to eat it within two days for the best taste. You can freeze the Spicy Thai Noodle Salad, but it's not ideal. Freezing can change the texture of the vegetables. If you decide to freeze it, use a freezer-safe container. Thaw the salad in the fridge overnight for best results. To serve, let it sit at room temperature for about 15 minutes after thawing. This helps bring back some freshness. To reheat the salad, use a microwave at low power. Heat it in 30-second intervals, stirring in between. This method keeps the noodles and veggies from becoming mushy. If you prefer it cold, serve it straight from the fridge. A squeeze of fresh lime juice can brighten the flavors after refrigeration. Preparing Spicy Thai Noodle Salad takes about 15 minutes. Cooking the rice noodles adds another 10 minutes. In total, you spend around 25 minutes. This recipe yields 4 servings, perfect for sharing or meal prep. Yes, you can make this salad ahead of time. I suggest preparing the vegetables and dressing first. Store them in separate containers. When you're ready to serve, combine everything. This keeps the salad fresh and crisp. If you need a substitute for fish sauce, soy sauce works well. It’s great for vegetarians. You can also use coconut aminos for a milder flavor. These alternatives maintain the dish's salty taste. Absolutely! You can add protein like shrimp, chicken, or tofu. You can also swap out vegetables based on your taste. Try adding mango for sweetness or radishes for a crunch. The options are endless. To make this salad gluten-free, use rice noodles. For the dressing, ensure you pick gluten-free soy sauce. Check labels when buying ingredients to avoid hidden gluten. This way, everyone can enjoy the salad. The Spicy Thai Noodle Salad recipe combines vibrant ingredients for a tasty dish. You learned how to cook rice noodles, prepare fresh vegetables, and create a zesty dressing. The nutritional benefits of the main ingredients make this salad a healthy choice. Remember, you can adjust flavors and ingredients to suit your taste. Try adding proteins or seasonal veggies for new twists. Follow proper storage tips to enjoy leftovers or make it ahead of time. With these guidelines, you’re set for a flavorful, customizable meal.](https://joymealplan.com/wp-content/uploads/2025/07/00f7a476-2e89-474b-9c80-2d6783f3d5a0-768x768.webp)


