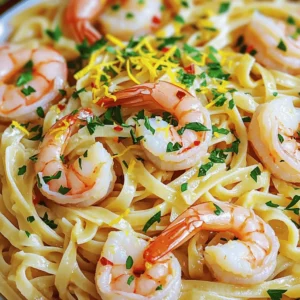
Garlic Butter Scampi Linguine Flavorful and Easy Meal
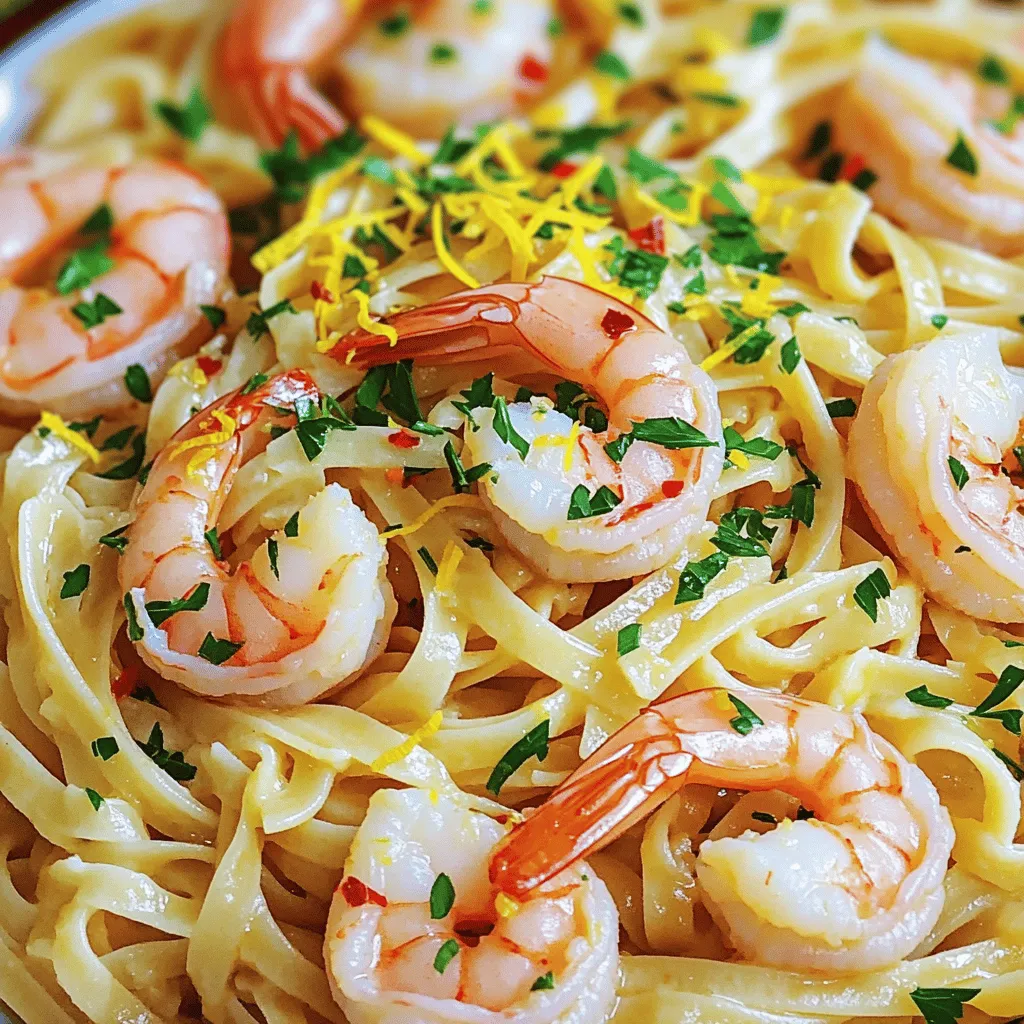
Looking for a quick and tasty dinner? Garlic Butter Scampi Linguine is your answer! In just a few steps, you can whip up a meal that’s not only simple but bursting with flavor. With shrimp, garlic, and butter, this dish will impress your family or friends. Let’s dive into the easy ingredients and steps to create a dish that everyone will love. Get ready to savor every bite!
Ingredients
List of Ingredients
– 8 ounces linguine pasta
– 6 tablespoons unsalted butter
– 4 cloves garlic, finely minced
– 1 pound large shrimp, peeled and deveined
– 1 teaspoon red pepper flakes
– 1 cup chicken broth
– 2 tablespoons fresh lemon juice
– Zest of 1 lemon
– Fresh parsley, finely chopped
– Salt and black pepper to taste
To make Garlic Butter Scampi Linguine, you need simple ingredients that pack a punch. The linguine pasta serves as a great base. Use large shrimp for a nice bite. The unsalted butter is key for rich flavor. Garlic adds aroma and taste. The red pepper flakes give it a little kick. Chicken broth brings depth to the sauce. Fresh lemon juice and zest brighten the dish. Finally, parsley adds color and freshness.
Equipment Needed
– Large pot
– Skillet
– Colander
– Measuring cups and spoons
– Knife and cutting board
Having the right tools makes cooking easier. A large pot helps boil the pasta evenly. A skillet is essential for sautéing garlic and shrimp. A colander drains the pasta quickly. Measuring cups and spoons ensure accurate amounts. A knife and cutting board help with chopping garlic and parsley. With these items, you are set to create a tasty meal.
Step-by-Step Instructions
Cooking the Linguine
To start, boil a large pot of salted water. Add the linguine and cook as the package says, usually for 8-10 minutes. You want the pasta to be al dente. Once cooked, drain it but save about 1 cup of the pasta water. Set the linguine aside for later.
Sautéing the Garlic
In a large skillet, melt 4 tablespoons of unsalted butter over medium heat. Once it’s completely melted, add 4 cloves of finely minced garlic. Sauté the garlic for about 1 minute. Stir often until you smell that great garlic aroma. Be careful not to let it brown.
Cooking the Shrimp
Now, add 1 pound of peeled and deveined shrimp to the skillet. Season them with red pepper flakes, salt, and black pepper. Cook the shrimp for 2-3 minutes, stirring occasionally. They should turn pink and opaque. Once done, take the shrimp out and set them aside.
Making the Sauce
In the same skillet, pour in 1 cup of chicken broth. Bring it to a gentle simmer. Add 2 tablespoons of fresh lemon juice and the zest of 1 lemon. Stir everything well. Let the sauce reduce for about 3-4 minutes. This helps blend all the delicious flavors.
Combining Ingredients
Return the cooked linguine and shrimp to the skillet. Toss everything together gently. You can add the reserved pasta water a little at a time, until the sauce is just how you like it. Stir in the remaining 2 tablespoons of butter until it melts and blends in.
Final Seasoning and Serving
Taste your dish and add more salt and pepper if needed. When you’re happy with the flavor, take it off the heat. Garnish with chopped parsley before serving. This adds color and freshness to your meal. Serve it hot for the best taste!
Tips & Tricks
Perfecting the Sauce
To make the sauce just right, use pasta water. After cooking the linguine, save a cup of that starchy water. If your sauce is too thick, add a bit of this water. It helps the sauce cling to the pasta better. Remember, the salt from the pasta water adds flavor too.
For seasoning, taste as you go. Start with salt and pepper. Add red pepper flakes for a kick. Adjust these to match your taste. A pinch more lemon juice can brighten the dish. Always aim for a balance of flavors.
Cooking the Shrimp
How do you know when shrimp are done? Look for a pink color. They should be opaque and firm. If they curl tightly, they are likely overcooked. It only takes 2-3 minutes to cook shrimp. Watch them closely to keep them tender and juicy.
Avoid overcooking by removing the shrimp from heat early. They continue to cook from residual heat when off the stove. It’s better to undercook slightly than to overdo it.
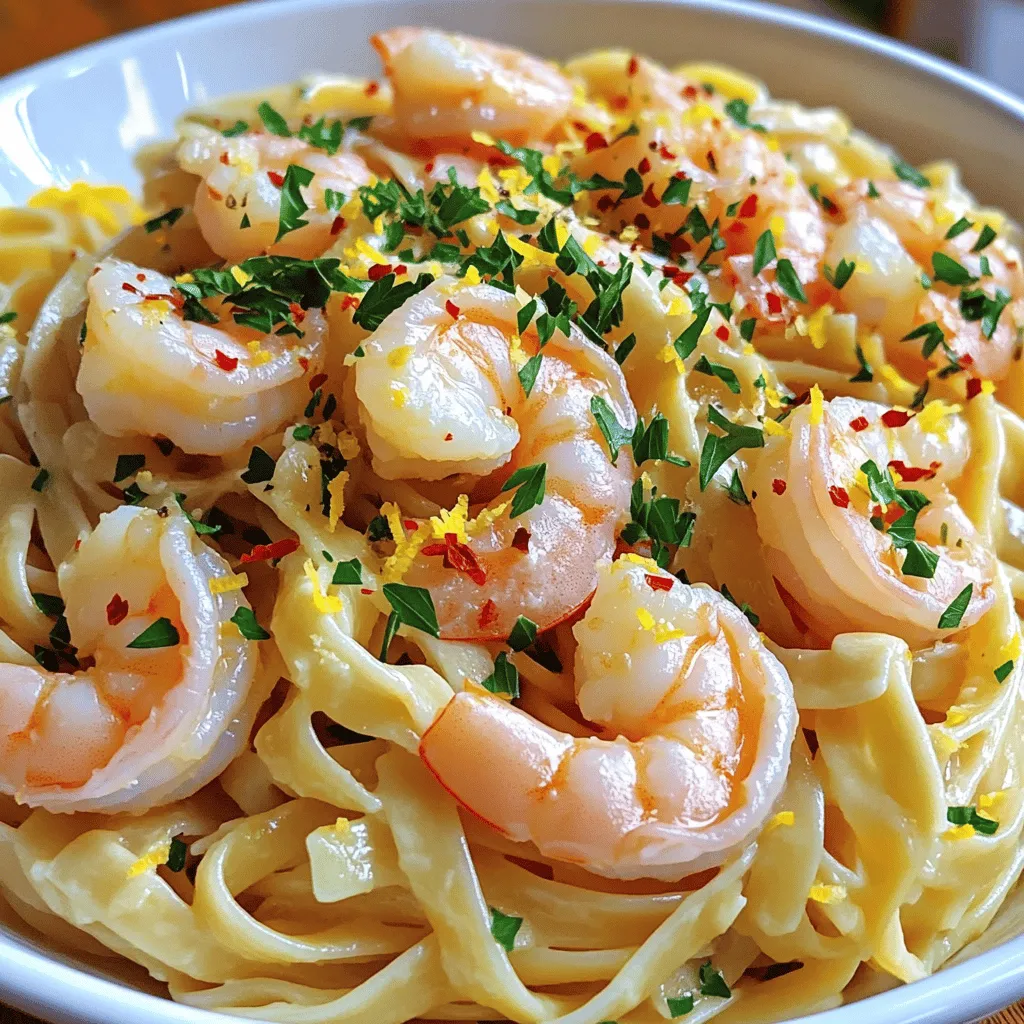
Presentation Tips
To make your dish look great, serve the linguine in shallow bowls. This lets the shrimp sit nicely on top. It also makes it easy to see the sauce and garnish. Sprinkle fresh parsley on top for a pop of color.
For extra flair, add a lemon wedge on the side. This not only looks nice but also gives a fresh flavor boost. You can also drizzle a bit of olive oil over the top for a shiny finish.
Variations
Adding Vegetables
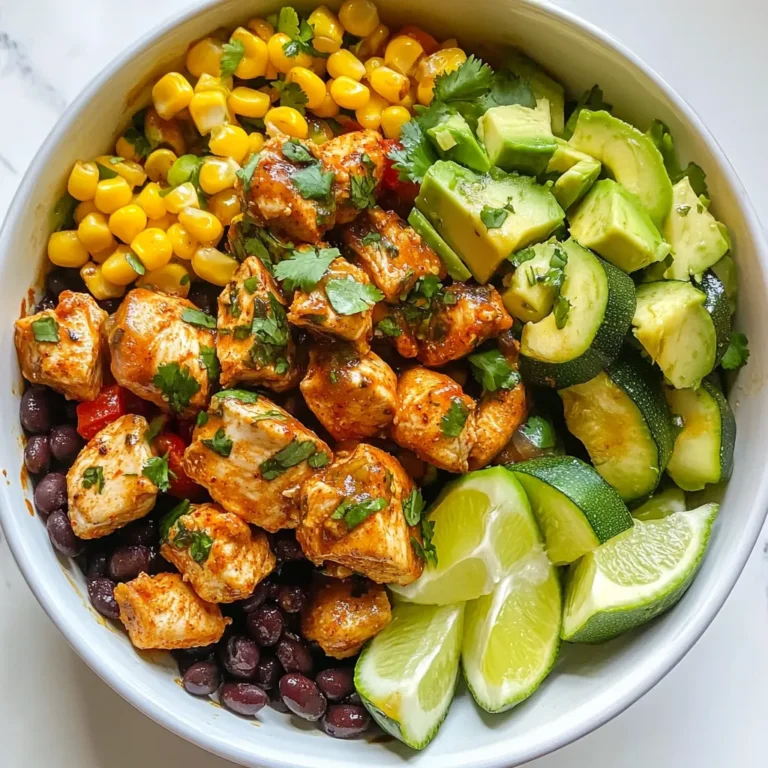
You can easily boost the nutrition of your Garlic Butter Scampi Linguine by adding some vegetables. Here are a few tasty options:
– Spinach: Toss in fresh spinach during the last minute of cooking.
– Cherry Tomatoes: Halve them and add them to the skillet with shrimp.
– Zucchini: Spiralize or slice zucchini and sauté it until tender.
For cooking these vegetables, simply sauté them in the butter before adding garlic. This will help them absorb the garlic flavor. Make sure to adjust cooking times so they stay crisp and fresh.
Protein Alternatives
If you want to switch up the protein, here are some great choices:
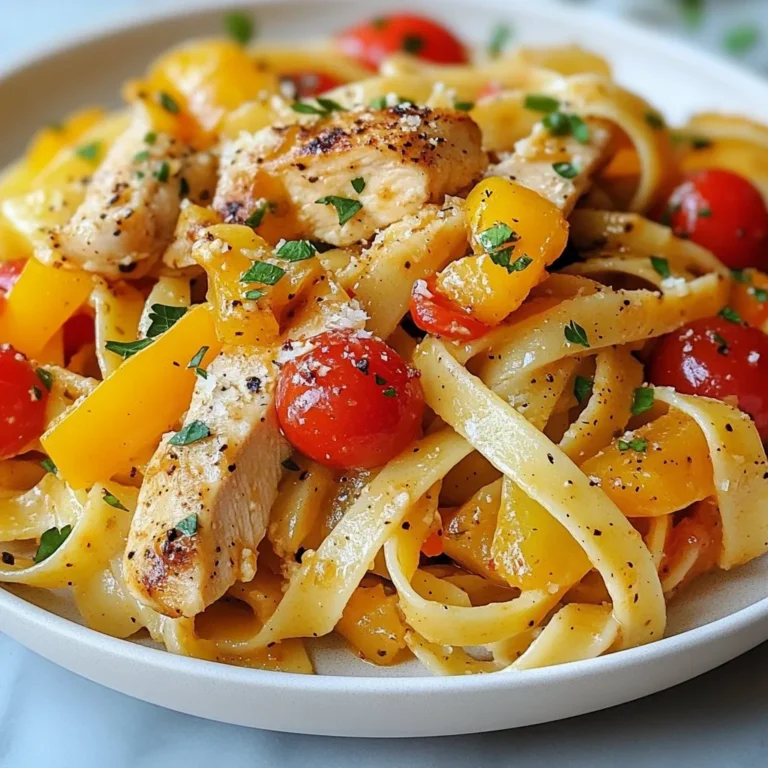
– Chicken: Use diced chicken breast instead of shrimp. Cook until golden brown and fully cooked.
– Scallops: These cook quickly. Sauté them for about 2-3 minutes on each side.
– Tofu: For a vegetarian option, use firm tofu. Sauté until golden and crispy.
Adjust the cooking time based on the protein you choose. Make sure to season well for the best flavor.
Sauce Enhancements
The garlic butter sauce is the star, but you can get creative! Here are some ideas:
– White Wine: Add a splash of white wine while simmering the sauce.
– Cream: Stir in a bit of heavy cream for a rich, creamy sauce.
– Herbs: Fresh basil or dill can add a nice twist. Sprinkle in some chopped herbs just before serving.
Feel free to experiment with spices too! A pinch of smoked paprika or lemon zest can take your dish to the next level.
Storage Info
Storing Leftovers
To store leftovers, let the dish cool down first. Place the linguine and shrimp in an airtight container. Make sure to seal it well. You can keep it in the fridge for up to three days. If you want to keep it longer, consider freezing it.
Reheating Instructions
When reheating, the best method is to use the stove. Place the leftovers in a skillet over medium heat. Add a splash of chicken broth or water to keep it moist. Stir gently until heated through. You can also microwave it in short bursts, stirring in between. Just be careful not to overcook the shrimp.
Freezing Options
To freeze Garlic Butter Scampi Linguine, use a freezer-safe container. Make sure it’s completely cool before sealing. You can freeze it for up to three months. When you’re ready to eat, thaw it overnight in the fridge. Reheat it gently as mentioned above for the best taste.
FAQs
What is the best pasta to use for scampi?
The best pasta for scampi is linguine. It pairs well with the sauce. You can also use fettuccine or spaghetti if you prefer. Both options hold the sauce nicely.
Can I make Garlic Butter Scampi Linguine ahead of time?
Yes, you can make Garlic Butter Scampi Linguine ahead of time. Cook the pasta and shrimp separately. Store them in the fridge. When ready to eat, warm them up together with the sauce.
How can I make this dish spicier or milder?
To make it spicier, add more red pepper flakes. Adjust to your taste. For a milder dish, reduce the red pepper flakes. You can also skip them entirely if you want no spice.
What can I serve with Garlic Butter Scampi Linguine?
This dish pairs well with a fresh salad. A crusty bread also complements it nicely. You can serve it with white wine for a perfect finish.
Is this recipe suitable for meal prep?
Yes, this recipe is great for meal prep. Store it in airtight containers. It keeps well in the fridge for up to three days. Reheat it gently to enjoy later.
This blog post covered a simple and tasty Garlic Butter Scampi Linguine recipe. We explored key ingredients, tools needed, and step-by-step instructions. I shared tips to perfect the dish, along with variations to suit your taste. Remember, cooking shrimp to a perfect pink and storing leftovers is essential. This dish is easy to make and great for any meal. Enjoy creating your own delicious version!
![- 1 pound sirloin steak, cut into bite-sized cubes - 4 tablespoons unsalted butter - 4 cloves garlic, finely minced - 1 tablespoon fresh rosemary, finely chopped - 1 tablespoon fresh thyme, finely chopped - Salt and freshly ground black pepper, to taste - 1 tablespoon olive oil - ¼ teaspoon red pepper flakes (optional for heat) - Fresh parsley, finely chopped, for garnish The right ingredients make all the difference. For this dish, you want a good cut of meat. Sirloin steak works well because it’s tender and flavorful. Cut it into bite-sized cubes. This size helps them cook quickly and evenly. Butter adds richness. The unsalted kind allows you to control the salt level. Garlic gives a strong, tasty punch. Fresh herbs, like rosemary and thyme, add a nice touch. They bring out the beefy flavor. You can add red pepper flakes for a bit of heat. If you prefer a milder dish, just skip this ingredient. Fresh parsley is perfect for garnishing. It adds color and freshness to the final plate. Every ingredient plays a role. Together, they create joy in every bite. For the complete recipe, check out the Full Recipe section. Start by patting the steak cubes dry with a paper towel. This helps create a nice crust when searing. Moisture can make it hard to get that perfect sear. Next, season each steak cube with salt and freshly ground black pepper. This simple step packs in flavor. Let the seasoned steak sit for a bit. This allows the salt to work its magic. In a large skillet, heat the olive oil over medium-high heat until it shimmers. This means the oil is hot enough for searing. Carefully add the steak cubes. Make sure they are in a single layer. Sear the steak for 2-3 minutes without moving them. This helps form a beautiful crust. After that, flip the cubes and sear for another 2-3 minutes. Adjust the time if you want your steak more done. Once they’re seared to your liking, take the steak bites out and set them aside. In the same skillet, lower the heat to medium. Add the unsalted butter and minced garlic. Then toss in the chopped rosemary, thyme, and red pepper flakes if you want some heat. Stir everything together until the butter melts and the garlic smells great. This should take about a minute. Now, return the cooked steak bites to the skillet. Toss them gently in the garlic butter sauce. Cook for another 1-2 minutes. This lets all the flavors mix well together. Take the skillet off the heat. For the final touch, garnish the steak bites with freshly chopped parsley. Serve them on a colorful platter for a nice look. For fun, you can skewer the bites with toothpicks. This makes them easy to eat. Drizzle some of that garlic butter sauce on top to make them even more tasty! For the full recipe, check out the details provided earlier. Enjoy your cooking! To make the best garlic butter steak bites, start with patting the steak dry. This step is key. Dry steak creates a nice crust when you sear it. Use a paper towel to soak up any moisture. Next, adjust your cooking times based on how you like your steak. For medium-rare, sear the cubes for 2-3 minutes on each side. If you prefer your steak more done, add an extra minute or two. Remember, don’t overcrowd the pan. This helps the steak cook evenly. To boost flavor, consider adding spices and herbs. Fresh rosemary and thyme work wonders. The aroma will fill your kitchen and make the bites irresistible. You can also customize your steak bites with optional add-ins. If you like heat, sprinkle in some red pepper flakes. Want a bit of sweetness? Try adding a splash of balsamic vinegar. Each tweak can create a new taste experience. For the full recipe, click here: [Full Recipe]. {{image_4}} You can swap steak for chicken or shrimp. Chicken thighs work well because they stay juicy. Cut the pieces into bite-sized chunks. Cook for about 5-7 minutes until they are golden brown. Shrimp cooks quickly and adds a sweet taste. Use large shrimp and cook them for 2-3 minutes on each side until they turn pink. Both options absorb the garlic butter flavor nicely. For a gluten-free meal, use gluten-free soy sauce instead of regular soy sauce. Always check the label on your butter and spices. Most of them are naturally gluten-free. This keeps the dish safe for those with gluten sensitivities. Enjoy the same great taste without worry. If you want a vegetarian version, mushrooms are a great substitute. Portobello or cremini mushrooms can mimic the texture of meat. Slice them into bite-sized pieces and cook until golden. You can also use tofu for added protein. Press the tofu to remove moisture, then cut it into cubes. Sauté in the garlic butter for a tasty, plant-based dish. To keep your leftover steak bites fresh, store them in an airtight container. Make sure to cool them first. Place them in the fridge within two hours of cooking. This way, they stay safe to eat. Good storage helps keep the flavor and texture. Leftover steak bites last about three to four days in the fridge. When you're ready to enjoy your steak bites again, reheating is key. Use a skillet for the best results. Heat it over medium-low heat. Add a small amount of butter or oil to help keep them moist. Stir gently for about five minutes. This way, you keep the great taste and tender bite. Avoid using the microwave, as it can make the steak chewy. If you want to save steak bites for later, freezing is a good option. First, let them cool completely. Then, place them in a freezer-safe container. You can also use freezer bags, making sure to remove as much air as possible. They can last up to three months in the freezer. When ready to eat, thaw in the fridge overnight. Reheat them in a skillet for the best flavor. Enjoy your Garlic Butter Steak Bites with these storage tips for later meals! For the full recipe, check out the earlier section. Garlic butter steak bites pair well with many sides. Here are some great options: - Roasted vegetables: Carrots, Brussels sprouts, or asparagus are tasty choices. - Mashed potatoes: Creamy potatoes balance the rich steak flavor. - Rice: Fluffy rice soaks up the garlic butter sauce nicely. - Salad: A fresh green salad adds a crisp bite. - Garlic bread: Perfect for dipping into the garlic butter sauce. Yes, you can prep some parts ahead. Here are my tips: - Season the steak: You can season the steak cubes a few hours before cooking. This helps the flavors soak in. - Make the garlic butter sauce: Prepare the sauce in advance and store it in the fridge. Just warm it up before tossing in the steak. - Cook and store: You can cook the steak bites and store them in the fridge for up to two days. Reheat them gently before serving. If you want more heat, try these ideas: - Add more red pepper flakes: Increase the amount to your taste. - Use hot sauce: Drizzle some hot sauce over the finished dish. - Add jalapeños: Sauté sliced jalapeños with the garlic for extra spice. - Try chili powder: Sprinkle some chili powder on the steak while seasoning. These changes will add a nice kick to your garlic butter steak bites! For the full recipe, check out the [Full Recipe]. In this guide, we explored making garlic butter steak bites. We covered key ingredients, step-by-step cooking instructions, and tips for perfecting your dish. Remember to use fresh herbs for great flavor and adjust cooking times for your preference. You can also try alternatives like chicken or mushrooms. This dish is easy to store and reheat, making it perfect for any meal. Enjoy experimenting with flavors and creating a delicious steak experience!](https://joymealplan.com/wp-content/uploads/2025/06/487cc2c4-861e-43bd-80e8-4492eb920a60-768x768.webp)

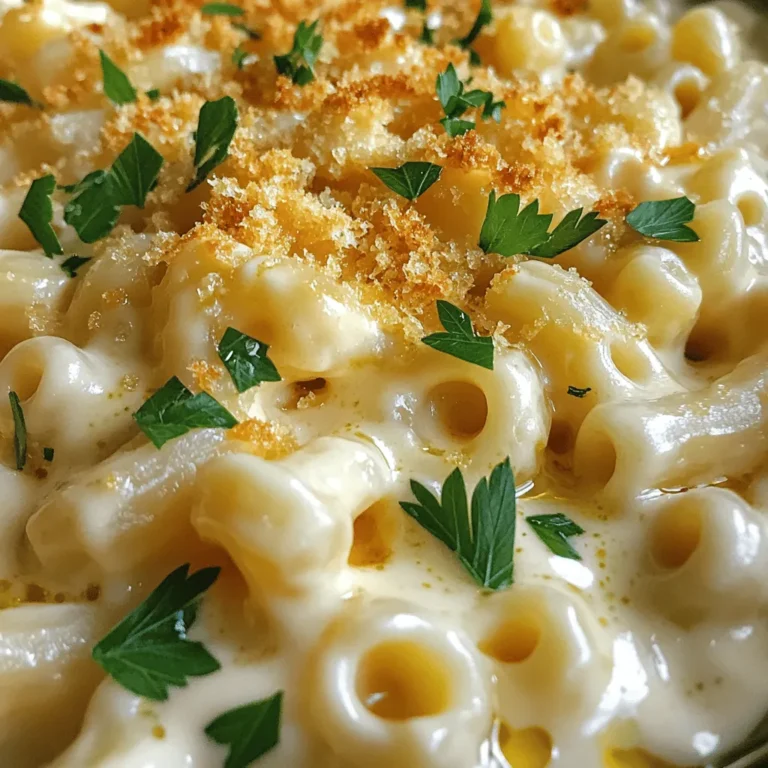
![To make the Pickle Ranch Pasta Bake, you need the following ingredients: - 8 ounces elbow macaroni - 1 cup dill pickles, chopped - 1 cup cooked chicken, shredded (optional for added protein) - 1 cup ranch dressing - 1 cup cheddar cheese, shredded - 1/2 cup cream cheese, softened - 1/2 teaspoon garlic powder - 1/2 teaspoon onion powder - 1/2 teaspoon black pepper - 1/2 cup breadcrumbs - Fresh dill for garnish (optional) These ingredients create a rich and fun dish. The elbow macaroni serves as the base, providing a nice bite. Dill pickles add a tangy crunch that surprises the taste buds. If you want more protein, shredded chicken works great. Ranch dressing brings a creamy flavor that ties it all together. Cream cheese makes it rich, while garlic and onion powders add depth. Shredded cheddar gives a gooey finish, and breadcrumbs add a crispy top. For garnish, fresh dill is a lovely touch. You can find the complete recipe in the Full Recipe section. - Preheat the oven to 350°F (175°C). - Cook the elbow macaroni until it is al dente. This means it should be firm but not hard. Follow the package directions for timing. After cooking, drain the pasta well and let it cool slightly. - In a mixing bowl, combine the softened cream cheese and ranch dressing. - Add garlic powder, onion powder, and black pepper. - Mix everything well until the sauce is smooth and creamy without any lumps. - In the bowl with the sauce, add the chopped dill pickles. If you want more protein, add shredded chicken too. - Gently fold in the cooked macaroni, ensuring all pieces are covered in sauce. - Grease a 9x13 inch baking dish with cooking spray or a bit of olive oil. - Pour the pasta mixture into the dish, spreading it out evenly. - Top it all with shredded cheddar cheese to create a nice, cheesy layer. - In a small bowl, mix the breadcrumbs with a tablespoon of olive oil until they are coated. - Sprinkle this breadcrumb mix over the cheese layer for a crunchy top. - Place the baking dish in your preheated oven and bake for 25-30 minutes. - Look for the cheese to be bubbly and the breadcrumbs to turn golden brown. Now you have a warm, hearty dish ready to serve. For more details, check the Full Recipe. To make your Pickle Ranch Pasta Bake shine, try different types of pickles. You can use sweet pickles for a fun twist or spicy ones for a kick. Each variety adds its unique taste. Always taste your dish as you cook. Adjust the seasoning to suit your preferences. More garlic powder? Add it! Need more zest? A touch of lemon juice can work wonders. For a creamier sauce, mix in a bit more cream cheese. This change makes the sauce rich and smooth. If you prefer a crunchy topping, add more breadcrumbs or even crushed potato chips. They will give the bake an exciting crunch that contrasts nicely with the soft pasta. Presentation matters! Serve the pasta bake right from the dish for a cozy look. For a pop of color, sprinkle fresh dill on top before serving. This not only looks good but also adds fresh flavor. Consider adding extra dill pickles on the side. They make a fun garnish and give guests a chance to customize their plates. For the full recipe, check out the [Full Recipe]. {{image_4}} You can switch out pasta types in this dish. Gluten-free pasta works well if you need it. You can also try whole wheat or penne for a twist. The dressing is flexible too. Use a ranch with herbs for more flavor. Different cheeses can change the taste. Try pepper jack or mozzarella for a new experience. This dish is fun because you can add more veggies or proteins. Bell peppers, spinach, or even corn can boost the flavor. You can add cooked bacon or sausage for extra heartiness. If you want a vegan option, use plant-based cream cheese and cheese. You can skip the chicken and still have a tasty meal. This pasta bake can fit many diets and tastes. To keep your Pickle Ranch Pasta Bake fresh, store leftovers in an airtight container. Place it in the fridge right after it cools. This helps keep it moist and tasty. Consume leftovers within three to four days for the best flavor. If you want to save some for later, freezing works great. First, let the pasta bake cool completely. Then, cut it into portions. Wrap each piece in plastic wrap, then place them in a freezer-safe bag. Label the bag with the date. It can last up to three months in the freezer. When it's time to enjoy your pasta bake again, you want it to taste just as good. The best way to reheat it is in the oven. Preheat your oven to 350°F (175°C). Place the portioned bake in a baking dish and cover it with foil. This keeps it from drying out. Heat for about 20 minutes or until it's warm throughout. If you're in a hurry, you can use a microwave. Place a piece on a microwave-safe plate. Cover it with a damp paper towel to keep moisture in. Heat on medium power for about two minutes. Check and stir if needed. Enjoy your delicious dish just like the first time! Yes, you can make this dish ahead of time. To do this, prepare the pasta and sauce as usual. Then, combine everything in the baking dish. Cover it tightly with foil or plastic wrap. You can store it in the fridge for up to 24 hours before baking. When you are ready to bake, remove the cover and heat your oven to 350°F (175°C). Bake for about 30 to 35 minutes. Check for bubbly cheese and a golden crust. This tip saves time during busy weeknights. Absolutely! The Pickle Ranch Pasta Bake is very kid-friendly. Kids often love the creamy texture and cheesy flavor. To make it even better for picky eaters, you can leave out the dill pickles. You might also want to reduce the ranch dressing. If your kids like it, you can try adding some cooked broccoli or peas. This adds color and nutrition without changing the taste too much. To add some heat, consider mixing in some diced jalapeños or crushed red pepper flakes. You can also use a spicy ranch dressing instead of the regular one. If you enjoy hot sauce, drizzle some over the top before baking. Just remember to taste as you go. This way, you can adjust the heat to your liking. Enjoy experimenting with flavors! This dish blends macaroni, ranch dressing, and pickles into a tasty bake. You can customize it with various ingredients and adjust flavors. For a creamy dish, mix the sauce well; for crunch, use more breadcrumbs. Store leftovers properly to enjoy later. You can make it ahead or cater to picky eaters with simple swaps. Overall, this recipe provides versatility and fun for your cooking adventures. Get creative and enjoy your delicious meal!](https://joymealplan.com/wp-content/uploads/2025/07/1b3a3990-0373-4e07-90bf-a46c97a9e002-768x768.webp)