
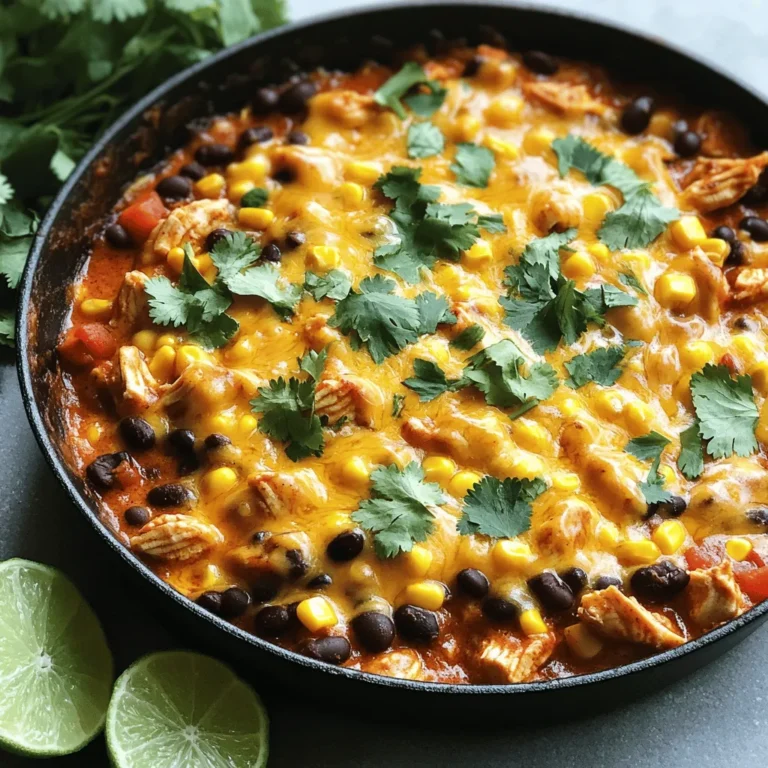
Instant Pot Chicken Burrito Bowls Simple and Tasty
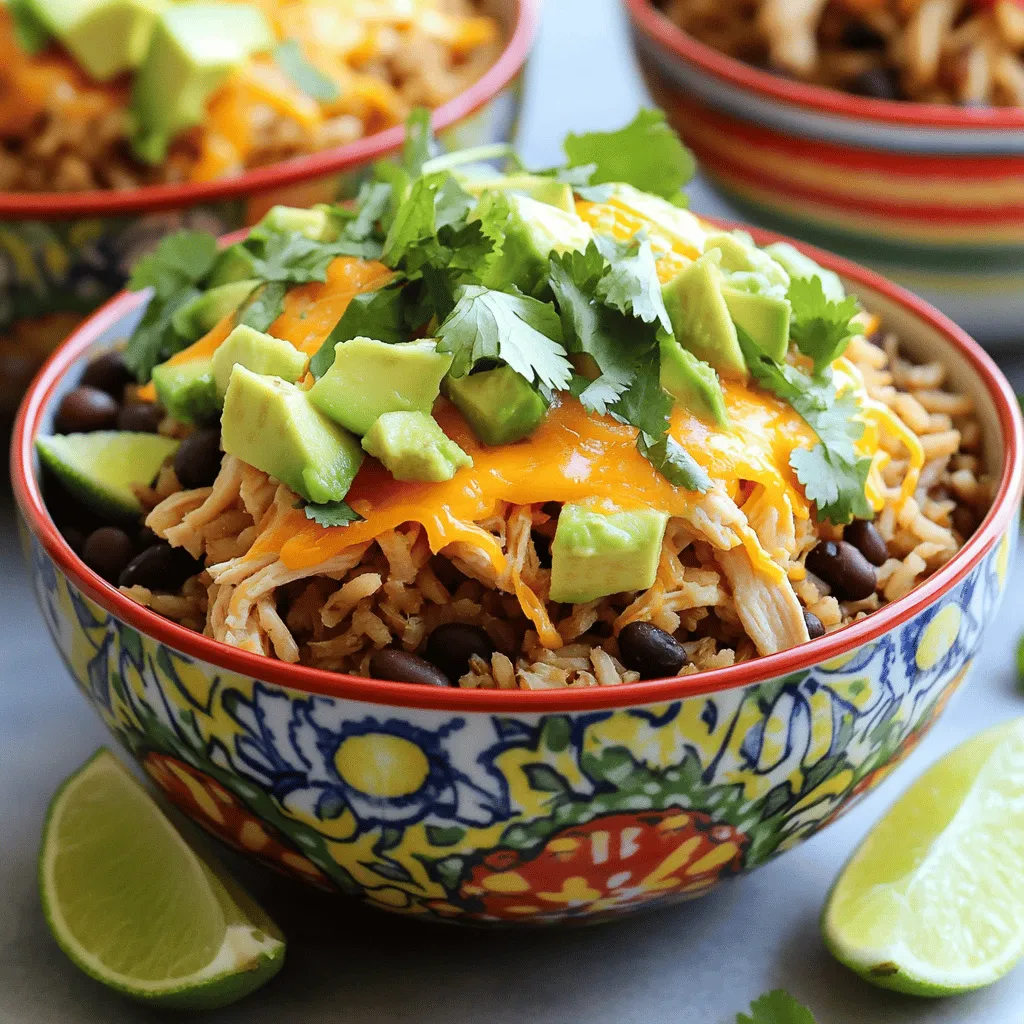
If you’re looking for a quick and delicious dinner, Instant Pot Chicken Burrito Bowls are the answer. I’ll show you how to make this tasty meal using simple ingredients like chicken thighs and black beans. You’ll enjoy layering flavors and topping them with cheese, avocado, and cilantro. Whether you’re cooking for family or just yourself, this dish is sure to impress. Let’s dive into how to whip up your own bowl of goodness!
Ingredients
Main Ingredients
– 1 pound boneless, skinless chicken thighs
– 1 cup brown rice
– 1 can (15 oz) black beans, rinsed and drained
– 1 can (10 oz) diced tomatoes with green chilies
– 1 cup chicken broth
– 1 teaspoon chili powder
– 1 teaspoon ground cumin
– 1 teaspoon garlic powder
– 1 teaspoon onion powder
– Salt and pepper to taste
– 1 cup corn (frozen or canned)
For our Instant Pot Chicken Burrito Bowls, I choose chicken thighs for their tender, juicy meat. Brown rice adds a hearty base, while black beans bring fiber and protein. The diced tomatoes with green chilies pack a punch of flavor. I always use chicken broth. It enhances the taste of the dish and helps the rice cook well. Seasoning is key; I use chili powder, cumin, garlic powder, onion powder, salt, and pepper to lift the flavors.
Toppings and Garnishes
– 1 cup shredded cheddar cheese
– 1 avocado, diced
– 1 cup fresh cilantro, chopped
– Lime wedges for serving
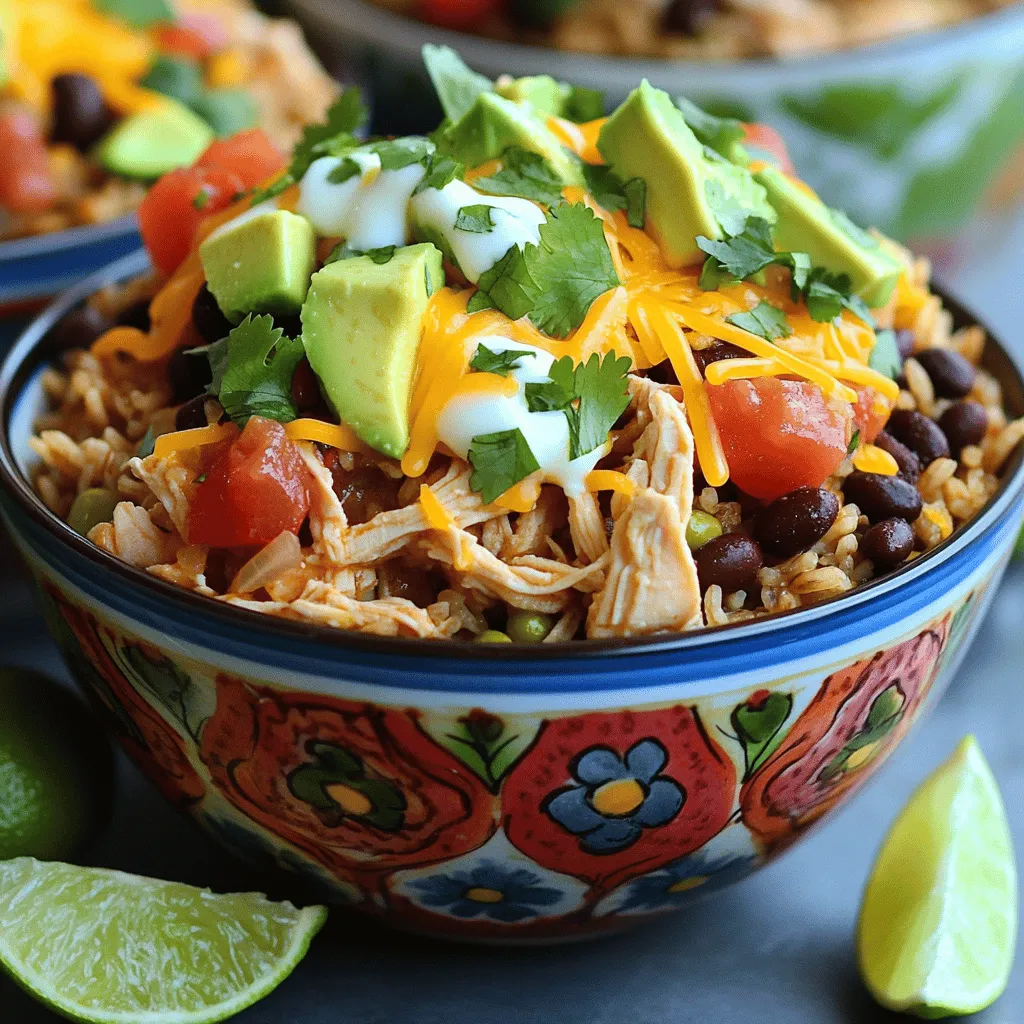
Toppings elevate our bowls. Shredded cheddar cheese melts beautifully, adding richness. Diced avocado brings creaminess and a fresh taste. Chopped cilantro adds a burst of color and flavor. Don’t forget lime wedges! The squeeze of lime juice brightens each bite.
Cooking Essentials
– Instant Pot
– Measuring cups
– Utensils
You need a few essentials to make this recipe. An Instant Pot is crucial for fast cooking. Measuring cups ensure you add the right amounts. Use basic utensils like spoons and forks for mixing and serving. With these ingredients and tools, you’re ready to create a delicious meal!
Step-by-Step Instructions
Preparation of Chicken
Start by drying the chicken thighs with paper towels. This step helps the seasoning stick better. Next, season both sides of the chicken. Use salt, pepper, chili powder, cumin, garlic powder, and onion powder. Make sure to coat it evenly. Even seasoning allows the flavors to blend well during cooking.
Layering Ingredients in the Instant Pot
Pour one cup of chicken broth into the Instant Pot. This liquid creates a tasty base for the dish. Next, add one cup of brown rice, smoothing it gently across the bottom. Then, place the seasoned chicken thighs on top of the rice. After that, layer the rinsed black beans, diced tomatoes with their juices, and corn evenly over the chicken. Proper layering ensures even cooking and flavor distribution.
Cooking and Shredding
Secure the lid on the Instant Pot. Make sure the valve is set to sealing. Choose the Manual setting and set the timer for 15 minutes. This cooking time allows the chicken to become tender. Once the cooking is done, wait for about 10 minutes for natural pressure release. After that, switch the valve to venting to release any remaining pressure. Carefully open the lid and remove the chicken thighs. Place them on a cutting board and use two forks to shred the chicken into bite-sized pieces. Return the shredded chicken to the pot and stir everything together gently.
Tips & Tricks
Cooking Tips
Using an Instant Pot can feel tricky at first. Here are some best practices:
– Prep the chicken well. Dry the chicken thighs with paper towels. Season them evenly.
– Layer right. Always place the liquid first. This helps with cooking and reduces burning.
– Use natural pressure release. Let the pot sit for ten minutes after cooking. This keeps your food moist.
To achieve the perfect balance of flavors:
– Season well. Use salt and spices like chili powder and cumin. They add depth.
– Taste as you go. Adjust salt and spices before serving.
Presentation Tips
Serving your food well makes a big difference. Here’s how to enhance visual appeal:
– Use colorful bowls. Bright dishes make the meal pop.
– Garnish smartly. Sprinkle extra cheddar cheese on top. Add a cilantro leaf for freshness.
– Include lime wedges. They add color and give diners a fresh burst of flavor.
Customization Ideas
You can easily modify this recipe to fit different diets:
– Swap proteins. Try chicken breast, turkey, or beef. For a vegetarian option, use tofu or jackfruit.
– Add veggies. Toss in bell peppers, spinach, or zucchini for extra nutrition.
– Spice it up. Add jalapeños, or use hot salsa to adjust the heat.
Feel free to get creative with your chicken burrito bowls!
Variations
Protein Alternatives
You can switch chicken thighs for chicken breast if you prefer. Turkey also works well in this recipe. If you want beef, use ground beef or shredded beef for a different texture. For a vegetarian option, try tofu or jackfruit. Both can soak up flavors and add protein.
Rice Alternatives
If you want to change the rice, substitute brown rice with white rice or quinoa. Quinoa cooks fast and is a good source of protein. For low-carb options, consider using cauliflower rice. It’s light and absorbs the taste of the dish well.
Flavor Enhancements
To boost flavor, add salsa or your favorite beans. Black beans are great, but you can use pinto or kidney beans too. Spice it up with some cayenne or extra chili powder. For the kids, you could leave out the spice and add mild cheese. This keeps it kid-friendly and tasty.
Storage Info
Refrigeration
Store any leftover chicken burrito bowls in airtight containers. This keeps them fresh and tasty. Make sure to cool the bowls to room temperature before sealing. They can last about 3 to 4 days in the fridge. To ensure food safety, always check for any signs of spoilage, like off smells or color changes. If in doubt, throw it out!
Freezing Method
To freeze chicken burrito bowls, let them cool completely first. Divide them into portions and place them in freezer-safe bags or containers. Remove as much air as possible to prevent freezer burn. They can stay good in the freezer for up to 3 months. When you’re ready to eat, thaw them in the fridge overnight. Reheat in the microwave or on the stove until hot all the way through.
Shelf Life
In the fridge, chicken burrito bowls are good for 3 to 4 days. For frozen bowls, they can last up to 3 months. Always look for signs of spoilage. If you see any ice crystals or if the food smells odd, it’s best to discard it. Enjoy your meal safely!
FAQs
Can I use frozen chicken?
Yes, you can use frozen chicken for this recipe. Just follow these guidelines:
– Increase the cooking time to 20 minutes.
– Ensure the chicken is fully submerged in the broth.
– Check for doneness after cooking; it should reach 165°F.
Cooking from frozen is a great time-saver. The Instant Pot handles it well, keeping the chicken juicy and tender.
What can I serve with Chicken Burrito Bowls?
You can serve many tasty sides with chicken burrito bowls:
– Tortilla chips with salsa
– A fresh green salad
– Mexican street corn
– Guacamole and sour cream
These sides add crunch and flavor. They also make your meal more fun and filling!
How can I make this dish spicier?
Want more heat? Here are some tips:
– Add diced jalapeños to the pot.
– Use hot salsa instead of diced tomatoes.
– Stir in cayenne pepper or extra chili powder.
Taste as you go to find the right spice level. Your burrito bowls will have a kick that everyone loves!
You now have everything you need to make delicious Chicken Burrito Bowls. We discussed main ingredients like chicken thighs and brown rice, as well as the best layering and cooking methods in your Instant Pot. I shared various tips for flavor balance and presentation, plus options for swaps and customization. Finally, we covered safe storage methods and FAQs to help you along the way. With these steps, you can create tasty meals everyone will enjoy. Happy cooking!

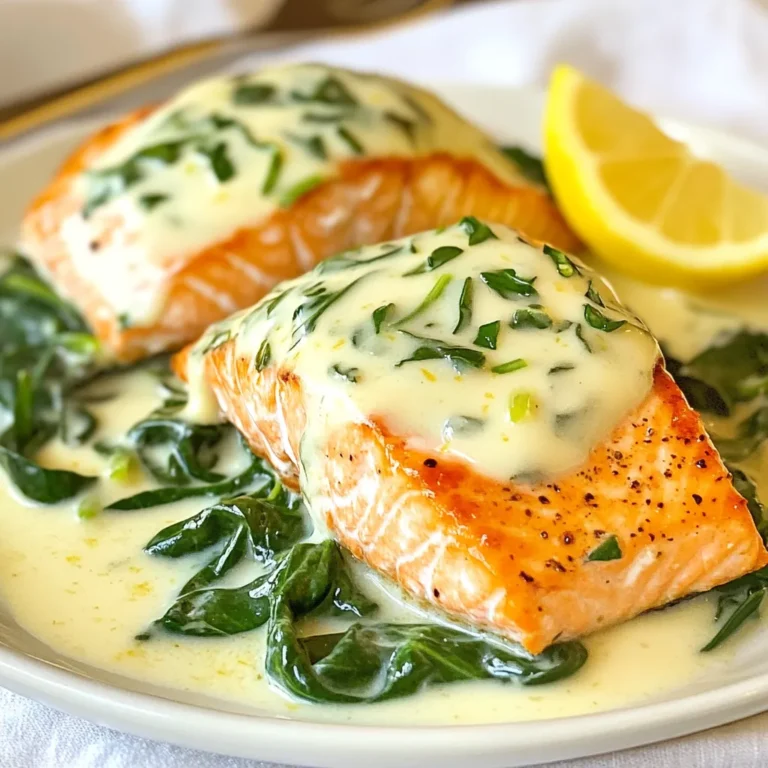

![To make a tasty sweet potato hash, gather these simple ingredients: - 2 medium sweet potatoes, peeled and diced into 1/2-inch cubes - 1 red bell pepper, finely diced - 1 green bell pepper, finely diced - 1 small red onion, finely diced - 2 cloves garlic, minced - 1 teaspoon smoked paprika - 1/2 teaspoon ground cumin - Salt and freshly ground black pepper to taste - 3 tablespoons extra-virgin olive oil - 4 large eggs (optional, for serving) - Fresh parsley, chopped (for garnish) Fresh herbs can brighten your hash. Try adding: - Chopped cilantro for a fresh kick - Thyme for an earthy flavor - Chives for a mild onion taste - Oregano for a hint of sweetness Experiment with spices too. You can add chili powder for heat or turmeric for color. Choosing the right cooking oil is key. I recommend: - Extra-virgin olive oil: Rich in healthy fats and flavor. - Avocado oil: Great for high heat and packed with vitamins. - Coconut oil: Adds a unique taste and is good for cooking. Each oil brings its own benefits, making your sweet potato hash even better. For the best result, use extra-virgin olive oil in this recipe. You will love the flavor! For the full recipe, check out the details above. 1. Start by heating 2 tablespoons of olive oil in a large skillet over medium heat. Wait until the oil shimmers. 2. Carefully add the diced sweet potatoes to the skillet. Season them with salt, pepper, smoked paprika, and cumin. Stir to coat the sweet potatoes evenly. 3. Let the sweet potatoes cook for 10-12 minutes. Stir them occasionally. They should soften and turn golden-brown on the edges. 4. Next, add the diced red onion and bell peppers to the skillet. Cook while stirring for another 5-7 minutes. All the veggies should become tender and slightly caramelized. 5. In the last minute, add the minced garlic to the skillet. Stir well and cook until the garlic smells great, about 30 seconds. Taste and adjust seasoning if needed. 6. If you want to add eggs, heat the last tablespoon of olive oil in another pan over medium heat. Cook the eggs to your liking, either fried sunny-side-up or poached. 7. Serve by spooning the sweet potato hash onto plates or bowls. Top with a cooked egg and sprinkle fresh parsley for color. This recipe uses several key cooking techniques: - Sautéing: This method cooks the sweet potatoes and veggies quickly, creating a nice browning effect. - Seasoning: Adding spices like smoked paprika and cumin enhances the flavor. - Layering: Cooking veggies in stages helps build depth in taste and texture. - Garnishing: Adding fresh parsley brightens up the dish visually and adds freshness. - Use medium heat to ensure even cooking. High heat can burn the sweet potatoes. - Stir often, especially after adding the onions and bell peppers. This keeps them from sticking and burning. - Keep an eye on the garlic. It can burn quickly, so add it last. - If you see the veggies getting too dark, lower the heat and add a splash of water to steam them. For more details, check the Full Recipe. To achieve the best texture for your sweet potato hash, follow these tips: - Cut sweet potatoes into even 1/2-inch cubes. This helps them cook evenly. - Pre-cook sweet potatoes in the microwave for 3-4 minutes. This speeds up cooking. - Cook on medium heat. This prevents burning while allowing them to crisp up. - Stir occasionally, so they don’t stick to the pan. This keeps a nice texture. You can elevate the flavors of your sweet potato hash with these ideas: - Add fresh herbs like thyme or rosemary for a burst of freshness. - Include a splash of lime juice or vinegar for extra zing. - Experiment with different spices, like chili powder or turmeric, for warmth. - Top with avocado or feta cheese for creaminess and richness. Avoid these common mistakes for a perfect sweet potato hash: - Don’t overcrowd the skillet. This can lead to steaming instead of browning. - Avoid using old or dry sweet potatoes. Fresh ones yield better flavor and texture. - Don’t skip the seasoning early on. It helps build flavor from the start. - Be careful not to overcook the garlic. It can turn bitter if burned. For the full recipe, check out Savory Sweet Potato Hash . {{image_4}} You can change up your sweet potato hash with many vegetables. Adding spinach gives it a nice green touch. Kale is another great choice; it adds a hearty bite. Try zucchini for a mild taste. You can even toss in some corn for sweetness. Each vegetable adds its own flavor and texture. To make your hash more filling, add protein. Cooked bacon or sausage provides a savory kick. If you want a leaner option, try diced chicken. For a meatless choice, black beans work well. They add protein and a creamy texture. You can even sprinkle feta cheese on top for a salty finish. Making your hash vegan is easy. Simply skip the eggs and use olive oil for cooking. You can also add nutritional yeast for a cheesy flavor. For gluten-free, all the ingredients in the recipe are safe. Just ensure any added condiments are gluten-free. This way, everyone can enjoy your delicious sweet potato hash! For the complete recipe, check out the [Full Recipe]. To keep your sweet potato hash fresh, let it cool first. Place it in an airtight container. Store it in the fridge for up to four days. This keeps the flavors intact. Be sure to label the container with the date. This helps you track how long it has been stored. If you want to save some for later, freezing is a great option. Use a freezer-safe container or bag. Portion it out to make reheating easier. Make sure to squeeze out as much air as possible. This helps prevent freezer burn. Sweet potato hash can freeze well for up to three months. When it’s time to eat your leftovers, reheating is easy. You can use a skillet or microwave. If using a skillet, add a splash of olive oil. Heat it on medium until warmed through. Stir occasionally to avoid sticking. If using a microwave, cover your dish to keep moisture in. Heat in short bursts, stirring in between. This helps keep the flavors fresh and vibrant. For more detailed instructions, check out the Full Recipe. Yes, you can make sweet potato hash in advance. Cook it fully and let it cool. Store it in an airtight container in the fridge. It stays fresh for up to three days. When ready to eat, just reheat it in a skillet. This keeps the flavors intact and makes serving easy. Sweet potato hash is super versatile. You can serve it for breakfast, lunch, or dinner. Top it with fried or poached eggs for a hearty breakfast. Add avocado slices for creaminess. For lunch, pair it with a green salad. You can also serve it as a side dish with grilled chicken or fish. The options are endless! You can customize your sweet potato hash in many fun ways. Try adding different vegetables like zucchini or mushrooms. For a spicy kick, toss in jalapeños. You can mix in cooked sausage or bacon for added flavor. If you prefer a vegan option, skip the eggs and add chickpeas. Use herbs like thyme or cilantro to enhance the taste. Get creative and make it your own! For the full recipe, check out the savory sweet potato hash section. This article covered how to make sweet potato hash. We discussed ingredients, cooking steps, and tips for perfect texture. You learned about variations, storage, and common questions. Each section helps you craft a tasty dish. As you make your hash, remember to experiment with flavors and textures. This dish is versatile and can fit many diets. Enjoy your cooking, and don't hesitate to make it your own!](https://joymealplan.com/wp-content/uploads/2025/06/a9a4856f-e5e6-4dd7-b1d4-7d775511eecc-768x768.webp)