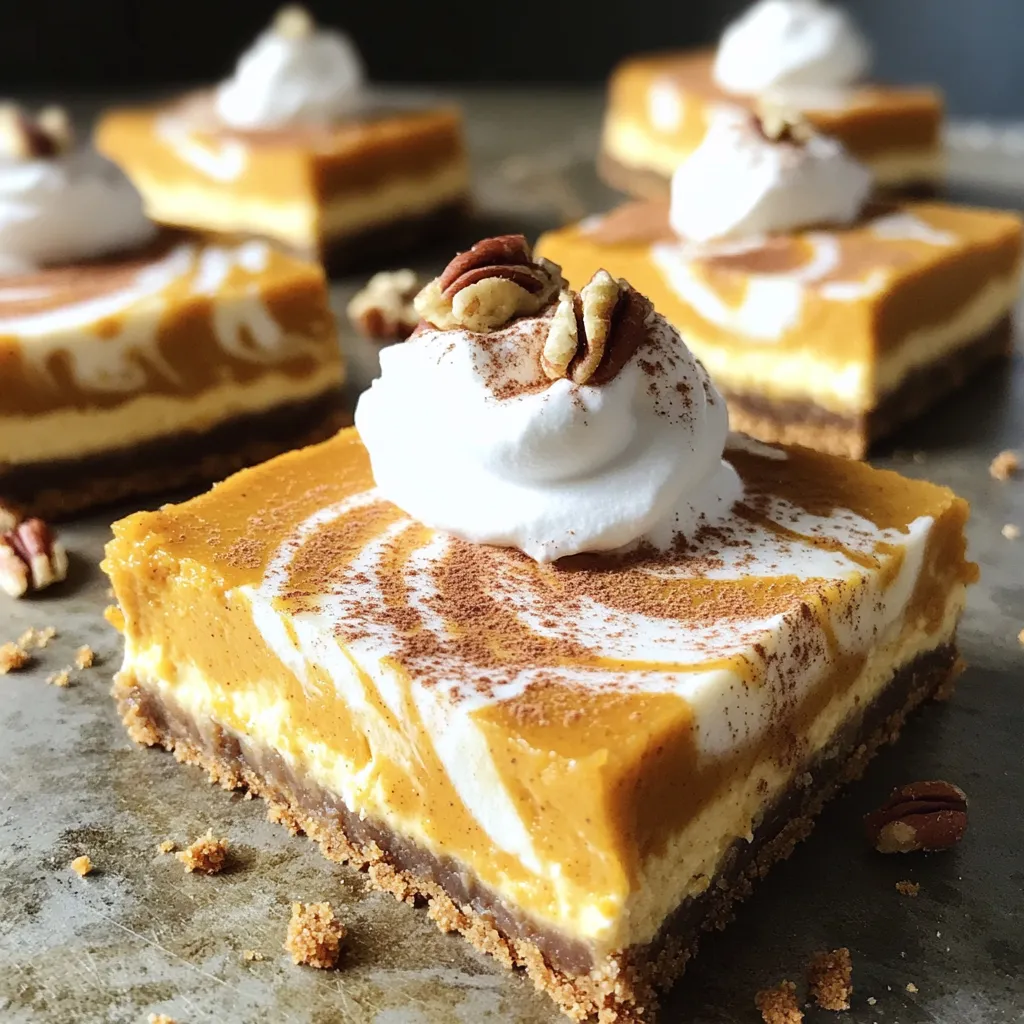
Pumpkin Pie Cheesecake Bars No Bake Easy Delight
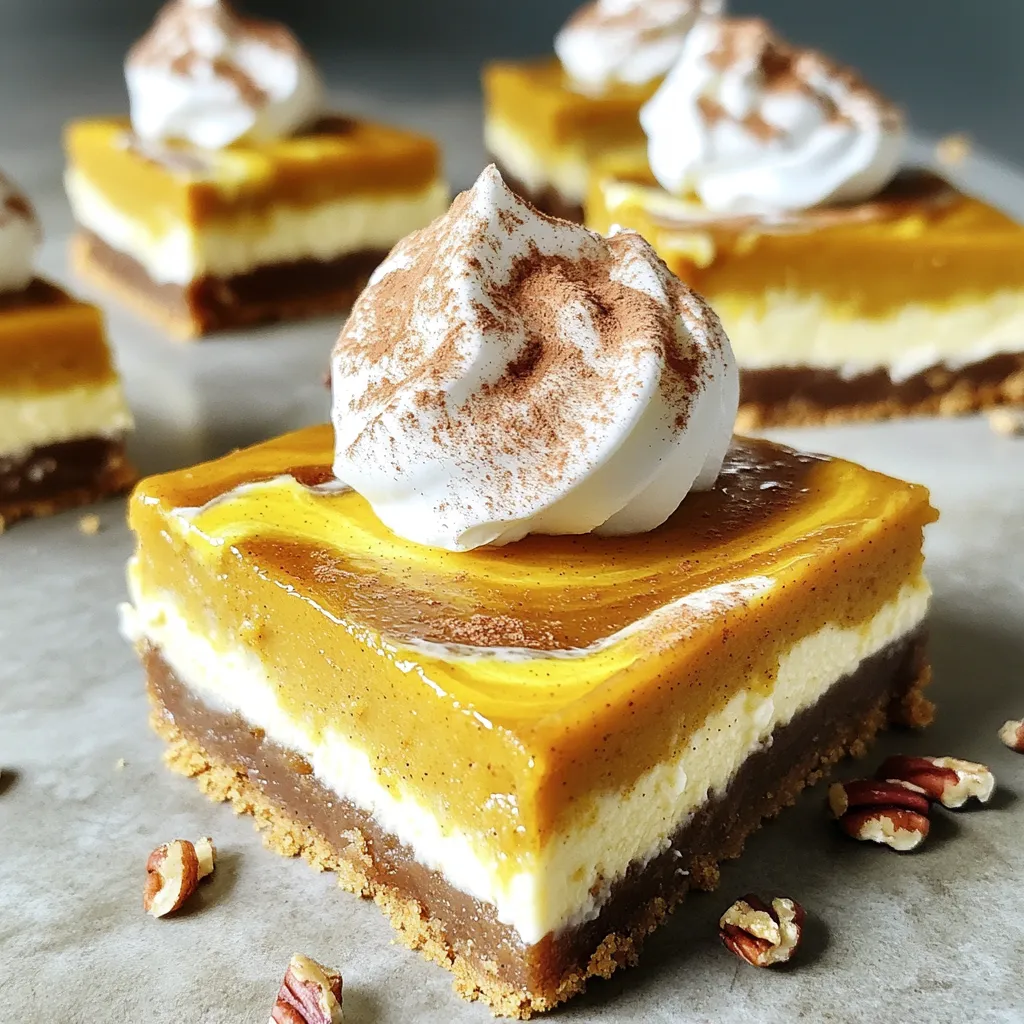
If you love fall treats, you’ll adore these no-bake Pumpkin Pie Cheesecake Bars! They combine the rich flavor of pumpkin pie with the creamy goodness of cheesecake, all in a simple, easy recipe. Plus, there’s no oven involved! In this article, I’ll guide you through each step and share tips to make them perfect every time. Let’s dive into the deliciousness and start creating some autumn magic!
Ingredients
Complete List of Ingredients
– 1 ½ cups graham cracker crumbs
– ½ cup unsalted butter, melted
– 2 tablespoons brown sugar
– 2 cups cream cheese, softened at room temperature
– 1 cup pumpkin puree (canned or homemade)
– ¾ cup powdered sugar
– 1 teaspoon vanilla extract
– 1 teaspoon ground cinnamon
– ½ teaspoon ground nutmeg
– 1 teaspoon pumpkin pie spice
– 1 cup whipped cream (for topping)
– Optional: crushed pecans for garnish
To make these pumpkin pie cheesecake bars, you need simple yet flavorful ingredients. Start with graham cracker crumbs for the crust. The melted unsalted butter binds the crumbs together. Brown sugar adds a hint of sweetness.
For the filling, softened cream cheese is key. It gives a creamy texture. Pumpkin puree brings that classic fall flavor. Powdered sugar sweetens the mix, while vanilla extract enhances the taste. Ground cinnamon and nutmeg add warmth, along with pumpkin pie spice for a festive touch.
Don’t forget the whipped cream! It’s perfect for topping the bars. If you like a little crunch, crushed pecans make a great garnish.
Step-by-Step Instructions
Preparing the Crust
To start, gather your ingredients. In a medium bowl, combine 1 ½ cups of graham cracker crumbs, ½ cup of melted unsalted butter, and 2 tablespoons of brown sugar. Use a fork or spatula to mix these until they look like wet sand. The right texture helps the crust hold together.
Pressing the Crust
Now, take the mixture and transfer it to a lined 9×9-inch baking pan. Firmly press the mixture across the bottom of the pan. You can use your fingers or the back of a measuring cup to help pack it tightly. Once done, place the pan in the refrigerator to set while you prepare the filling.
Making the Cheesecake Filling
For the filling, grab a large mixing bowl. Beat 2 cups of softened cream cheese with an electric mixer on medium speed. Mix for about 2-3 minutes until it’s smooth and creamy. Then, add in 1 cup of pumpkin puree, ¾ cup of powdered sugar, 1 teaspoon of vanilla extract, 1 teaspoon of ground cinnamon, ½ teaspoon of ground nutmeg, and 1 teaspoon of pumpkin pie spice. Continue mixing until fully blended and velvety.
Layering the Filling
Once your crust has set, retrieve it from the fridge. Carefully pour the cheesecake filling over the chilled crust. Use a spatula to spread it evenly across the surface. Make sure the top is smooth for a nice finish.
Chilling Process
Cover the baking pan with plastic wrap or foil. Seal it well and place it in the refrigerator. Allow it to chill for at least 4 hours. This time helps the filling set firm enough to cut into bars.
Serving the Bars
When the cheesecake bars are chilled, lift them out of the pan using the edges of the liner. Place them on a cutting board and cut into squares. Top each square with a generous dollop of whipped cream. You can also sprinkle crushed pecans for added flavor and crunch.
Tips & Tricks
Tips for a Perfect Crust
– Selecting the right graham cracker crumbs: I always choose finely crushed graham cracker crumbs. You can crush them at home or buy them pre-made. The finer the crumbs, the better they stick together. This keeps your crust firm and easy to cut.
– Adjusting sweetness with brown sugar: I like to use brown sugar in my crust. It adds a nice hint of caramel flavor. If you prefer a sweeter crust, feel free to add a tad more brown sugar. Just keep the balance right with the filling.
Achieving a Creamy Filling
– Importance of room temperature ingredients: Always use room temperature cream cheese. Cold cream cheese can create lumps in your filling. Let it sit out for about 30 minutes before mixing. This small step makes your filling smooth and creamy.
– Common pitfalls to avoid: Avoid over-mixing after adding pumpkin puree. This can make the filling too airy. Mix just until combined for a denser, richer texture. Also, watch out for unblended powdered sugar; it can create a gritty texture.
Presentation Enhancements
– Serving suggestions for parties: For a festive touch, serve these bars on a colorful platter. You can even stack them neatly for a beautiful display. Make sure to have extra whipped cream on the side for guests to add.
– Creative garnish ideas: Get creative with your garnishes! Try adding crushed pecans for a crunchy bite. You can also drizzle caramel sauce over the whipped cream for a sweet finish. A sprinkle of cinnamon on top makes it look even more inviting.
Variations
Alternative Flavor Options
You can make these pumpkin pie cheesecake bars even more exciting. Try adding unique spices. A pinch of ginger or allspice can add warmth. You can also switch up the whipped cream. Use flavored whipped cream, like maple or vanilla, for a fun twist.
Dietary Modifications
If you need gluten-free options, use gluten-free graham crackers for the crust. You can also make a vegan version. Replace cream cheese with vegan cream cheese. Instead of butter, use coconut oil. This way, everyone can enjoy these treats.
Serving Size Adjustments
Want to make fewer bars? Halve the recipe easily. Just use half of each ingredient. If you’re hosting a party, you might want more. Double the recipe for larger gatherings. This way, you can share the joy of these delicious bars with more friends.
Storage Info
Proper Storage Techniques
To keep your pumpkin pie cheesecake bars fresh, store them in the refrigerator. Place them in an airtight container to protect against odors and moisture. This method keeps the bars tasty and safe to eat.
Freezing the Cheesecake Bars
These cheesecake bars freeze well. To freeze, cut them into squares and wrap each piece tightly in plastic wrap. Then, place them in a freezer-safe container. They can last up to three months in the freezer. When you want to enjoy them, simply thaw the bars in the fridge overnight.
Shelf Life
In the fridge, these cheesecake bars last for about five days. Look for signs of spoilage, such as off smells or discoloration. If you notice any changes, it’s best to discard them. Enjoy your delicious dessert while it’s fresh!
FAQs
Can I use homemade pumpkin puree?
Yes, you can use homemade pumpkin puree. Some find it fresher and tastier than canned. Homemade puree can be thicker, so adjust your moisture levels if needed. Canned pumpkin puree is consistent, easy, and saves time. Both options work well in this recipe.
How long do these cheesecake bars need to chill?
These cheesecake bars need to chill for at least 4 hours. This time allows the filling to set properly. Chilling helps the flavors blend and makes the bars easy to cut. For best results, consider chilling overnight for a firmer texture.
Can I substitute cream cheese with other ingredients?
You can substitute cream cheese with Greek yogurt or ricotta cheese. These options give a different texture and taste. Greek yogurt adds tanginess, while ricotta makes it creamier. Keep in mind these swaps may change the flavor slightly.
What can I use instead of whipped cream for topping?
If you want alternatives to whipped cream, try yogurt or coconut cream. For a lighter option, use whipped coconut milk. You can also use a drizzle of caramel or chocolate sauce. Each option can enhance the flavor of the bars.
How do I know when the cheesecake is set?
To know if the cheesecake is set, gently press the center. It should feel firm but still have a little give. You can also check the edges; they should be solid. If it jiggles too much, let it chill longer.
This cheesecake bars recipe combines simple ingredients, clear steps, and helpful tips. You can create a tasty dessert that will impress anyone. Remember to chill the bars well for the best texture. Try variations to fit your taste or dietary needs. With proper storage, they last long, keeping your treats ready for any occasion. Enjoy sharing these delicious bars with friends and family, or savor them yourself. Your baking skills will shine, bringing joy to your table. Happy baking!