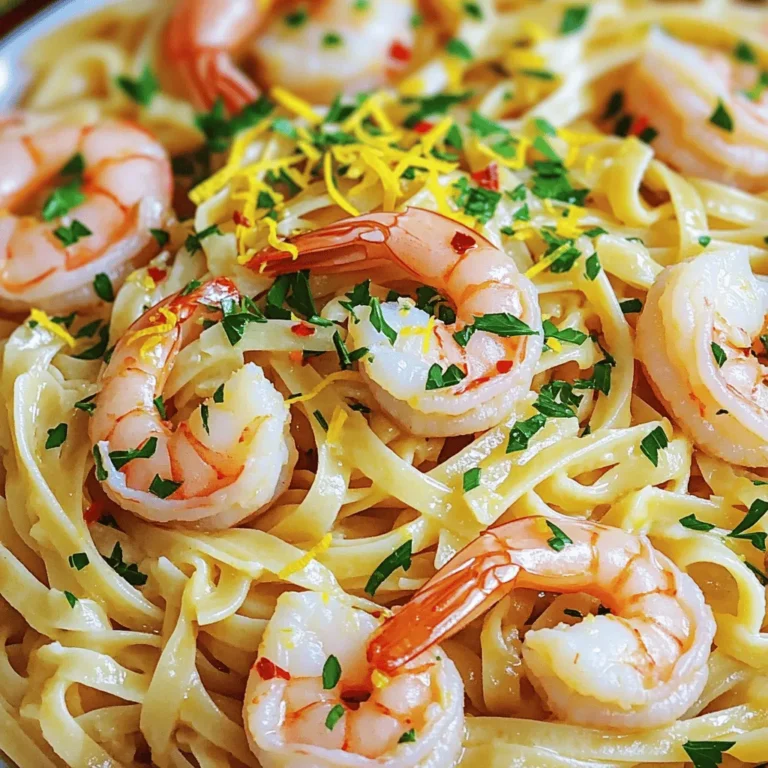
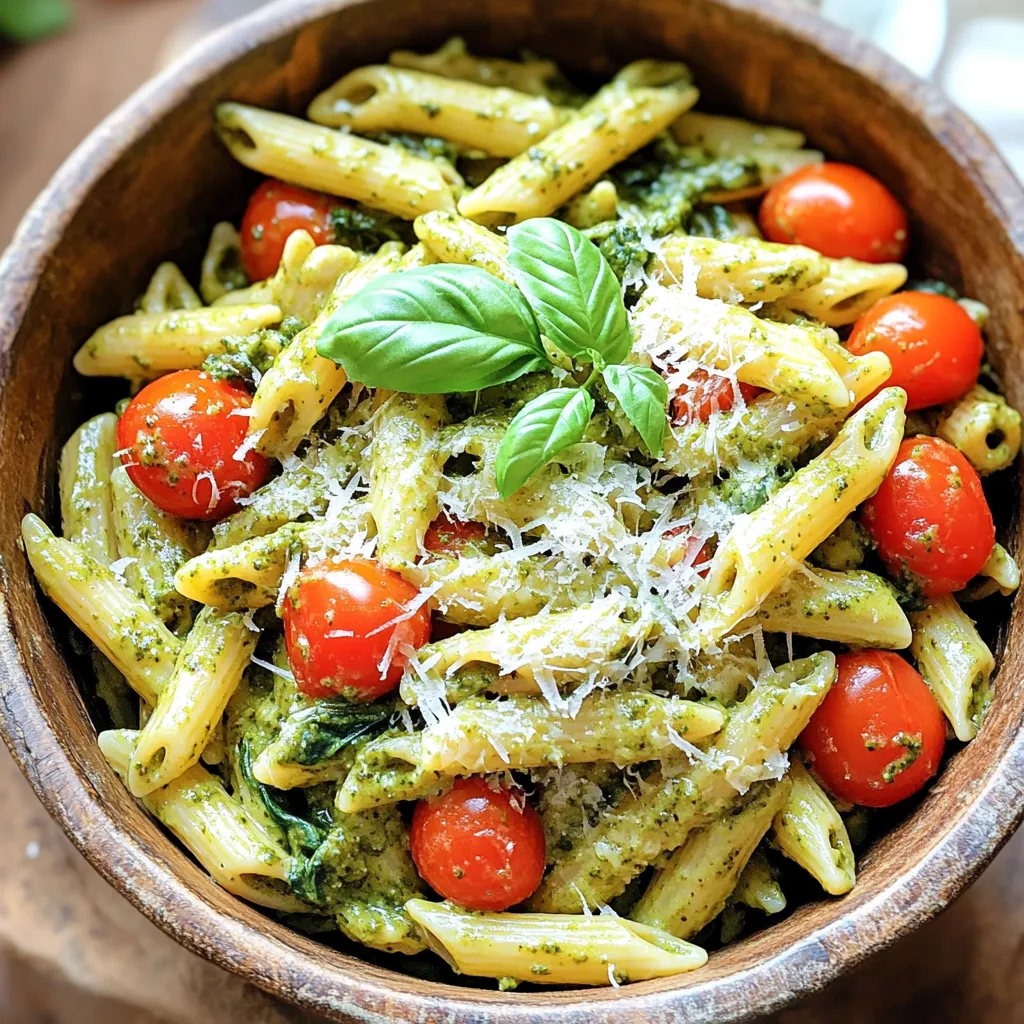
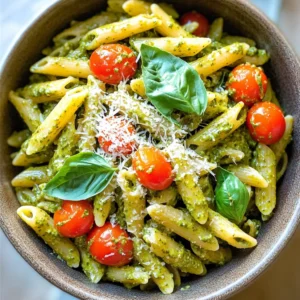
One Pot Pesto Chicken Pasta Tasty and Simple Meal
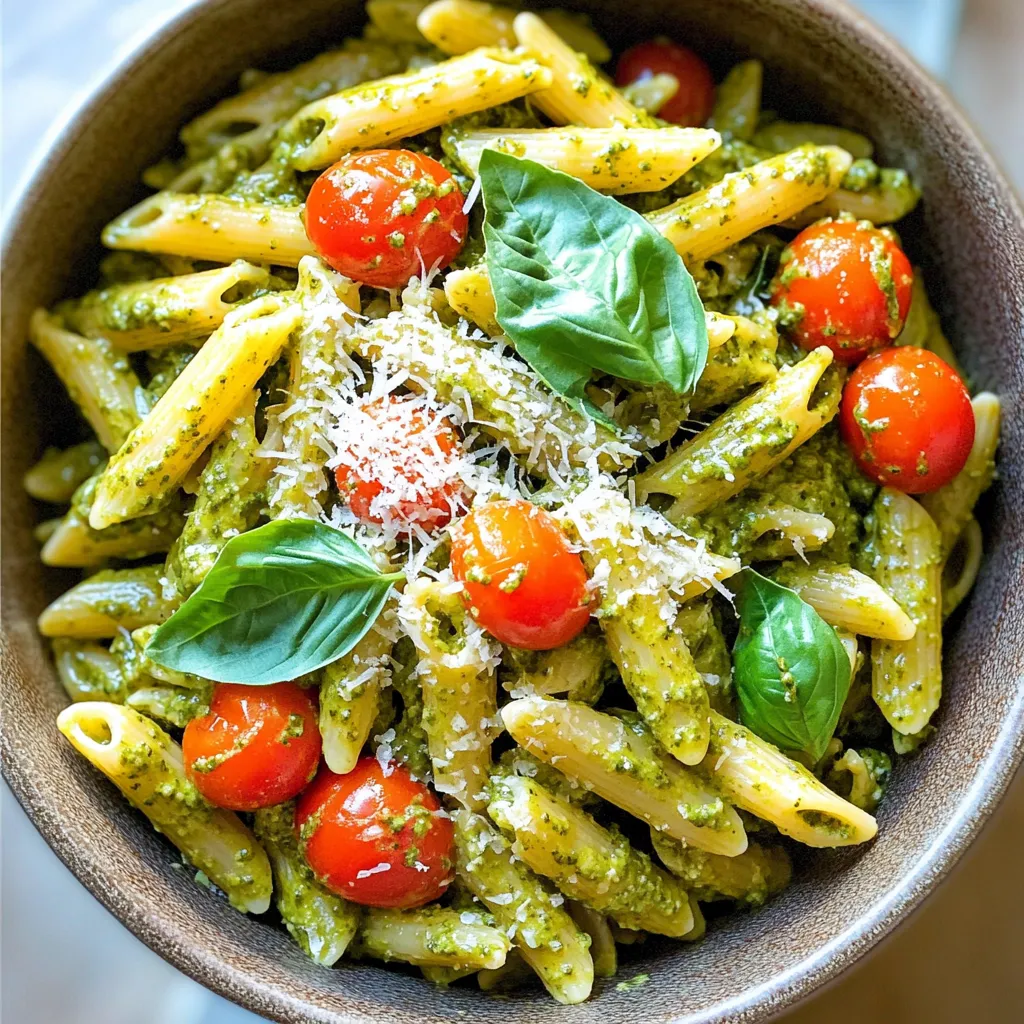
Looking for a quick and tasty dinner idea? One Pot Pesto Chicken Pasta is your answer! This easy recipe combines penne pasta, cooked chicken, and vibrant basil pesto into a delicious meal. With just a few ingredients and steps, you’ll have a satisfying dish ready in no time. Plus, it’s perfect for busy weeknights or meal prep. Ready to dive in? Let’s get cooking!
Ingredients
Main Ingredients Needed
– 12 oz penne pasta
– 2 cups chicken broth
– 1 cup cooked chicken breast
– 1/2 cup basil pesto
Additional Ingredients
– 1/2 cup heavy cream
– 1 cup cherry tomatoes
– 1 cup fresh spinach
– 1/2 cup Parmesan cheese
Seasoning and Garnishing
– 2 tablespoons extra virgin olive oil
– 2 cloves garlic
– Salt and black pepper
– Fresh basil leaves
Each ingredient plays a key role in making this dish tasty. The penne pasta serves as the base, soaking up all the flavors. Chicken broth adds depth and richness. Cooked chicken breast brings protein and heartiness. Basil pesto gives that fresh, herby flavor that ties it all together.
The heavy cream makes the dish creamy and smooth. Cherry tomatoes add a pop of color and sweetness. Fresh spinach offers nutrition and a nice green touch. Finally, Parmesan cheese adds a salty kick that enhances the overall flavor.
For seasoning, I use extra virgin olive oil for cooking. The minced garlic adds a fragrant touch. Salt and black pepper balance the flavors. Fresh basil leaves are perfect for garnishing, adding both flavor and visual appeal. Each ingredient works together to create a simple yet delightful meal.
Step-by-Step Instructions
Prepping the Ingredients
– Sautéing the garlic: Start by pouring extra virgin olive oil into a large pot. Heat it over medium heat. Add minced garlic and cook for about one minute. You want the garlic to smell good but not brown. If it browns, it can taste bitter.
– Measuring the broth and pasta: Next, grab your chicken broth. Measure out two cups. Also, measure 12 ounces of penne pasta. This step helps keep your cooking smooth and easy.
Cooking the Pasta
– Simmering the chicken broth: Pour the chicken broth into the pot with garlic. Bring this mixture to a gentle simmer. You want it to bubble lightly, not boil hard.
– Adding penne pasta: Add the penne pasta to the simmering broth. Cook it according to the package instructions, usually about 10 to 12 minutes. Stir occasionally to keep the pasta from sticking together.
Mixing and Finalizing the Dish
– Incorporating chicken and cream: Once the pasta is cooked al dente, add one cup of shredded chicken and heavy cream to the pot. Stir well to mix everything evenly.
– Adding pesto and spinach: Lower the heat and let it cook for 3 to 5 more minutes. This helps the flavors mix together. Finally, stir in half a cup of basil pesto and one cup of chopped spinach. Mix until everything is well-combined. Adjust salt and pepper to taste.
Tips & Tricks
Perfecting the Pasta
To cook pasta perfectly, aim for al dente. This means the pasta should be firm to the bite. For penne, this usually takes about 10-12 minutes. Keep an eye on the clock, and taste a piece to check doneness. This will help you get it just right.
Stir the pasta often while it cooks. This will help prevent it from sticking together. A quick stir every few minutes keeps the pasta separate and ensures even cooking.
Ingredient Substitutions
If you want a lighter option, you can swap heavy cream. Use half-and-half or coconut milk for a different flavor. Both options give a creamy texture without the heaviness.
For pesto, you can use store-bought or homemade. If you want a change, try sun-dried tomato pesto or spinach pesto. These add unique flavors to your dish.
Serving Suggestions
When serving, use shallow bowls for a nice touch. Top each bowl with extra cherry tomatoes and a drizzle of pesto for a pop of color. This makes the dish look even more appealing.
As for side dishes, a fresh green salad pairs well with this pasta. You can also serve it with garlic bread or crusty rolls. These sides add to the meal and make it feel special.
Variations
Protein Alternatives
You can switch up the protein in this dish. Instead of chicken, consider turkey. It works well and has a nice flavor. You can also use rotisserie chicken for added ease. For a vegetarian option, try chickpeas or white beans. They add protein and help make the dish satisfying.
Flavor Enhancements
You can boost the flavor with spices or herbs. A pinch of red pepper flakes adds heat. Fresh herbs like thyme or oregano can bring a new taste. Adding other vegetables also helps. Try bell peppers, zucchini, or broccoli. Just chop them and mix them in during cooking for a colorful meal.
Different Pasta Options
Not a fan of penne? You can use whole grain pasta. It adds more fiber and has a nutty taste. Gluten-free pasta is also a great option if you need it. You can choose different shapes too. Fusilli or farfalle can make the dish fun and unique. Each shape will soak up the sauce differently, giving you a new experience every time!
Storage Info
Refrigeration Guidelines
Store your One Pot Pesto Chicken Pasta in an airtight container. This keeps it fresh and tasty. It lasts up to three days in the fridge. Make sure it cools down before sealing. This helps prevent sogginess.
Freezing Instructions
To freeze, place the pasta in a freezer-safe container. Leave some space for expansion. It stays good for about two months. For reheating, thaw it overnight in the fridge. Heat in a pot over low heat, adding a splash of chicken broth if needed. This helps restore creaminess.
Meal Prep Ideas
You can make this dish ahead of time. Just store it in the fridge for quick meals. Aim for serving sizes of about one to two cups per meal. This way, you can enjoy it throughout the week. It’s perfect for busy nights or lunch at work.
FAQs
How can I make this dish dairy-free?
To make this dish dairy-free, you can easily swap out the cheese and cream. Use a dairy-free cream like coconut cream or cashew cream. For cheese, try nutritional yeast or a dairy-free cheese blend. These options still give a creamy texture and flavor without dairy.
Can I use homemade pesto?
Yes, you can use homemade pesto! Making fresh pesto is simple and tasty. Blend fresh basil, garlic, nuts, olive oil, and nutritional yeast or cheese. Adjust the flavors to your liking. Fresh pesto adds a bright and vibrant taste to your dish. Store any leftovers in the fridge for up to a week.
What side dishes pair well with One Pot Pesto Chicken Pasta?
This pasta dish goes well with light salads or crusty bread. A simple arugula salad with lemon vinaigrette is refreshing. Garlic bread is also a great choice to soak up the creamy sauce. You can even serve it with roasted vegetables for added flavor and nutrition.
This blog post covered the key ingredients, step-by-step cooking instructions, and helpful tips for making One Pot Pesto Chicken Pasta. You learned about ingredient swaps, variations, and storage options. Emphasizing ease and flavor makes this dish great for anyone.
Try it your way to create a meal that fits your taste. Enjoy exploring new flavors and sharing this dish with others!
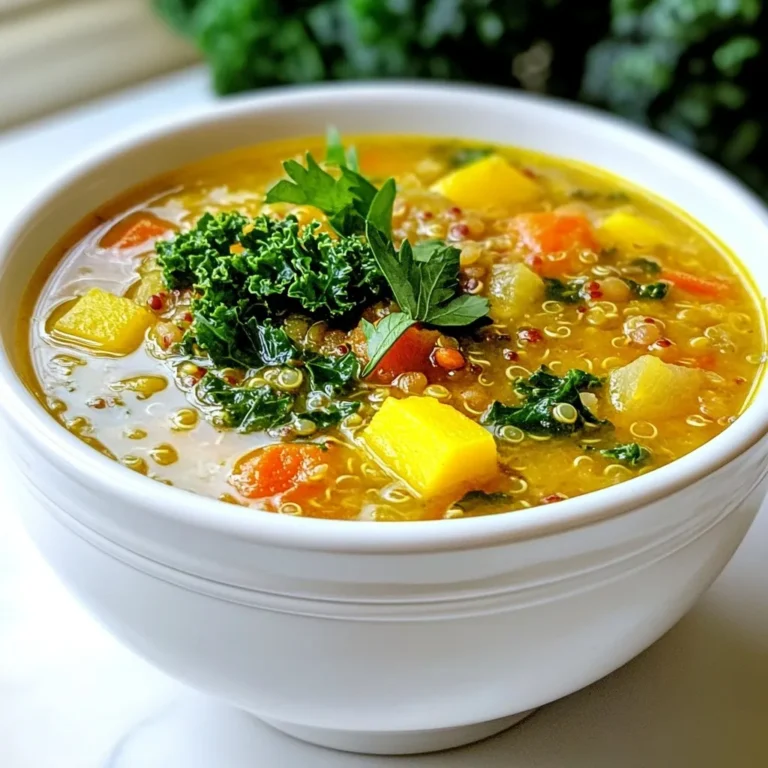
![- 4 large bell peppers (any color of your choice) - 1 cup quinoa, thoroughly rinsed - 2 cups vegetable broth - 1 can (15 oz) black beans, drained and rinsed - 1 cup corn kernels - 1 small red onion, finely chopped - 2 cloves garlic, minced - 1 teaspoon ground cumin - 1 teaspoon smoked paprika - 1 teaspoon chili powder - Salt and freshly cracked black pepper, to taste - 1 cup diced tomatoes - 1 cup shredded cheese - Fresh cilantro or parsley for garnish This recipe is full of vibrant colors and flavors. The bell peppers add sweetness and crunch. Quinoa provides protein, making it a healthy meal choice. I love using black beans for their creaminess and fiber. Corn adds a nice sweetness and texture too. You can choose any color of bell pepper you like. Each color brings a unique taste. Red, yellow, and green all work well. The quinoa must be rinsed to remove saponin, a bitter coating. This step makes the quinoa taste better. Using vegetable broth instead of water boosts flavor. The spices, like cumin and smoked paprika, add warmth and depth. Garlic and onion give a great base flavor. Don't forget to adjust salt and pepper to your taste. I recommend adding cheese on top for a nice finish. It melts beautifully and adds richness. You can use cheddar or a Mexican blend, based on your preference. For a pop of color, garnish with fresh cilantro or parsley. For the complete recipe, check out the [Full Recipe]. - Preheat your oven to 375°F (190°C). - Slice the tops off four large bell peppers. Remove the seeds and membranes. - Stand the peppers upright in a baking dish. This keeps them stable while cooking. - In a saucepan, add one cup of rinsed quinoa and two cups of vegetable broth. - Bring the mixture to a boil over medium heat. - Once boiling, lower the heat and cover the pot. Simmer for about 15 minutes. - Fluff the quinoa with a fork when it’s done. - In a large bowl, combine the cooked quinoa with one can of black beans, one cup of corn, and one small chopped red onion. - Add two minced garlic cloves, one teaspoon of cumin, smoked paprika, and chili powder. - Season with salt and pepper to taste. - Fold in one cup of diced tomatoes before stuffing the peppers. - Carefully spoon the quinoa mixture into each pepper. Pack it down gently. - Top each stuffed pepper with one cup of shredded cheese. - Cover the dish with aluminum foil to keep the moisture in. - Place the covered dish in the preheated oven. Bake for 25 to 30 minutes. - Remove the foil and bake for another 10-15 minutes until the cheese is golden. This recipe brings together flavors and nutrition in a fun way. You’ll enjoy the vibrant colors and tastes! For the complete recipe, check out the Full Recipe. To get the best quinoa, start by rinsing it well. This removes any bitter coating. Use a fine mesh strainer for this step. Next, combine one part quinoa with two parts vegetable broth. This adds flavor. Cook on medium heat until it boils, then lower the heat and cover. Let it simmer for about 15 minutes. The quinoa should be fluffy and all the liquid gone. Spices make a big difference. I love adding ground cumin, smoked paprika, and chili powder for warmth. You can also mix in fresh herbs like cilantro or parsley for freshness. If you want more kick, add chopped jalapeños. Olives give a nice briny taste too. Feel free to get creative with your flavors! Make your dish pop! Serve the stuffed peppers on a bed of fresh greens. This adds color and crunch. You can sprinkle extra cheese on top before serving. A squeeze of lime over the peppers brightens the dish. Consider drizzling with a creamy sauce, like ranch or yogurt, for added richness. For the full recipe, check the details above. {{image_4}} You can make quinoa stuffed peppers vegan by swapping out cheese and broth. Use a plant-based cheese or skip it entirely. For broth, substitute with water or vegetable stock. Add more flavor by mixing in nutritional yeast. For protein, try lentils or chickpeas. Add veggies like spinach, kale, or mushrooms for extra nutrients. Quinoa isn't your only option. You can use rice or couscous. Both grains offer a nice texture. If you want to add meat, chicken, turkey, or even crumbled tofu work great. Just cook the proteins before mixing them into the filling. You can also add diced olives or sun-dried tomatoes for a flavor boost. Feel free to experiment with various pepper types. Bell peppers are common, but try poblano or jalapeño for a kick. Sweet peppers make the dish mild, while spicy peppers add heat. Using different sizes can change your serving style. Smaller peppers can be appetizers, while larger ones can be main dishes. To store your quinoa stuffed peppers after cooking, let them cool first. Place them in an airtight container. This keeps them fresh and tasty. You can store them in the fridge for up to four days. If you want to enjoy them later, be sure to keep the peppers whole. This helps them stay moist. If you want to freeze your stuffed peppers, wrap each one in plastic wrap. Then, place them in a freezer-safe bag or container. This method helps prevent freezer burn. You can freeze them for up to three months. When you are ready to eat, take them out and thaw them overnight in the fridge. Reheat them in the oven at 350°F (175°C) for about 20-25 minutes. This keeps the peppers nice and warm. You can also microwave them for faster results but be careful not to overcook. Enjoy your meal with a burst of flavor! For the full recipe, check out the earlier sections. Yes, you can prepare quinoa stuffed peppers ahead. Cook the quinoa and mix it with the other ingredients. You can stuff the peppers and store them in the fridge for up to 24 hours. If you want, you can bake them later. This saves time on busy days. Look for a few signs. The peppers should be tender but still firm. The filling inside should be hot and bubbly. The cheese on top should melt and turn golden brown. These are good signs your stuffed peppers are ready to enjoy. Yes, you can use other grains. Brown rice, couscous, or farro work well. Each grain has its own cooking time. For brown rice, cook it for about 40-45 minutes. Couscous cooks quickly in about 5 minutes. Adjust cooking times based on the grain you choose. I suggest a few side dishes. A simple salad with mixed greens adds freshness. You can also serve rice or a grain like quinoa on the side. If you want a warm side, consider roasted veggies. These pair well with the stuffed peppers and add color to your plate. Absolutely! This recipe uses quinoa, which is gluten-free. The other ingredients, like beans and veggies, are also gluten-free. Just make sure to check labels on canned goods. This helps ensure no gluten sneaks in. Enjoy this healthy meal worry-free! Quinoa stuffed peppers offer a balanced meal using simple, fresh ingredients. We explored the preparation, cooking tips, and variations. Remember to rinse your quinoa for the best flavor and texture. You can easily adjust the recipe for different diets or flavor profiles. Feel free to experiment with other grains or proteins. Enjoy these tasty peppers now or save some for later. Your kitchen adventures can lead to satisfying meals that everyone loves.](https://joymealplan.com/wp-content/uploads/2025/06/105cb204-6c23-4ed0-80a6-bb54efeb7f27-768x768.webp)