
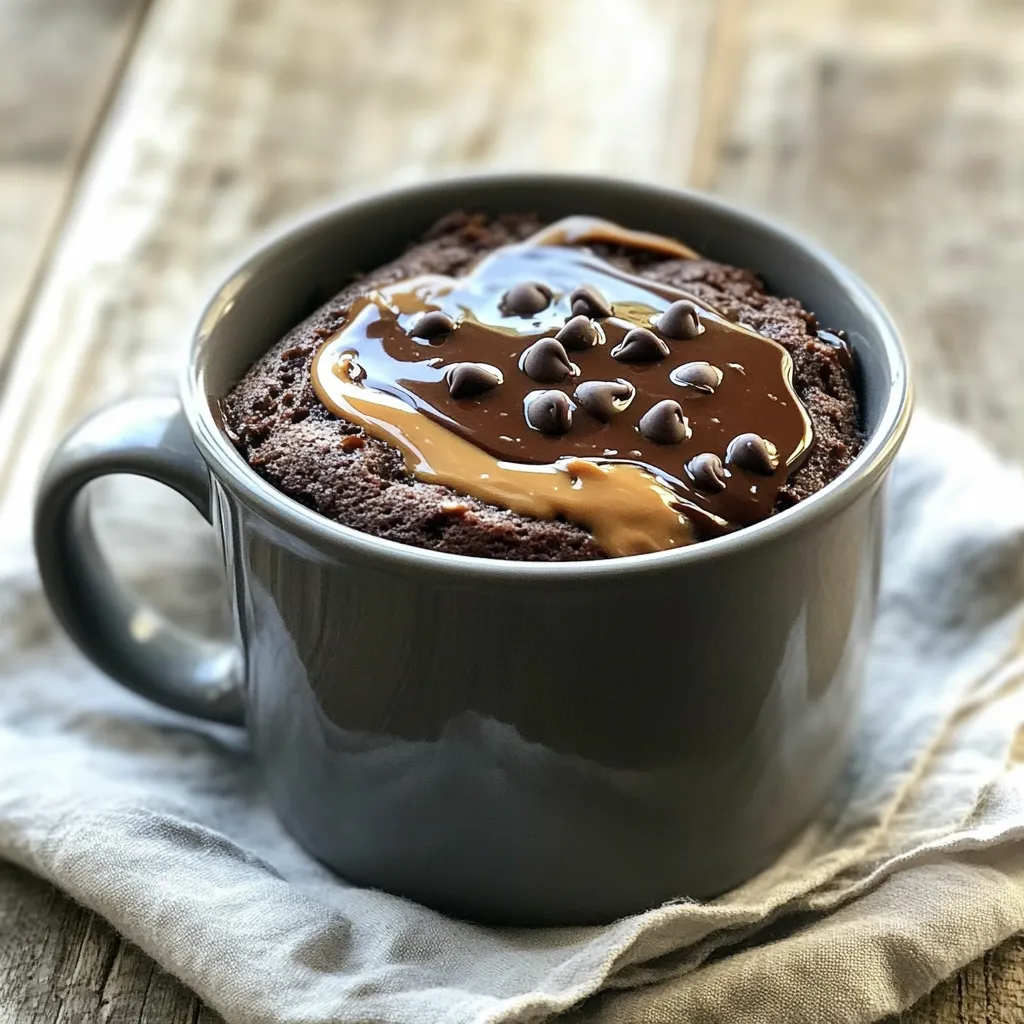
Chocolate Peanut Butter Mug Cake Simple and Quick Treat
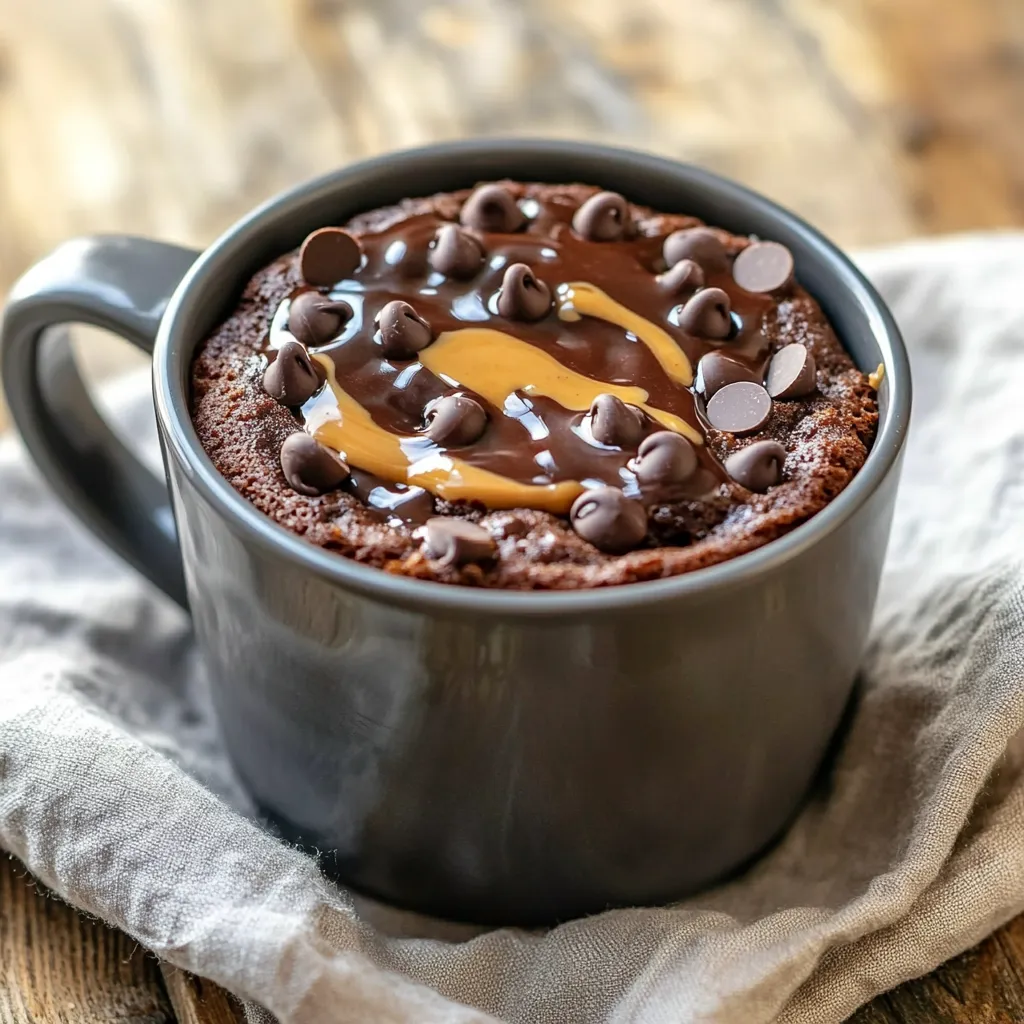
Craving a quick and easy dessert? You’re in the right place! This Chocolate Peanut Butter Mug Cake is a simple treat you can make in minutes. With just a few ingredients, you’ll whip up a warm, delicious cake in your microwave. Perfect for satisfying those sweet cravings, this recipe is a must-try. Get ready to impress yourself with this fun and tasty dessert!
Ingredients
List of Ingredients
To make your Chocolate Peanut Butter Mug Cake, you will need:
– 4 tablespoons all-purpose flour
– 4 tablespoons granulated sugar
– 2 tablespoons unsweetened cocoa powder
– 1/8 teaspoon baking powder
– 1/8 teaspoon fine salt
– 3 tablespoons milk (or your favorite non-dairy milk)
– 2 tablespoons creamy or crunchy peanut butter
– 1 tablespoon vegetable oil
– 1/2 teaspoon pure vanilla extract
– 1 tablespoon chocolate chips (optional but recommended)
These ingredients create a soft and rich cake that is both quick and easy.
Substitutions for Common Ingredients
Not all kitchens have the same items. Here are some swaps you can try:
– Flour: Use whole wheat flour for more fiber.
– Sugar: Coconut sugar can replace granulated sugar for a lower glycemic index.
– Cocoa powder: Dutch-process cocoa gives a richer flavor.
– Milk: Almond or oat milk work well in place of regular milk.
– Peanut butter: Almond butter or sunflower seed butter are great alternatives.
– Vegetable oil: Use melted coconut oil for a unique flavor.
– Chocolate chips: Dark chocolate chips or white chocolate chips can add a fun twist.
These substitutions keep your cake tasty and cater to your pantry.
Optional Toppings
Toppings can elevate your mug cake. Here are some ideas:
– A dollop of extra peanut butter
– Whipped cream for a sweet finish
– Fresh fruit slices like bananas or strawberries
– A sprinkle of powdered sugar for a touch of elegance
– A scoop of your favorite ice cream for extra indulgence
Feel free to mix and match these toppings for your perfect mug cake!
Step-by-Step Instructions
Preparing the Mug
Start by picking a microwave-safe mug. A 12 oz mug works best. Make sure it is clean and dry. This will hold your cake as it cooks. If you have a fun mug, use that! It makes the treat feel special.
Mixing Dry Ingredients
In your mug, add these dry ingredients:
– 4 tablespoons all-purpose flour
– 4 tablespoons granulated sugar
– 2 tablespoons unsweetened cocoa powder
– 1/8 teaspoon baking powder
– 1/8 teaspoon fine salt
Use a fork or small whisk to mix them well. Stir until there are no lumps left. This step is key for a fluffy cake!
Combining Wet Ingredients
Next, pour in the wet ingredients:
– 3 tablespoons milk (or your favorite non-dairy milk)
– 2 tablespoons creamy or crunchy peanut butter
– 1 tablespoon vegetable oil
– 1/2 teaspoon pure vanilla extract
Use the fork or whisk again to mix. Blend until the batter is smooth. Scrape the sides of the mug to catch all the yummy bits.
Cooking the Mug Cake
Now, it’s time to cook! Place the mug in the microwave. Set it on high for 45-60 seconds. Keep an eye on it as it cooks. Watch for the cake to rise. It should look puffy and not spill over.
When the time is up, carefully take the mug out. It will be hot! Let it cool for about 1 minute. Now, it’s ready to enjoy. You can eat it plain or add toppings like peanut butter or whipped cream.
Tips & Tricks
Microwave Cooking Tips
When using a microwave, choose a mug that can hold 12 ounces. This size helps the cake rise without spilling over. Start by cooking for 45 seconds. If it looks wet, add 10 more seconds. Every microwave varies, so keep an eye on it.
Ensuring the Perfect Texture
For a soft and moist cake, do not overmix the batter. Mixing too much can make the cake tough. Make sure to stop mixing once you see no dry spots. Remember, the center should be moist when done. It will continue to cook a bit after you take it out.
Presentation Tips for Serving
To make your mug cake look great, set it on a small plate. Dust some powdered sugar on top for a sweet touch. Add a few fresh berries or a scoop of ice cream. These extras make the treat even more special!
Variations
Flavor Variations
You can change up the taste of your mug cake easily. Want a spicy kick? Add a pinch of cinnamon or a dash of cayenne pepper. Both spices pair well with chocolate and peanut butter. If you crave something fruity, mix in some mashed banana or a few drops of almond extract. These flavors can turn a simple treat into a gourmet delight.
Peanut Butter Alternatives
Don’t have peanut butter? No worries! You can swap it for other nut butters like almond or cashew. Sunflower seed butter is a great choice if you need a nut-free option. Each nut butter brings its unique flavor, so feel free to experiment. You can even use chocolate hazelnut spread for a rich twist!
Gluten-Free Options
If you need a gluten-free mug cake, switch the all-purpose flour for almond flour or gluten-free all-purpose flour. Both options will keep your cake soft and delicious. Just check the baking powder to ensure it’s gluten-free, too. This way, everyone can enjoy a tasty treat without worry!
Storage Info
How to Store Leftovers
If you have leftover mug cake, let it cool first. Wrap it tightly with plastic wrap or place it in an airtight container. Store it in the fridge for up to two days. This keeps the cake fresh and moist.
Reheating Tips
To reheat your mug cake, simply pop it back in the microwave. Heat it for about 10-15 seconds. Check if it’s warm enough for you. If not, add a few more seconds. You want to avoid overcooking it, which can dry it out.
Freezing the Mug Cake
You can freeze the mug cake too! Make sure it’s completely cool, then wrap it tightly. Use aluminum foil or freezer-safe bags. This keeps it safe from freezer burn. The mug cake can be frozen for up to a month. When you’re ready to eat it, thaw it in the fridge overnight, then reheat as mentioned above. Enjoy your tasty treat anytime!
FAQs
How do I fix a dry mug cake?
If your mug cake turns out dry, it may need more liquid. You can add a bit of milk or water, one teaspoon at a time. Mix it well. Try not to overcook it next time. Each microwave is different, so keep an eye on the cake as it cooks.
Can I make a larger batch?
Yes, you can make a larger batch! Just multiply the recipe. Use a bigger bowl and divide the batter into multiple mugs. Cook them one at a time in the microwave. This way, everyone can enjoy their own mug cake.
Is this mug cake suitable for kids?
Absolutely! This mug cake is great for kids. It’s quick, easy, and fun to make. You can let them help with mixing. Just be cautious with the hot mug when cooking. They will love the taste of chocolate and peanut butter!
In this post, we explored mug cakes from ingredients to cooking tips. You learned about substitutions and toppings to make your cake your own. We covered step-by-step instructions and tips to ensure the best texture. Variations let you try new flavors, and storage tips help keep leftovers fresh.
Mug cakes are fun and easy. With this guide, you can bake a tasty treat anytime! Enjoy your mug cake adventures!

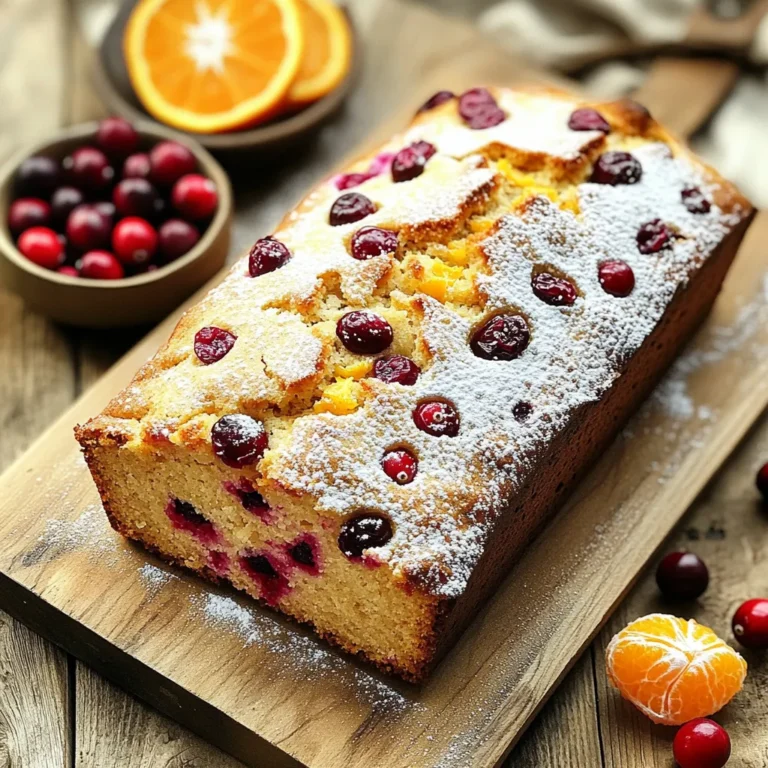
![For my Lemon Poppy Seed Zucchini Muffins, I use these ingredients: - 1 cup grated zucchini (squeeze out excess moisture) - 1 cup all-purpose flour - 1/2 cup whole wheat flour - 1/4 cup poppy seeds - 1 teaspoon baking powder - 1/2 teaspoon baking soda - 1/2 teaspoon salt - 1/2 teaspoon ground cinnamon - 1/2 cup granulated sugar - 1/4 cup brown sugar, packed - 2 large eggs - 1/2 cup vegetable oil - 1/4 cup plain Greek yogurt - Zest of 1 lemon (about 1 tablespoon) - 2 tablespoons fresh lemon juice Using fresh zucchini is key. It keeps your muffins moist. Fresh lemon juice and zest add bright flavors. These ingredients work together to create a light and fluffy treat. If you have dietary needs, you can substitute some ingredients: - For gluten-free muffins, replace all-purpose flour with a gluten-free blend. - Use almond milk or coconut milk in place of Greek yogurt for a dairy-free option. - You can swap the granulated sugar with coconut sugar for a lower glycemic option. To enhance flavor, consider adding: - 1/2 cup chopped nuts, like walnuts or pecans. - 1/2 cup chocolate chips for a sweet twist. - A pinch of nutmeg or ginger for a warm spice note. Feel free to experiment! These small changes can lead to new and exciting flavors in your muffins. For the complete recipe, check out the [Full Recipe]. 1. Preheat your oven to 350°F (175°C). This step is key for even baking. 2. Prepare a muffin tin by lining it with paper liners or lightly greasing it with cooking spray. I like to use liners for easy removal and cleanup. 3. Mix the dry ingredients in a medium bowl. Combine all-purpose flour, whole wheat flour, poppy seeds, baking powder, baking soda, salt, and ground cinnamon. Whisk until well blended. This helps mix the leavening agents evenly. 4. In a large bowl, blend the granulated sugar and brown sugar. Add the lemon zest and whisk until mixed. This adds a bright flavor to your muffins. 5. Add the eggs one at a time, whisking well after each. This helps create a smooth, fluffy batter. Then, pour in the vegetable oil, Greek yogurt, and lemon juice. Mix until smooth. 1. Carefully fold the dry ingredients into the wet mixture. Stir gently until just combined. Avoid overmixing to keep your muffins tender. 2. Fold in the grated zucchini. Make sure it is evenly distributed without overworking the batter. The zucchini adds moisture and flavor. 1. Divide the batter evenly among the muffin cups. Fill each cup about two-thirds full. This allows space for the muffins to rise. 2. Bake in the preheated oven for 18-22 minutes. Check for doneness by inserting a toothpick into the center. If it comes out clean, your muffins are ready. 3. Let the muffins cool in the tin for about 5 minutes. Then, transfer them to a wire rack to cool completely. This helps them maintain their shape and texture. For the complete recipe, check the [Full Recipe]. Enjoy the delightful taste of lemon poppy seed zucchini muffins! To make moist lemon poppy seed zucchini muffins, focus on a few key techniques: - Squeeze the Zucchini: Grate your zucchini, then squeeze out the excess moisture. This step prevents the batter from becoming too wet. - Measure Accurately: Use measuring cups for both dry and wet ingredients. This helps your muffins rise and stay light. When you measure, remember that even small variations can change the texture. Accurate measurements make a big difference in your results. Avoid these common missteps to keep your muffins light and fluffy: - Overmixing: When you combine the dry and wet ingredients, mix gently. Overmixing can lead to tough muffins. - Filling Too Full: Fill the muffin cups about two-thirds full. If you fill them too high, they might sink in the middle. By following these tips, you can make sure your lemon poppy seed zucchini muffins turn out perfectly every time. For the complete recipe, check out the [Full Recipe]. {{image_4}} You can make lemon poppy seed zucchini muffins even more exciting by adding spices. Try mixing in 1/2 teaspoon of nutmeg or 1/2 teaspoon of ginger for a warm twist. These spices add depth and enhance the citrus flavor. Fruits can also change the taste of your muffins. You might consider adding 1/2 cup of blueberries or 1/2 cup of cranberries. These fruits will bring a burst of sweetness and tartness. Just fold them into the batter gently to keep the muffins fluffy. If you want to make vegan lemon poppy seed zucchini muffins, it's easy. Substitute the eggs with 1/2 cup of unsweetened applesauce or 1/4 cup of ground flaxseed mixed with 1/2 cup of water. Both options work well for binding the ingredients. For those wanting lower sugar options, you can use 1/4 cup of honey or 1/4 cup of maple syrup instead of granulated sugar. If you need a sugar-free version, try a sugar substitute that measures like sugar. These variations help you enjoy the muffins while fitting your dietary needs. You can still delight in the great taste of lemon poppy seed zucchini muffins. For the full recipe, check out the details provided earlier. To keep your lemon poppy seed zucchini muffins fresh, store them in an airtight container at room temperature. If you add a paper towel inside, it helps absorb moisture. This method keeps the muffins soft and tasty. When stored this way, they can last for about 2 to 3 days. After that, they may start to dry out or lose their flavor. If you want to save muffins for later, freezing is a great option. Allow the muffins to cool completely, then wrap each muffin tightly in plastic wrap. Place them in a freezer-safe bag or container. They can stay fresh in the freezer for up to 3 months. When you’re ready to eat a muffin, take it out of the freezer. Let it thaw in the fridge overnight or at room temperature for a few hours. For the best taste, reheat them in the oven at 350°F for about 10 minutes. You can also use the microwave for about 20-30 seconds. This warms them up and brings back their soft texture. Enjoy your muffins just like the day you baked them! To make lemon poppy seed zucchini muffins, start by prepping your oven and muffin tin. 1. Preheat your oven to 350°F (175°C). 2. Grate 1 cup of zucchini and squeeze out extra moisture. 3. In one bowl, mix 1 cup all-purpose flour, 1/2 cup whole wheat flour, 1/4 cup poppy seeds, 1 teaspoon baking powder, 1/2 teaspoon baking soda, 1/2 teaspoon salt, and 1/2 teaspoon ground cinnamon. 4. In another bowl, combine 1/2 cup granulated sugar, 1/4 cup brown sugar, and the zest of 1 lemon. 5. Add 2 large eggs, followed by 1/2 cup vegetable oil, 1/4 cup Greek yogurt, and 2 tablespoons of lemon juice. 6. Mix until smooth. Fold in the dry ingredients, then add the zucchini. 7. Fill muffin cups two-thirds full. Bake for 18-22 minutes. This quick overview gives you all the steps needed to create delicious muffins. Check the Full Recipe for more details. Yes, you can freeze these muffins. Here’s how: - Let the muffins cool completely after baking. - Place them in an airtight container or a freezer bag. - Label the bag with the date and type of muffin. - Store in the freezer for up to 3 months. When ready to eat, thaw them in the fridge overnight or on the counter for a few hours. You can warm them in the oven for a fresh-baked taste. Dense muffins can happen for a few reasons: - Overmixing the batter can create too much gluten. - Not using enough leavening agents like baking powder or baking soda can also lead to density. - Using too much zucchini without squeezing out moisture may add extra weight. To prevent dense muffins, mix the batter gently and ensure you measure ingredients correctly. Following these tips will help you achieve light and fluffy muffins. In summary, we covered how to make Lemon Poppy Seed Zucchini Muffins. You learned about the key ingredients and possible substitutions for dietary needs. I shared step-by-step instructions, tips to perfect your muffins, and various flavor options. Remember, measuring accurately and not overmixing are key for success. These muffins can be stored well, either short-term or long-term, for your convenience. With a bit of practice, you can enjoy delicious muffins tailored to your taste preferences. Happy baking!](https://joymealplan.com/wp-content/uploads/2025/07/b4c3b954-0106-4660-8231-7250b8c7a63e-768x768.webp)