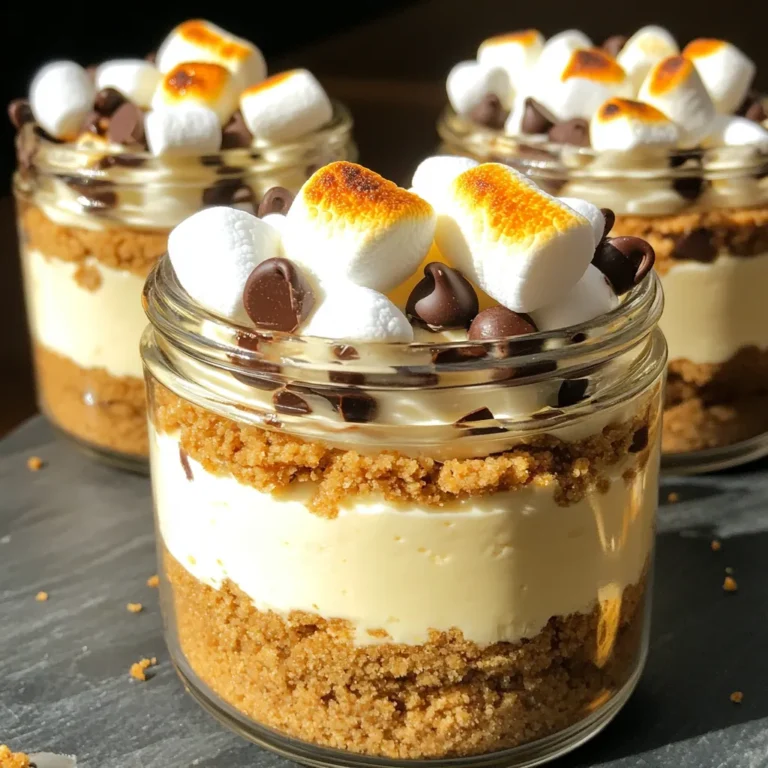
Caramel Apple Cheesecake Dip Rich and Creamy Delight
Get ready to satisfy your sweet tooth with my Caramel Apple Cheesecake Dip! This rich and creamy delight combines the best flavors of fall into one easy-to-make treat. Perfect for parties or cozy nights at home, it features a smooth cream cheese base with delicious caramel and fresh apples. I’ll walk you through the steps, tips, and variations to make this dip a crowd favorite. Let’s dive into this tasty experience!
Ingredients
List of Ingredients
– 8 oz cream cheese, softened to room temperature
– 1/2 cup powdered sugar
– 1 teaspoon vanilla extract
– 1/2 cup caramel sauce (store-bought or homemade, plus extra for drizzling)
– 1/2 cup apple pie filling (or finely diced fresh apples)
– 1/4 teaspoon ground cinnamon
– 1/2 cup chopped pecans (optional, for added texture)
– Sliced fresh apples, graham crackers, or pretzels for dipping
Optional Ingredients
You can add chopped pecans to the dip for a nice crunch. If you want more flavor, sprinkle some extra cinnamon on top before serving. You could also use different types of apples or even a mix of them.
Nutritional Information
Caramel Apple Cheesecake Dip is creamy and delightful. A serving has about 200 calories. You get some protein from the cream cheese and a bit of fiber from the apples. Just keep in mind that this dip is a treat, so enjoy it in moderation!
This dip is perfect for gatherings or just a fun night in. You can easily share it with friends or family. Just remember to have enough sliced apples, graham crackers, or pretzels on hand for dipping. Enjoy!
Step-by-Step Instructions
Preparation of Cream Cheese Base
To start, grab 8 oz of cream cheese. Make sure it’s soft and at room temperature. Place it in a mixing bowl. Use an electric mixer on medium speed. Beat the cream cheese until it’s creamy and smooth. This step is key for a great texture. You want no lumps in your base.
Mixing in Sugar and Vanilla
Next, add 1/2 cup of powdered sugar. Pour in 1 teaspoon of vanilla extract. Mix this on low to medium speed. Keep beating until fluffy and well blended. Scrape down the sides of the bowl to mix everything well. This is where the sweet flavor starts to build.
Adding Caramel and Apples
Now, gently fold in 1/2 cup of caramel sauce. Save a bit for drizzling later. Mix it until smooth. Then, add in 1/2 cup of apple pie filling or finely diced fresh apples. Sprinkle in 1/4 teaspoon of ground cinnamon. Use a spatula to fold these in gently. Be careful not to break the apple pieces too much. If you like, fold in 1/2 cup of chopped pecans for a nice crunch. Now your dip is ready to serve!
Tips & Tricks
How to Achieve the Best Texture
To get the best texture for your dip, start with softened cream cheese. This makes it easy to blend. Use an electric mixer on medium speed. Beat until the cream cheese is smooth, with no lumps. When you mix in the sugar and vanilla, do it slowly. This helps keep your mix fluffy. After adding the caramel, don’t over-mix. You want that creamy consistency with apple chunks still visible.
Serving Suggestions for Dipping
I love serving this dip with a variety of dippers. Sliced fresh apples bring a crisp bite. Graham crackers add a nice crunch, and pretzels give a salty twist. You can create a fun platter with all three. For a sweet touch, drizzle extra caramel on top. This makes it look even more tempting and delicious.
Ways to Enhance Flavor
To take the flavor up a notch, try adding spices. A bit of extra cinnamon can deepen the taste. You can also use nutmeg for a warm twist. If you enjoy a bit of crunch, fold in more pecans. They add a nice texture and a nutty flavor. Don’t forget to taste as you go. This helps you find the perfect balance for your dip.

Variations
Alternative Flavor Options
You can change up the flavor of the dip easily. For a chocolate twist, add cocoa powder to the cream cheese base. You could also use peanut butter instead of caramel for a nutty flavor. Try swapping the apple pie filling for cherry or peach filling for a fruity change.
Ingredient Swaps
If you want to make this dip lighter, use Greek yogurt instead of cream cheese. You can also use honey or agave syrup in place of powdered sugar for a healthier sweetener. If you are nut-free, skip the pecans or replace them with crushed graham crackers for crunch.
Seasonal Ingredient Ideas
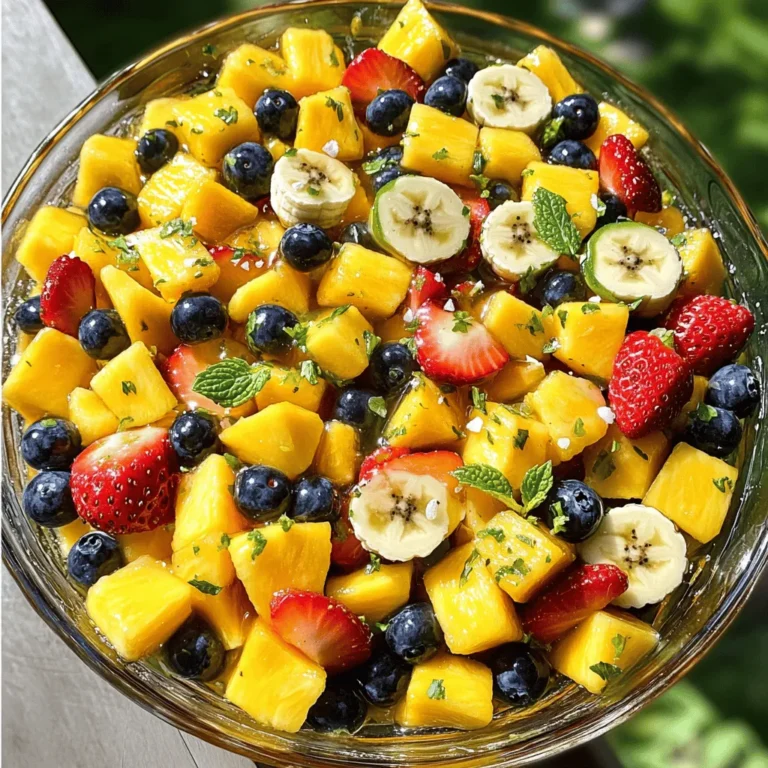
In fall, use fresh apples and add nutmeg for a cozy taste. For spring, try fresh berries like strawberries or raspberries mixed in. During summer, you might enjoy adding diced fresh peaches or mango to brighten the dip. This keeps your dip fresh and fun for any season.
Storage Info
Storing Leftovers
After enjoying the caramel apple cheesecake dip, you might have some left. To store it, place the dip in an airtight container. Make sure to cover it well. This will keep the dip fresh for up to three days in the fridge. If you see any slight browning, don’t worry. Just give it a good stir before serving again.
Freezing Instructions
You can also freeze the dip for longer storage. To do this, scoop the dip into a freezer-safe container. Leave some space at the top for expansion. Seal it tightly and label it with the date. You can freeze it for up to two months. When you’re ready to enjoy it, let it thaw in the fridge overnight.
Best Practices for Reheating
When it comes to reheating, you want to be gentle. Avoid using the microwave directly. Instead, allow the dip to sit at room temperature for about 30 minutes. This helps it soften. Then, you can stir it to regain its creamy texture. If you need to warm it, use a double boiler on low heat. This method prevents the dip from getting too hot and helps keep it smooth.
FAQs
Can I make this dip ahead of time?
Yes, you can make this dip ahead of time. It tastes great when chilled. Just prepare it and store it in an airtight container. Keep it in the fridge for up to two days before serving. This allows the flavors to blend nicely.
What can I substitute for cream cheese?
You can use Greek yogurt or mascarpone cheese as a substitute for cream cheese. Both options give a creamy texture. Greek yogurt adds a bit of tang, while mascarpone is richer. Choose based on your taste preference.
How long does the dip last in the fridge?
This dip lasts about three to four days in the fridge. Store it in an airtight container to keep it fresh. If you notice any changes in smell or appearance, it’s best to throw it out. Always check before serving.
This blog post covered how to make a delicious cream cheese dip. We discussed key ingredients, like cream cheese and caramel, and optional flavors to boost taste. I shared steps for mixing the dip and tips for serving and storing it well.
In closing, feel free to tweak the recipe using your favorite ingredients. Enjoy sharing this tasty dip with family and friends!

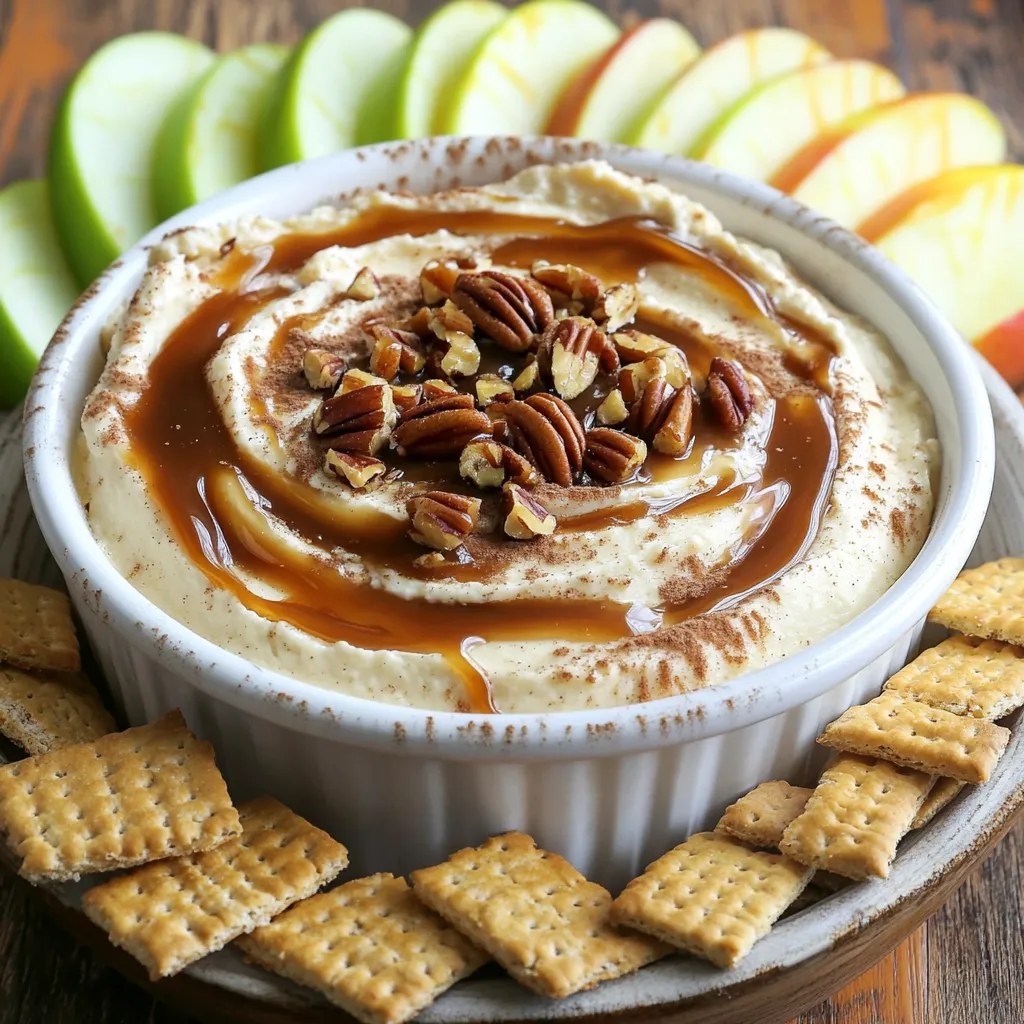
![To make these no-bake lemon cheesecake bites, gather the following ingredients: - 1 cup graham cracker crumbs - 1/4 cup unsalted butter, melted - 2 tablespoons granulated sugar - 8 oz cream cheese, softened to room temperature - 1/2 cup powdered sugar - 1/4 cup plain Greek yogurt - 2 tablespoons freshly squeezed lemon juice - Zest from 1 lemon - 1/2 teaspoon pure vanilla extract - Fresh berries (such as strawberries, blueberries, or raspberries) for garnish (optional) These ingredients create a creamy and zesty treat. The graham cracker crumbs form a delightful crust, while cream cheese adds richness. Greek yogurt gives a light tang, balancing the sweetness. Fresh lemon juice and zest provide a bright flavor that makes these bites so refreshing. The optional berries add color and a burst of fruitiness, making each bite even more tempting. For the complete recipe, check out the [Full Recipe]. - Start by combining the graham cracker crumbs, melted butter, and granulated sugar in a bowl. - Mix until it feels like damp sand and holds together. - Press this mixture firmly into the bottom of mini muffin tins or silicone molds. - Chill the crust in the fridge for about 10 minutes to set. - In a clean bowl, beat the softened cream cheese with powdered sugar until smooth. - Add in plain Greek yogurt, freshly squeezed lemon juice, lemon zest, and vanilla extract. - Mix these ingredients until you have a creamy and fluffy filling. - Spoon the lemon cheesecake filling into each crust. - Use a spatula to smooth the tops for an even look. - Return the molds to the fridge and chill for at least 2 hours, or until firm. You can find the Full Recipe for precise measurements and tips! Softened cream cheese is key for smooth cheesecake bites. If it’s too cold, it will clump. Let your cream cheese sit out for 30 minutes before mixing. Chilling helps the bites set and firm up. I recommend at least 2 hours in the fridge. This makes them easy to pop out and enjoy. Want a bolder lemon taste? Add extra lemon zest to the filling. This little trick brightens the flavor. You can also swap plain Greek yogurt for flavored yogurt. Lemon or vanilla yogurt adds a fun twist, making these bites even more delicious. Garnishing makes your cheesecake bites stand out. Fresh berries on top add color and taste. Drizzling honey brings out sweetness and shine. You can sprinkle extra lemon zest for a pop of brightness. Use a decorative platter to showcase your treats for friends and family. {{image_4}} You can easily change the flavor of your no-bake lemon cheesecake bites. Here are two fun ideas: - Berry cheesecake bites: Swap the lemon juice for mixed berry puree. Use strawberries, blueberries, or raspberries. This adds a sweet and fruity twist. The berry flavor pairs well with the creamy filling. - Chocolate lemon cheesecake bites: Mix in cocoa powder with the cream cheese. This gives a rich chocolate flavor. You still get the bright lemon taste, but with a chocolatey touch. Making these bites fit different diets is simple. Here’s how: - Gluten-free alternatives for crust: Use gluten-free graham cracker crumbs. You can also blend nuts or oats to make a crust. Just mix them with melted butter and sugar. - Substituting dairy for vegan options: Use vegan cream cheese instead of regular cream cheese. You can also replace yogurt with coconut yogurt. These swaps keep the bites creamy and delicious. Feel free to experiment with these variations. You can create a cheesecake treat that fits your taste and dietary needs. Enjoy! To keep your No-Bake Lemon Cheesecake Bites fresh, refrigeration is key. Store them in an airtight container. This helps to lock in moisture and keeps them from drying out. If you want to freeze them, place the bites in a single layer on a baking sheet. Once frozen, transfer them to a freezer-safe container or bag. Make sure to label it with the date. They are easy to grab for a quick treat later! How long do they last in the fridge? These cheesecake bites can last up to 5 days when stored properly in the refrigerator. After that, they may lose their taste and texture. Always check for freshness. Signs of spoilage to watch for include an off smell, discoloration, or an unusual texture. If you notice any of these signs, it’s best to toss them out. For the full recipe, check out the recipe section. No-Bake Lemon Cheesecake Bites need at least 2 hours to chill. This time lets them firm up. If you want them extra cold, you can chill them longer. Just ensure they are firm to the touch before serving. This helps create that perfect bite! Yes, you can use different cheeses! Cream cheese gives the best flavor and texture. However, you might try mascarpone for a richer taste. Cottage cheese can work too, but blend it well to avoid lumps. Each cheese adds a unique twist to these bites. If you don't have graham crackers, try crushed cookies or oat flour. Digestive biscuits work great too! For a gluten-free option, use gluten-free cookies or almond flour. These swaps can change the flavor, but they still make a good crust. Absolutely! These cheesecake bites are great to make a day ahead. Just chill them overnight. This allows the flavors to meld nicely. Be sure to cover them well to keep them fresh. They will taste even better the next day! To make these bites vegan, substitute cream cheese with a vegan cream cheese. For the crust, use coconut oil instead of butter. Replace Greek yogurt with a plant-based yogurt. You can also use maple syrup instead of powdered sugar. These changes keep the flavor while making it vegan-friendly. For the full recipe, check out the [Full Recipe]. You now have the steps to make delicious No-Bake Lemon Cheesecake Bites. We covered all ingredients, from graham cracker crumbs to fresh berries. I shared helpful tips for perfect texture and exciting flavor ideas. Variations let you adapt these bites for any taste or diet. Remember to store them properly for the best quality. Enjoy creating these treats, and don't hesitate to get creative!](https://joymealplan.com/wp-content/uploads/2025/07/839985c9-ca67-4b01-8b72-ff6921bf99fe-768x768.webp)