Air Fryer Mozzarella Sticks Crispy and Simple Snack

Want to make a snack that’s both crispy and simple? Air fryer mozzarella sticks are the answer. They’re cheesy, crunchy, and ready in no time. You only need a few ingredients, like string cheese, flour, and breadcrumbs. In this guide, I’ll show you how to prepare, cook, and serve these delicious bites. Get ready for a tasty treat that you can whip up anytime!
Ingredients
Main Ingredients
– 12 mozzarella string cheese sticks
– 1 cup all-purpose flour
– 1 cup breadcrumbs (preferably panko)
Seasonings and Additives
– 1 teaspoon garlic powder
– 1 teaspoon Italian seasoning
– Salt and pepper to taste
Cooking Essentials
– Cooking spray
– Marinara sauce for serving
Gather these key ingredients for the perfect air fryer mozzarella sticks. The mozzarella gives that gooey, cheesy bite we all love. The all-purpose flour helps the cheese sticks stay coated. I like to use panko breadcrumbs; they add extra crunch. The garlic powder and Italian seasoning give your sticks a tasty twist. Don’t forget salt and pepper to make it all pop! Finally, a light spray of cooking oil ensures your sticks don’t stick. Serve your crispy treats with marinara sauce for dipping. It’s a simple yet delicious pairing that everyone will enjoy!
Step-by-Step Instructions
Preparation of Mozzarella Sticks
To start, cut each mozzarella stick in half. You will have 24 shorter sticks. Place them on a plate and put them in the freezer for at least 30 minutes. Freezing helps keep their shape during cooking.
Next, create a breading station. You need three shallow bowls. In the first bowl, mix flour with a dash of salt and pepper. The second bowl holds the beaten eggs. In the third bowl, combine panko breadcrumbs with garlic powder and Italian seasoning. This setup makes the breading easy.
Cooking Setup
While you prepare, preheat your air fryer to 400°F (200°C). This step is crucial for crispiness. Once preheated, take the frozen mozzarella sticks out of the freezer.
Start coating each stick. First, roll it in the flour mixture. Shake off any extra flour. Then dip it into the beaten eggs. Make sure it is fully coated. Finally, roll it in the breadcrumb mix. Press gently to help the crumbs stick. Repeat this for all the mozzarella sticks.
Air Frying Process
Now, it’s time to air fry! Lightly spray the air fryer basket with cooking spray to prevent sticking. Place the breaded sticks in a single layer, leaving space between them for even cooking.
For extra crunch, spray the tops of the sticks lightly. Cook them for about 6-8 minutes. Flip them halfway through. Keep an eye on them to ensure they turn golden brown and crispy.
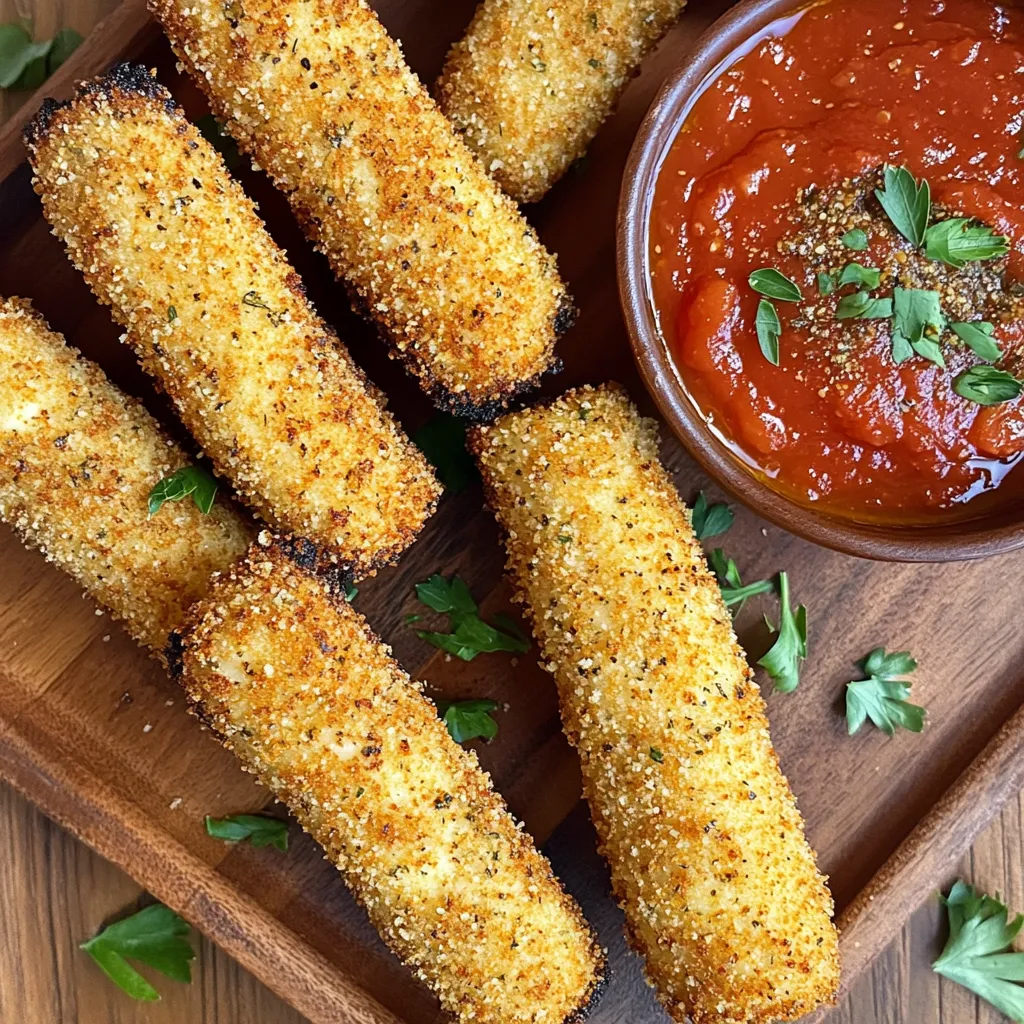
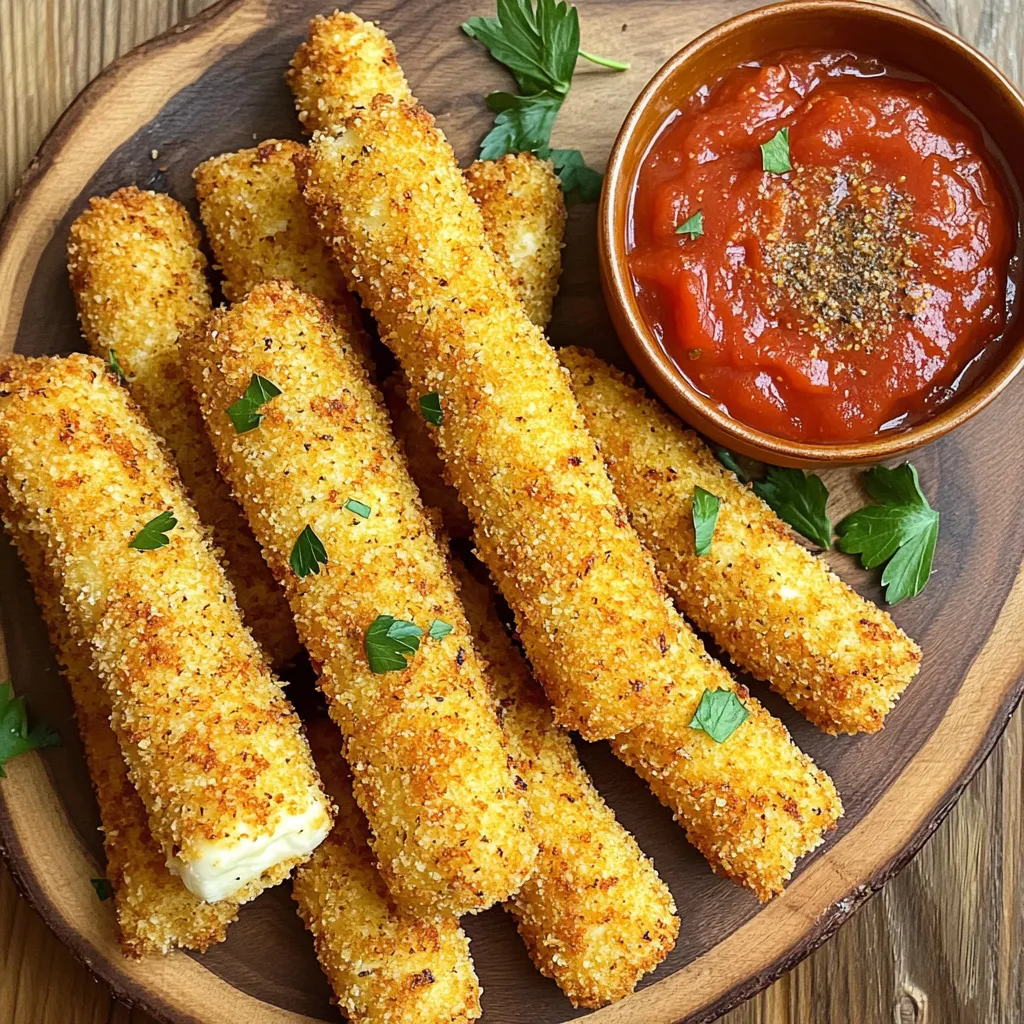
Once cooked, carefully take the sticks out of the air fryer. Let them cool slightly before enjoying. They pair perfectly with marinara sauce for dipping.
Tips & Tricks
Achieving Optimal Crispiness
To get that perfect crunch, freezing the mozzarella sticks is key. Freeze them for at least 30 minutes. This step helps keep their shape as they cook. Next, focus on your coating technique. Use three bowls: one for seasoned flour, one for beaten eggs, and one for breadcrumbs. Make sure to coat each stick fully in flour first. Then dip it in egg, and finally roll in the breadcrumbs. Press gently to ensure the crumbs stick well.
Enhancing Flavor
Want to boost the taste? Try adding garlic powder and Italian seasoning to your breadcrumb mix. These spices add a nice touch. You can also experiment with different types of cheese. Cheddar or pepper jack can add fun flavors. Each cheese brings its own taste, so feel free to mix it up.
Serving Suggestions
When serving, think about presentation. Arrange the mozzarella sticks nicely on a plate. You can sprinkle extra Italian seasoning or fresh parsley on top for color. Pair them with marinara sauce for dipping. This classic combo makes for a delicious snack. Enjoy your crispy treats with friends or family for a fun time!
Variations
Different Flavor Profiles
You can switch up the taste of your mozzarella sticks. If you love heat, try spicy mozzarella sticks. Add some cayenne pepper or crushed red pepper flakes to your breadcrumb mix. This will give your snack a nice kick. For a fresh taste, make herb-infused mozzarella sticks. Mix dried herbs like basil, oregano, or thyme into the breadcrumbs. This adds a lovely aroma and flavor.
Alternative Coatings
You can also change how you coat your sticks. For a gluten-free option, use gluten-free breadcrumbs. They work just like regular breadcrumbs but without the gluten. You can also use crushed rice crackers or cornflakes for a different crunch. If you want to try flour alternatives, use almond flour or coconut flour. They give a unique taste and texture too.
Additional Fillings
Want to get creative? Stuffed mozzarella sticks are a fun option. You can fill them with things like pepperoni, jalapeños, or even spinach. Just make a small cut in the cheese stick and add your filling before breading. You can also add vegetables or meats to your mozzarella sticks. Chopped bell peppers, cooked sausage, or even bacon bits can add extra flavor. Just remember to keep the size small so they fit well.
Storage Info
Storing Leftovers
After enjoying your mozzarella sticks, let them cool completely. Place them in an airtight container. Keep them in the fridge for up to three days. If you want them to stay fresh longer, freeze them instead.
Reheating Instructions
To keep your mozzarella sticks crispy, the oven is your best friend. Preheat the oven to 375°F (190°C). Place the sticks on a baking sheet and heat for about 5-7 minutes. This method helps regain their crunch. You can use a microwave, but that may make them soft and chewy. If you do use a microwave, heat them for 30 seconds to one minute.
Freezing Options
To freeze mozzarella sticks, wrap each one in plastic wrap. Then, place them in a freezer bag. They can stay in the freezer for up to three months. When you’re ready to cook, take them out and let them thaw in the fridge for about an hour before air frying. This helps them cook evenly and stay delicious.
FAQs
How long should mozzarella sticks be frozen before cooking?
I recommend freezing mozzarella sticks for at least 30 minutes. This time helps keep their shape during cooking. If you freeze them longer, that’s okay too. Just make sure they are firm but not rock solid. This way, they won’t melt too quickly in the air fryer.
Can I use different types of cheese?
Yes, you can use other types of cheese! Cheddar, pepper jack, or gouda work well. Just cut the cheese into sticks similar to mozzarella. Each cheese brings its own flavor and texture. Experiment to find your favorite!
What is the best dipping sauce for mozzarella sticks?
Marinara sauce is a classic choice for dipping. Its tangy flavor pairs perfectly with the cheesy sticks. You can also try ranch dressing or spicy buffalo sauce for a kick. Just pick your favorite sauce and enjoy every bite!
This blog post covered the essentials for making delicious mozzarella sticks at home. We explored the key ingredients, step-by-step preparation, and cooking methods. I shared tips for crispy texture and flavor variations to try. Remember, using different cheeses or seasonings can bring new tastes. Store leftovers properly and reheat them for the best texture. Enjoy your homemade mozzarella sticks with your favorite dipping sauce. Cooking can be fun, and these snacks will impress everyone! Now, it’s time to get cooking and enjoy.

![This Zesty Lemon Tahini Dressing is a bright and tasty addition to many dishes. It takes just 10 minutes to make and serves four people. You can use it on salads, grain bowls, or as a dip for veggies. The balanced mix of flavors will make your meals pop! - 1/4 cup tahini paste - 1/4 cup freshly squeezed lemon juice (approximately 2 medium lemons) - 2 tablespoons extra virgin olive oil - 1 garlic clove, finely minced - 1 tablespoon maple syrup or honey (to taste) - 2-3 tablespoons filtered water (adjust for desired consistency) - Sea salt and freshly cracked black pepper, to taste - Zest of 1 lemon (for an aromatic finish) - Tahini paste provides healthy fats and protein, making it creamy and rich. - Lemon juice adds vitamin C and a bright, zesty flavor that lifts your dishes. - Extra virgin olive oil is a heart-healthy fat with a smooth taste that enhances the dressing. - Garlic brings flavor and has health benefits like boosting immunity. - Maple syrup or honey adds a hint of sweetness, balancing the tang of lemon. - Sea salt and black pepper enhance all the flavors, making every bite enjoyable. - Lemon zest gives an aromatic finish that deepens the lemon taste. This dressing is not only simple to make, but it also packs a punch of flavor and nutrition. You can easily adjust the sweetness and thickness to fit your taste. To make Zesty Lemon Tahini Dressing, start with the right ingredients. Gather your tahini paste, lemon juice, olive oil, garlic, maple syrup, water, salt, pepper, and lemon zest. Use fresh lemons for the best taste. Squeeze enough juice to fill 1/4 cup. A good juicer helps extract the juice easily. In a medium mixing bowl, add the tahini paste first. This helps create a smooth base. Pour in the lemon juice, extra virgin olive oil, and minced garlic. Next, add the maple syrup or honey for sweetness. Use a whisk to mix these ingredients together until smooth. Make sure there are no lumps left in the tahini. This step is key for a creamy dressing. Once the mixture is smooth, it’s time to adjust the consistency. Slowly add filtered water, one tablespoon at a time. If you want a thinner dressing, add more water. For a thicker dip, use less. Taste your dressing and decide if you need more salt, pepper, or lemon juice. The zest adds a nice aromatic touch. For best results, chill the dressing for about 10 minutes before serving. This enhances the flavors. This recipe makes about four servings of a fresh and zesty dressing. Enjoy experimenting with it on salads or as a dip! To make the best Zesty Lemon Tahini Dressing, I focus on balance. Each ingredient plays a role. The tahini brings creaminess, while the lemon adds bright zest. Use fresh lemon juice for the best taste. The garlic gives a nice kick, and sweet maple syrup rounds it out. Taste your dressing as you mix. Adjust the sweetness or tartness as needed. If it's too thick, add more water slowly. This dressing shines on salads. It pairs well with leafy greens or roasted veggies. I love to drizzle it over grain bowls with quinoa or farro. Use it as a dip for fresh veggies or pita chips. You can even spread it on wraps for extra flavor. The options are endless, so get creative with your meals! How you present the dressing matters. I like to serve it in a small, stylish bowl. Drizzle a little extra olive oil on top for shine. Sprinkle sesame seeds for texture and a nice look. You can also add lemon slices around the bowl for a colorful touch. This makes it eye-catching and fun to enjoy. For a truly gourmet touch, pair it with your favorite dishes and watch everyone enjoy! {{image_4}} You can tweak this recipe to suit your tastes. Try using sunflower seed butter in place of tahini. This adds a nutty flavor without sesame. If you're allergic to nuts, sunflower butter is a good choice. You can also use lime juice for a different citrus kick. It gives the dressing a unique twist. For a creamier texture, try adding Greek yogurt. This will thicken the dressing and add protein. Want to boost the flavor? Add fresh herbs like parsley, cilantro, or dill. These herbs bring freshness and color. For a spicy kick, mix in red pepper flakes or a dash of hot sauce. This adds heat and complexity. If you love garlic, increase the amount or add roasted garlic for a sweeter taste. A pinch of cumin can also deepen the flavor profile. This dressing works with many cuisines. It pairs well with Mediterranean dishes like falafel or grilled vegetables. Drizzle it over a fresh Greek salad for a zesty touch. You can also use it in Asian dishes, like a cold noodle salad. The lemon tahini dressing complements sesame flavors well. It is perfect for drizzling on grain bowls filled with quinoa or brown rice. For a fun twist, use it as a dip for fresh spring rolls. Explore the [Full Recipe] for all the delicious details! Store your Zesty Lemon Tahini Dressing in an airtight container. Glass jars work great. Make sure the lid is tight. This keeps the flavors fresh. Always use a clean spoon to scoop out the dressing. This way, you avoid adding germs. Keep your dressing in the fridge. It helps maintain its zesty flavor. If you leave it out, it can spoil quickly. Always chill it right after you make it. The colder it is, the better it tastes. Your dressing lasts up to a week in the fridge. After that, it may not taste good. Watch for changes in color or smell. If it smells sour or looks odd, throw it away. Trust your senses; they guide you well. This dressing is already vegan! It uses tahini, lemon juice, and maple syrup or honey. If you prefer, just stick with maple syrup. It gives a sweet touch and keeps everything plant-based. I don’t recommend freezing this dressing. Freezing can change its texture. When thawed, it may separate and lose its creamy feel. Instead, store it in the fridge for fresh use. This dressing shines on salads, grain bowls, and roasted veggies. Try it with fresh greens, quinoa, or as a dip for crisp veggies. It adds a zesty kick to any meal. To cut calories, reduce the olive oil or use less tahini. You can also add more water for a thinner dressing. This keeps the flavor while lowering the calorie count. For the full recipe, check the details above. In this post, we explored the key ingredients, step-by-step instructions, and helpful tips for Zesty Lemon Tahini Dressing. You learned about the benefits of each ingredient and how to achieve the perfect flavor balance. We also discussed variations and storage tips. To wrap up, this dressing is versatile and easy to make. With the right approach, you can impress your guests and enjoy tasty meals. Use this dressing often to enhance your dishes.](https://joymealplan.com/wp-content/uploads/2025/06/f654f103-f68b-4d89-afc0-0ab326df6c5a-768x768.webp)