
Creamy Tomato Basil Pasta One Pot Delightful Dish
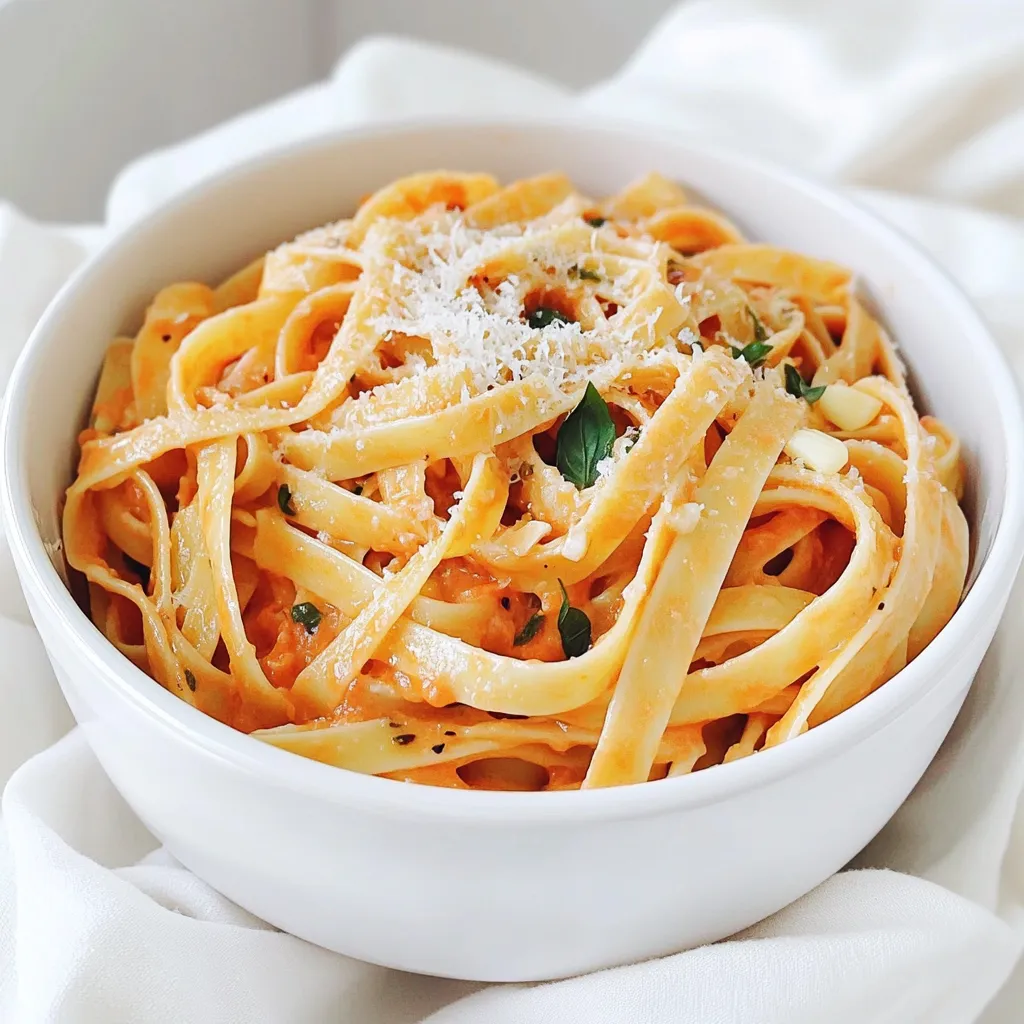
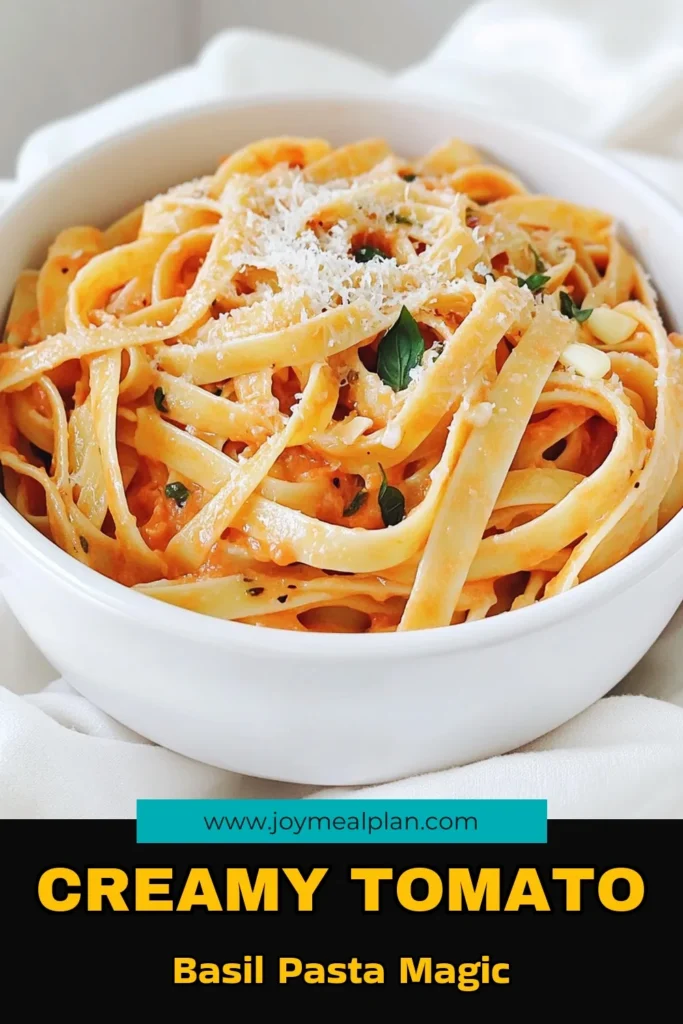
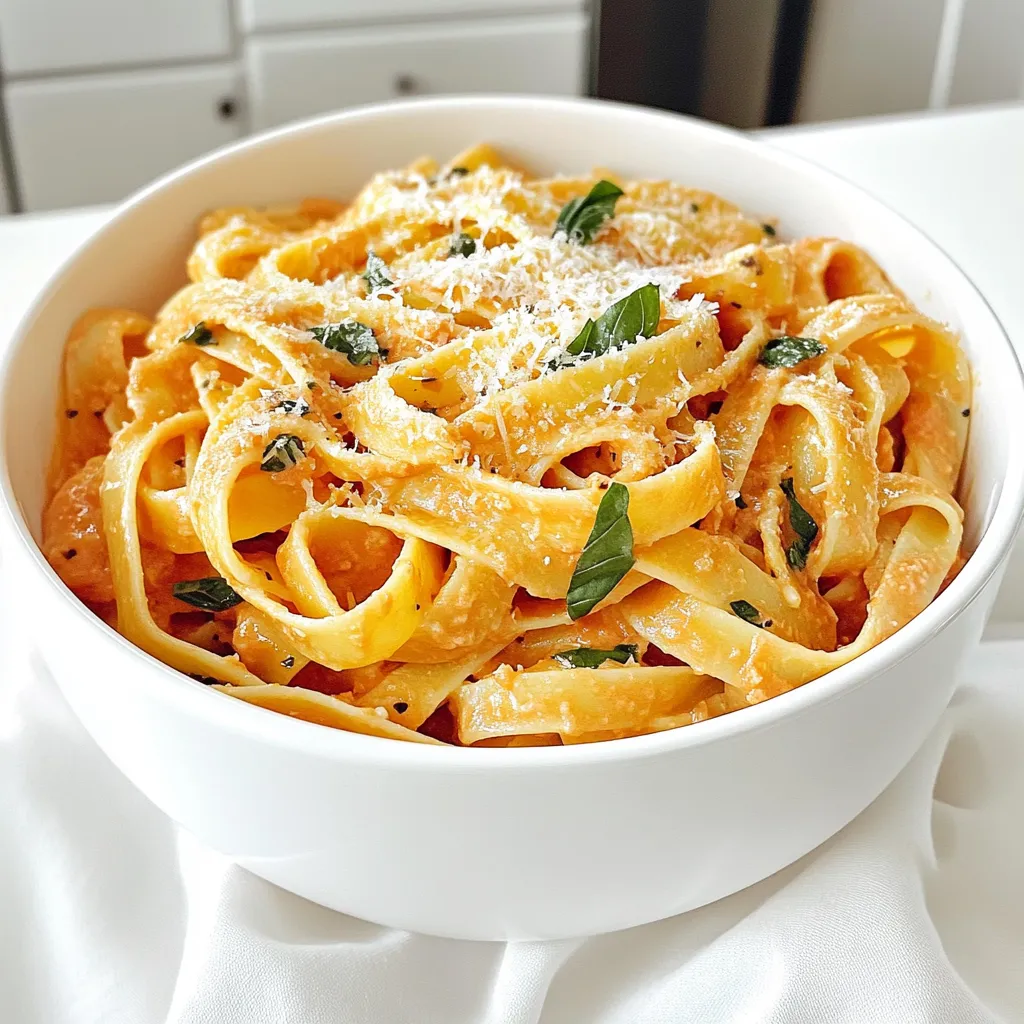
Looking for a quick and tasty meal? My Creamy Tomato Basil Pasta One Pot is perfect! This dish blends rich flavors and a creamy sauce, all in one pot. With just a few simple ingredients, you can whip up a delightful dinner in no time. Join me as we explore this easy recipe that is sure to impress your family or friends. Let’s dive into the delicious details!
Ingredients
Main Ingredients
– 12 oz fettuccine or preferred pasta
– 2 tablespoons olive oil
– 1 small onion, finely chopped
– 3 cloves garlic, minced
Sauce Ingredients
– 1 can (14 oz) crushed tomatoes
– 2 cups vegetable broth
– 1 cup heavy cream or coconut cream
– 1 teaspoon dried oregano
Seasoning and Garnish
– 1 teaspoon sugar
– Salt and freshly ground black pepper to taste
– 1 cup fresh basil leaves, roughly chopped
– Grated Parmesan cheese for serving (optional)
This creamy tomato basil pasta uses simple, fresh ingredients. First, you need your pasta. I love using fettuccine, but any pasta works. The olive oil adds richness and flavor. Chopped onion and minced garlic bring depth to the dish.
Next, the sauce comes from crushed tomatoes and vegetable broth. These ingredients create a rich base. Adding heavy cream or coconut cream makes it creamy and smooth. Dried oregano gives the sauce a lovely herbal note that pairs well with tomatoes.
Don’t forget the seasoning! A teaspoon of sugar balances the sauce’s acidity. Salt and black pepper enhance the flavors. Finally, fresh basil adds a burst of brightness. You can top your dish with Parmesan cheese if you like. This mix of ingredients makes a delightful meal in one pot.
Step-by-Step Instructions
Preparing the Pasta
Start by boiling a large pot of water. Add a pinch of salt to enhance the flavor of the pasta. Once the water is bubbling, add 12 oz of fettuccine. Cook the pasta according to the package instructions, usually about 8-10 minutes. You want it to be al dente, so keep an eye on it. When it’s done, reserve about ½ cup of the pasta water, then drain the fettuccine.
Making the Sauce
In a deep skillet, heat 2 tablespoons of olive oil over medium heat. Add 1 small, finely chopped onion. Sauté the onion for about 5 minutes until it becomes soft and clear. Then, add 3 minced garlic cloves. Stir and cook for another minute. You want the garlic to smell great but not burn. Next, pour in a 14 oz can of crushed tomatoes and 2 cups of vegetable broth. Sprinkle in 1 teaspoon of dried oregano and 1 teaspoon of sugar to balance the acidity. Stir everything together and let it simmer gently.
Combining and Finishing
Now, gently mix your drained pasta into the sauce. Make sure all the fettuccine is coated. Cover the pot with a lid and let it cook for another 10-12 minutes. This lets the pasta soak up the sauce. After that time, turn the heat to low and stir in 1 cup of heavy cream or coconut cream for a dairy-free option. Mix in 1 cup of roughly chopped fresh basil and season with salt and freshly ground black pepper to taste. Stir well to combine. Let the pasta sit for a few minutes off the heat to thicken. Serve hot, and if you like, top with some grated Parmesan cheese for a nice touch.
Tips & Tricks
Cooking Tips
To get the perfect al dente pasta, you must watch the timing closely. Al dente means the pasta is firm to the bite. Start by boiling a large pot of water. Add a pinch of salt to enhance the pasta’s flavor. Follow the package directions but check a minute early. Taste the pasta to see if it’s done. It should be tender yet still have a bit of bite.
Reserving pasta water is very important. Before you drain your pasta, save about half a cup of that starchy water. This water can help thicken your sauce and bind it to the pasta. It also adds flavor and helps the sauce stick better.
Flavor Enhancements
To elevate your dish, think about adding more seasoning. A pinch of red pepper flakes can give a nice kick. You can also sprinkle some extra dried oregano or thyme for more depth. If you want a little sweetness, try adding a touch more sugar.
For variety, consider adding some optional ingredients. Spinach or kale can be great for extra nutrition. You could also toss in cooked chicken or shrimp for added protein. Sun-dried tomatoes can enhance the flavor too.
Presentation Tips
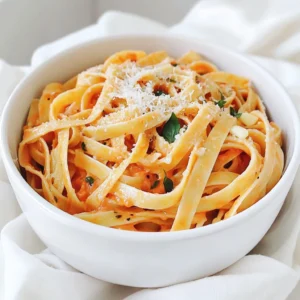
Serving this dish nicely makes it even more enjoyable. Use a large bowl to present the creamy tomato basil pasta. Garnish it with freshly chopped basil leaves for color. A sprinkle of grated Parmesan cheese adds richness and visual appeal.
Pair this dish with a side salad or garlic bread. A simple green salad with a light vinaigrette complements the pasta well. Garlic bread adds a nice crunch and is perfect for soaking up the sauce.
Variations
Dietary Adjustments
You can make creamy tomato basil pasta fit your needs. To make it dairy-free, use coconut cream instead of heavy cream. This swap gives a rich flavor without dairy. If you prefer gluten-free options, choose gluten-free pasta. Many brands offer great textures and taste.
Ingredient Swaps
What if you can’t find fresh basil? You can use dried basil instead. Just remember, dried herbs are stronger, so use less. If you want to boost protein, add cooked chicken or shrimp. Both options pair well with the creamy sauce and add heartiness.
Flavor Variations
Want to spice things up? Add red pepper flakes for heat. Start with a pinch and adjust to your taste. You can also mix in fresh vegetables like spinach or bell peppers. They add color, nutrition, and flavor to your dish.
Storage Info
Storing Leftovers
To keep your creamy tomato basil pasta fresh, use airtight containers. Glass or plastic containers work well. Make sure to let the pasta cool before sealing it. Store leftovers in the fridge for up to three days. This way, you can enjoy it later without losing its great taste.
Reheating Instructions
When reheating, the best method is to use a skillet. Add a splash of water or broth to help bring back the sauce. Heat it over low heat and stir often. This prevents the pasta from sticking and helps keep it creamy. If the sauce thickens too much, add a bit of the reserved pasta water to revive it.
Freezing Tips
To freeze your pasta, let it cool completely first. Then, portion it into freezer-safe bags or containers. Squeeze out any extra air before sealing. This helps prevent freezer burn. When you’re ready to eat, thaw it in the fridge overnight. Reheat it in a skillet, adding a little liquid to refresh the sauce.
FAQs
Common Questions
Can I make this dish vegan?
Yes, you can make this dish vegan. Use coconut cream instead of heavy cream. Also, check that your pasta is egg-free. Many brands offer vegan pasta.
What can I do if the sauce is too thick?
If your sauce is too thick, add a bit of reserved pasta water. Start with a small amount and stir well. This will help thin it out without losing flavor.
Cooking Questions
How do I know when the pasta is al dente?
Pasta is al dente when it is firm but not hard. Check the package for timing, usually around 8-10 minutes. Taste a piece for the best test.
What adjustments do I need to make for larger servings?
To serve more people, increase the pasta and sauce in equal parts. Use about 3 oz of pasta per person. Adjust other ingredients to match for flavor.
Ingredient Specific Questions
Can I use dried basil instead of fresh?
Yes, you can use dried basil. Use about one teaspoon for each tablespoon of fresh basil. Dried basil has a more concentrated flavor, so adjust to taste.
What can I substitute for heavy cream?
You can use coconut cream for a dairy-free option. Silken tofu blended until smooth also works well. This keeps the dish creamy without dairy.
You now have a detailed guide to making a delicious pasta dish. We covered the ingredients, step-by-step instructions, helpful tips, and variations. You can adapt the recipe to fit your diet and preferences. Remember to store and reheat leftovers properly to enjoy your meal later. This recipe offers flexibility, so feel free to get creative. Enjoy your cooking adventure with these simple tools and tips!
![- 1 pound fresh shrimp, peeled and deveined - 1 tablespoon extra virgin olive oil - 1 teaspoon chili powder - 1 teaspoon ground cumin - 1 clove garlic, finely minced - Juice of 1 lime - 1/2 teaspoon sea salt - 1/4 teaspoon freshly ground black pepper The main ingredients create the base of your dish. Fresh shrimp gives a sweet and juicy taste. Olive oil adds richness and helps with cooking. The spices and seasonings bring the zing. Chili powder and cumin mix well for flavor. Garlic adds depth, while lime juice brightens the dish. - 8 small corn tortillas - 1 cup finely shredded red cabbage - 1/2 cup ripe tomatoes, diced - 1 ripe avocado, sliced into thin wedges - Fresh cilantro leaves, chopped For the tacos, corn tortillas are perfect. They hold all the goodness inside. Red cabbage gives a nice crunch. Diced tomatoes add a fresh touch. Avocado brings creaminess, balancing the flavors. Cilantro adds a bright note, making each bite special. - Lime wedges - Salsa Garnishes add fun and flavor. Squeeze fresh lime over the tacos for more zest. Salsa can give extra taste and a little heat. These choices let you customize each taco just how you like it. You can find the full recipe for Zesty Shrimp Tacos, and enjoy cooking! To start, I prepare the marinade. In a medium bowl, I combine fresh shrimp with olive oil, chili powder, cumin, minced garlic, lime juice, sea salt, and black pepper. I mix everything well so the shrimp get coated evenly. This step is crucial for flavor. I let the shrimp marinate for about 15 minutes. This time allows the flavors to blend and makes the shrimp taste amazing. Next, I heat a non-stick skillet over medium-high heat. Once it's hot, I add the marinated shrimp in a single layer. I make sure not to crowd the pan. I cook the shrimp for about 2-3 minutes on each side. They turn pink and opaque when done. Once cooked, I remove them from the heat and set them aside. While the shrimp cook, I warm the corn tortillas. I have two methods. First, I can use a pan. I heat it over low heat for about 30 seconds on each side. This keeps them soft. The second way is to use the microwave. I place the tortillas on a plate, cover them with a damp paper towel, and microwave them for 15-20 seconds. Soft tortillas are key for great tacos. Now it’s time to assemble the tacos. I take each warm tortilla and place 3-4 shrimp pieces on it. I ensure each taco has enough filling. Then, I top the shrimp with shredded red cabbage, diced tomatoes, and avocado slices. This layering makes each bite full of flavor. For the finishing touch, I sprinkle fresh cilantro leaves on top. If I want, I can add a squeeze of lime juice for extra zest. For the full recipe, check out the detailed instructions. To avoid overcooking shrimp, watch the clock closely. Cook them for only 2-3 minutes per side. Shrimp cooks fast and can turn rubbery if you leave them too long. Look for signs of perfectly cooked shrimp: they should be pink and opaque. The texture should be firm but not tough. Adding extra spices can boost the taste of your shrimp. Try cayenne for heat or smoked paprika for a deeper flavor. Pair your tacos with sauces like spicy crema or zesty salsa. These add layers of flavor and make each bite exciting. When serving, make your tacos look appealing. Use a colorful platter to catch the eye. Arrange lime wedges around the tacos for a bright touch. For gatherings, consider serving with a small bowl of extra toppings. Diced tomatoes or fresh salsa can be fun for guests to add themselves. {{image_4}} You can switch up the protein in your tacos for different tastes. Fish like salmon or tilapia works great instead of shrimp. Just follow the same marinade and cooking steps. Chicken is another option. Use diced chicken breast and cook it until golden. If you want a vegetarian version, try grilled portobello mushrooms or spicy tofu. Both options soak up flavors well and add a hearty bite. Experimenting with marinades can add fun twists to your tacos. Try a mango lime marinade for a sweet and tangy kick. A chipotle marinade gives a smoky, spicy flavor. You can also mix herbs like oregano and basil for a fresh taste. For toppings, get creative! Add sliced radishes for crunch or pickled onions for tang. Feta cheese can also lend a creamy touch. Each of these will make your tacos unique and exciting. To make your meal more complete, serve your tacos with side dishes. Black beans or corn salad pair well. A light cucumber salad can also balance the spice. If you have leftovers, use them in new ways. Toss shrimp in a salad or mix with rice for a bowl. You can also make a shrimp quesadilla using the tortillas left over. There are many ways to enjoy what you have! For the full recipe, check out the [Full Recipe]. To keep leftover shrimp fresh, store them in an airtight container. Make sure to refrigerate them right away. Shrimp can stay good in the fridge for up to three days. If you wait longer, they may spoil. Always check for any bad smell before using leftovers. To keep tortillas fresh, wrap them tightly in foil or plastic wrap. You can also place them in a resealable bag. Store them in the fridge for up to a week. For toppings like avocado and cabbage, use airtight containers. Avocado can turn brown quickly, so add lime juice to slow down this process. Cabbage stays fresh for about five days when stored properly. Yes, you can freeze cooked shrimp. Place them in a single layer on a baking sheet. Once frozen, transfer them to a freezer-safe bag. They can last for up to three months in the freezer. For raw shrimp, store them in a freezer-safe bag with as much air removed as possible. They can also last for up to three months. Always label your bags with the date for easy tracking. You should marinate shrimp for about 15 minutes. This short time lets the flavors soak in. The lime juice adds a nice tang, while the spices enhance the taste. Don't go too long, or the shrimp can become tough. Yes, you can prep some parts in advance. You can marinate the shrimp and store it in the fridge for a few hours. Just cook it when you’re ready. You can also chop veggies early and keep them in airtight containers. If you have shrimp allergies, try chicken or fish. Thinly sliced chicken breast works well. You can also use tofu or tempeh for a plant-based option. Just keep the marinade the same for great flavor. To spice up your tacos, add jalapeños or hot sauce. You can mix in cayenne pepper or chipotle powder with the marinade. Another idea is to top with a spicy salsa. These tweaks will give your tacos an extra kick. For the full recipe, check out the Full Recipe section. In summary, this guide covered how to make zesty shrimp tacos from start to finish. We discussed key ingredients, step-by-step instructions, useful tips, and delicious variations. You learned how to marinate shrimp perfectly, warm tortillas, and assemble the tacos for the best flavor. Remember, customizing your tacos keeps things fresh and fun. Enjoy experimenting with different ingredients and flavors. These tacos can make every meal feel special. Dive in, and happy cooking!](https://joymealplan.com/wp-content/uploads/2025/06/53de0157-3bfc-48aa-976d-e4e7ac7f22a7-768x768.webp)
![- 2 boneless, skinless chicken breasts - 8 oz penne pasta - 1 tablespoon Cajun seasoning - 2 tablespoons olive oil - 1 medium onion - 3 cloves garlic - 1 red bell pepper - 1 cup heavy cream - 1 cup chicken broth - 1 cup grated Parmesan cheese - Salt and pepper - Fresh parsley The ingredients for this dish come together to create a rich and tasty meal. You’ll notice how each part plays a role in the final flavor. The chicken gives protein and heartiness, while the pasta acts as a lovely base. The Cajun seasoning adds a spicy kick that makes this dish stand out. If you want to change things up, I have options for you. - For dairy alternatives, you can use coconut milk or almond milk instead of heavy cream. This keeps the dish creamy without dairy. - If you need a chicken substitute, consider using tofu or chickpeas. They both provide protein and soak up the sauce well. - For gluten-free pasta, options like rice or quinoa pasta work great. They cook differently, so keep an eye on them while cooking. With these substitutions, you can still enjoy a delicious creamy Cajun chicken pasta that fits your needs. Enjoy making this dish your own! If you want to see the full recipe, check out the [Full Recipe]. To cook the penne pasta, start by bringing a large pot of water to a rolling boil. Add a generous pinch of salt. This helps enhance the pasta's flavor. Once the water is boiling, add the penne pasta. Follow the package instructions for cooking time, usually around 11-12 minutes. You want it to be al dente, which means it should be firm to the bite. To check, taste a piece a minute or two before the time is up. When ready, drain the pasta in a colander and set it aside. In a large skillet, heat the olive oil over medium-high heat. Add the diced chicken pieces to the skillet. Season them generously with Cajun seasoning, salt, and pepper. Cook the chicken for about 5-7 minutes. You want it to be fully cooked through and golden brown. Use a meat thermometer to check if it reaches 165°F. Once cooked, remove the chicken from the skillet and place it on a plate. Set it aside while you prepare the other ingredients. In the same skillet, reduce the heat slightly. Add the finely chopped onion and minced garlic. Sauté them for about 2-3 minutes until the onion turns translucent and fragrant. Next, add the sliced red bell pepper. Cook for another 3-4 minutes until the pepper softens a bit. Then, pour in the heavy cream and chicken broth. Increase the heat until the mixture starts to simmer gently. Once simmering, lower the heat to keep it warm. Now, gradually mix in the grated Parmesan cheese. Stir continuously to melt the cheese completely. This will give your sauce a rich, creamy texture. Finally, return the sautéed chicken and drained penne pasta to the skillet. Toss everything together well, ensuring every piece of pasta is coated in the creamy sauce. Taste and adjust the seasoning if needed. To make your creamy Cajun chicken pasta even better, consider adding more spices. You can try smoked paprika or cayenne for extra heat. Fresh herbs like thyme or basil can also brighten the dish. To balance the creaminess, add a splash of lemon juice or a dash of vinegar. This adds a nice zing and cuts through the richness. Avoid overcooking your chicken by using medium heat. Cook it until golden brown, about 5-7 minutes. For pasta, watch the clock! Boil it until al dente, which means it should still have a slight bite. Drain it right away to stop the cooking. For a smooth sauce, stir continuously as you add cheese. This helps it melt evenly without clumping. If the sauce gets too thick, add a bit of chicken broth until it reaches your desired consistency. Plating makes a big difference! Serve your pasta in shallow bowls for a nice look. Drizzle some extra cream sauce on top to make it inviting. A sprinkle of extra Parmesan cheese adds a lovely touch. For garnish, fresh parsley works wonders. It adds color and a fresh taste. You might even add a slice of lemon on the side. This lets your guests squeeze a bit of juice over their pasta for a burst of flavor. For the full recipe, check out the detailed instructions above. {{image_4}} You can make a great vegetarian version of this dish. Replace the chicken with veggies. Use mushrooms, zucchini, or spinach for a fresh taste. For protein, add chickpeas or tofu. 1. Cook the Veggies: Sauté the vegetables until they soften. 2. Season Well: Use Cajun seasoning on the veggies to keep that flavor. 3. Follow the Sauce Steps: Keep the sauce the same, and mix in your veggies. This way, you keep the creamy goodness and add healthy veggies! Want more heat? You can boost the spice in a few ways. - Add Hot Sauce: Mix in your favorite hot sauce while cooking the chicken. - Use Spicy Peppers: Dice jalapeños or cayenne peppers and sauté with the onions. - Extra Cajun Seasoning: Add a bit more Cajun seasoning to the chicken for a kick. These small tweaks will give your pasta a fiery twist! If you love seafood, swap the chicken for shrimp or scallops. 1. Cook Seafood: Sauté shrimp or scallops until they turn pink and opaque. 2. Follow the Same Steps: Use the same sauce and pasta methods. 3. Adjust Cooking Time: Seafood cooks fast, so watch it closely. This change creates a rich, ocean-inspired version of the dish. Don't forget to check out the Full Recipe for more details! To keep your creamy Cajun chicken pasta fresh, store it in the fridge. Place the pasta in airtight containers. This helps prevent it from drying out and keeps the flavors strong. Make sure to cool the pasta to room temperature before sealing it. If you're storing it for more than a few days, consider freezing it. Just remember that freezing may change the texture a bit. When you’re ready to enjoy your leftovers, use gentle reheating methods. The best options are the stovetop or microwave. If you use the stovetop, add a splash of chicken broth or a little cream. This helps keep the sauce creamy. Stir often to avoid sticking. If using a microwave, cover the dish with a damp paper towel. This helps trap moisture. Heat in short bursts, stirring in between, until warm. Enjoy your creamy Cajun chicken pasta just like the first time! Yes, you can make this dish ahead of time. Here are some tips: - Cook the pasta: You can cook the penne pasta earlier on. Drain it well and toss it with a little oil to prevent sticking. - Prepare the chicken: Sauté the chicken and store it in the fridge. Reheat it before mixing with pasta. - Make the sauce: You can prepare the creamy sauce in advance. Store it in an airtight container in the fridge. - Combine before serving: Mix everything together just before serving. This keeps the pasta fresh and hot. Pair this pasta with these delicious sides: - Garlic bread: A warm, crusty garlic bread complements the dish perfectly. - Caesar salad: A fresh Caesar salad adds a nice crunch and balances the creamy pasta. - Steamed vegetables: Broccoli or green beans offer a healthy touch and color to your meal. - Corn on the cob: Sweet corn is a fun side that goes well with Cajun flavors. Adjusting the serving size is simple. Here’s how: - Double ingredients: If you want to serve eight, just double each ingredient in the recipe. - Halve ingredients: For two servings, cut the amounts in half. - Scale easily: Keep the ratios the same, so the flavors remain balanced. - Use measuring tools: A scale or measuring cups can help ensure precision when scaling down or up. You can find the [Full Recipe] online for more details! This blog post covered a delicious creamy Cajun chicken pasta recipe. You learned about the key ingredients, including chicken, pasta, and spices. We explored cooking methods and tips to enhance flavors. Variations allowed you to personalize your dish. Don't forget proper storage and reheating tips to enjoy leftovers. Embrace your culinary skills and try this recipe. It’s quick, satisfying, and perfect for any meal. Enjoy your cooking adventure!](https://joymealplan.com/wp-content/uploads/2025/06/ca6cae42-757f-40a7-bcb0-99b7cd192fd8-768x768.webp)