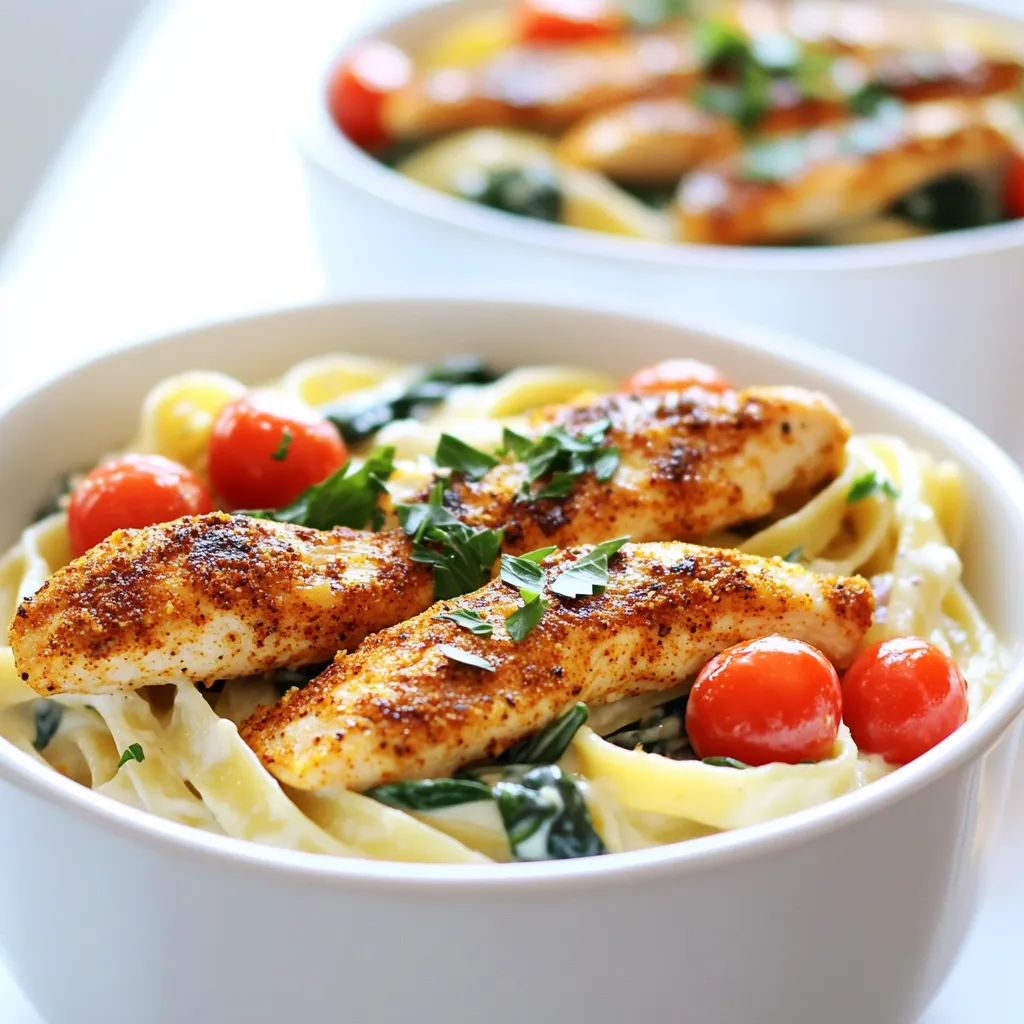
Cajun Chicken Alfredo One Pot Creamy Comfort Meal


Craving a big bowl of comfort food? You’re in the right place! My Cajun Chicken Alfredo One Pot recipe is not just easy; it’s loaded with flavor. Picture tender chicken, creamy sauce, and a kick of spice all in one dish. You’ll learn how to make it step-by-step, with tips to tweak it to your taste. Let’s dive into this creamy delight that’s sure to please everyone at your table!
Ingredients
Essential ingredients
– 1 lb chicken breast, sliced into strips
– 2 tablespoons Cajun seasoning
– 2 tablespoons olive oil
– 3 cups chicken broth
– 8 oz fettuccine pasta
– 1 cup heavy cream
– 1 cup grated Parmesan cheese
– 1 cup cherry tomatoes, halved
– 2 cups fresh spinach
– 2 cloves garlic, minced
– Salt and pepper to taste
– Fresh parsley, chopped for garnish
When making Cajun Chicken Alfredo, I always start with fresh, high-quality ingredients. The chicken breast is the star here, sliced into strips for even cooking. I coat the chicken with Cajun seasoning, which brings that bold flavor. Olive oil helps with cooking and adds richness.
For the sauce, I use chicken broth as the base. It adds depth to the dish. Fettuccine pasta cooks directly in the broth, soaking up all the flavors. Heavy cream makes the sauce rich and creamy. Parmesan cheese gives it that cheesy goodness.
Adding cherry tomatoes and fresh spinach not only adds color, but also nutrients. Minced garlic gives a lovely aroma. I finish with salt and pepper to taste, and fresh parsley for garnish. This mix of flavors and textures creates a true comfort meal that warms the soul.
Step-by-Step Instructions
Preparation of Chicken
To start, get your chicken ready. Place one pound of chicken strips in a bowl. Sprinkle two tablespoons of Cajun seasoning over the chicken. Toss the chicken well to coat every piece. This helps the chicken soak up all that tasty flavor.
Now, heat two tablespoons of olive oil in a large pot over medium-high heat. When the oil is hot, add the seasoned chicken strips. Sauté them for about five to seven minutes. You want them golden brown on the outside and fully cooked inside. Once done, take the chicken out and set it aside on a plate.
Cooking the Pasta
Next, let’s cook the pasta. In the same pot, add two cloves of minced garlic and sauté for about one minute. Stir until you smell the garlic, but don’t let it burn. Then, pour in three cups of chicken broth and turn up the heat. Bring the broth to a rolling boil.
Once the broth boils, add eight ounces of fettuccine pasta. Cook the pasta according to the package instructions. Stir it occasionally until it’s al dente, which means it should be firm but not hard.
Assembling the Dish
Now, let’s make it creamy and delicious. Lower the heat to medium-low after the pasta is cooked. Stir in one cup of heavy cream and one cup of grated Parmesan cheese. Keep stirring until the cheese melts into the creamy sauce.
Next, return the chicken to the pot. Add one cup of halved cherry tomatoes and two cups of fresh spinach. Gently stir everything together. Cook for another two to three minutes until the spinach wilts down.
Finally, season the dish with salt and pepper to your taste. Mix well to ensure every bite is full of flavor. Let the pot rest for a couple of minutes before serving. This helps all the flavors blend together nicely.
Tips & Tricks
Perfecting Cajun Chicken Alfredo
To make your Cajun Chicken Alfredo shine, adjust the spice levels to your taste. If you like heat, add more Cajun seasoning. For a milder dish, use less. Start with a small amount, and taste as you go. You can always add more, but it’s hard to take it out.
Using fresh ingredients is key. Fresh spinach and ripe cherry tomatoes make a big difference. They add flavor and color to your dish. Always choose high-quality chicken and fresh garlic for the best taste. Fresh ingredients bring out the flavors and make your meal more vibrant.
Cooking and Serving Suggestions
For the best creaminess, monitor your heat. After adding cream and cheese, don’t let it boil. Keep it on low heat. Stir gently to blend the flavors. This helps create a silky sauce that coats every strand of pasta.
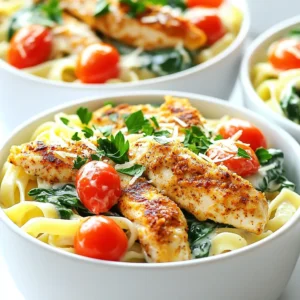
When serving, choose deep, wide bowls. This not only looks nice but also makes it easy to enjoy. Don’t forget to garnish with chopped parsley and extra Parmesan cheese. This step makes your dish look inviting and delicious. You’ll impress everyone at the table!
Variations
Ingredient substitutions
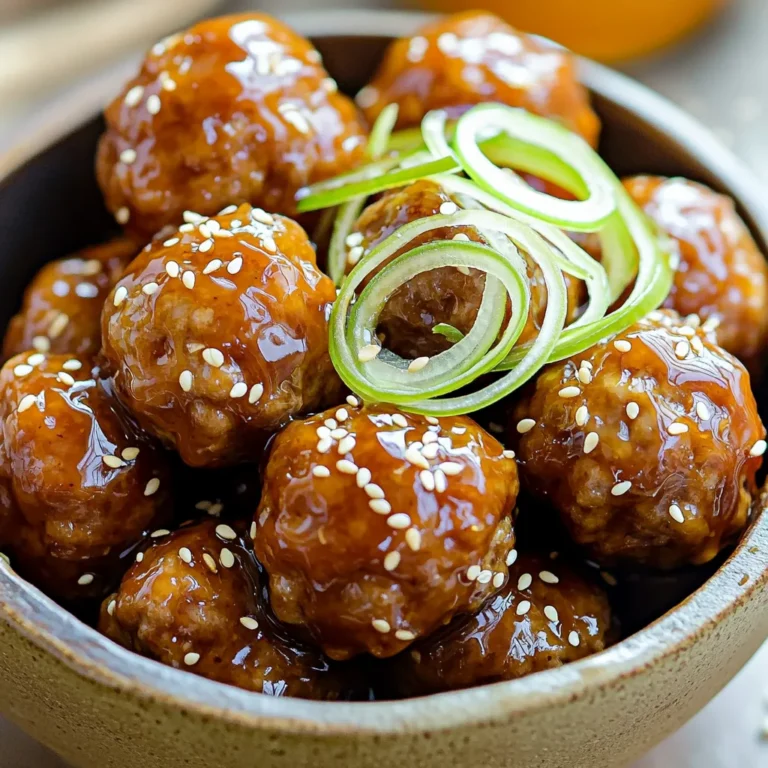
You can swap chicken for shrimp or tofu. Both add unique flavors. If you want a lighter option, use zucchini noodles instead of fettuccine. They keep the dish fresh and low-carb. You can also use any pasta you like, such as penne or farfalle.
For veggies, feel free to mix it up! Bell peppers add crunch and sweetness. Mushrooms bring a nice earthiness. You can even toss in some broccoli for added nutrients. Just remember to cook harder veggies longer so they soften well.
Dietary adaptations
If you need gluten-free options, choose gluten-free pasta. Many brands offer great textures that work well in this dish. You can also use chickpea pasta for extra protein and fiber.
For a dairy-free version, substitute heavy cream with coconut milk or a cashew cream. Nutritional yeast can replace Parmesan cheese for a cheesy flavor without dairy. These swaps keep your meal creamy and delicious while meeting your dietary needs.
Storage Info
Storing leftovers
To keep your Cajun Chicken Alfredo fresh, store it in an airtight container. Make sure to refrigerate it within two hours of cooking. This will help prevent bacteria growth. When stored properly, it can last for up to three days in the fridge.
For reheating, I suggest using a skillet over low heat. This helps maintain the dish’s creamy texture. Add a splash of chicken broth or cream to keep it moist. Stir often until heated through. You can also use the microwave, but be careful not to overheat it. Heat in short bursts and stir in between.
Freezing tips
If you want to save Cajun Chicken Alfredo for later, freezing is a good option. Allow the dish to cool completely before freezing. Portion it into freezer-safe containers or bags. Remove as much air as possible to prevent freezer burn. It can last for up to three months in the freezer.
When you are ready to enjoy it again, thaw the dish in the fridge overnight. Reheat it in a skillet or microwave as mentioned earlier. You may need to add some cream or broth to bring back the creaminess. Enjoy your flavorsome meal again with ease!
FAQs
Can I use different pasta?
Yes, you can use different types of pasta. Some great options include:
– Penne
– Rotini
– Bowtie
– Spaghetti
Each type brings its own charm to the dish. Just keep the cooking time in mind. Make sure to check the package for the right cooking time.
How spicy is Cajun Chicken Alfredo?
Cajun seasoning can vary in spice. Most blends have a good kick but are not overly hot. If you’re unsure, start with less seasoning. You can always add more later. If you like it spicy, go for it!
Can I make this recipe ahead of time?
Yes, you can prepare this dish ahead of time. Cook the chicken and pasta as directed. Store them separately in the fridge. When ready to serve, heat them both and mix in the sauce. The dish can last about three days in the fridge.
In this article, we explored making Cajun Chicken Alfredo. We covered essential ingredients like chicken, spices, and cream, plus step-by-step instructions for preparation. Tips helped ensure you perfect flavors, and variations let you customize the dish. I shared storage info to keep leftovers fresh and answered common questions to clarify your doubts. Enjoying this recipe means savoring great taste and easy cooking. You now have everything you need to create a delicious meal. Dive into your kitchen and make this flavorful dish today!
![- 4 medium zucchinis - 1 pound ground turkey (or beef) - 1 small onion, finely diced - 2 cloves garlic, minced - 1 tablespoon taco seasoning - 1 can (14 oz) diced tomatoes, drained - 1 cup canned black beans, rinsed and drained - 1 cup corn kernels (fresh or frozen) - 1 cup shredded cheese (cheddar or Mexican blend) - 2 tablespoons olive oil - Fresh cilantro, chopped (for garnish) - Sour cream (optional) - Salt and pepper to taste When picking zucchinis, look for ones that are firm and bright. They should feel heavy for their size. Avoid any that are soft or have blemishes. For measuring, use a scale for the ground meat and a measuring cup for the beans and corn. When chopping onions and garlic, a sharp knife helps avoid tears. This ensures even cooking and great flavor in your dish. This taco stuffed zucchini boats recipe is full of fun and taste. You can find the full recipe above. Enjoy every bite! - Preheat your oven to 375°F (190°C). - Take 4 medium zucchinis and cut them in half lengthwise. Scoop out the seeds carefully. Leave enough flesh for support. - Brush the insides of the zucchini halves with 2 tablespoons of olive oil. Arrange them cut-side up on a baking sheet. - In a large skillet, heat 1 tablespoon of olive oil over medium heat. - Add 1 small onion, finely diced, and sauté until it is soft, about 3-4 minutes. - Next, add 2 minced cloves of garlic. Sauté for another minute until fragrant. - Add 1 pound of ground turkey (or beef) to the skillet. Break the meat apart with a spatula. Cook until it is browned, about 5-7 minutes. - Season with 1 tablespoon taco seasoning, salt, and pepper to taste. - Stir in 1 can of drained diced tomatoes, 1 cup of rinsed black beans, and 1 cup of corn kernels. Cook for another 2-3 minutes until everything is hot. - Remove from heat and fold in half of the 1 cup of shredded cheese until it melts slightly. - Carefully fill each zucchini boat with the taco mixture. Press down gently to pack it in. - Sprinkle the remaining cheese over the top of each stuffed zucchini. - Place the baking sheet in the oven and bake for 20-25 minutes. Check for tenderness and ensure the cheese is melted and golden. - Once cooked, remove from the oven and garnish each zucchini with chopped cilantro. - Serve warm with a dollop of sour cream, if desired. For the full recipe, check the Full Recipe section above. To make your zucchinis tender yet not mushy, follow these tips: - Choose medium zucchinis: They cook evenly and hold their shape well. - Scoop carefully: Leave enough flesh for support, but remove the seeds. - Preheat your oven: A hot oven helps the zucchinis cook just right. For sautéing your filling, use these methods: - Heat your skillet well: This helps to cook onions and garlic faster. - Add oil before ingredients: Olive oil prevents sticking and enhances flavor. - Stir often: This keeps your mixture from burning and ensures even cooking. Garnishing your taco stuffed zucchini boats adds a fresh touch. Here are some ideas: - Chop fresh cilantro: Sprinkle it on top for a pop of color and flavor. - Add a dollop of sour cream: It adds creaminess and balances the spice. Pair your zucchini boats with sides or salads. Some great options include: - Rice or quinoa: These grains add texture and heartiness. - A fresh garden salad: Crisp greens complement the warm, savory boats. For the full recipe, check out the [Full Recipe]. {{image_4}} You can change the meat in this dish easily. Ground chicken works great in place of turkey or beef. It gives a lighter flavor while still being filling. If you want a plant-based option, try using lentils or crumbled tofu. Both can soak up the tasty taco seasoning. You can also swap out the black beans. Try pinto beans or kidney beans for a new twist. They add different textures and flavors that make the dish fun. Adding spices can really change the taste. Try cumin or smoked paprika for an extra kick. You could also mix in some chili powder if you like it hot. Each spice brings its own personality to your zucchini boats. Cheese is another place to get creative. Instead of cheddar, use pepper jack for a spicy twist. Or, try a mix of different cheeses for depth. Condiments can also change the game. Consider adding salsa or guacamole on top. These add fresh flavors and make every bite exciting. You can find the full recipe for Taco Stuffed Zucchini Boats to explore all these variations! Store leftover zucchini boats in an airtight container. Use parchment paper to separate layers if stacking. This keeps them fresh for up to three days. Make sure to cool them down before sealing to avoid moisture buildup. To maximize freshness, place them in the fridge as soon as they cool. Reheat zucchini boats in the oven for the best results. Set your oven to 350°F (175°C) and bake for about 10-15 minutes. This method warms them evenly and keeps the texture nice. If you want a quicker option, use the microwave. Heat them for 1-2 minutes, but watch for sogginess. To avoid this, place a paper towel under the zucchini boats while reheating. This helps absorb extra moisture. For detailed cooking steps, check the Full Recipe. Enjoy your tasty leftovers! To make taco stuffed zucchini boats healthier, use low-fat ground turkey instead of beef. You can also choose low-fat cheese or skip it entirely for a lighter option. Adding more veggies boosts the nutrition. Consider mixing in diced bell peppers, spinach, or mushrooms. You can also serve them with a side salad for extra greens. This way, you enjoy a tasty dish while keeping it nutritious! Yes, you can freeze taco stuffed zucchini boats! Start by letting them cool completely. Wrap each boat in plastic wrap or foil. Place them in a freezer bag to save space. They can stay in the freezer for up to three months. When you’re ready to eat, let them thaw overnight in the fridge. Then, heat them in the oven until warm. Taco stuffed zucchini boats pair well with rice or quinoa. You can also serve them with tortilla chips and salsa for a fun crunch. For gatherings, consider adding some guacamole as a dip. Fresh fruit like watermelon or mango is a great side too. These options make your meal more exciting and flavorful! Taco stuffed zucchini boats offer a fun and tasty twist on dinner. You learned how to prepare fresh ingredients, cook a hearty filling, and assemble a dish that's sure to please. Remember, you can mix and match proteins and spices to fit your taste. Storing and reheating tips will help you enjoy leftovers without losing flavor. Dive into this dish for a healthy meal that’s easy to make and customize. Enjoy experimenting and sharing your tasty creations!](https://joymealplan.com/wp-content/uploads/2025/07/a6f85fbf-686b-42b4-a399-5784f990ec67-768x768.webp)
![- 1 pound large shrimp, peeled and deveined - 2 cups broccoli florets - 1 cup cherry tomatoes, halved - 1 medium yellow bell pepper, sliced into strips - 3 tablespoons extra virgin olive oil - 4 cloves garlic, finely minced - Zest and juice of 1 large lemon - 1 teaspoon dried oregano - 1 teaspoon dried thyme - Salt and freshly cracked black pepper to taste - Fresh parsley for garnish The main ingredients in this recipe create a bright, fresh dish. The shrimp are the star. Their sweet flavor pairs well with the crunchy broccoli and juicy tomatoes. The yellow bell pepper adds color and sweetness. For the drizzle, I love using olive oil. It adds richness and helps the garlic blend well with the other flavors. The lemon brings a zesty kick. Its zest adds a fragrant aroma, while the juice brightens the dish. Dried oregano and thyme lend an earthy note. They balance the freshness of the lemon and shrimp. Finally, salt and pepper bring out all the flavors. Fresh parsley adds a splash of color and a hint of freshness when you serve. You can find the full recipe here: [Full Recipe]. Enjoy cooking! 1. First, preheat your oven to 400°F (200°C). 2. Line a large baking sheet with parchment paper. This makes cleanup simple. 3. In a big bowl, mix 1 pound of shrimp, 2 cups of broccoli, 1 cup of halved cherry tomatoes, and 1 sliced yellow bell pepper. Toss them gently to combine. 1. In a small bowl, whisk together 3 tablespoons of olive oil, 4 minced garlic cloves, the zest of 1 lemon, and its juice. 2. Then, add 1 teaspoon each of dried oregano and thyme, plus salt and pepper. Mix it well. 1. Pour the lemon herb mix over the shrimp and veggies. Toss everything together to coat well. 2. Spread the mixture evenly on the baking sheet. 3. Place it in the oven and bake for about 12-15 minutes. The shrimp should turn pink, and the veggies should soften. 4. After baking, sprinkle chopped parsley on top for a fresh look and taste. This recipe is quick and makes a colorful dish that bursts with flavor. For the full recipe, check the details above. To know when shrimp are done, look for a bright pink color. They should also be opaque. If you see these signs, they are ready to eat. Cooking time may change with different ovens. Start checking for doneness at around 12 minutes. Your oven may cook faster or slower, so keep an eye on them. Adding more flavors can make this dish even better. You might try a pinch of red pepper flakes for some heat. A dash of smoked paprika adds a nice smoky taste. Fresh herbs are key in this dish. They give a bright and fresh flavor that dried herbs can't match. Always use fresh parsley for a vibrant finish. You can serve the shrimp right from the baking sheet. This gives a fun, casual feel. If you want to impress, transfer them to a nice platter. Drizzle with extra lemon juice for zing. Pair this dish with a light salad or some rice to soak up the juices. These sides complement the shrimp beautifully. For the full recipe, check out the details above. {{image_4}} You can use many vegetables in this dish. Instead of broccoli and bell peppers, try zucchini or asparagus. These options add color and flavor. You can also use seasonal veggies. In summer, fresh corn or green beans work well. In fall, add butternut squash or Brussels sprouts. Mix and match to suit your taste. If you want to change the protein, scallops or chicken are great swaps. Scallops cook fast like shrimp. They need about 8-10 minutes in the oven. Chicken takes longer, around 20-25 minutes. Cut it into small pieces for even cooking. Adjust your bake time based on the protein you choose. This recipe is easy to adapt for different diets. For a gluten-free option, make sure your seasonings are gluten-free. You can also make it dairy-free. Just skip any dairy-based sides. Want a vegan version? Use chickpeas or tofu instead of shrimp. Season them the same way for a delicious meal. Store leftover shrimp and veggies in an airtight container. Keep it in the fridge for up to two days. If you want to save some for later, freezing is a good option. Place shrimp and vegetables in a freezer-safe bag. Remove as much air as you can before sealing. They can last up to three months in the freezer. When reheating, use the oven or stovetop for best results. Preheat your oven to 350°F (175°C) and place the shrimp and veggies on a baking sheet. Heat for about 10 minutes. This keeps everything warm and tasty. You can also use a skillet on low heat. Stir gently to warm the dish without overcooking the shrimp. Avoid the microwave if possible, as it can make shrimp tough. For the full recipe of Sheet Pan Lemon Herb Shrimp, check the earlier section! Shrimp cook quickly. The best time is 12 to 15 minutes at 400°F. They turn pink and opaque when done. Overcooking makes them tough, so watch closely. Each oven is different, so check them a little early. Yes, you can prep this dish in advance. Mix the shrimp and veggies, then store them in the fridge. You can also make the marinade ahead. Just keep the shrimp and marinade separate until you are ready to bake. This keeps the shrimp fresh. This shrimp pairs well with many sides. Here are some great options: - Quinoa salad for a healthy touch - Garlic bread for a filling option - Steamed rice for a classic choice - A fresh garden salad for crunch These sides balance the flavors and make a complete meal. In this post, I shared how to make a delicious sheet pan lemon herb shrimp dish. We covered main ingredients, step-by-step instructions, and tips for perfecting the recipe. I also included variations based on your taste. Cooking should be fun and easy. With quick steps and fresh ingredients, you can create a meal everyone will love. Enjoy experimenting with flavors and make this recipe your own!](https://joymealplan.com/wp-content/uploads/2025/06/8195c318-04ef-4784-9bf9-d5c1a8395797-768x768.webp)