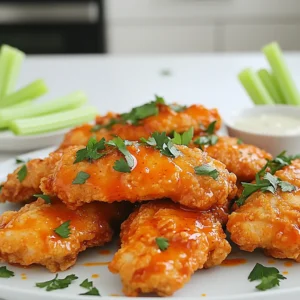
Buffalo Chicken Tenders Air Fryer Crispy Delight


Are you ready to elevate your snack game? Buffalo Chicken Tenders made in an air fryer offer a crispy delight that’s hard to resist. I’ll guide you through marinating, coating, and cooking these tender bites to perfection. Plus, I’ll share tips, tricks, and variations that suit any palate. Whether you’re a busy parent or a game-day enthusiast, these tenders will become your go-to treat. Let’s dive in!
Ingredients
Main Ingredients
– 1 pound chicken tenderloins
– 1 cup buttermilk (or 1 cup milk mixed with 1 tablespoon lemon juice)
– 1 cup all-purpose flour
Seasoning Components
– 1 teaspoon garlic powder
– 1 teaspoon onion powder
– 1 teaspoon smoked paprika
– 1/2 teaspoon cayenne pepper (adjust for spice)
– Salt and pepper to taste
Additional Ingredients
– 1/2 cup buffalo sauce (reserve more for tossing)
– 2 tablespoons olive oil (for coating)
– Fresh parsley, finely chopped (for garnish)
The key to crispy buffalo chicken tenders lies in the right ingredients. Start with fresh chicken tenderloins. They cook quickly and stay juicy. Next, soak them in buttermilk. This step adds flavor and keeps the chicken tender. If you don’t have buttermilk, mix milk with lemon juice. It works just as well!
For the crunch, combine all-purpose flour with spices. Garlic powder and onion powder give it depth. Smoked paprika adds a nice touch of smokiness. Cayenne pepper provides heat, but adjust it to your taste. Don’t forget salt and pepper to enhance the flavors.
Buffalo sauce is the star here. Use a good brand or homemade sauce for the best taste. Olive oil is crucial for a crispy crust. It helps the coating brown perfectly. Finally, fresh parsley adds a pop of color. It makes the dish look even more appealing.
Gather all these ingredients, and you’re ready to create a crispy delight in your air fryer!
Step-by-Step Instructions
Preparing the Chicken
To start, I marinate the chicken in buttermilk. This helps keep the chicken juicy and adds flavor. I put the chicken tenderloins in a bowl and pour in the buttermilk. I make sure they are fully covered. I cover the bowl with plastic wrap and place it in the fridge. Let it sit for at least 30 minutes, but no more than 2 hours. After that, I take the chicken out and let the excess buttermilk drip off.
Coating the Chicken
Next, I prepare the coating. I combine the flour, garlic powder, onion powder, smoked paprika, cayenne pepper, salt, and pepper in a separate bowl. I whisk these together until well mixed. This seasoned flour creates a tasty crust. I take each chicken tenderloin and dredge it in the flour mix. I coat it well and shake off any extra flour to keep it from clumping.
Air Frying Process
Now, I preheat the air fryer. I set it to 400°F (200°C) for about 5 minutes. This step is key for a crispy finish. I then lightly spray the air fryer basket with cooking spray or brush it with olive oil. I arrange the chicken tenders in a single layer in the basket. I make sure they are not crowded. This allows for even cooking. I give the tops a light spray of olive oil for extra crunch.
Cooking the Tenders
I cook the chicken tenders for 10 to 12 minutes. At the halfway mark, I flip them over for even browning. The chicken is ready when it is golden brown and reaches an internal temperature of 165°F (74°C). I always check with a meat thermometer to be sure.
Tossing in Sauce
Once the tenders are done, I transfer them to a clean bowl. I drizzle buffalo sauce over the hot tenders. I toss them gently to coat every piece. I like to adjust the sauce to my taste, adding more if I want extra heat. The result is a plate full of spicy, crispy goodness.
Tips & Tricks
Marinating Tips
Marinating the chicken is key to great flavor. For the best taste and tenderness, soak the chicken in buttermilk for at least 30 minutes. You can marinate it for up to 2 hours for an even richer flavor. If you want variety, try using yogurt or a mix of soy sauce and honey for your marinade. Both options add unique flavors.
Air Frying Tips
To make your tenders crispy, preheat your air fryer to 400°F (200°C) for about 5 minutes. This step helps seal in moisture and gives a nice crunch. Also, avoid overcrowding the basket. Cook in a single layer. This ensures even cooking and helps the tenders become crispy on all sides.
Serving Suggestions
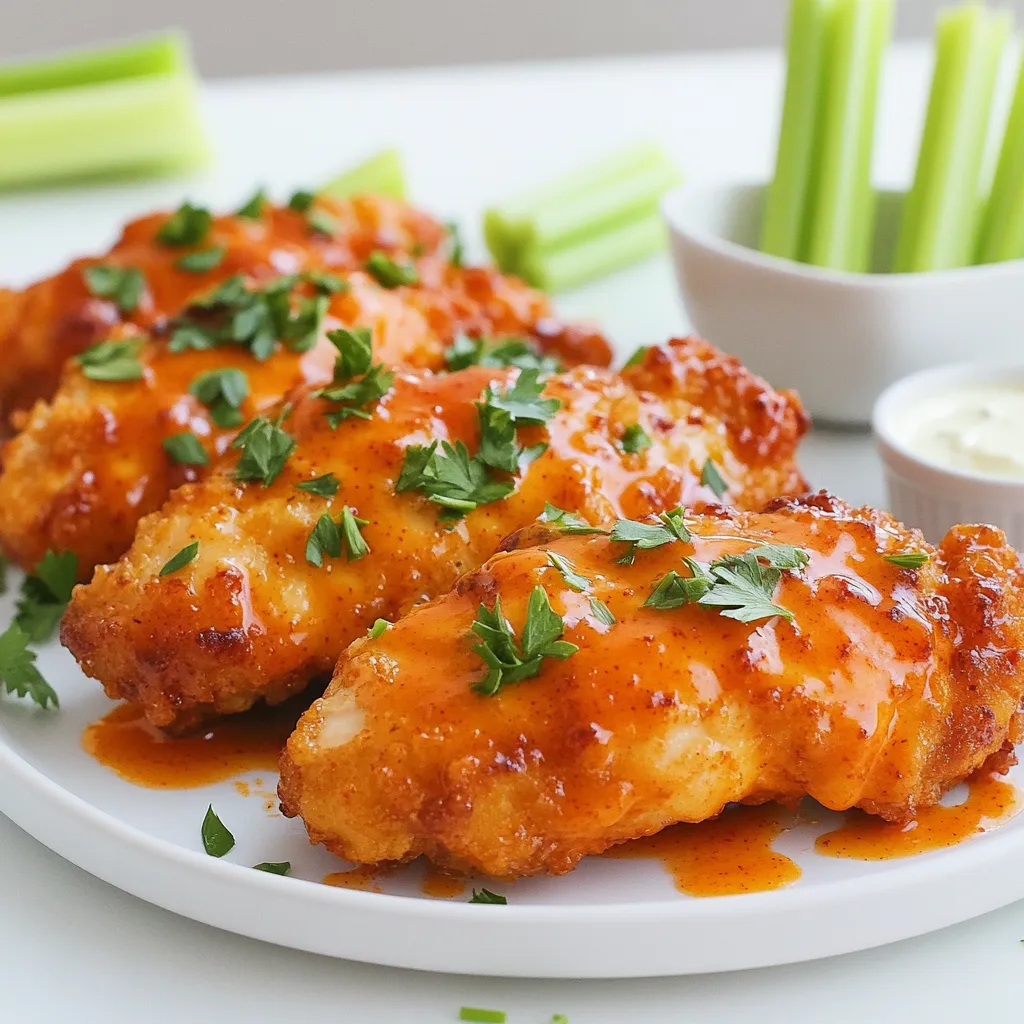
Buffalo chicken tenders pair well with crunchy celery sticks and creamy ranch or blue cheese dressing. These sides help balance the spice. For a fun presentation, serve the tenders on a rustic wooden platter. You can also use small bowls for a more elegant look. Garnishing with fresh parsley adds a vibrant touch. Enjoy sharing these tasty bites!
Variations
Spicy Versions
To kick up the heat, add more cayenne or hot sauce. You can adjust the spice level in two easy ways. First, increase the cayenne pepper in the flour mixture. Start with an extra 1/4 teaspoon and taste. If you want more heat, add more! Second, drizzle extra hot sauce over the tenders after tossing in buffalo sauce. This adds a zesty kick that spice lovers will adore.
Gluten-Free Options
If you need a gluten-free option, swap all-purpose flour for gluten-free flour. Brands like almond flour or coconut flour work great. Use the same amount as regular flour, but check the texture. You may need to add a bit more liquid to the mix. This keeps the tenders moist and tasty while avoiding gluten.
Flavor Infusions
For a twist on flavor, try adding other seasonings. Mix in some Italian herbs like oregano or basil for a unique taste. You can even add a hint of ranch seasoning to the flour mix. This gives your chicken a whole new vibe. Remember, the key is to experiment and find your favorite blend!
Storage Info
Storing Leftovers
To keep your buffalo chicken tenders fresh, allow them to cool down. Place them in an airtight container. Make sure to separate layers with parchment paper to avoid sticking. This method helps maintain their crunch.
Reheating Recommendations
For the best results, reheat the tenders in the air fryer. Set it to 350°F (175°C) for about 5-7 minutes. This keeps them crispy. You can also use a conventional oven at the same temperature. Avoid the microwave; it can make them soggy.
Shelf Life
Buffalo chicken tenders can last up to 3 days in the fridge. If you freeze them, they can stay good for up to 3 months. Just make sure to store them in a freezer-safe bag. Always label the bag with the date for easy tracking.
FAQs
Can I use frozen chicken tenderloins?
Yes, you can use frozen chicken tenderloins. First, thaw them completely. This takes about 24 hours in the fridge. Once thawed, follow the same marinating steps. If you cook them straight from frozen, add a few extra minutes to the cooking time. Make sure to check that the chicken reaches 165°F (74°C) inside.
What dipping sauces pair well with buffalo chicken tenders?
Many sauces work great with buffalo chicken tenders. Here are a few tasty options:
– Ranch dressing
– Blue cheese dressing
– Honey mustard
– Garlic aioli
– Creamy sriracha sauce
These sauces enhance the spicy flavor and add a cool touch.
How do I make buffalo sauce from scratch?
Making buffalo sauce is easy and fun! Here’s a simple recipe:
1. In a small bowl, mix together:
– 1/2 cup hot sauce (like Frank’s RedHot)
– 1/4 cup melted butter
– 1 tablespoon white vinegar
– 1/4 teaspoon garlic powder
2. Stir until it’s well combined.
3. Adjust the heat by adding more hot sauce if you like it spicier.
This sauce is perfect for tossing your cooked chicken tenders!
Can I make these tenders in the oven instead?
Yes, you can bake these tenders! Preheat your oven to 425°F (220°C). After coating the chicken, place them on a baking sheet lined with parchment paper. Bake for 20-25 minutes, flipping them halfway. Just like in the air fryer, ensure they reach an internal temperature of 165°F (74°C). Enjoy the same crispy delight!
In this article, we explored how to make delicious buffalo chicken tenders. We covered important ingredients like chicken tenderloins, buttermilk, and spices. I shared easy steps for preparation, coating, and air frying for perfect crunch. You learned tips for marinating and serving, plus variations to try.
Remember, practice brings skill. Don’t hesitate to experiment with flavors and temperatures. Enjoy making these tasty tenders for friends or family at your next meal!