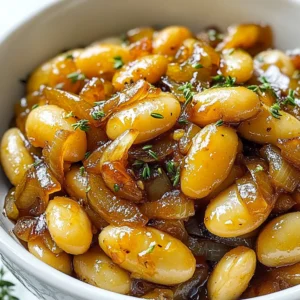
Caramelized Onion Butter Beans Savory and Easy Dish

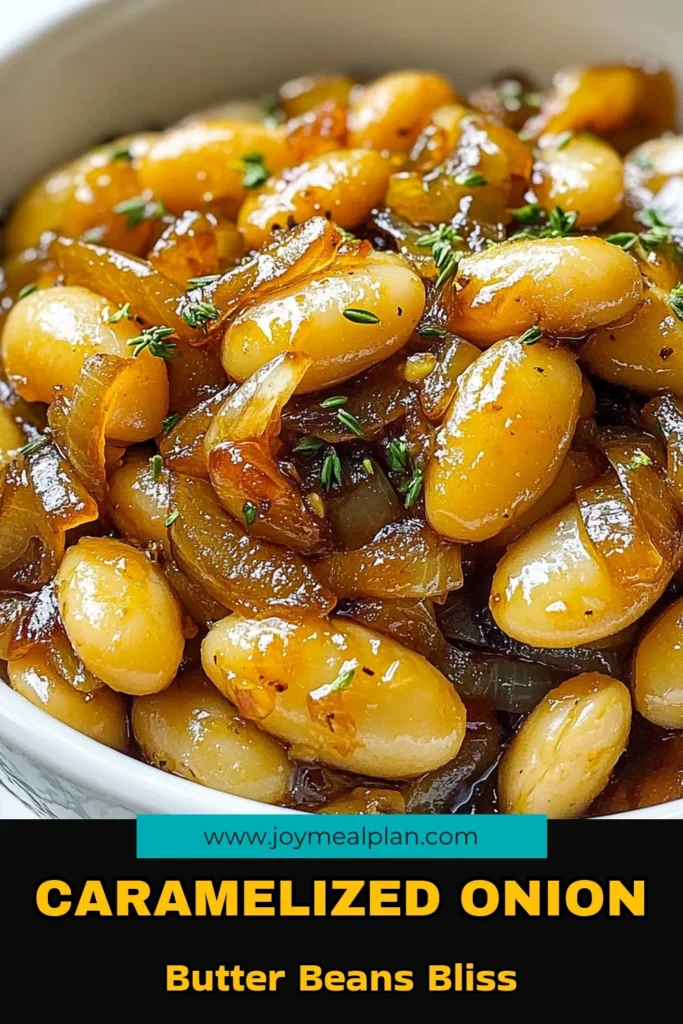
Are you ready to tantalize your taste buds with a simple yet tasty dish? Caramelized Onion Butter Beans are savory, satisfying, and come together with just a few key ingredients. In this guide, I’ll walk you through everything you need to know—from the ingredients to expert tips—so you can whip up this delicious meal in no time. Let’s dive into the world of rich flavors and easy cooking!
Why I Love This Recipe
- Comforting Flavors: This recipe combines the sweet, caramelized onions with creamy butter beans, creating a dish that is both comforting and satisfying.
- Simple Ingredients: With just a few pantry staples, this recipe is easy to whip up without the need for extravagant grocery shopping.
- Versatile Dish: It can be served as a main course, a side dish, or even a dip, making it perfect for any occasion.
- Healthy and Hearty: Packed with fiber and nutrients from the butter beans and onions, it’s a wholesome option that doesn’t compromise on flavor.
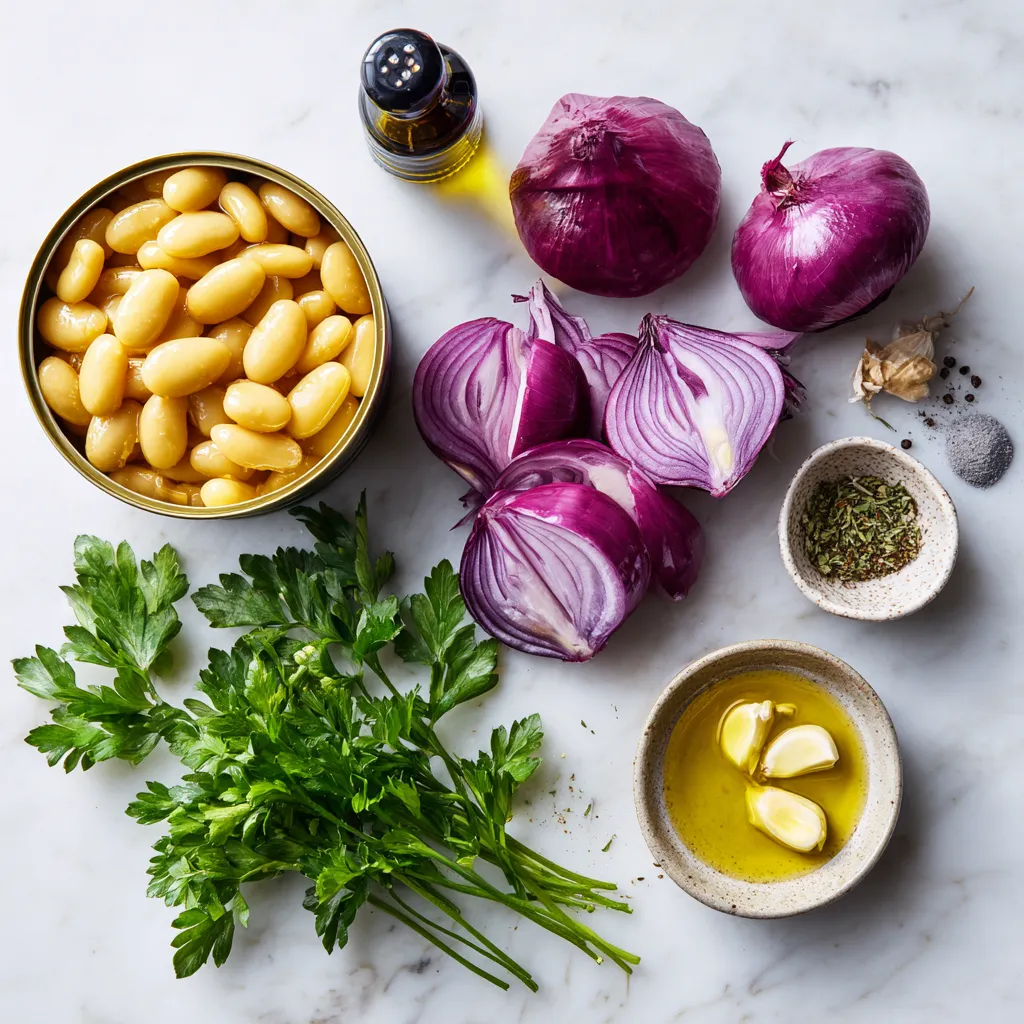
Ingredients
List of Ingredients
– 1 can (15 oz) of butter beans, thoroughly drained and rinsed
– 2 large onions, beautifully thinly sliced
– 3 tablespoons extra-virgin olive oil
– 2 cloves of garlic, finely minced
– 1 tablespoon rich balsamic vinegar
– 1 teaspoon dried thyme, or fresh if available
– Sea salt and freshly cracked black pepper to taste
– Fresh parsley, finely chopped (for a colorful garnish)
Alternative Ingredients for Variations
You can switch up ingredients for fun flavors. Try using white beans instead of butter beans. They add a different texture. You can also use red onions for a sweeter taste. If you want a kick, add a pinch of red pepper flakes. For a fresh twist, toss in some baby spinach at the end.
Nutritional Information per Serving
Each serving is packed with nutrients. You get about 200 calories, 8 grams of protein, and 5 grams of fiber. The dish is also rich in vitamins from the onions and parsley. Butter beans provide healthy fats, making this dish both tasty and filling. This dish is great for a balanced meal.
Step-by-Step Instructions
Preparation Steps
1. Start by gathering all your ingredients. You need:
– 1 can (15 oz) of butter beans, thoroughly drained and rinsed
– 2 large onions, beautifully thinly sliced
– 3 tablespoons extra-virgin olive oil
– 2 cloves of garlic, finely minced
– 1 tablespoon rich balsamic vinegar
– 1 teaspoon dried thyme, or fresh if available
– Sea salt and freshly cracked black pepper to taste
– Fresh parsley, finely chopped for garnish
2. Thinly slice the onions. This helps them cook evenly. Aim for long, thin strips.
Cooking Process for Caramelizing Onions
1. In a spacious skillet, pour in the olive oil. Warm it over medium-low heat. Let it become fragrant without smoking.
2. Add the thinly sliced onions. Season them lightly with sea salt. This step boosts their natural sweetness.
3. Cook the onions slowly. Stir them occasionally for about 15-20 minutes. Watch as they turn soft and golden-brown.
4. If onions stick, add a small splash of water. This keeps them tender and prevents burning.
5. Once caramelized, stir in the minced garlic. Sauté for 1-2 minutes until it becomes aromatic. Be careful not to burn the garlic.
Final Assembly of the Dish
1. Gently fold in the drained butter beans. Mix them well with the onions and garlic.
2. Drizzle balsamic vinegar over the mixture. Sprinkle in the dried thyme, salt, and freshly cracked black pepper.
3. Stir everything well. Cook for an additional 5 minutes. This lets all flavors meld beautifully.
4. Remove the skillet from heat. Taste and adjust seasoning as needed.
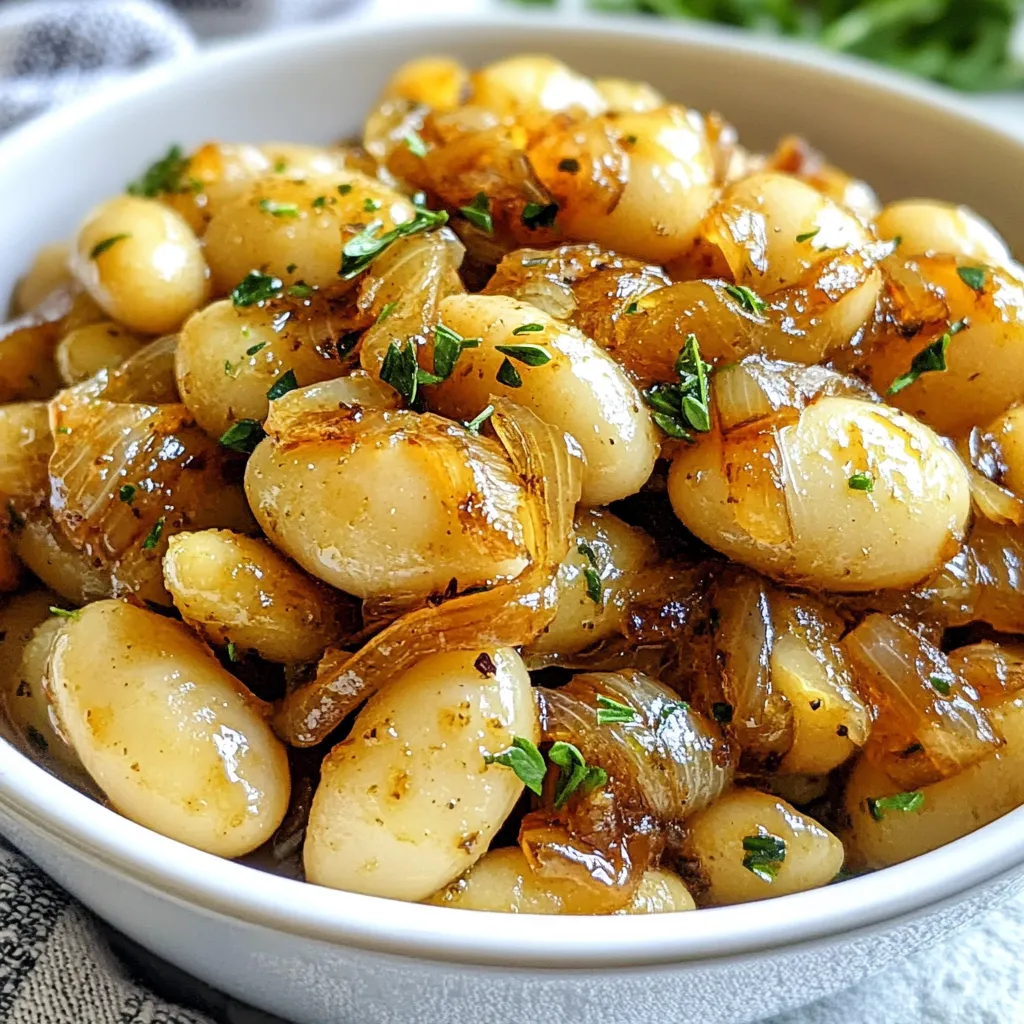
5. Serve the warm dish in bowls. Garnish with freshly chopped parsley for a vibrant touch.
Tips & Tricks
Best Practices for Caramelizing Onions
To get the best caramelized onions, use low heat. This method lets the sugars develop slowly. Start with a large skillet. Add olive oil and let it warm. Then, add your onions with a pinch of salt. This salt helps draw out moisture. Stir them often but gently. If they stick, add a splash of water. Keep cooking until they turn golden brown, about 15-20 minutes. The patience will be worth it!
How to Enhance Flavor (Herbs and Spices)
To boost the flavor, add fresh or dried herbs. Thyme works great in this dish. It adds a nice depth to the beans and onions. You can also experiment with other herbs. Try rosemary or sage for different tastes. For a little kick, add crushed red pepper flakes. Just a pinch will do. Remember, balance is key. You want the flavors to blend nicely.
Serving Suggestions and Pairings
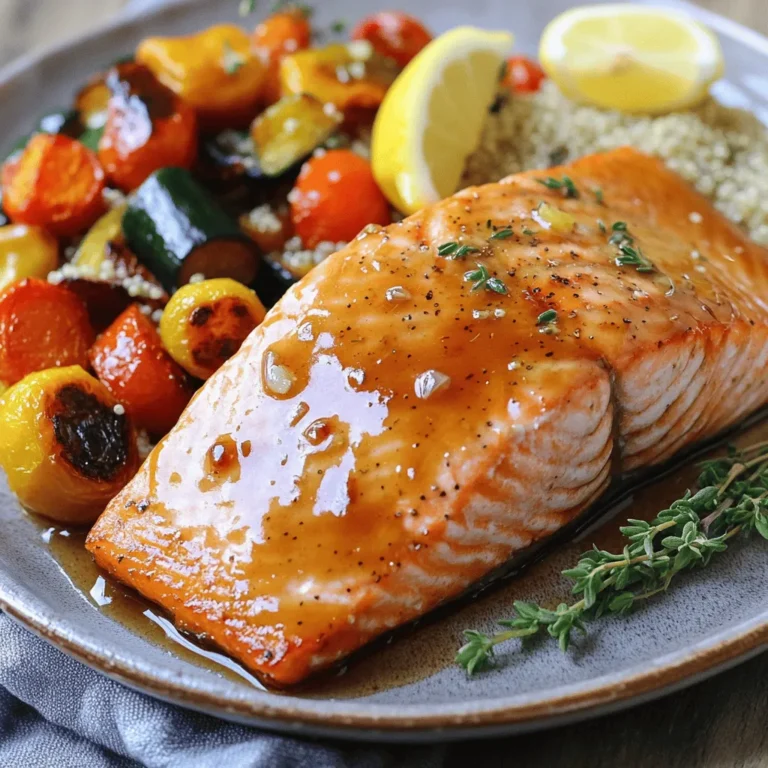
These caramelized onion butter beans shine as a side dish. Serve them next to grilled meats for a hearty meal. They pair well with chicken or steak. You can also enjoy them on their own. Top with extra parsley for color and freshness. For a complete meal, serve with crusty bread or a fresh salad. This makes for a delightful dinner experience!
Pro Tips
- Use Fresh Ingredients: Whenever possible, opt for fresh onions and herbs to enhance the dish’s flavor. Fresh ingredients bring a brightness and vitality that can elevate your meal.
- Control the Heat: Keep the heat on medium-low when caramelizing onions. This slow cooking process allows the natural sugars to develop without burning, resulting in perfectly sweet and tender onions.
- Experiment with Vinegars: While balsamic vinegar adds a rich flavor, feel free to experiment with other types like red wine or apple cider vinegar for a different taste profile.
- Add Texture: For a bit of crunch, consider topping the dish with some toasted pine nuts or breadcrumbs just before serving. This adds an interesting contrast to the creamy butter beans.
Variations
Vegetarian and Vegan Modifications
This dish is already vegetarian and can easily be vegan. Simply use vegetable broth instead of water if you need to add liquid while cooking the onions. You can also skip the butter and oil for a lighter version. The dish still tastes great without these fats.
Creamy Version with Dairy Alternatives
If you want a creamy texture, try adding a splash of coconut milk or cashew cream. Both options work well and keep the dish vegan. Just stir in a little at the end, after the beans are heated through. This change brings a rich flavor that pairs nicely with the caramelized onions.
Spice It Up: Adding Heat
For those who like some spice, add red pepper flakes or diced jalapeños. Start with a small amount and adjust to your taste. You can also mix in some smoked paprika for a different flavor twist. This will add warmth and depth to the dish, making it even more exciting.
Storage Info
How to Properly Store Leftovers
To store your leftover caramelized onion butter beans, let them cool first. Use an airtight container and pour the beans inside. Make sure to seal it tightly. Place the container in your fridge. They will stay fresh for about 3 to 4 days.
Reheating Instructions
When you want to eat them again, take the beans out of the fridge. You can reheat them on the stove or in the microwave. If using the stove, add a splash of water or olive oil. This helps keep them moist. Heat them over low heat until warm. In the microwave, heat for 1-2 minutes, stirring halfway through to warm evenly.
Freezing Tips for Future Meals
If you want to save the beans for later, freezing is great. Use a freezer-safe container or bag. Make sure to leave some space for expansion. Seal it tightly and label it with the date. They can last about 2 to 3 months in the freezer. When you’re ready to eat, thaw in the fridge overnight. Then reheat as mentioned.
FAQs
Can I use fresh butter beans instead of canned?
Yes, you can use fresh butter beans. First, shell them from their pods. Then, cook them in boiling water for about 5-7 minutes. Drain and cool them before adding to the recipe. Fresh beans will give a vibrant texture and taste.
How do I store leftover caramelized onion butter beans?
To store leftovers, let them cool to room temperature. Place them in an airtight container. Store in the fridge for up to 3 days. For longer storage, consider freezing them. Use a freezer-safe container, and they can last for about 2 months.
What can I serve with caramelized onion butter beans?
Serve these beans as a side with grilled meats or fish. They also pair well with crusty bread or over a bed of rice. For a vegetarian option, serve them with roasted vegetables or a fresh salad. The flavors complement many dishes.
This blog post explored how to make the best caramelized onion butter beans. You learned about the key ingredients, step-by-step cooking, and useful tips. Variations allow for personal touches, like making it vegan or spicy. I also shared smart ways to store and reheat leftovers.
In summary, cooking this dish is fun and flexible. Experiment with flavors to create your own favorite version. Enjoy your delicious creatio
Caramelized Onion Butter Beans Delight
Ingredients
- 1 can butter beans, thoroughly drained and rinsed
- 2 large onions, beautifully thinly sliced
- 3 tablespoons extra-virgin olive oil
- 2 cloves garlic, finely minced
- 1 tablespoon rich balsamic vinegar
- 1 teaspoon dried thyme, or fresh if available
- to taste sea salt and freshly cracked black pepper
- for garnish fresh parsley, finely chopped
Instructions
- In a spacious skillet, pour in the olive oil and warm it over medium-low heat, allowing it to become fragrant without smoking.
- Gently add the thinly sliced onions to the skillet, seasoning them with a pinch of sea salt to enhance their sweetness. Cook them slowly, stirring occasionally, for about 15-20 minutes until they are soft and golden-brown.
- Once the onions have achieved perfect caramelization, stir in the minced garlic and sauté for an additional 1-2 minutes until it becomes aromatic and golden.
- Next, gently fold in the drained butter beans, ensuring they are well-mixed with the onion and garlic mixture.
- Drizzle the balsamic vinegar over the beans and onion, then sprinkle in the dried thyme, along with a dash of salt and freshly cracked black pepper. Stir everything well and allow it to cook for an additional 5 minutes.
- Remove the skillet from the heat and taste for seasoning, adjusting with more salt or pepper as desired.
- Serve this warm dish in bowls, garnished generously with freshly chopped parsley.
![- 4 medium sweet potatoes - 1 lb ground turkey (or beef) - 1 tablespoon olive oil - 1 can (15 oz) black beans, rinsed and drained - 1 cup corn kernels (fresh or frozen) - 1 packet taco seasoning - 1 cup diced tomatoes (fresh or canned) - 1 cup shredded cheddar cheese - 1 avocado, diced - 1/4 cup fresh cilantro, chopped - 1 lime, cut into wedges - Salt and pepper to taste - Sour cream - Jalapeños - Salsa Gathering these ingredients is simple, and it sets the stage for a tasty meal. The sweet potatoes bring a nice sweetness and a lot of nutrients. Ground turkey or beef gives a hearty flavor. The black beans, corn, and tomatoes add texture and nutrition. Taco seasoning brings the classic flavor that everyone loves. The cheese and avocado on top make it all even better. Don't forget the lime for a fresh kick! For a full recipe, check out the [Full Recipe]. - Preheat the oven to 425°F (220°C). - Scrub and poke holes in sweet potatoes. - Bake sweet potatoes for 45-50 minutes. First, I preheat my oven to 425°F (220°C). This step is key to getting those sweet potatoes nice and tender. Next, I scrub each sweet potato under running water. Then, I poke holes in them with a fork. This prevents them from bursting while baking. After that, I place the potatoes on a baking sheet lined with parchment paper. Finally, I bake them for 45-50 minutes until they are soft. - Heat olive oil in a skillet over medium heat. - Cook ground turkey (or beef) until browned. - Stir in taco seasoning, black beans, corn, and tomatoes; simmer for 5-7 minutes. While the potatoes bake, I heat a tablespoon of olive oil in a skillet over medium heat. I add 1 pound of ground turkey or beef. I cook it until it is browned, about 5-7 minutes. Then, I stir in the taco seasoning, a can of rinsed black beans, corn, and diced tomatoes. I let this simmer for another 5-7 minutes. This lets all the flavors mix together nicely. - Slice baked sweet potatoes in half lengthwise. - Scoop filling into each half and top with cheese. - Garnish with avocado and cilantro, serve with lime wedges. Once the sweet potatoes are soft, I carefully take them out of the oven. I slice each potato in half lengthwise, making a boat shape. Then, I scoop the taco filling generously into each half. I sprinkle shredded cheddar cheese on top, letting it melt slightly from the heat. Finally, I garnish with diced avocado and fresh cilantro. I serve them with lime wedges on the side. A squeeze of lime adds a perfect tang to this dish. For the full recipe, check out the details above. - Adjust taco seasoning to taste. You can add more for a bolder flavor. - Incorporate lime juice for extra zing. This brightens the dish and adds freshness. - Use a fork to check for doneness easily. Poke the sweet potatoes to see if they are soft. - Allow cooling before cutting to prevent burns. Sweet potatoes hold heat well, so be careful. - Arrange on a platter for visual appeal. A colorful display makes the meal more inviting. - Drizzle lime juice for an added touch. This adds flavor and makes the dish shine. I love using these tips to make Taco Stuffed Sweet Potatoes even better. If you want to try this recipe, check out the Full Recipe for all the details. {{image_4}} You can switch up the protein in your taco stuffed sweet potatoes. Ground beef or chicken works great. If you want to keep it plant-based, try using lentils or beans. Shredded pork can also give a fun twist to the dish. Each option brings a unique taste and texture. Don't forget to add extra veggies! Diced bell peppers or onions can add flavor and crunch. You can also toss in spinach or kale for more nutrition. Adding these veggies not only boosts the health factor but also brightens the dish's colors. Want to mix things up a bit? Try some Mexican-style toppings like pico de gallo. This fresh salsa adds a burst of flavor. You can also use Greek yogurt instead of sour cream. It gives a creamy texture with less fat, making it a healthier choice. These simple changes can make your meal even more exciting. Store any leftovers in an airtight container. They stay fresh for up to 3 days. To keep the quality high, keep your toppings separate. This will help prevent sogginess and keep flavors bright. For quick reheating, use the microwave. Heat in short bursts to avoid hot spots. If you want a crispy texture, use the oven instead. Preheat it to 350°F and heat for about 10-15 minutes. You can freeze cooked sweet potatoes and the filling separately. This helps maintain their texture. When you're ready to eat, thaw everything in the fridge overnight. Then, reheat as needed for a tasty meal. - Approximately 45-50 minutes at 425°F. Sweet potatoes need time to bake until they are soft. You want them tender, so they are easy to scoop. I usually check them after 45 minutes. If they are not done, I leave them for a few more minutes. You can poke them with a fork to check. - Yes, prepare everything in advance and assemble before serving. Making these stuffed potatoes ahead of time is a great idea. You can bake the sweet potatoes and cook the taco filling. Store them separately in the fridge. When you are ready to eat, just warm them up and stuff the sweet potatoes. It saves time and keeps things simple. - Rich in vitamins A and C, fiber, and antioxidants. Sweet potatoes are a superfood. They are full of vitamins that help your body. Vitamin A is good for your eyes, and vitamin C helps your immune system. The fiber in sweet potatoes also helps with digestion. Plus, they have antioxidants that fight free radicals. - Yes, but sweet potatoes provide a unique flavor and nutrition. You can use regular potatoes if you want. They will work fine. However, sweet potatoes give a nice, sweet taste. They also have more nutrients than regular potatoes. So, I recommend sticking with sweet potatoes for this recipe. - A side salad or additional toppings like guacamole or corn chips. These stuffed potatoes are filling on their own. However, a side salad adds freshness. You can also top them with guacamole for creaminess. Corn chips bring crunch and fun. You can mix and match to create your perfect meal! This blog post shared a tasty recipe for Taco Stuffed Sweet Potatoes. You learned about the key ingredients and easy steps to prepare this dish. I also offered tips to enhance the flavors and variations to keep it exciting. Remember, you can adjust the recipe to suit your taste. Try different proteins or veggies to mix it up. Enjoy this healthy meal any night of the week!](https://joymealplan.com/wp-content/uploads/2025/07/756ff32a-7b8b-490b-a900-7ca350fe3047-768x768.webp)