Five-Star Steak Dinner Elevated to Perfection
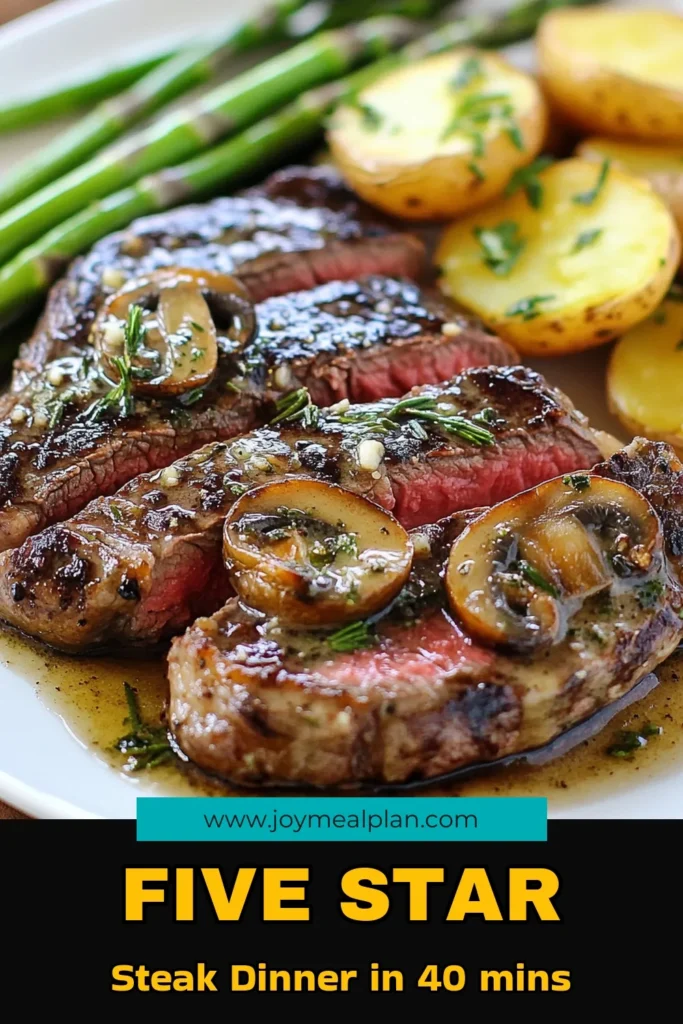
Imagine serving a five-star steak dinner right in your own home. With the right ingredients and techniques, you can elevate your meal to perfection. In this post, I’ll share my expert tips on creating a mouthwatering steak, from selecting the best cuts to impeccable plating. Plus, I’ll reveal essential tools and common mistakes to avoid. Ready to impress your guests? Let’s dive into the secrets of the perfect steak dinner!
Why I Love This Recipe
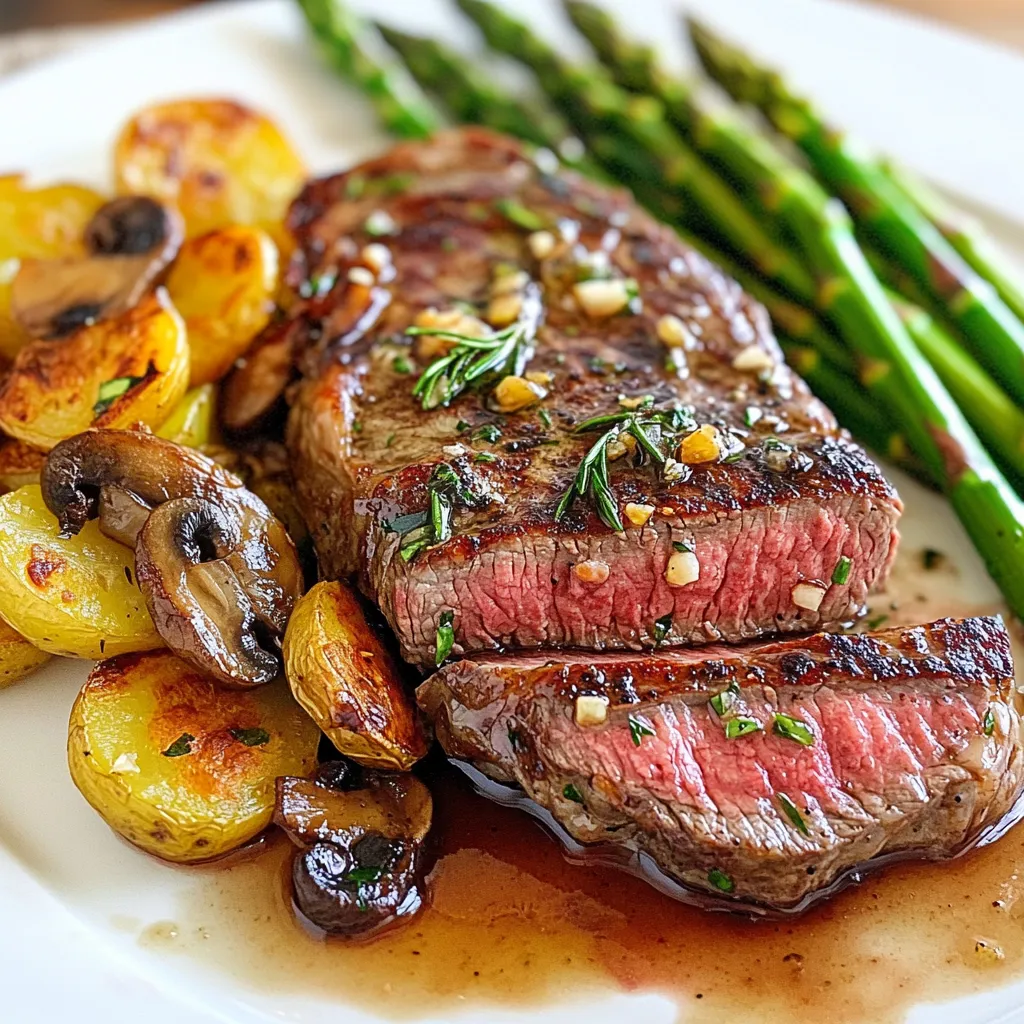
- Unmatched Flavor: The combination of ribeye steaks, garlic, and fresh rosemary creates an irresistible flavor profile that elevates this dish to gourmet status.
- Simple Preparation: With straightforward steps and minimal ingredients, this recipe is easy to follow, making it perfect for both novice and experienced cooks.
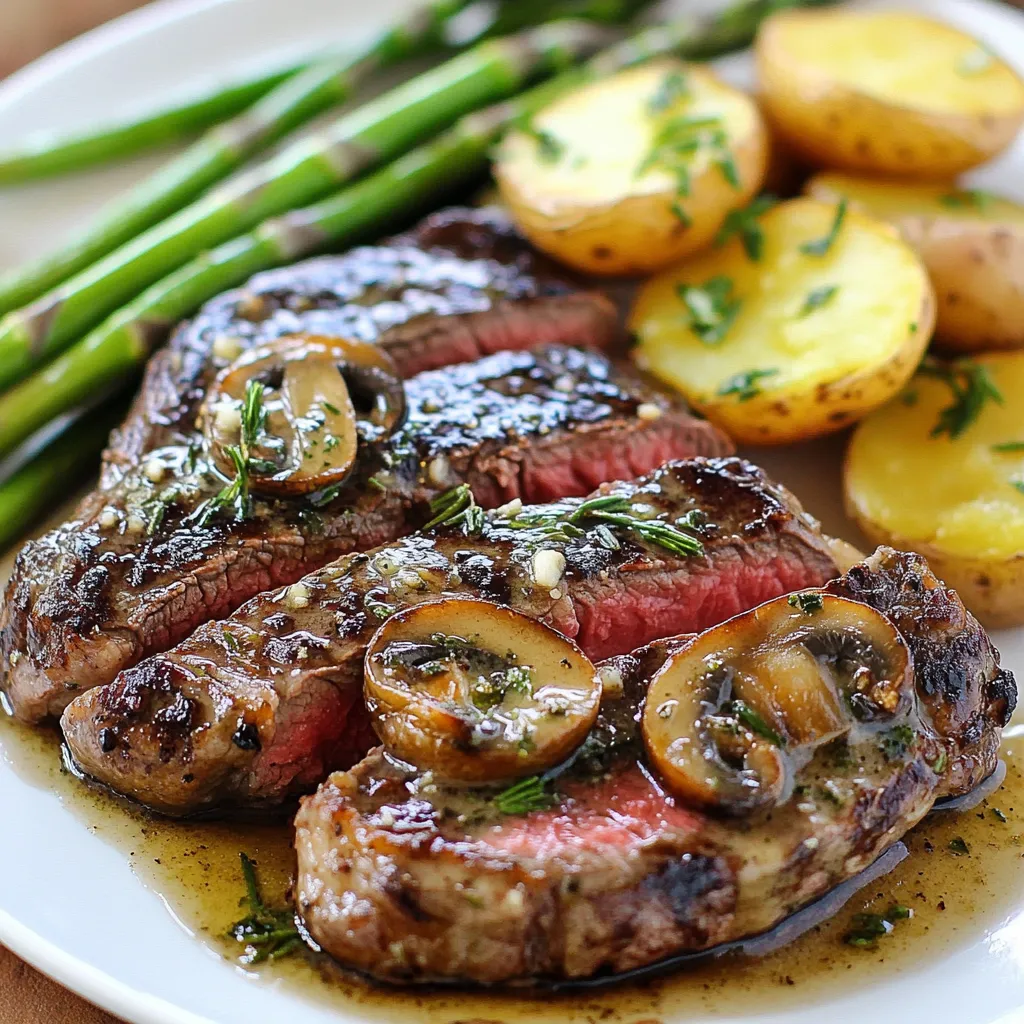
- Impressive Presentation: The vibrant colors of the sautéed asparagus and mushrooms alongside perfectly seared steak make for a visually stunning plate that will impress any guest.
- Versatile Side Dishes: The accompanying baby potatoes and vegetables can easily be substituted or adjusted according to seasonal availability, allowing for year-round enjoyment.
Ingredients
Key Ingredients for Five-Star Steak Dinner
– 2 ribeye steaks (1.5 inches thick)
– 2 tablespoons extra-virgin olive oil
– 3 cloves garlic, finely minced
– 2 sprigs fresh rosemary, finely chopped
– 2 tablespoons unsalted butter
– Sea salt and freshly cracked black pepper to taste
– 1 tablespoon Worcestershire sauce
– 1 cup cremini mushrooms, sliced
– 1 cup asparagus spears, trimmed
– 1 cup baby potatoes, halved
– Fresh herbs (parsley or chives) for garnish
Detailed Ingredient Breakdown
For the best flavor, I recommend using high-quality extra-virgin olive oil. Brands like California Olive Ranch or Colavita offer great taste. Use unsalted butter for better control over salt levels. Look for good Worcestershire sauce like Lea & Perrins for a rich, savory kick.
When choosing ribeye steaks, look for ones with bright red color and good marbling. The fat adds flavor and tenderness. For fresh produce, find firm, vibrant asparagus and smooth baby potatoes. Local farmers’ markets are great for fresh options.
Suggested Equipment
To cook your steak perfectly, a heavy skillet is key. I prefer cast iron for its heat retention. Look for a 10 or 12-inch skillet. A good meat thermometer is also handy for checking doneness. A sharp knife will help slice the steak easily. Use a cutting board to rest your steak after cooking. These tools make a big difference in your cooking experience.

Step-by-Step Instructions
Preparation of Ingredients
– Bringing the steaks to room temperature: Take the ribeye steaks out of the fridge. Let them sit for about 30 minutes. This helps them cook evenly. Pat them dry with paper towels to help get a great sear.
– Preparing vegetables for cooking: Trim the asparagus spears and slice the cremini mushrooms. Halve the baby potatoes for even cooking. Set them aside, ready for sautéing.
Cooking Process Explained
– How to achieve the perfect steak sear: Heat a cast iron skillet over medium-high heat. Add a drizzle of extra-virgin olive oil. Place the steaks in the hot skillet without crowding. Sear each side for about 4-5 minutes. Aim for a nice brown crust. Use a meat thermometer to check for 130°F (54°C) for medium-rare.
– Sautéing vegetables for maximum flavor: After the steaks are done, keep the heat on. Add the sliced mushrooms and asparagus to the skillet. Sauté for about 5-7 minutes until they soften. Drizzle with Worcestershire sauce for added flavor. Scrape up any brown bits from the pan for extra taste.
Plating Tips for Presentation
– Arranging the dish for an elegant appearance: Slice the steaks against the grain into thick strips. Place them on one side of the plate. Arrange the sautéed vegetables and seasoned baby potatoes on the other side. This creates a nice visual balance.
– Using sauces and garnishes effectively: Drizzle some of the buttery herb sauce from the skillet over the steak. Finish with freshly chopped herbs like parsley or chives. This adds color and freshness to your dish.
Tips & Tricks
Perfecting Your Steak Cooking Technique
– How to check for doneness without a thermometer: To check if your steak is done, use the touch test. Press the center of your steak. If it feels soft and squishy, it’s rare. If it feels firm, it’s well done. For medium, it should feel like the fleshy part of your palm when you touch your thumb to your middle finger.
– Basting techniques for enhanced flavor: Basting your steak adds depth. In the last minute of cooking, add butter, garlic, and rosemary to the pan. Use a spoon to drizzle this mix over the steak. It gives a rich flavor that makes your steak shine.
Enhancing Flavor Profiles
– Additional herbs and spices to consider: You can elevate your steak by adding herbs like thyme or tarragon. Fresh garlic adds a nice kick. Paprika or chili powder can also spice things up.
– Combinations of sauces that complement steak: Pair your steak with sauces like chimichurri or a red wine reduction. These sauces add layers of flavor. You can also use a simple balsamic glaze for a sweet touch.
Common Mistakes to Avoid
– Overcooking steak: One big mistake is overcooking. Keep a close watch on your cooking time. Remember, the steak continues to cook while resting.
– Neglecting resting time: Always let your steak rest for at least 10 minutes. This helps the juices spread evenly. If you cut too soon, those tasty juices will run out, and your steak will be dry.
Pro Tips
- Let the Steak Rest: Allowing the steak to rest after cooking is essential for juicy results. This process helps redistribute the juices, ensuring every bite is flavorful.
- Use a Meat Thermometer: For perfect doneness, invest in a meat thermometer. This tool ensures your steaks are cooked to your desired temperature, avoiding guesswork.
- High Heat for Searing: Always preheat your skillet until it’s very hot before adding the steaks. A high temperature will create a beautiful crust, sealing in the flavors.
- Enhance with Basting: Basting the steaks with melted butter and herbs during the last minute of cooking adds depth of flavor. Make sure to do this for an extra gourmet touch.
Variations
Different Cuts of Steak to Try
You can elevate your steak dinner by trying different cuts. Filet mignon offers a tender bite. New York strip has robust flavor. Each cut cooks differently.
– Filet Mignon: Cook for about 5-6 minutes per side for medium-rare.
– New York Strip: Sear for 4-5 minutes per side for a juicy finish.
Alternative Side Dishes
Pair your steak with unique vegetable sides. Roasted Brussels sprouts add crunch. Grilled zucchini brings summer vibes. You can also try different potato styles.
– Sweet Potato Mash: Boil and mash sweet potatoes for a sweet twist.
– Garlic Parmesan Potatoes: Toss boiled baby potatoes with garlic and cheese.
Flavor Profile Variations
You can change the steak’s flavor with new seasonings. Try adding smoked paprika for warmth. Fresh thyme gives a nice herbal note.
– Chimichurri Sauce: This bright sauce adds a fresh kick.
– Peppercorn Sauce: A creamy sauce gives a rich taste.
These variations let you create a five-star meal at home!
Storage Info
Storing Leftovers
To keep your cooked steak fresh, wrap it tightly. Use plastic wrap or aluminum foil. Place it in an airtight container to prevent air exposure. This helps maintain moisture and flavor. Store it in the fridge for up to three days. If you have leftover sides, store them in separate containers. This keeps each dish tasting great.
Recommended storage containers
Use glass or plastic containers with tight lids. Stackable containers save space in your fridge. Choose containers that fit your portions, so you avoid waste. Label each container with the date. This way, you know when to use them.
Reheating Guidelines
When reheating steak, aim to keep it juicy. Preheat your oven to 250°F (120°C). Place the steak on a baking sheet and cover it loosely with foil. Heat for about 20-30 minutes. This slow method warms the steak without drying it out.
For quick reheating, use a skillet. Heat the skillet over medium-low heat. Add a splash of broth or water. Place the steak in the skillet and cover it. Heat for about 5 minutes, flipping once.
Ideas for using leftover steak in other dishes
Leftover steak can be fun and tasty. Chop it up for tacos or salads. Use it in stir-fries for quick meals. You can also make a steak sandwich with fresh veggies.
Freezing Tips
To freeze steak, wrap it tightly in plastic wrap. Then place it in a freezer bag. Remove as much air as possible. This prevents freezer burn and keeps flavors intact. You can freeze cooked steak for up to three months.
For sides, allow them to cool before freezing. Use similar airtight containers or bags. Just like steak, remove excess air.
Thawing techniques for best results
Thaw frozen steak in the fridge overnight. This keeps the meat safe and helps maintain quality. If you need it faster, place it in a bowl of cold water. Change the water every 30 minutes until thawed. Avoid using the microwave, as it can cook parts of the steak unevenly.
FAQs
What is the best steak for a five-star dinner?
The best steak for a five-star dinner is ribeye. Ribeye steaks are rich, juicy, and flavorful. They have a nice amount of marbling, which adds taste and tenderness. Look for steaks that are at least 1.5 inches thick. This thickness helps achieve the perfect cook without drying out the meat.
How do I know when my steak is perfectly cooked?
To know when your steak is perfectly cooked, use a meat thermometer. For medium-rare, aim for an internal temperature of 130°F (54°C). If you don’t have a thermometer, you can also check by touch. A medium-rare steak feels like the fleshy part of your hand below the thumb when your thumb and index finger touch. Remember, letting the steak rest is key. It helps the juices stay in the meat.
Can I make this dish in advance?
You can prepare some parts of this dish in advance, but it’s best to cook the steak fresh. You can pre-sauté the mushrooms and asparagus. Store them in the fridge for up to a day. Reheat them when you are ready to serve. For the potatoes, you can boil them ahead of time too. Just keep them covered in the fridge until you need them.
What wines pair well with a five-star steak dinner?
Red wines pair best with ribeye steak. A full-bodied Cabernet Sauvignon works great. It complements the rich flavors of the meat. Merlot or Malbec are other good choices. If you prefer white wine, a rich Chardonnay can work too. Choose a wine that you enjoy and that matches your meal.
Are there any vegetarian alternatives for this recipe?
Yes, there are vegetarian alternatives for this recipe. You can use portobello mushrooms as a steak substitute. They have a meaty texture and taste great when grilled. For the sides, keep the asparagus and baby potatoes. You can also add roasted veggies or a fresh salad for more color and flavor.
Preparing a five-star steak dinner is rewarding. You learned about key ingredients that elevate your dish. Ribeye steaks, fresh herbs, and tasty sauces come together for a perfect meal. You now have equipment tips and step-by-step cooking techniques to help you succeed. Remember to avoid common mistakes like overcooking. With these insights, you can impress anyone at your dinner table. Enjoy crafting your delicious steak dinner and showcase your skills. Happy cookin
Five-Star Steak Dinner Delight
Ingredients
- 2 pieces ribeye steaks (1.5 inches thick)
- 2 tablespoons extra-virgin olive oil
- 3 cloves garlic, finely minced
- 2 sprigs fresh rosemary, finely chopped
- 2 tablespoons unsalted butter
- to taste sea salt and freshly cracked black pepper
- 1 tablespoon Worcestershire sauce
- 1 cup cremini mushrooms, sliced
- 1 cup asparagus spears, trimmed
- 1 cup baby potatoes, halved
- for garnish fresh herbs (parsley or chives)
Instructions
- Remove the ribeye steaks from the refrigerator and set them aside to reach room temperature, approximately 30 minutes. Use paper towels to pat the steaks dry thoroughly, ensuring a good sear.
- Coat both sides of the steaks with extra-virgin olive oil. Generously sprinkle sea salt and freshly cracked black pepper, ensuring an even seasoning that enhances the flavor.
- Place a heavy skillet, preferably cast iron, over medium-high heat and allow it to heat up until it reaches a high temperature, ensuring a great sear.
- Gently lay the steaks in the hot skillet. Sear for about 4-5 minutes on each side. For a perfect medium-rare finish, aim for an internal temperature of 130°F (54°C).
- In the final minute of cooking, introduce the minced garlic and chopped rosemary to the skillet, along with the unsalted butter. Use a spoon to baste the steaks with the melted butter and herb mixture, enhancing their flavor as they finish cooking.
- Carefully transfer the steaks to a cutting board or plate. Loosely cover them with aluminum foil and allow them to rest for 10 minutes.
- In the same skillet, add the sliced cremini mushrooms and trimmed asparagus. Sauté for approximately 5-7 minutes until just tender. Drizzle with Worcestershire sauce, scraping up any flavorful brown bits stuck to the pan to incorporate maximum taste.
- Meanwhile, in a separate pot, bring salted water to a boil and add the halved baby potatoes. Cook until fork-tender, about 15 minutes. Drain and toss them in a bowl with a drizzle of olive oil, seasoning lightly with salt and pepper.
- To serve, slice the steaks against the grain into thick strips, arranging them alongside the sautéed mushrooms, asparagus, and seasoned baby potatoes on each plate.
- Finish the dish by garnishing with freshly chopped herbs like parsley or chives, adding a pop of color and freshness.
![To make garlic roasted green beans, you'll need these simple items: - 1 pound fresh green beans, trimmed and rinsed - 4 large cloves garlic, finely minced - 3 tablespoons extra virgin olive oil - 1 teaspoon freshly grated lemon zest - 1 teaspoon balsamic vinegar - ½ teaspoon red pepper flakes (optional for heat) - Sea salt and freshly ground black pepper to taste - 2 tablespoons finely grated Parmesan cheese (optional) I always prefer fresh green beans for this recipe. They taste better and have a nice crunch. Fresh beans roast evenly and soak up the flavors well. If you can’t find fresh ones, frozen beans work too. Just make sure to thaw and drain them first. They may not be as crisp, but they will still taste great. You can change some ingredients if you need to. If you don’t have garlic, try using garlic powder. Instead of lemon zest, you can use orange zest for a different flavor. If you want a different vinegar, try red wine vinegar. For a dairy-free option, skip the Parmesan cheese or use a vegan cheese instead. These swaps keep the dish tasty and fun! To start, gather your ingredients. You will need: - 1 pound fresh green beans, trimmed and rinsed - 4 large cloves garlic, finely minced - 3 tablespoons extra virgin olive oil - 1 teaspoon freshly grated lemon zest - 1 teaspoon balsamic vinegar - ½ teaspoon red pepper flakes (optional for heat) - Sea salt and freshly ground black pepper to taste - 2 tablespoons finely grated Parmesan cheese (optional) First, preheat your oven to 425°F (220°C). This step is key for crispy beans. Next, take a large mixing bowl and add the green beans. Toss in the minced garlic, olive oil, lemon zest, and balsamic vinegar. If you like a little heat, add red pepper flakes. Season with sea salt and black pepper to taste. Mix everything well. You want each bean coated with flavor. Now, it’s time to roast! Spread the green beans on a large baking sheet. Make sure they lie flat in a single layer. This helps them roast evenly. Place the baking sheet in the oven and roast for 15-20 minutes. Halfway through, give the beans a toss. This ensures they cook evenly. You’ll know they’re done when they’re tender but still have a slight crunch. Once out of the oven, if you like, sprinkle grated Parmesan cheese on top. The heat will melt it slightly, making it even better. Transfer the roasted green beans to a nice serving dish. Serve them warm to your family or guests. They pair well with many main dishes. Try them with grilled chicken or fish. You can also serve them as a stand-alone snack. For the full recipe, please see the earlier section. Enjoy your tasty green beans! To boost the taste of garlic roasted green beans, add a squeeze of lemon. Lemon brings brightness and freshness. You can also use fresh herbs like thyme or rosemary. These herbs add depth and aroma. If you love heat, try adding more red pepper flakes. Just be careful not to overdo it! For the best texture, spread the beans on the baking sheet. Make sure they are in a single layer. This helps them roast evenly. Toss them halfway through cooking to ensure all sides get crispy. If you want them extra crispy, leave them in for a few more minutes. Serve your garlic roasted green beans in a nice dish. You can sprinkle extra Parmesan cheese on top for a gourmet look. Adding a few lemon wedges next to the beans can enhance the presentation. It also invites your guests to add more flavor if they wish. For a pop of color, place fresh herbs on top before serving. This will make your meal look and taste amazing! You can find the full recipe for garlic roasted green beans [Full Recipe]. {{image_4}} You can mix in other veggies with garlic roasted green beans. Carrots, bell peppers, and zucchini work well. Just cut them into similar sizes. This way, they all cook evenly. Toss them with the green beans in the same mix for great flavor. You can also try adding cherry tomatoes for a pop of color and sweetness. Add herbs to change the taste of your garlic roasted green beans. Fresh thyme or rosemary adds a lovely aroma. A sprinkle of smoked paprika gives a warm, savory hint. You can also try a dash of cumin for a unique flavor. These twists make your dish exciting and fresh each time. This recipe is already vegetarian. To make it vegan, simply skip the Parmesan cheese. You can also add nutritional yeast for a cheesy flavor without dairy. It’s a great way to keep it creamy and flavorful. Enjoy these garlic roasted green beans as a side dish or main meal. Each variation keeps it fun and tasty! For the full recipe, check out the detailed instructions provided earlier. After enjoying your garlic roasted green beans, you might have leftovers. Cool the beans down first. Then, place them in an airtight container. They stay fresh in the fridge for about 3-4 days. When ready to eat, check for any signs of spoilage. If they look good, you can enjoy them again! If you have more leftovers than you can eat, freezing is a great option. First, let the beans cool completely. Then spread them on a baking sheet in a single layer. Freeze them for about an hour. This step helps the beans stay separate. After freezing, transfer them to a freezer-safe bag. They can last up to 3 months in the freezer. Label the bag with the date so you know when to use them. Reheating garlic roasted green beans is simple. You can use the oven or a microwave. For the oven, preheat it to 350°F (175°C). Spread the beans on a baking sheet and heat for about 10 minutes. If you use a microwave, place the beans in a safe dish. Heat them for 1-2 minutes, stirring halfway. This method keeps them tasty and warm. For extra flavor, add a splash of olive oil or a sprinkle of salt before serving. Enjoy your meal! To make garlic roasted green beans, start by preheating your oven to 425°F (220°C). In a big bowl, mix 1 pound of fresh green beans with 4 minced garlic cloves, 3 tablespoons of olive oil, 1 teaspoon of lemon zest, and 1 teaspoon of balsamic vinegar. If you like spice, add ½ teaspoon of red pepper flakes. Season with sea salt and black pepper. Toss everything until the beans are well coated. Spread the beans on a baking sheet in a single layer. Roast them for 15-20 minutes, tossing halfway. When they are tender and crisp, serve hot. You can find the Full Recipe for more details. Yes, you can prepare garlic roasted green beans ahead of time. You can trim and wash the green beans and mix them with the garlic and oil. Store this mix in the fridge for up to a day. When you’re ready to eat, just roast them as directed. This makes dinner prep easier, and you can enjoy more time with your guests. Garlic roasted green beans pair well with many dishes. You can serve them alongside grilled chicken or fish for a balanced meal. They also complement pasta dishes, like spaghetti or fettuccine. If you want a vegetarian option, try them with quinoa or rice. Their bright flavor adds a nice touch to any plate. This post covered garlic roasted green beans from ingredients to serving ideas. Fresh or frozen beans work well, and you can swap key ingredients easily. Roasting creates a rich flavor, and adding herbs boosts it even more. Don’t forget about storage; knowing how to keep leftovers can help. Remember, you can customize this dish with other veggies or herbs. Enjoy experimenting with flavors! Roasted green beans can fit any meal.](https://joymealplan.com/wp-content/uploads/2025/07/774fbef7-0e10-49a5-abc6-76b985870023-768x768.webp)